

The topologies section of the “Settings” page provides data on Sites and Gateways.
Sites
The data displayed in the “Sites” section will help you assess network and application performances on a per-site basis of your corporate sites. It will help you compare how multiple sites perform in order to quickly identify any degradation and find its root cause from a contextualized view.
Important
Creating a site is mandatory for deploying Enterprise Stations.
It includes the IPSec/GRE tunnels (if any) and also defines the Network Probe tests to be performed by the attached Enterprise Station(s).
View a List of Existing Sites
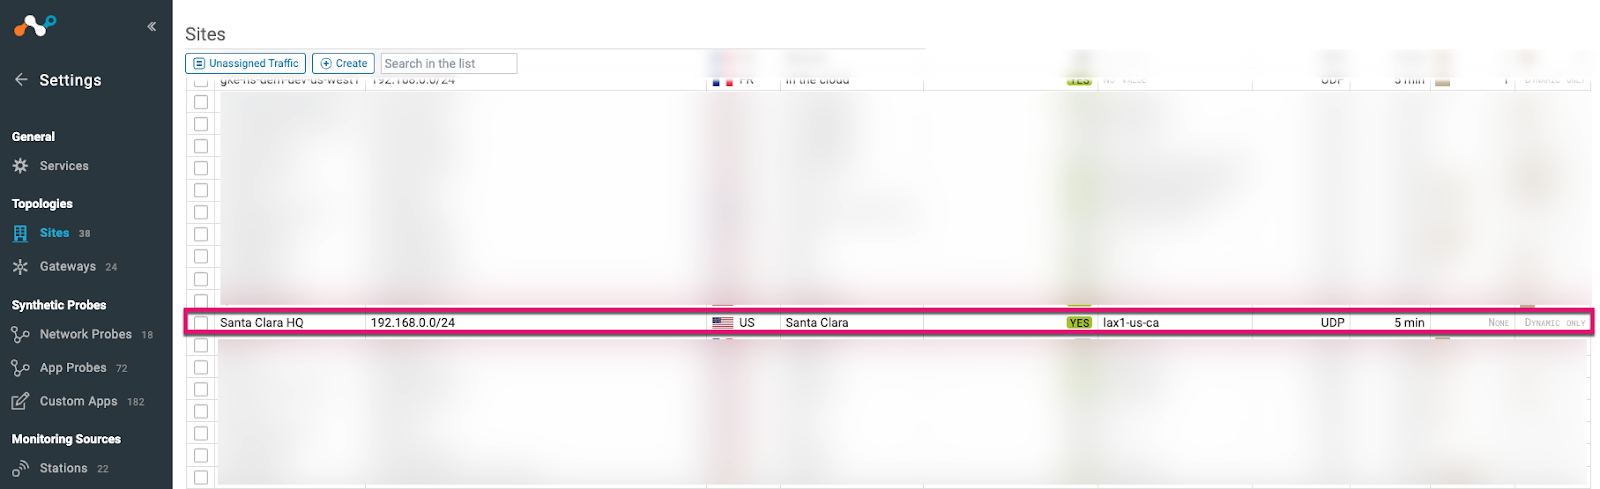
You can view a list of sites that have been created by doing the following:
- Go to Digital Experience Management > Settings > Sites (under the “Topologies” section).
- A list of existing sites will be displayed on the “Sites” page.
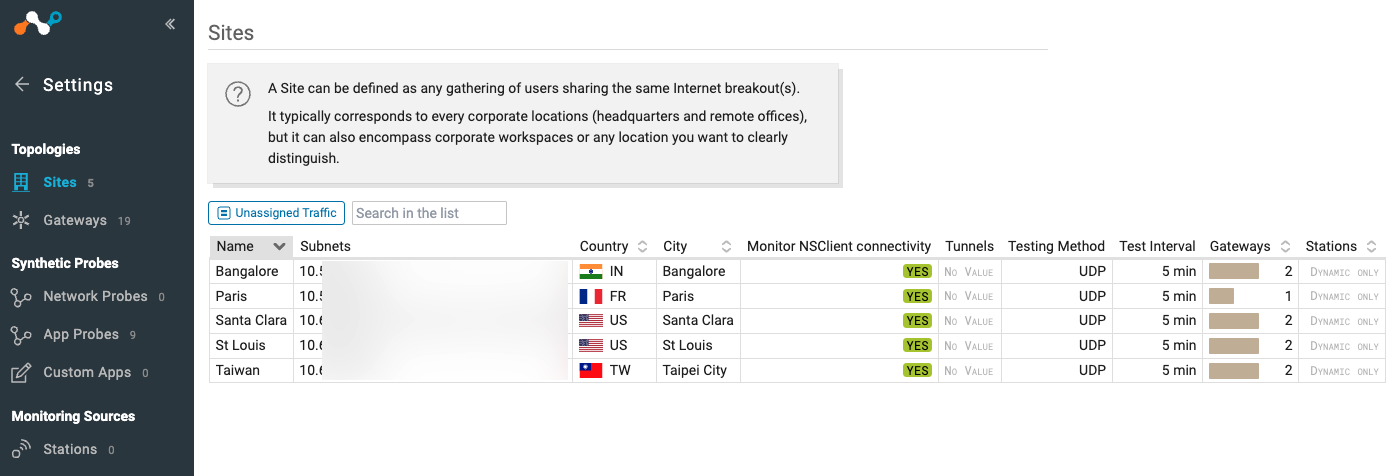
Components of a Site
The following section provides information about the primary components of a site:
- Site Identification
- Site Location
- Secured Tunnels and Associated POP Tests
Site identification
A site can be identified through two attributes:
- Its name you can freely choose to align with your organization’s requirements.
- Its subnet(s): this(ese) subnet(s) correspond(s) to the IP address range(s) used by the end users when connecting from the site. This is generally one or multiple private IP address range(s)/subnet(s).
Multiple IP addresses, IP address ranges and/or IP address subnets can be added by separating them by commas.
Site Location
A site is geographically localized through the configuration of the country and city in which it is deployed.
For example, this setting will allow you to see your corporate sites on a map. You’ll also be able to group and filter collected data by site locations.
Secured Tunnels and Associated POP Tests
The “POP Testing” section enables you to link the IPSEc and/or GRE tunnels that you have configured in your Netskope environment to the corresponding site.
This is done by selecting tunnels from the dropdown lists.
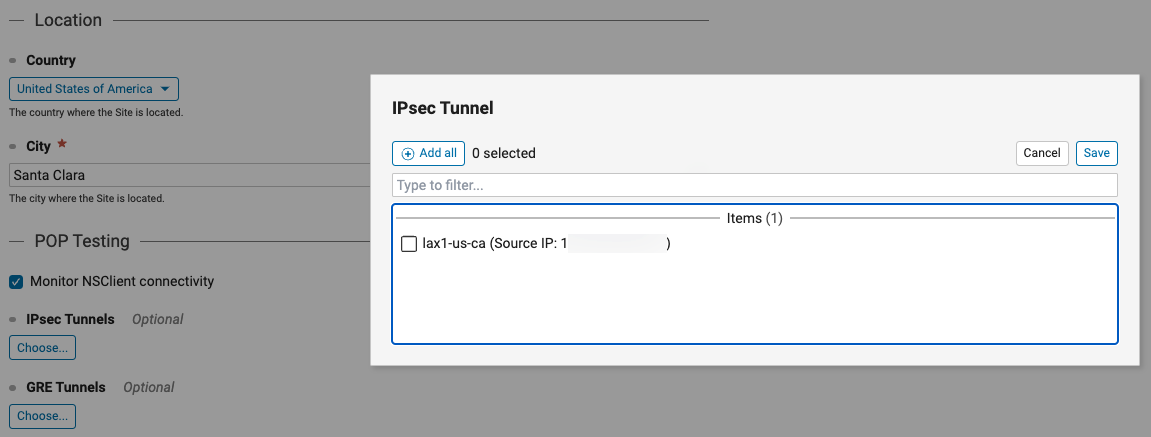
Important
Associating tunnels to the site will automatically trigger corresponding Network Probe tests from the Enterprise Station that is deployed on the site. No need to manually create Network Probes (please refer to the “Network Probes” section for more information).
In addition to automatically testing the Netskope POP through the associated IPSec/GRE tunnels, you can also request the Enterprise Station to mimic the behavior of NSClients that actively steer the traffic to Netskope cloud while working from the site.
For this, simply select the “Monitor NSClient connectivity” checkbox.
Finally, you can specify how the Network Probes tests will be performed:
- The method can be freely chosen between ICMP and UDP.
- The interval between consecutive Network Probe tests can be set between 5 and 60 minutes by 5 minutes increments. The default value is 5 minutes.
Please refer to the “Network Probes” section for more details.
When you are done with the configuration, click the Save button to apply the configuration.
Configure a New Site
- Go to Digital Experience Management > Settings > Sites (under the “Topologies” section).
- Click the Create button to start the site creation process.
- The New Site configuration page will open.
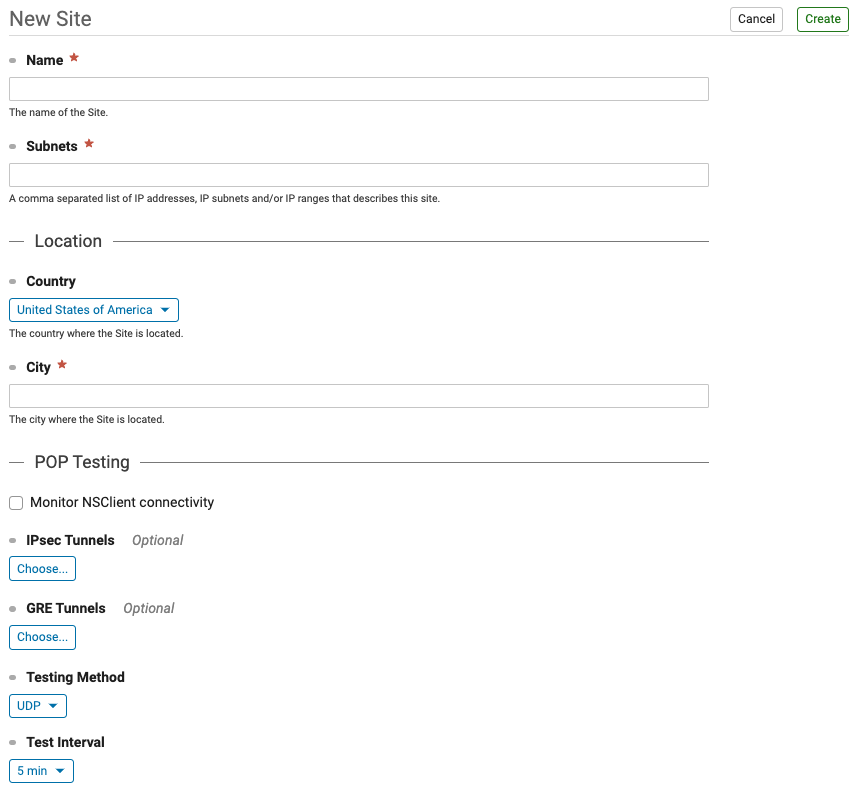
- Complete the following fields on the “New Site” configuration page:
- Name: Create a name for the site for site identification..
- Subnets: Create subnet(s) for site identification.
- Location
- Country: Select a country.
- City: Choose the city where the site is located.
- POP Testing
- Monitor NSClient connectivity: Check the associated box to monitor NSClient connectivity.
- IPsec Tunnels: Choose IPsec Tunnels.
- GRE Tunnels: Choose GRE tunnels.
- Testing Method: Select a testing method.
- Test Interval: Select a test interval period for the POP connectivity tests.
- Click the Create button to create your new site.
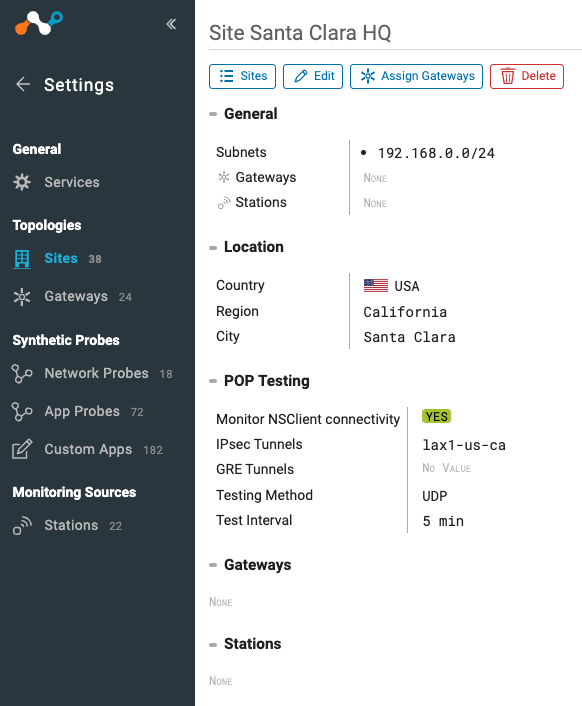
- The newly created site is now visible in the list of sites.
Gateways
The concept of “gateway” is required to identify the location of the users who are steering their traffic through the NSClient. Since these users may move frequently, working from corporate sites and from home, it is important to be able to identify their location at any given time without requiring them to indicate their work location. The following list provides additional information about gateways:
- A Gateway is defined by the corporate site’s local Internet breakout’s public IP address. This corresponds to the local Internet Service Provider (ISP) connection IP address.
- A gateway must be associated with at least one site.
- Multiple gateways can be associated with a single site.
- Multiple sites can be associated with a single gateway.
Bulk Import/Export
Simplify the process of creating or updating site and gateway objects within your Netskope tenant using the bulk import/export tool. This tool allows for the upload of bulk site and gateway definitions via predefined CSV, JSON, and YAML templates. The templates are available for download via the Netskope tenant UI within the Import/Export section of the DEM settings UI.
Once an import file is uploaded to the tenant UI, the tool will run a comparison process and generate an output of all the changes that will be applied. Please ensure these changes are reviewed before the file is imported. As a best practice recommendation, we recommend you export the existing sites and/or gateways in the format of your choice as a backup, make a copy where you will make your changes or additions and import the copy. You can simply re-import the backup copy if you need to rollback your changes
To Export Sites and Gateways
- Browse to Digital Experience Management > Settings > Topologies > Import/Export.
- Select either Gateways or Sites, under the Export section, click on the Export button based on the format of your choice. Exports in CSV, JSON, and YAML formats are supported.