

Universal Reverse Proxy (URP) is a feature that allows unmanaged device access to sanctioned enterprise applications. The Netskope platform enforces inline controls on the unmanaged devices to any application.
Netskope’s URP uses RBI to provide an isolated environment for unmanaged users and devices to access SaaS applications. With this, users will have granular access and inline constraint control through unified policy creation for all SAML based applications. In addition, users can protect enterprise data from unmanaged devices that are granted access but are prevented from printing, cutting, and copying sensitive data. Finally, users can define custom app domains that should be isolated.
Netskope’s URP provides a faster and scalable way to add new applications in a more efficient and less disruptive way which helps security operations maintain supported applications. This enables admins to onboard their ecosystem applications faster and controls risk for unmanaged devices.
The general workflow is outlined below:
- Enable URP via: SAML, RAAS, or Office365 Auth
- Create and / or update Real-time Protection Policies with the new access method
- Create and / or update Real-time Protection Policies with the new filter option
- Update Skope IT Application Events with a new filter to view URP events
Prerequisites
- Ensure you have Office365 Auth Universal Reverse Proxy set up
- If Office365 configuration is not set up, ensure you have SAML Universal Reverse Proxy set up with SaaS apps authenticated. To learn more: SAML Reverse Proxy
Enable URP via SAML Reverse Proxy
The first step is to enable an account for URP.
- Navigate to Settings > Security Cloud Platform > Reverse Proxy > click an account name.
Adding a new SAML account remains the same. The URP option is visible only when the feature is enabled in your account. To learn more: Configure the SAML Proxy in the Netskope UI
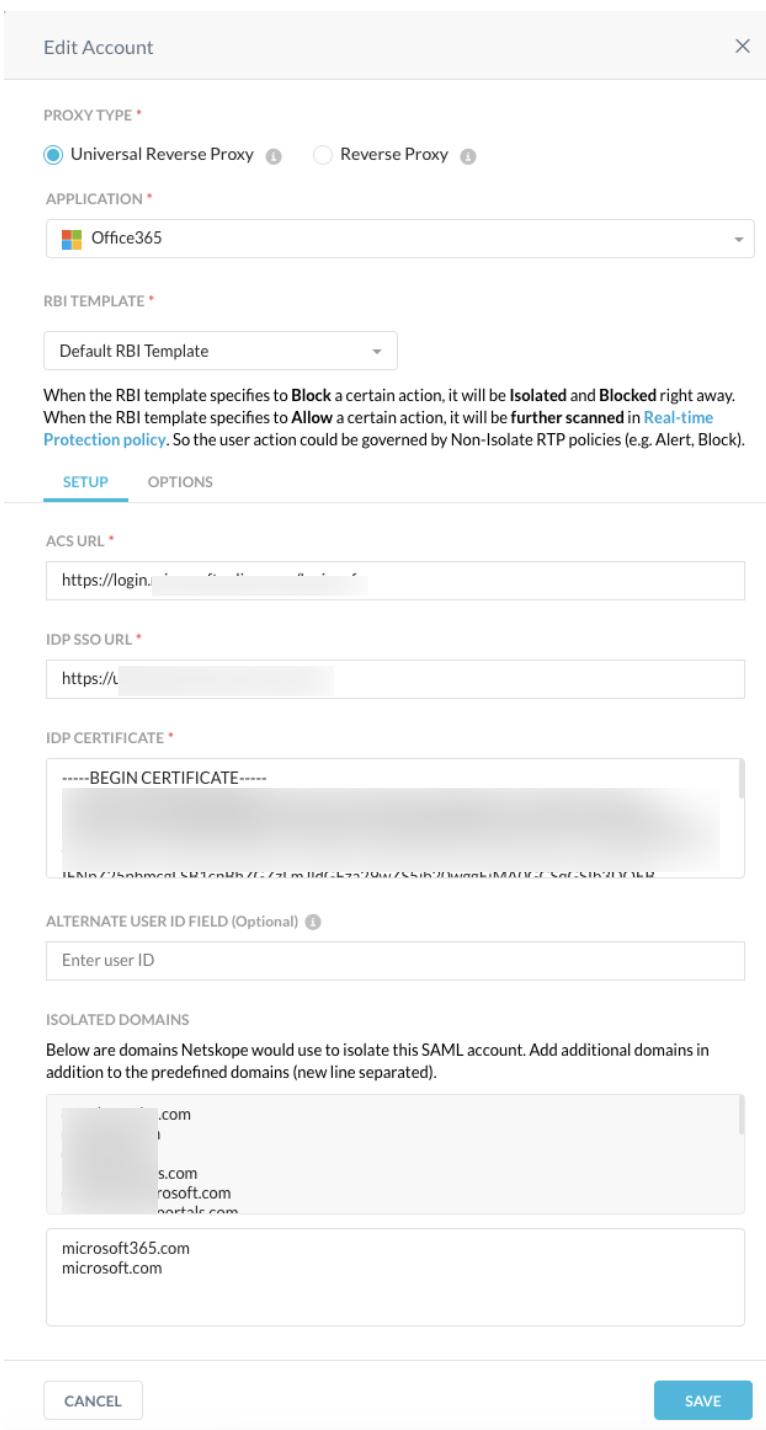
Select Proxy Type > Universal Reverse Proxy. By selecting URP, app traffic is sent via RBI.
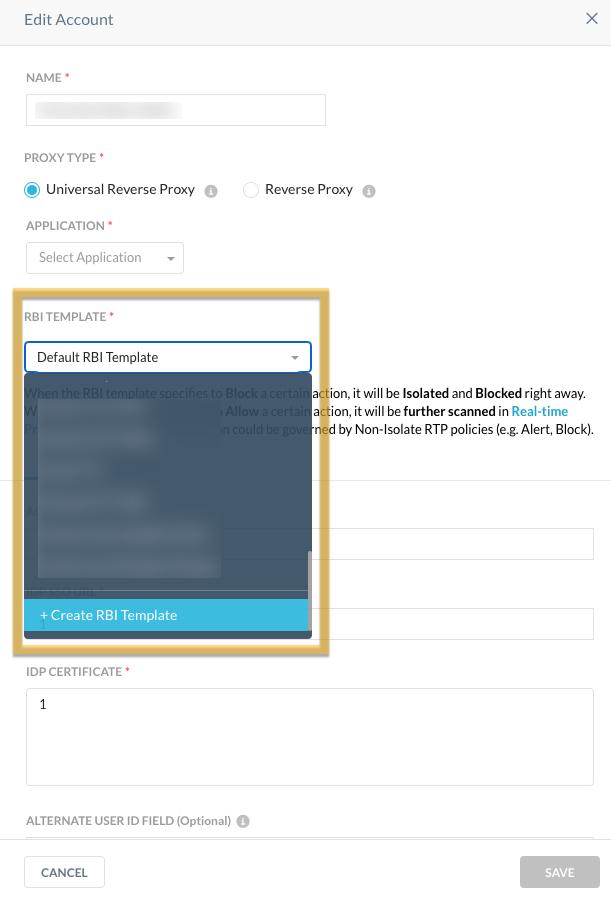
- Select an RBI template. You can view the RBI template option when editing or adding a new SAML account and Universal Reverse Proxy is selected.
If you select a ‘Block’ RBI template, the action is isolated and blocked right away. If you select an ‘Allow’ RBI template, Real-time Protection Policies are applied. This means user actions are governed by non-isolate RTP policies, e.g. Alert, Block.
To learn more: RBI Templates,
You’ll know that you’re browsing in isolation based on certain visual queues. To learn more: Isolation in an End User’s Browser
2. Click Save.
Enable RAAS with URP via SAML Reverse Proxy
This section describes enabling Reverse Proxy As A Service (RAAS) using URP with SAML Reverse Proxy.
The first step is to enable an account for URP.
- Navigate to Settings > Security Cloud Platform > Reverse Proxy > click an account name.
Adding a new SAML account remains the same. The URP option is visible only when the feature is enabled in your account. - Select Proxy Type > Universal Reverse Proxy. By selecting URP, app traffic is sent via RBI.
- Select the Office365 application under the dropdown.
- A checkbox Enable RAAS (Reverse Proxy As A Service) appears. Enabling this checkbox facilitates the account to work similar to a Reverse Proxy as a Service with Microsoft Entra ID.
- Once the RAAS checkbox is selected, new fields appear as shown:
IDP ISSUER ID
APP LANDING URL
IDP LOGIN URL - Provide the required fields as described in the section Reverse Proxy as a Service with Microsoft Entra ID.
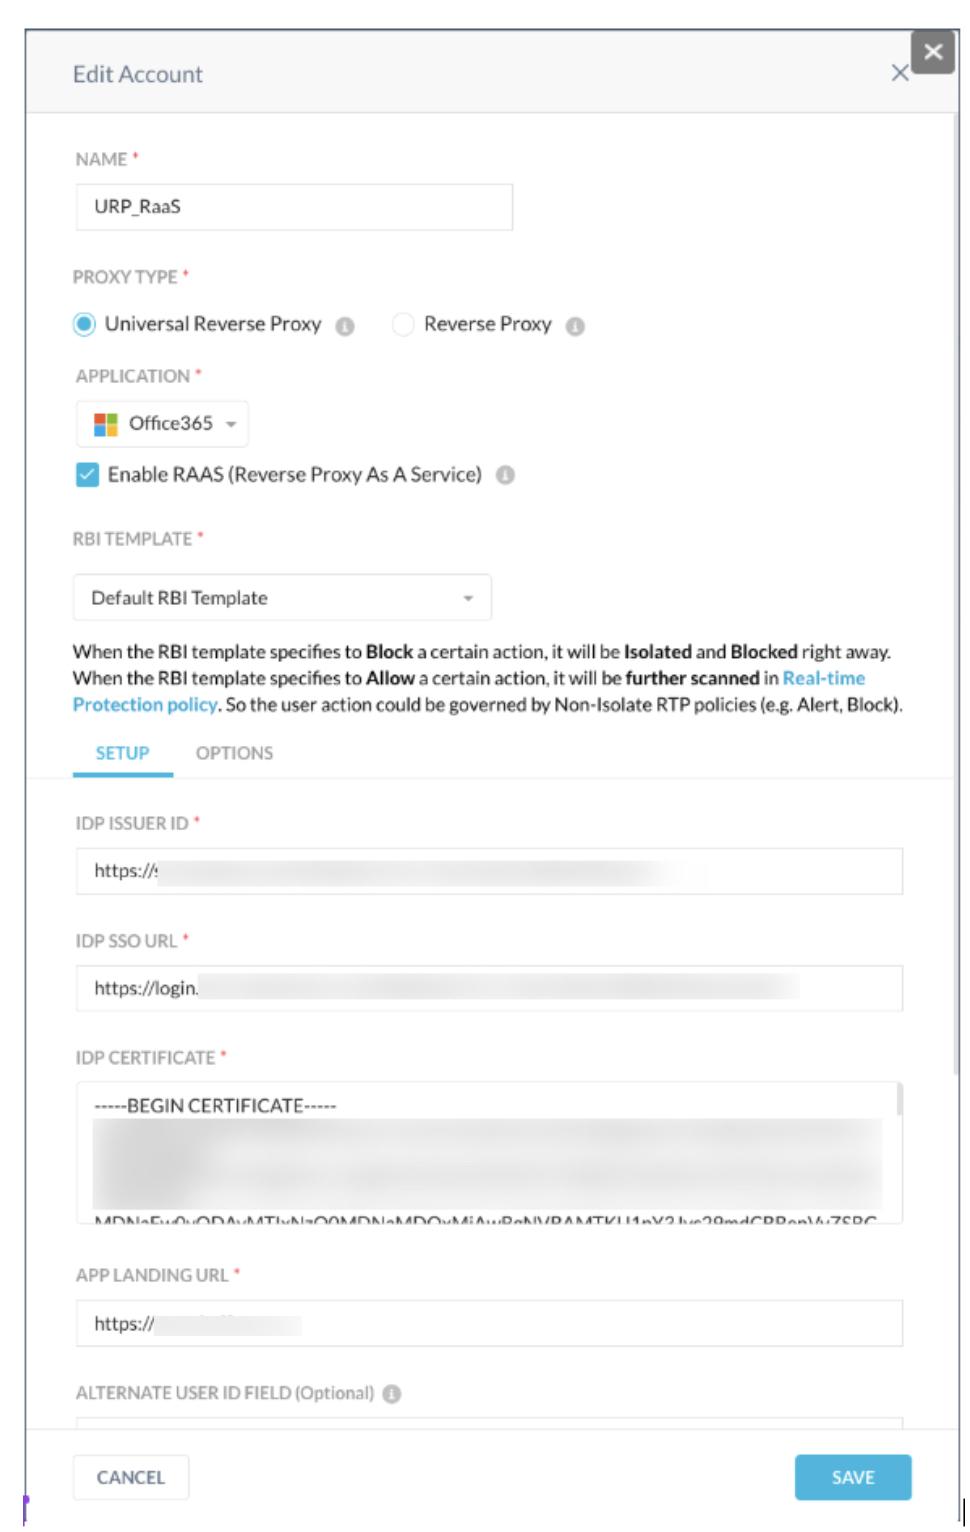
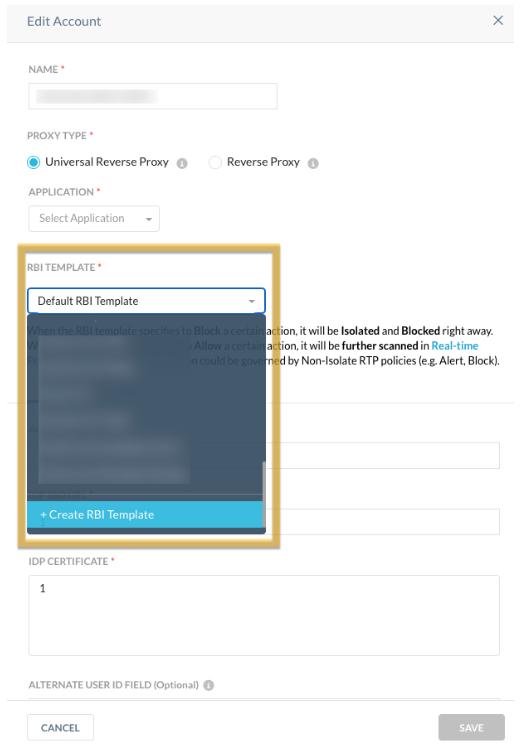
7. Select an RBI template. You can view the RBI template option when editing or adding a new SAML account and Universal Reverse Proxy is selected.
8. In the App Landing URL field, type “https://portal.office.com”.
If you select a ‘Block’ RBI template, the action is isolated and blocked right away. If you select an ‘Allow’ RBI template, Real-time Protection Policies are applied. This means user actions are governed by non-isolate RTP policies, e.g. Alert, Block.
To learn more: RBI Templates
You’ll know that you’re browsing in isolation based on certain visual queues. To learn more: Isolation in an End User’s Browser
Enable URP via ‘Office365 Auth’ Under Reverse Proxy
The first step is to enable an account for URP.
1. Navigate to Settings > Security Cloud Platform > Reverse Proxy > Click an account name.
Adding a new Office365 Auth SAML account remains the same. The URP option is visible only when the feature is enabled in your account. To learn more: Configure the Office365 Auth in the Netskope UI
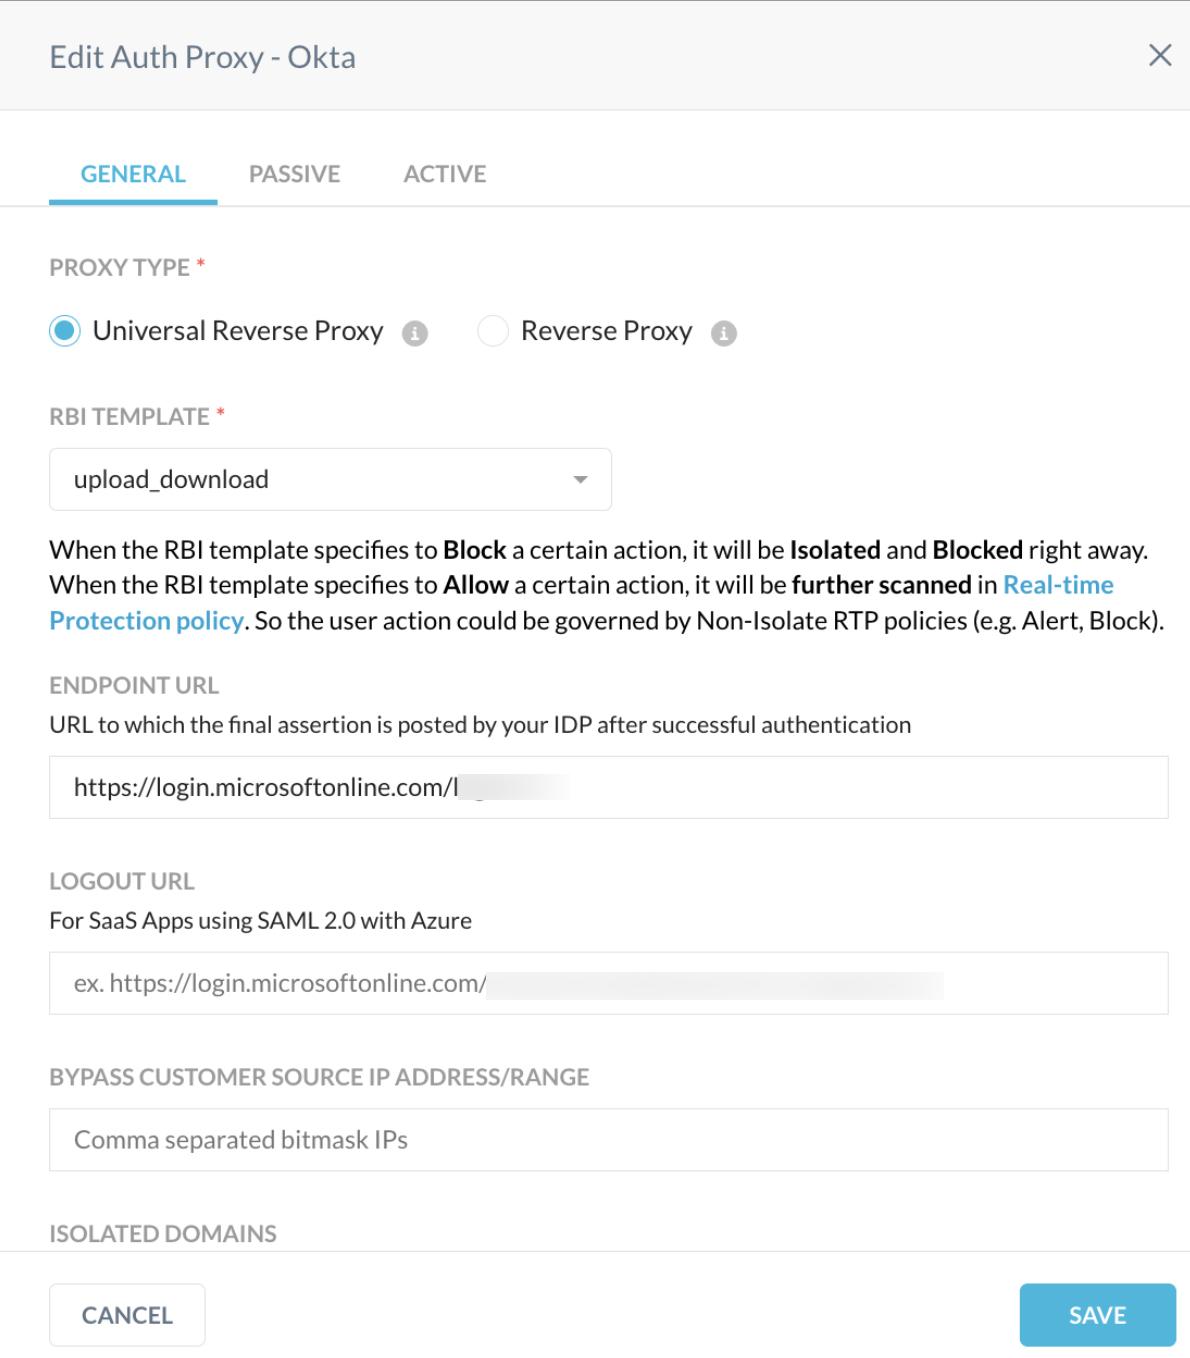
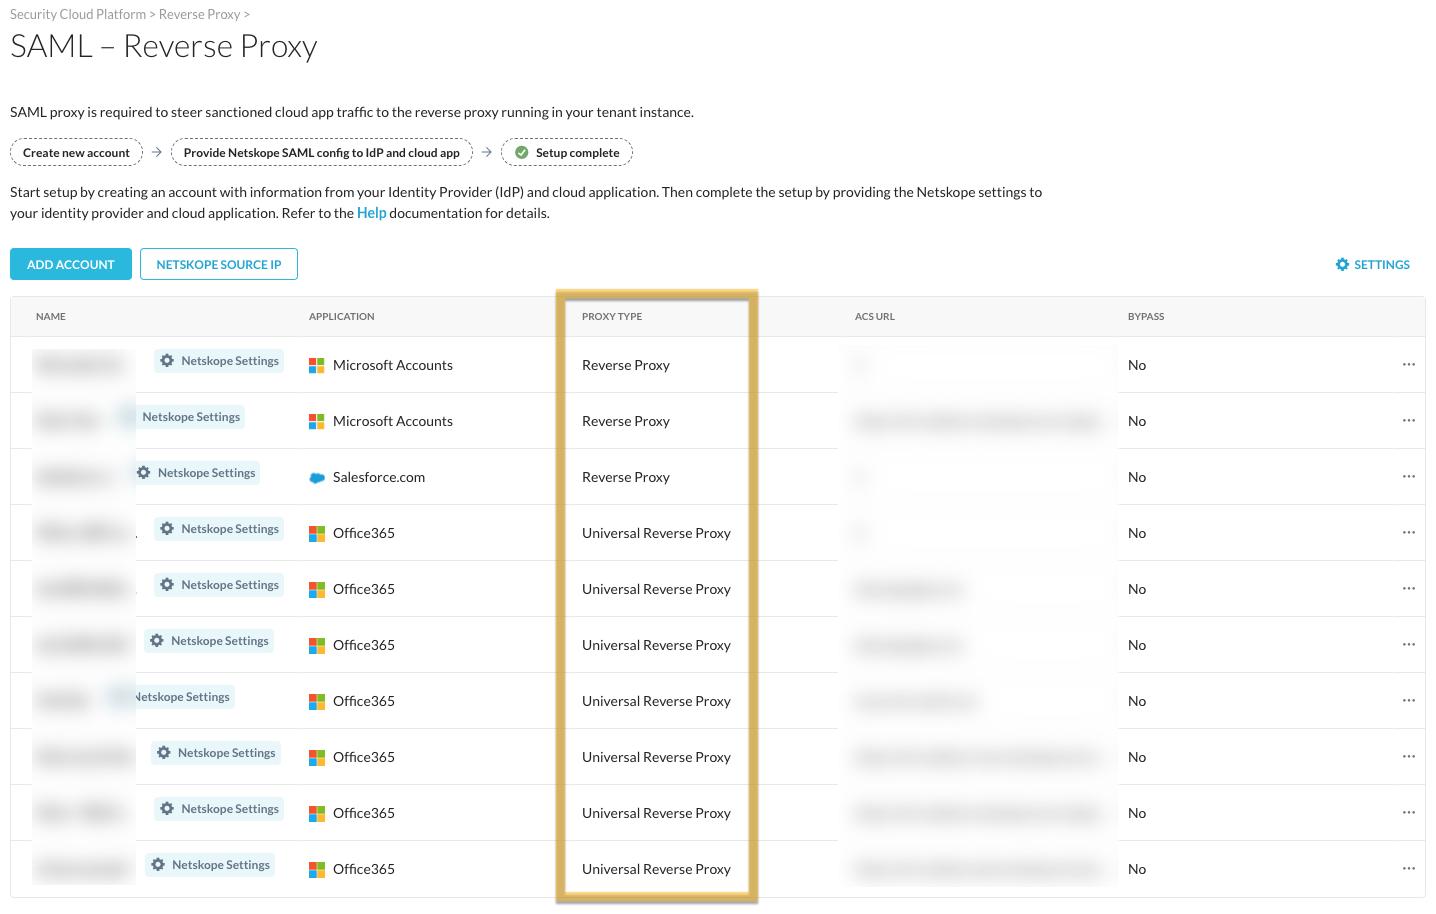
You can view the Access Method on the list page under the Proxy Type column.
Updating Real-time Protection Policies
You can create a new Real-time Protection Policy or update an existing policy and use the URP access method. In addition, you can add URP as a new filter option in the RTP Policy list page.
- Navigate to Policies > Real-time Protection > select a policy and open the policy editor.

2. Select Source > Add Criteria > Access Method > Universal Reverse Proxy.
3. Select Destination > Application > Microsoft Office365 SharePoint Online.
4. Click Save.
Creating new Real-time Protection Policies remains unchanged. To learn more: Create a Real-time Protection Policy
Real-time Protection Policy Filter Option
You can add URP as a new filter option in the RTP Policy list page.
- Navigate to Policies > Real-time Protection > +Add Filter > Access Method > Universal Reverse Proxy.
- Click Apply.
The Access Method appears in the Policy list page under the Source column.
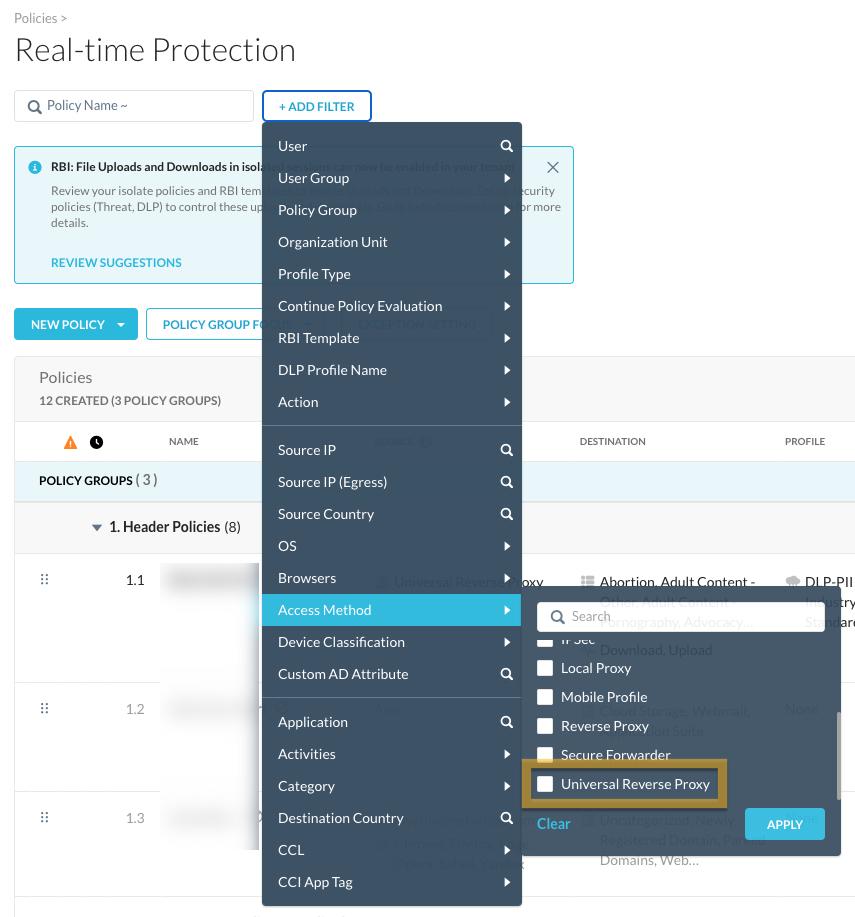
SkopeIT Filter Option
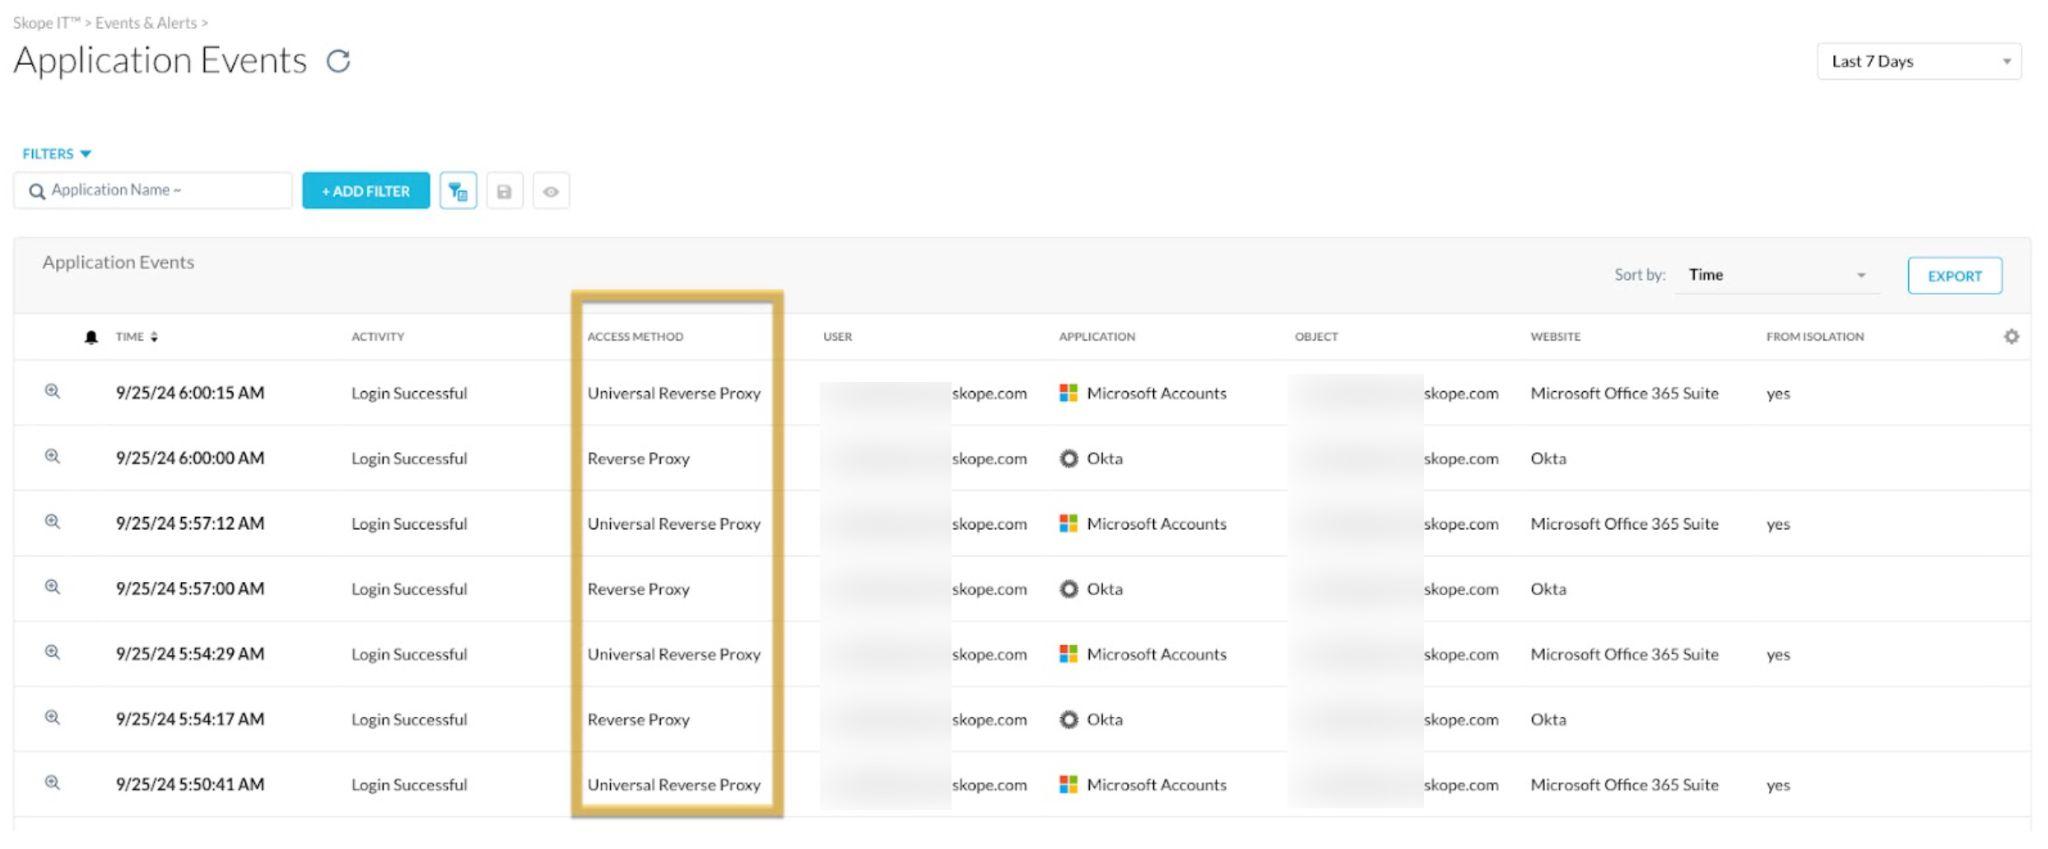
You can add URP as a new filter option in the Skope IT Application Events.
- Navigate to Skope IT > Events & Alerts > Application Events > +Add Filter > Access Method > Universal Reverse Proxy.
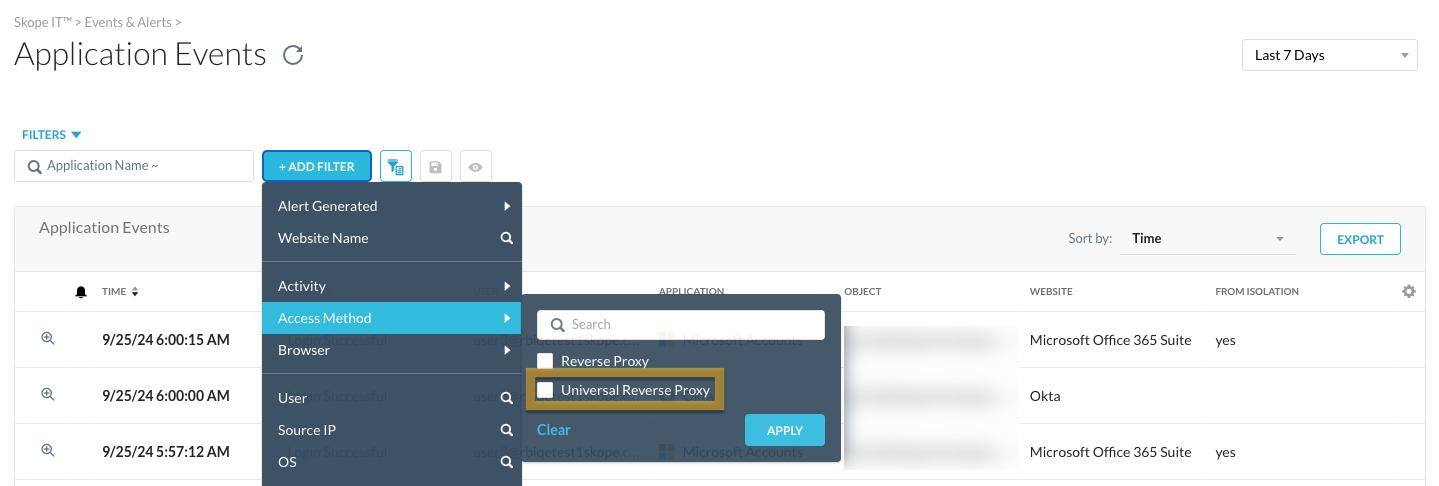
- Click Apply.
- Click the gear icon and select General > Access Method.
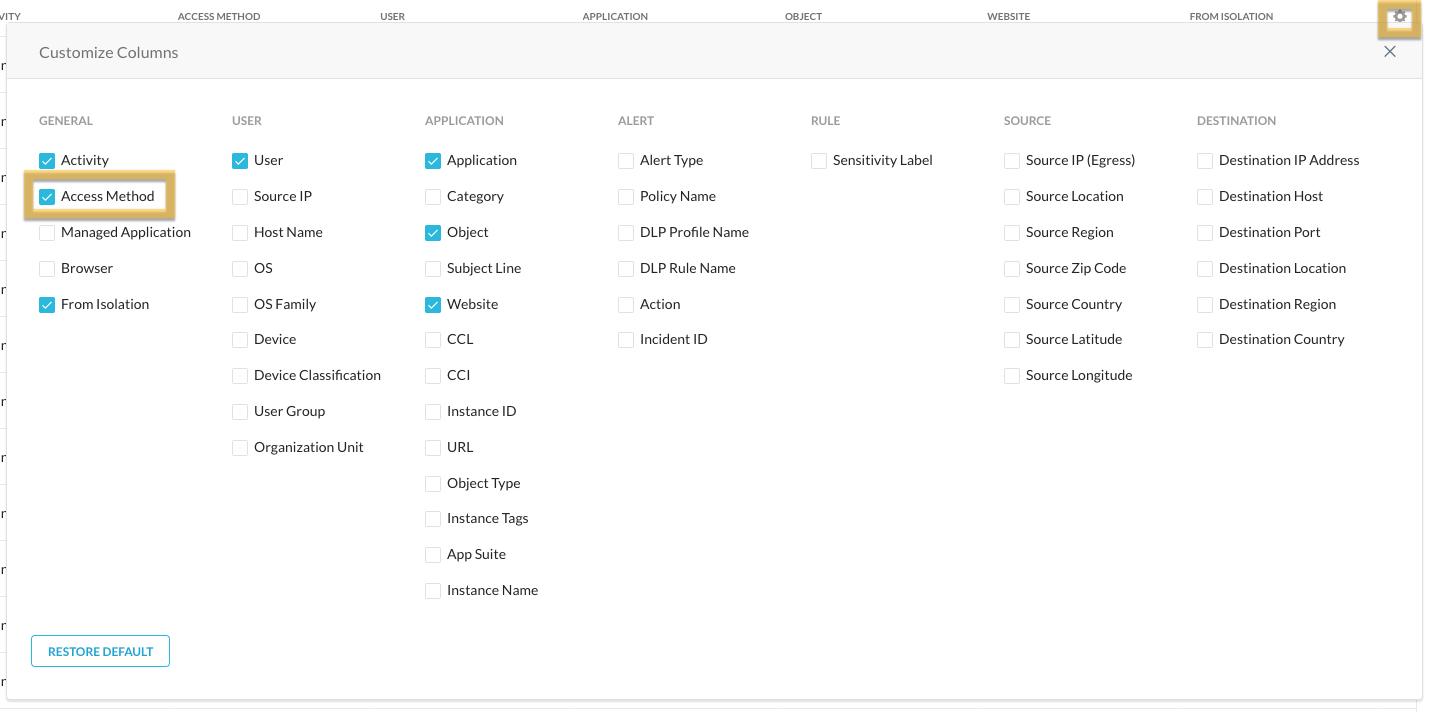
The Access Method column appears in the Application Events list page.
Supported Applications
The following list are the Universal Reverse Proxy supported applications (to-date, more coming).
Amazon Web Services (AWS)
- Amazon AWS – IAM, EC2, S3
Atlassian
- Atlassian Jira
- Atlassian Confluence
Google Suite
- Google Mail
- Google Drive
- Google Sheets
- Google Slides
- Google Forms
- Googel Calendar
- Google Contacts
- Google Docs
- Google Keep
- Google Chat
Microsoft Suite
- MS OneDrive For Business
- MS Outlook
- MS Sway
- MS Portal (Suite) & Powerapps
- MS Azure
- MS Yammer
- MS Tasks (To Do)
- MS Forms
- MS Planner
- MS OneNote Online
- MS Delve
- MS Todo
- MS SharePoint
Other
- Box
- Citrix ShareFile
- DropBox
- Egnyte
- Salesforce
- ServiceNow
- WorkDay
Qualified IdPs
By default, any IDP which supports SAML 2.0 protocol should work with NS SAML Proxy. However, IDPs listed in the below table are regularly qualified by the engineering team.
| IDPs | SAML | AUTH |
|---|---|---|
| ADFS | ❌ | ✅ |
| Entra ID | ✅ | ❌ |
| Okta | ✅ | ✅ |
| PingFed | ❌ | ✅ |