

Overview
This article details the functionality of the Netskope DSPM Classification Management page. We recommend reading more about Netskope DSPM’s approach to Classification Management before proceeding.
Review Classifications
To review how Netskope DSPM has classified your data, go to Classification > Classification Management in the left navigation menu.
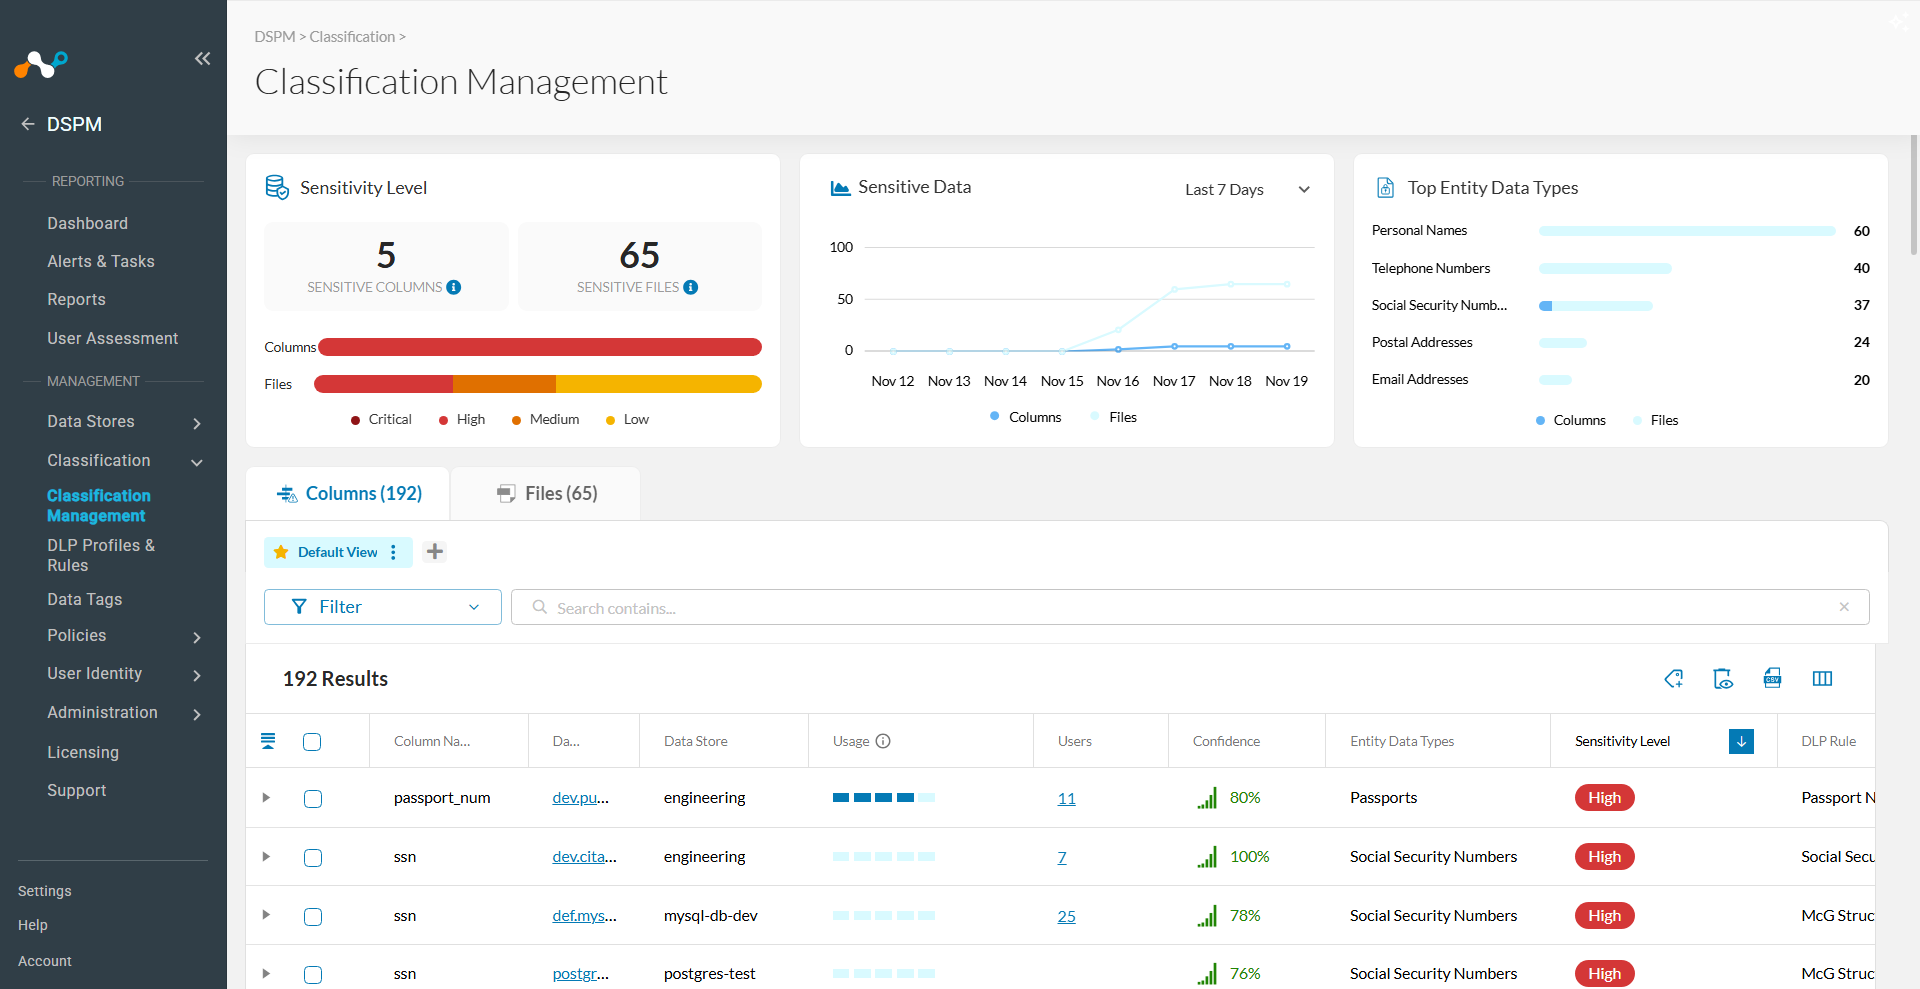
The dashboard at the top of the page provides a high-level summary of your data stores, displaying:
- A summarized view of sensitive fields/files and their sensitivity levels.
- A trend graph showing the growth of sensitive data over time.
- A donut chart breaking down all highly-sensitive fields and files.
Use Filters
You can narrow down the list view at the bottom of the page using the following filtering methods:
- Quick Filters: Click any number within the Dashboard displays to automatically filter the list.
- Custom Filters: Click the Filter button to build your own view using a combination of column names and their associated values or ranges.
- Clear Filters: Click the dustbin icon next to an individual condition to remove it, or click Clear Filters to remove all conditions and restore the full list.
Manage Saved Views
Each saved view is a custom configuration of displayed columns and applied filters. You can use them to switch contexts quickly (e.g., researching high-severity fields vs. reviewing unverified classifications) or to repeatedly export specific CSV reports.
There are two view types:
- Default View: Displays the most important columns with no filtering applied.
- Saved Views: Private, user-created views that enforce your specific filters and column layouts.
Saved views appear as clickable boxes within a view ribbon. The currently active view is highlighted in light purple.


How to Manage Your Views
First, configure your desired filters, sorting, and column displays. The “Unsaved Changes” label will appear. From the view ribbon, you can perform the following actions:
Create a New View
- Click the Add button (
+). - In the modal, enter a unique name.
- (Optional) Check Set as Preferred View, and click Save.

Update an Existing View
- Select the view.
- Adjust your filters/columns.
- Click the context menu icon (⋮), and select Save Changes.

Rename a View
- Select the view
- Click the context menu icon (⋮), and select Rename.
- Update the name and click Save.

Change the Preferred View
- Select the desired view
- Click the context menu icon (⋮)
- Select Set as Preferred.
Delete a View
- Select the view
- Click the context menu icon (⋮), and select Delete.
Review Individual Fields
-
If the classification is correct: Click the Mark as Reviewed icon in the Action column. The button turns green, indicating to other users that this classification has been verified and any associated alerts are likely accurate.
-
If the classification is incorrect: Check the box next to the field. Use the drop-down options to adjust the type, tags, sensitivity level, and review status. Check the Reclassify on Next Scan box and click Save. The system will update the classification during the next scan.

-
Bulk Edit: Select multiple rows to tag, review, and reclassify them simultaneously.

Note on Empty Data: If there are no data samples available for classification, Netskope DSPM will mark the field as “Not Sensitive.” Hover over the supplementary tooltip for more information.
Review Individual Files
On the Files tab, you can see all Entity Data Types Netskope DSPM has detected within files across connected data stores, including their respective data store names, sensitivity levels, data tags, and occurrence counts. Use the filters to glean more insight based on these column headers.
If you have DSPM > Sampling permission set to View or Manage, the Actions column will display with a Get Snippets icon.


Fetching File Snippets
When fetching snippets, you can select specific DLP Profiles to evaluate. Selecting specific profiles reduces fetch time and improves system responsiveness, especially in environments with a high volume of rules.
- Click the Get Snippets icon next to the file you want to inspect.
- In the snippets drawer, select the specific DLP Profiles you want to include in the fetch. The system lets you choose from the profiles that originally classified the file or the current DSPM Discovery Profile.
- Start the snippet fetch.
Netskope DSPM retrieves and displays the file data classified under your selected profiles, grouped by DLP Profile or DLP Rule. The matching data highlights in purple alongside its surrounding context.
Be aware that the returned snippets might not meet your expectations if:
-
You changed the selected DLP Rules since the last scan.
-
The file contents changed and no longer match the selected DLP Rules.
If you inspect an archive file, an additional control lists the archive’s individual contents. Select this to limit the classifications to just that file.
Use External Tags
Netskope DSPM supports ingesting tags from GCP Policy Taxonomies and Snowflake tags. If you have any GCP Projects or Snowflake Data Stores configured to ingest tags, any object-to-tag associations we discover will be regularly synced to their equivalent Netskope DSPM Classification Fields.
These associations cannot be changed within Netskope DSPM. Please update your configurations within the appropriate cloud platform console if you need to add, edit, or delete them. To learn more, visit our Data Tags article.
View User Access Information
Netskope DSPM displays the number of users accessing specific fields. Clicking on this count displays additional user information to help you analyze access control.
