

Netskope DEM Browser extension supports monitoring of both steered and bypassed browser based applications. Determining which applications the browser extension will monitor is based on the Browser Extension Policies, and the custom applications chosen for use within a Browser Extension Policy. Note that Browser Extension policies only support custom applications with defined URL patterns as targets for monitoring.
How to Create a Custom Application for Browser Extension
Custom applications are used as the targets for the browser extension monitoring. Custom application definitions support URL patterns as the primary method of targeting the specific components of a web application you would like to monitor.
- Go to Homepage > Digital Experience Management > Settings.
- Within Settings go to Monitoring Policies > Custom Applications.
- Click the Stations/Browsers tab at the top of the page.
- If you already have custom applications configured for the browser extension or enterprise station they will be present in the table below.
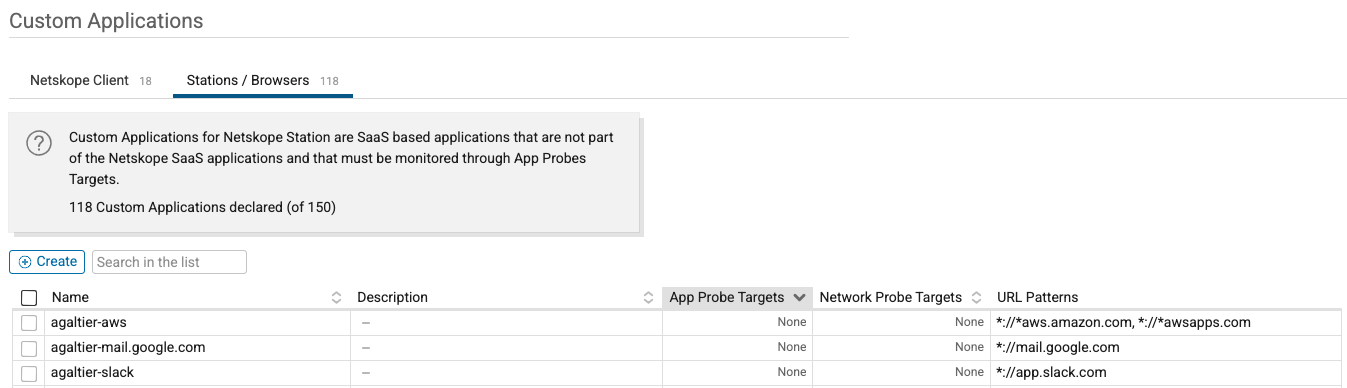
5. To create a new custom application for use with the browser extension, click Create.
6. Provide the new custom application with a name and description, and click Save.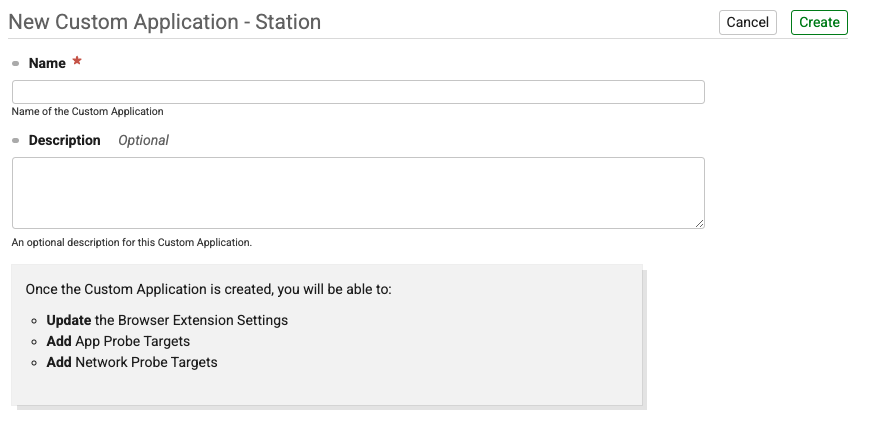
7. Now that we have an application created, we can add the URL patterns we want to monitor with the browser extension. Click Edit in the Browser Extension Settings section.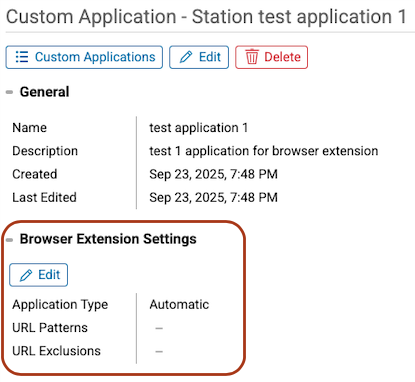
8. Now we must choose the application type. By default “Automatic” is chosen. This option will leverage Netskope to determine whether the application being monitored is a Single page application or Multi page application. If you choose to manually override the Automatic mechanism please ensure you understand the nature of the application and choose SPA or MPA accordingly. See the descriptions below.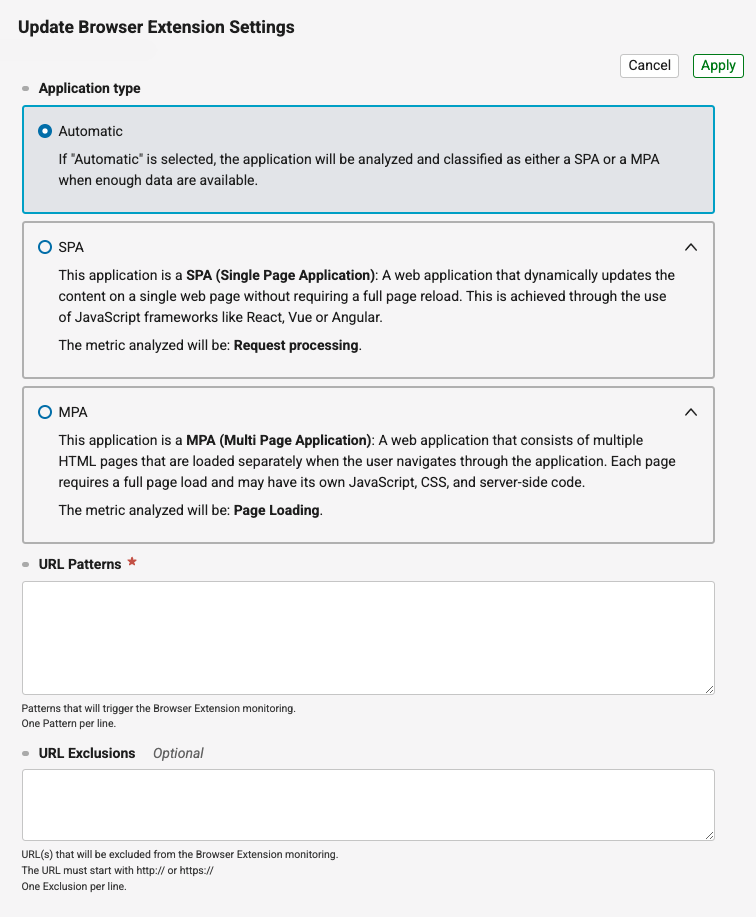
9. Next we need to define the URL patterns and exclusions we wish to use as a part of the custom application definition. After URL patterns and exclusions have been added, click Apply. The custom application is now ready for use within browser extension policies.
How to Create Browser Extension Policies
Browser extension policies are used to apply the monitoring of defined custom applications (must have URL patterns defined within the custom application) to a specific set of users for which the browser extension has been installed. Browser extension policies can be mixed and matched across various user groups, OUs, and OS types to ensure optimal coverage and monitoring of business critical browser based applications across your organization.
- Go to Homepage > Digital Experience Management > Settings
- Within Settings go to Monitoring Policies > Browser Extension Policies
- Click the “Create” button.
- Within this screen you will enter the following information:
- Name: Name of the browser extension policy.
- Monitored Application: Select the custom application from the dropdown, for which you defined URL patterns to monitor.
- Users: Select the users, groups, and OUs for which the policy will be applied. Note: you can select any combination of users, groups, and OUs. The logic applied between each criteria is “AND”.
- OS: Select the operating systems for which this policy will apply.
- Order: Select the position the browser extension policy will be applied to your users with browser extension deployed. Note that ordering will be important if you have numerous policies with various different group, OU, and user selections. The completed global order can be found here: Monitoring Policies > Browser Extension Policies.
- Click Create. Your policy is now created and will be applied to the users defined in the policy scope at the next configuration checkin interval.