

Notes de mise à jour
1.3.0 (Requires minimum Cloud Exchange version 6.0.0)
Added
- Added support for Custom Region and Externally Provisioned Bucket in the configuration parameters.
- Ajout de solutions pour les journaux d'erreurs.
- Option de format JSON ajoutée.
Changed
- Updated the object file name format to <epoch>_<thread_id>_<uuid>.gz to prevent data overwrite when data is ingested at the exact same time.
Fixed
- Erreur corrigée observée lors du partage de données WebTx à l'aide de NLS.
- Fixed proxy settings not being applied to AWS IAM Roles Anywhere requests.
1.2.0
Added
- Ajout de deux New méthodes d'authentification.
Removed
- Suppression des identifiants secrets pour l’authentification.
Changed
- Structure d'objet mise à jour dans la fonctionnalité de push.
1.1.0
Changed
- Added support for a few regions.
- Changed the plugin name
1.0.0
Added
- Initial release.
This document explains how to configure the AWS S3 WebTx v1.3.0 plugin with the Log Shipper module of the Netskope Cloud Exchange platform. This plugin supports ingestion of WebTx data to an AWS S3 bucket. This plugin supports ingestion in JSON format only.
Conditions préalables
Pour compléter cette configuration, vous avez besoin de :
- Un locataire Netskope (ou plusieurs, par exemple des instances de production et de développement/test).
- Un locataire Netskope Cloud Exchange avec le plugin Tenant et le plugin Log Shipper déjà configurés.
- A Netskope Cloud Exchange tenant with the AWS Netskope LogStreaming or Azure Netskope LogStreaming plugin already configured, for ingesting WebTx from the Netskope Log Streaming plugins.
- Autorisations pour les seaux Amazon S3 pour l'utilisateur IAM.
- ListBucket
- CreateBucket
- GetBucketLocation
- PutObject
- To use a Secrets Manager, refer to this documentation. To set up Azure Key Vault, refer to this documentation.
- Connectivité avec les hôtes suivants : AWS S3 Bucket access.
Note
Vérifiez que les autorisations d'accès à votre seau sont sécurisées et qu'elles ne sont pas configurées pour un accès public. N'autorisez l'accès à votre instance de stockage en nuage qu'à partir de votre hôte Cloud Exchange et de toute autre adresse nécessitant un accès.
Support du plugin AWS S3 WebTx
Le plugin AWS S3 WebTx est pris en charge :
| Type de données | Support |
|---|---|
| Événements | Non |
| Alertes | Non |
| WebTx | Yes (via Netskope Log Streaming) |
Note
- CLS WebTX basé sur Google Pub Sub Lite est obsolète. Veuillez vous référer aux annonces EOL/EOS des produits Netskope - Netskope Knowledge Portal
- Pour ingérer les logs WebTX vers vos destinations de livraison de logs comme SIEM, SOAR, XDR, données Lake, utilisez le plugin AWS Netskope LogStreaming ou Azure Netskope LogStreaming.
Permissions
The IAM user needs these Amazon S3 bucket permissions to send WebTx (via Netskope LogStreaming) data to buckets:
- ListBucket
- CreateBucket
- GetBucketLocation
- PutObject
Détails de l'API
Liste des API utilisées
Ce plugin utilise des bibliothèques Python pour créer des objets fichiers dans AWS S3.
Bibliothèque : Le SDK AWS pour Python (Boto3)
Utilisation : Le SDK AWS pour Python (Boto3) pour créer, configurer et gérer les services AWS, tels que Amazon Elastic Compute Cloud (Amazon EC2) et Amazon Simple Storage Service (Amazon S3). Le SDK fournit une API orientée objet ainsi qu'un accès de bas niveau aux services AWS.
Create a Client
s3_client = boto3.client(
    "s3",
    aws_access_key_id=self.aws_access_key_id,
    aws_secret_access_key=self.aws_secret_access_key,
    aws_session_token=self.aws_session_token,
    region_name=get_effective_region(self.configuration),
    verify=self._get_verify(),
    config=Config(
        proxies=self._get_proxies() or None,
        user_agent=self.user_agent,
        connect_timeout=CONST.BOTO_CONNECT_TIMEOUT,
        read_timeout=CONST.BOTO_READ_TIMEOUT,
        retries=dict(
            total_max_attempts=CONST.BOTO_MAX_ATTEMPTS,
            mode=CONST.BOTO_RETRY_MODE,
        ),
    ),
)
Create an STS Client
sts_client = boto3.client(
    "sts",
    aws_access_key_id=self.aws_access_key_id,
    aws_secret_access_key=self.aws_secret_access_key,
    aws_session_token=self.aws_session_token,
    region_name=get_effective_region(self.configuration),
    verify=self._get_verify(),
    config=Config(
        proxies=self._get_proxies() or None,
        user_agent=self.user_agent,
        connect_timeout=CONST.BOTO_CONNECT_TIMEOUT,
        read_timeout=CONST.BOTO_READ_TIMEOUT,
        retries=dict(
            total_max_attempts=CONST.BOTO_MAX_ATTEMPTS,
            mode=CONST.BOTO_RETRY_MODE,
        ),
    ),
)
Generate Temporary Credentials (AWS IAM Roles Anywhere Only)
response = requests.post(
    "https://rolesanywhere.<region>.amazonaws.com/sessions",
    data=body,
    headers=headers,
    proxies=self.proxy,
    verify=self.verify,
    timeout=CONST.ROLES_ANYWHERE_TIMEOUT,
)
En-têtes de la demande
headers = {
    "Content-Type": CONST.CONTENT_TYPE,
    "X-Amz-Date": amz_date,
    "X-Amz-X509": amz_x509,
    "Authorization": authorization,
    "User-Agent": self.user_agent,
}
Corps de la demande
{
    "durationSeconds": 900,
    "profileArn": "<Profile ARN>",
    "roleArn": "<Role ARN>",
    "sessionName": "Session",
    "trustAnchorArn": "<Trust Anchor ARN>"
}
Response
{
    "credentialSet": [
        {
            "credentials": {
                "accessKeyId": "<accessKeyId>",
                "secretAccessKey": "<secretAccessKey>",
                "sessionToken": "<sessionToken>",
                "expiration": "<UTC time, e.g. 2026-10-21T10:15:00Z>"
            }
        }
    ]
}
Create a Bucket
s3_client.create_bucket(Bucket=bucket_name)  # us-east-1
s3_client.create_bucket(
    Bucket=bucket_name,
    CreateBucketConfiguration={"LocationConstraint": region_name},
)
Upload a File into the Bucket
s3_client.upload_file(
    file_name,
    bucket_name,
    object_name,
)
Check Bucket Existence and Accessibility (HeadBucket)
s3_client.head_bucket(Bucket=bucket_name)
Verify Bucket Ownership (HeadBucket with ExpectedBucketOwner)
s3_client.head_bucket(
    Bucket=bucket_name, ExpectedBucketOwner=own_account_id
)
Get the Caller Identity
sts_client.get_caller_identity()
Verify the Bucket Region
location = s3_client.get_bucket_location(Bucket=bucket_name)
Matrice de performance
Cette lecture de performance concerne un CE à grande pile testé avec ces spécifications de VM.
| Description | Spécifications |
|---|---|
| Détails de la pile | Taille : Grande RAM : 32 GB CPU : 16 cœurs |
| WebTx (via Netskope LogStreaming) ingéré dans SIEM | ~170K EPM |
Agent utilisateur
APN/1.1 (ahq9d89xj9gspapczzdb59goq)
Workflow
- Créez un seau, une politique de seau et configurez une méthode d'authentification.
- Configurez le plugin AWS S3 WebTx.
- Configurez les règles commerciales de l'expéditeur de journaux pour AWS S3 WebTx.
- Configurer l'expéditeur de logs Livraison de logs pour AWS S3 WebTx.
- Validez le plugin AWS S3 WebTx.
Cliquer sur « play » pour regarder une vidéo.
Configure AWS S3
Create a AWS S3 Source Bucket
-
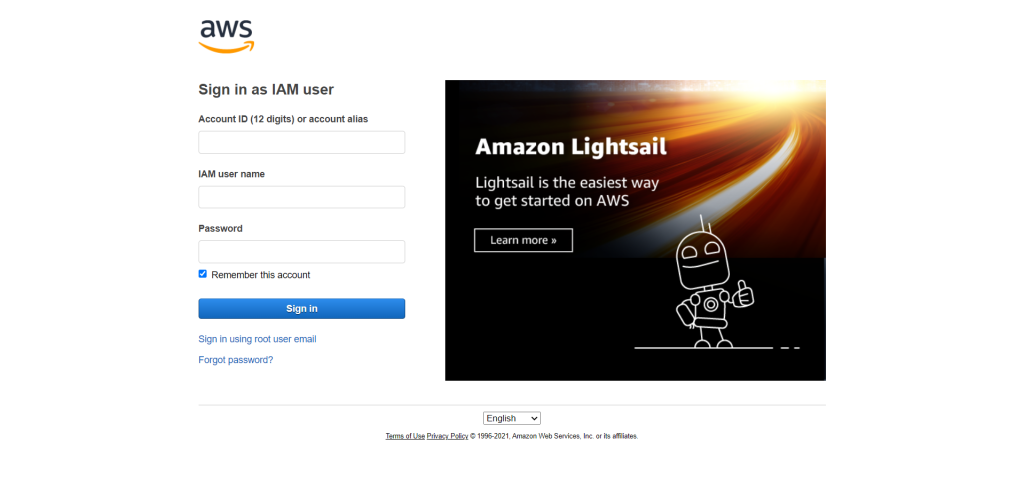
To create a Bucket and set the required policies, go to the AWS console and enter credentials to log in.
-
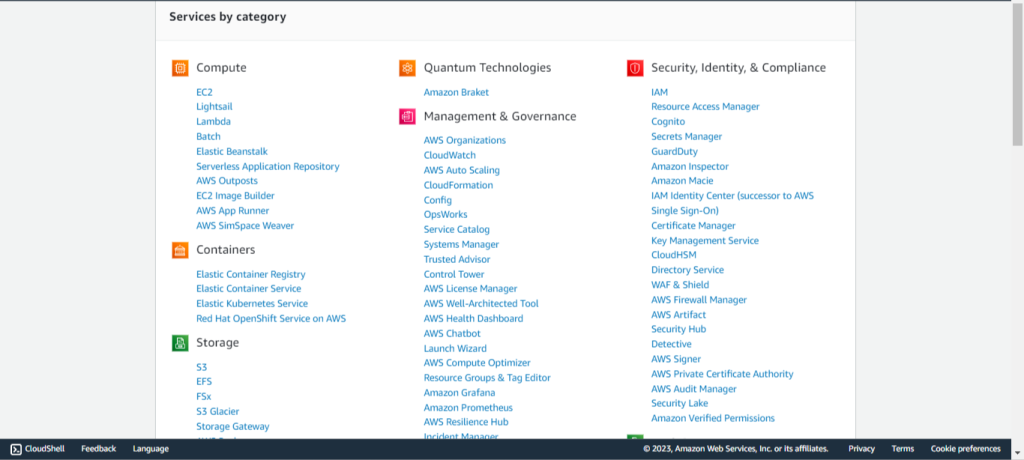
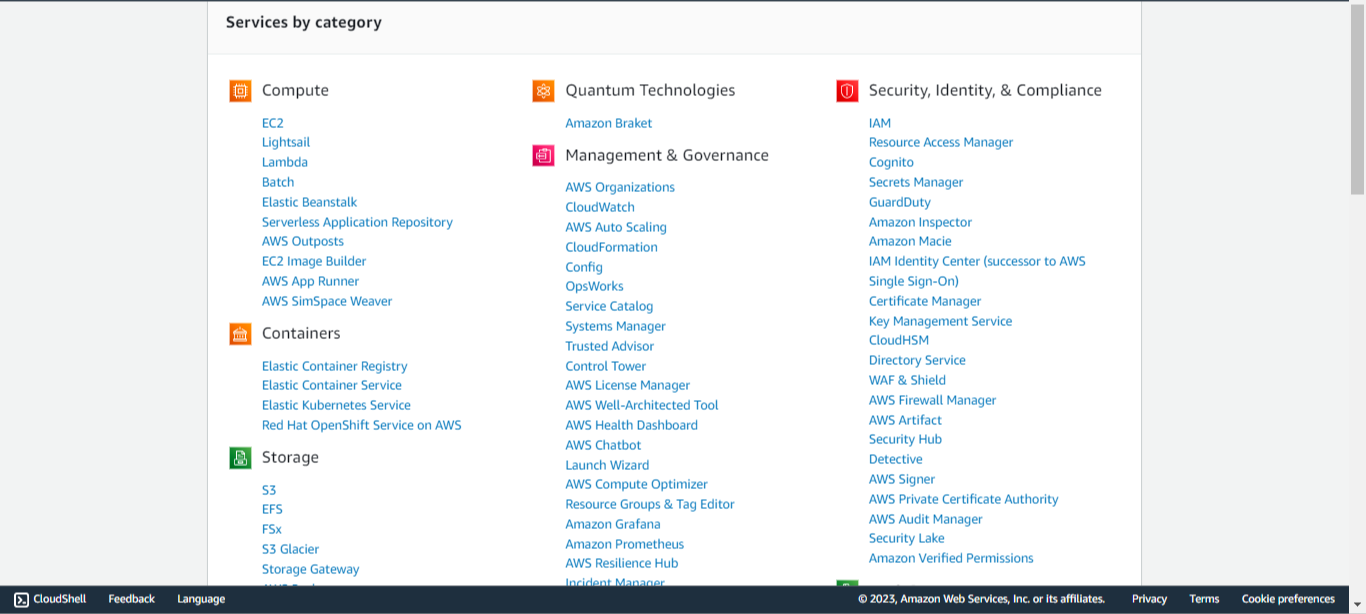
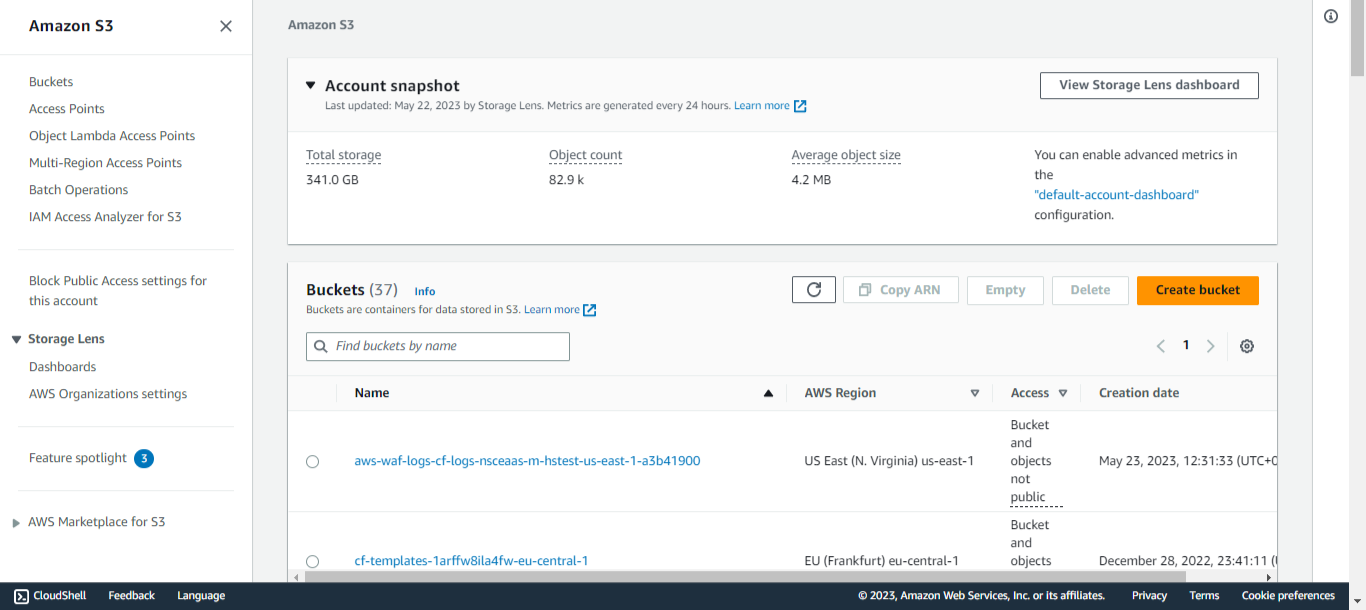
From All Services, select S3, or search for S3 in the search bar.
-
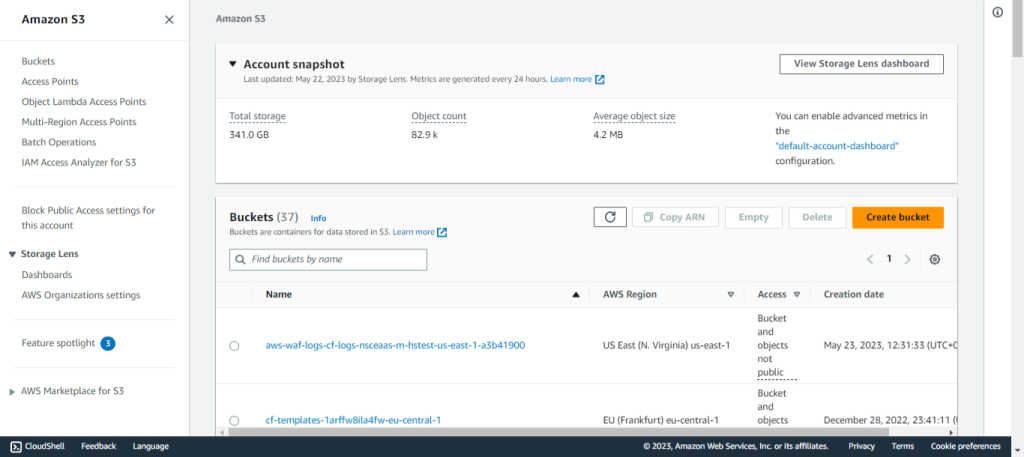
Cliquez sur Create Bucket.
-
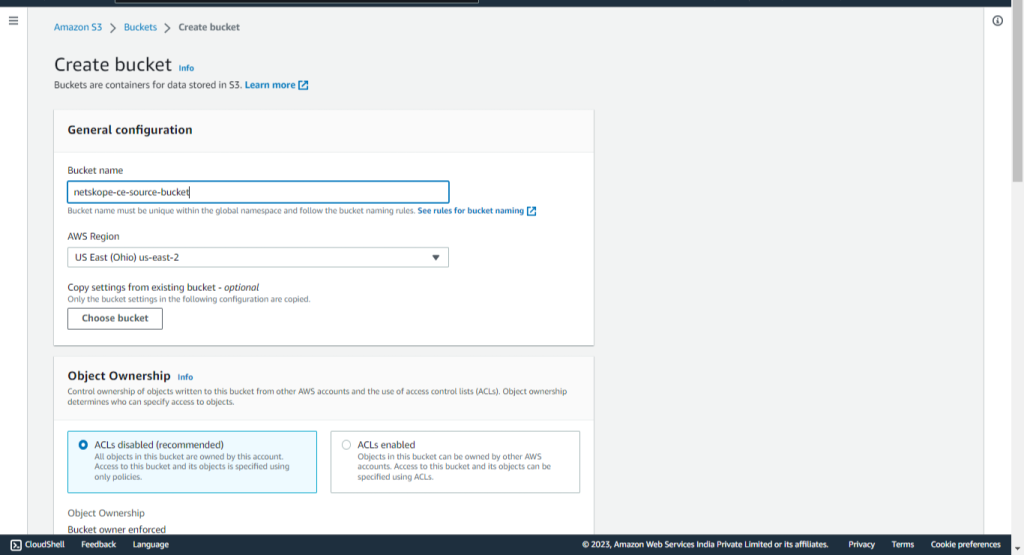
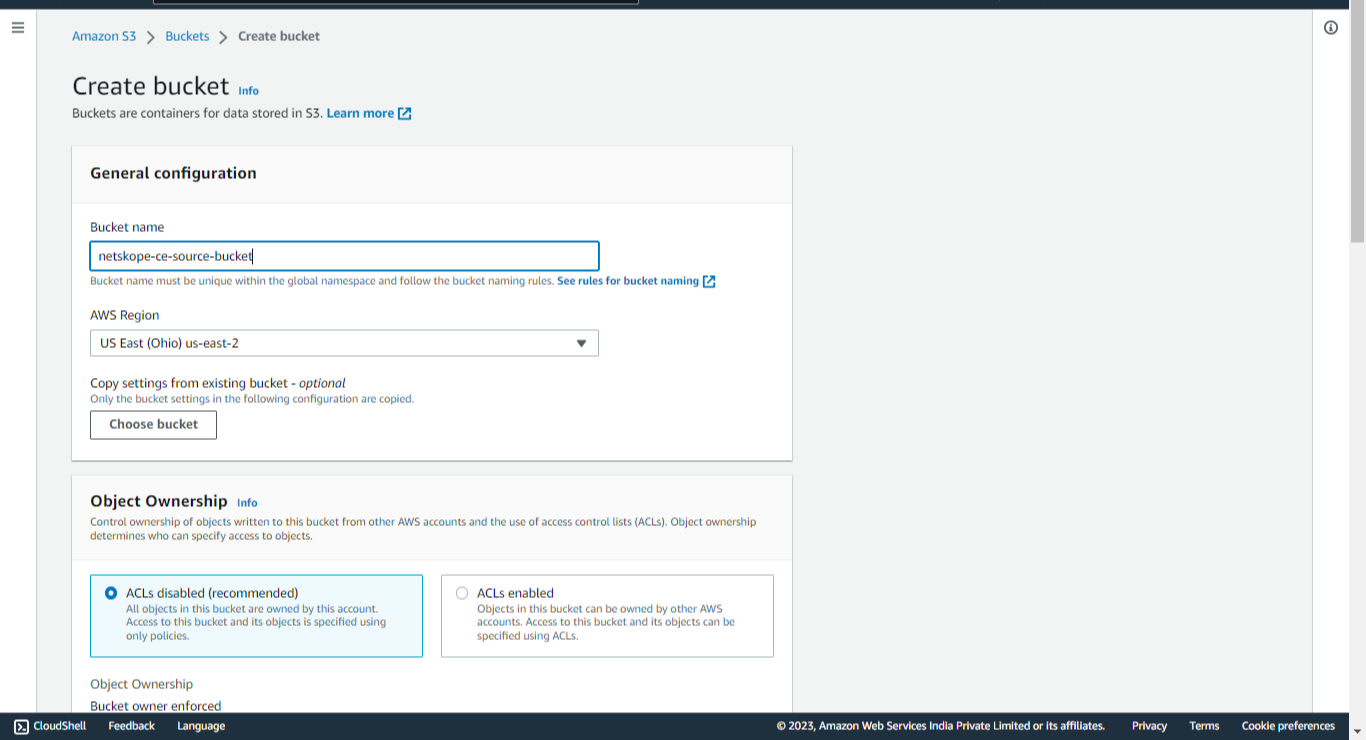
Enter a Bucket Name (like netskope-ce-source-bucket), scroll to the bottom, and click Create Bucket.
-
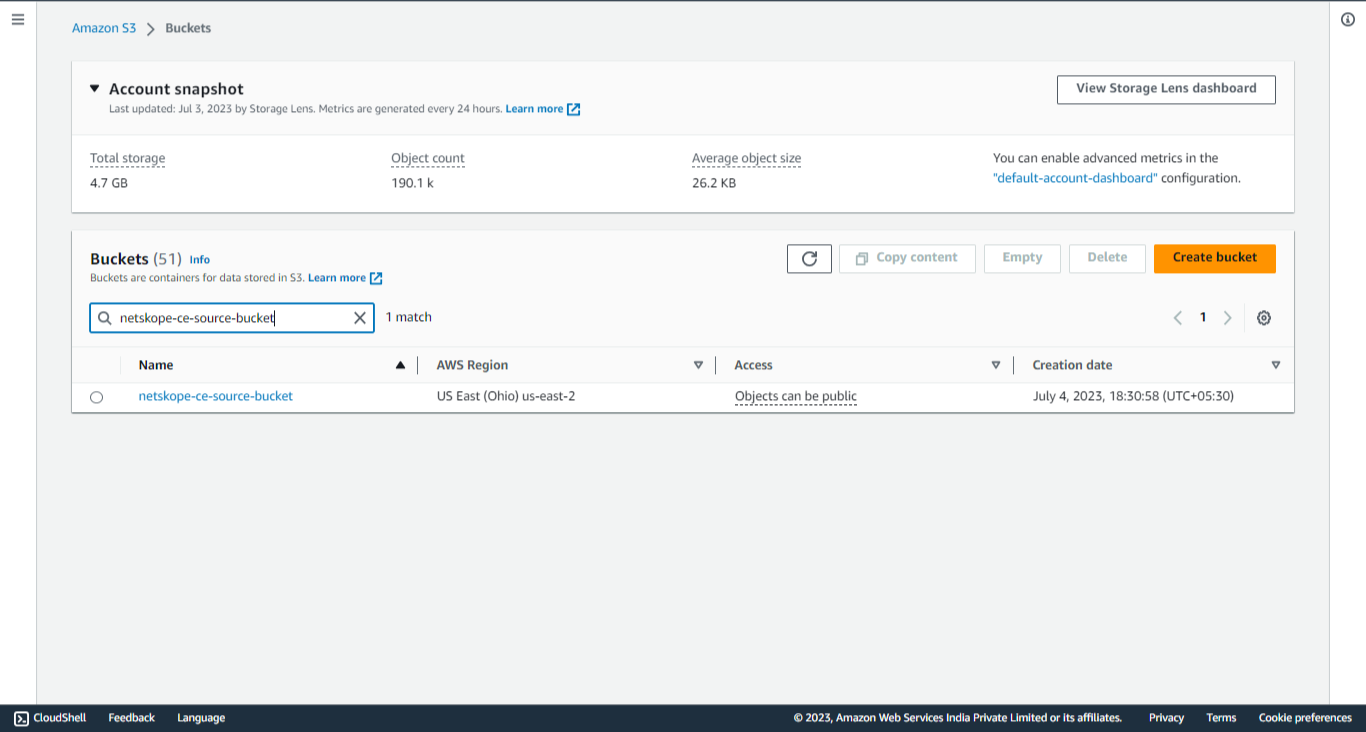
Recherchez votre seau et cliquez sur son nom pour l'ouvrir.
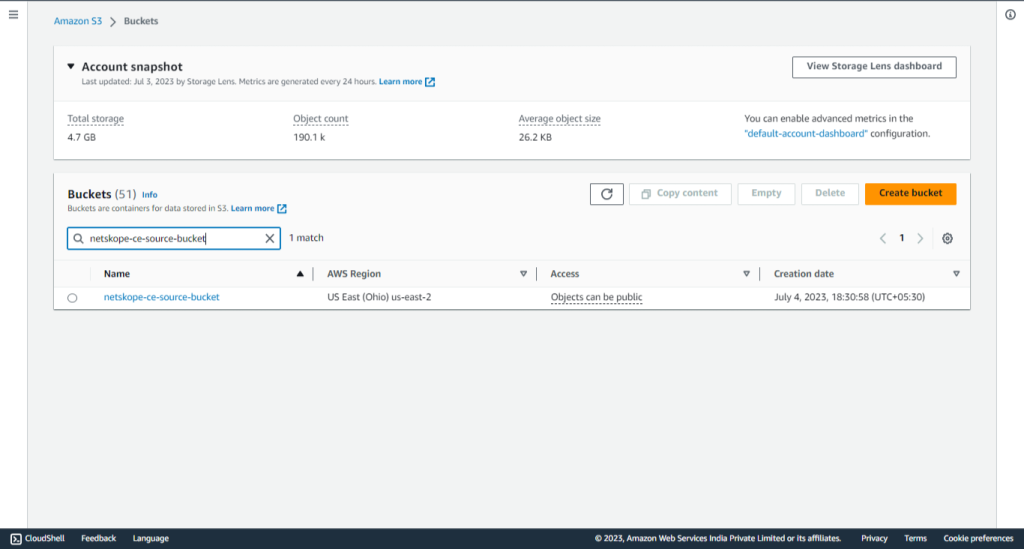
-
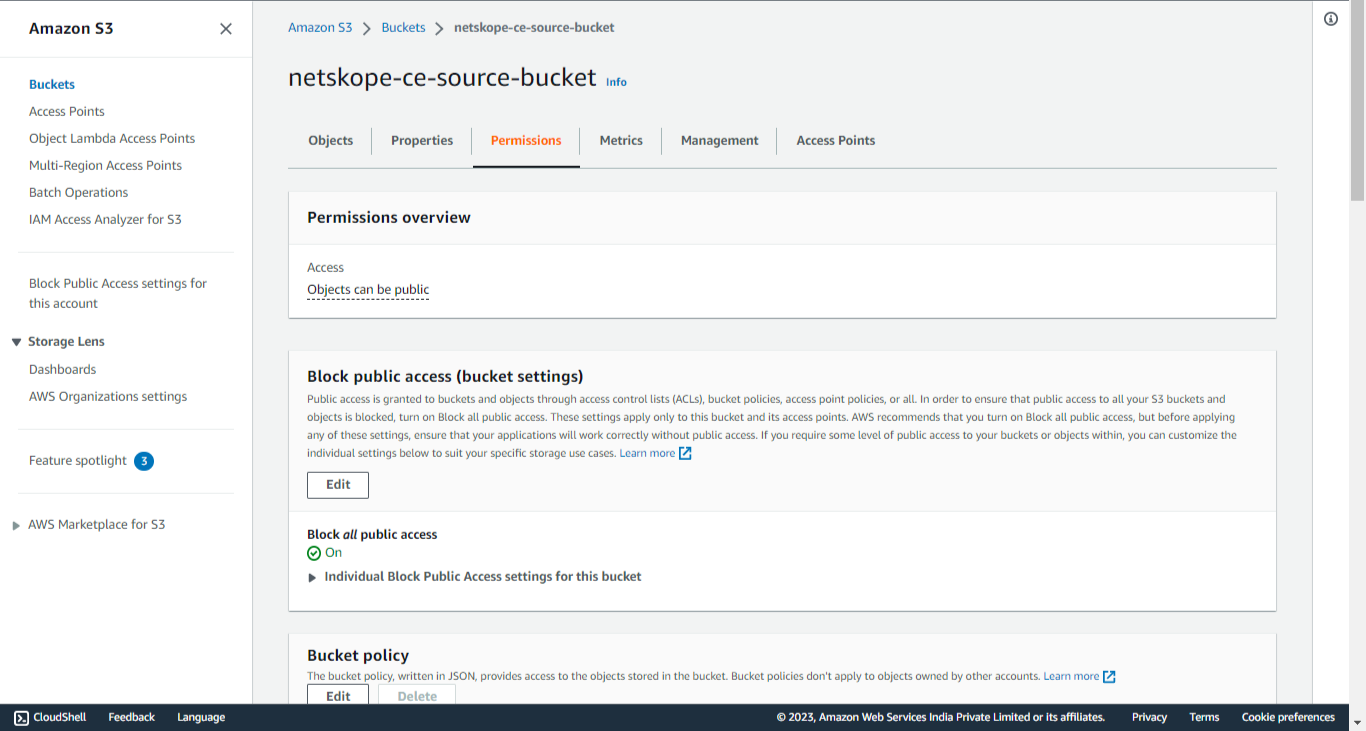
Cliquez sur Permission pour ouvrir l'onglet des autorisations et définir la politique.
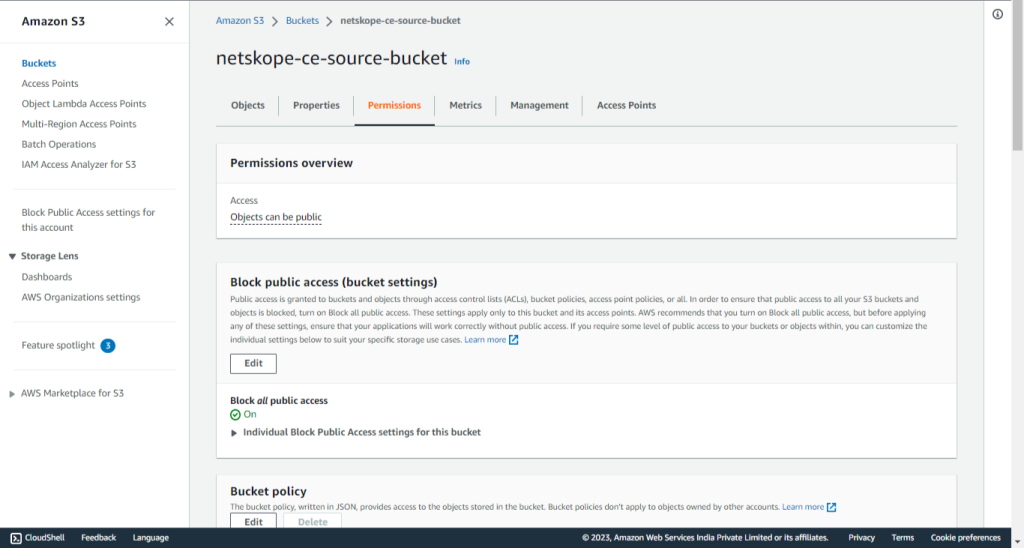
-
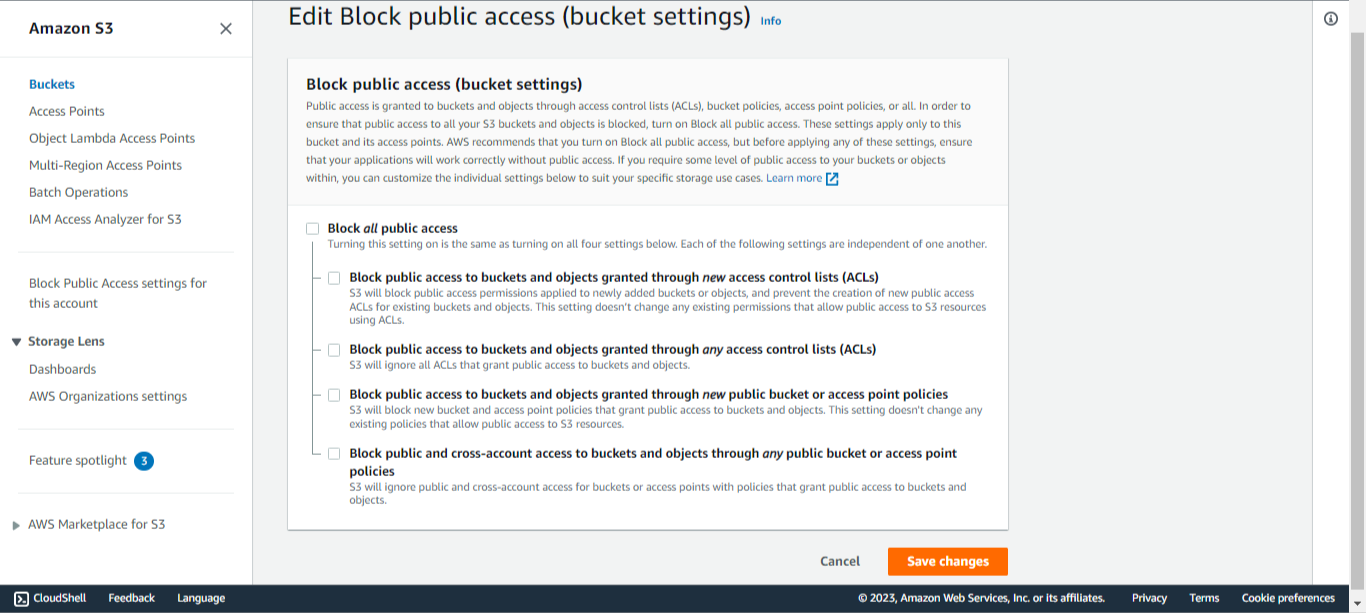
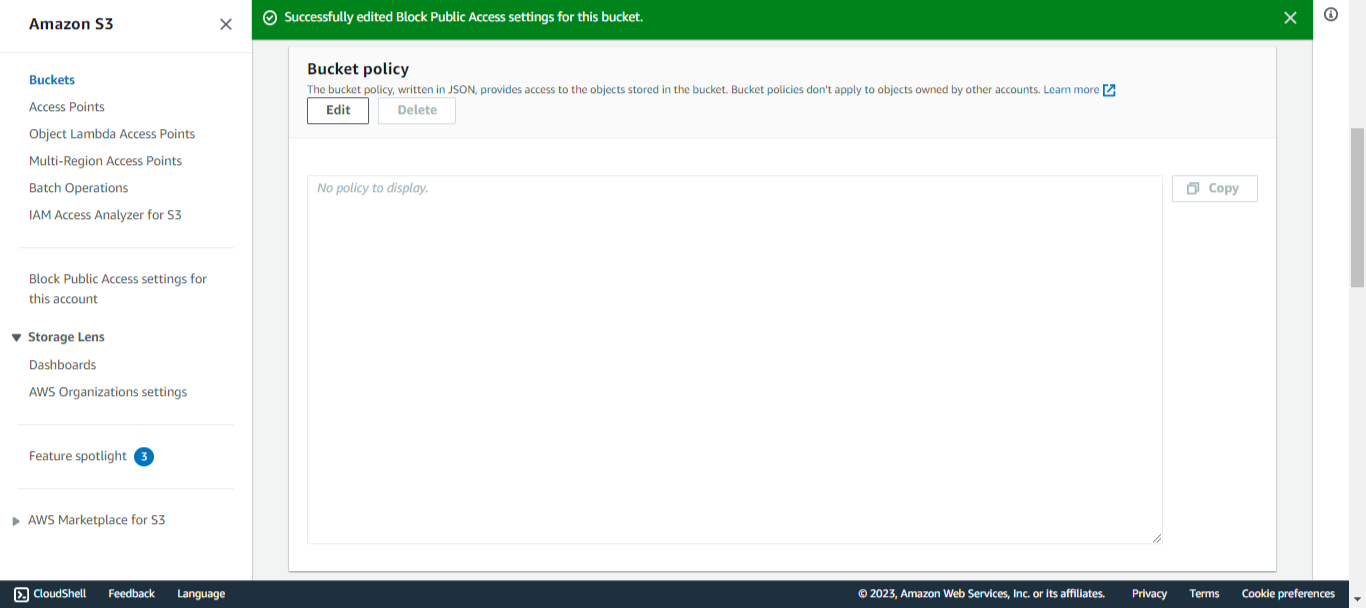
Click Edit in the Block public access (bucket settings) section. Uncheck all checkboxes and click Save Changes. It will ask for confirmation. Confirm it and click Confirm.
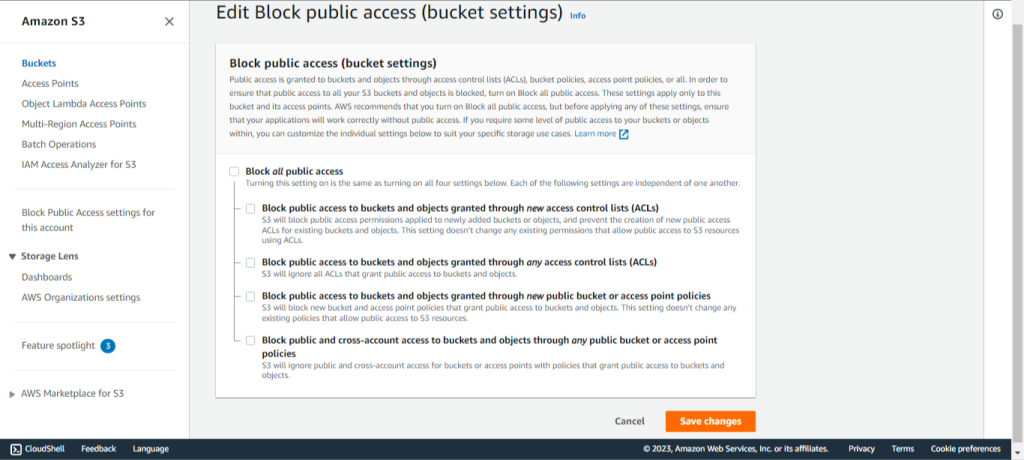
-
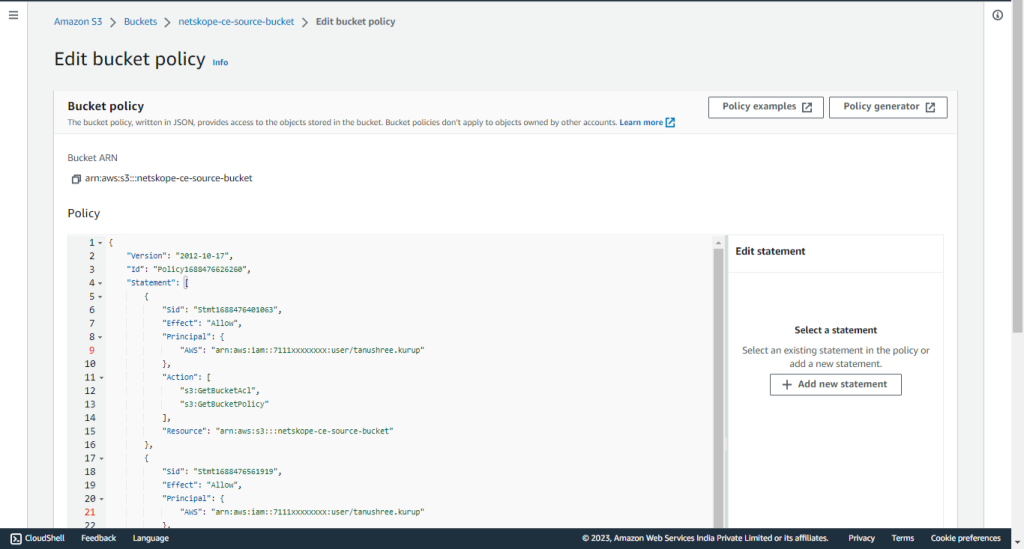
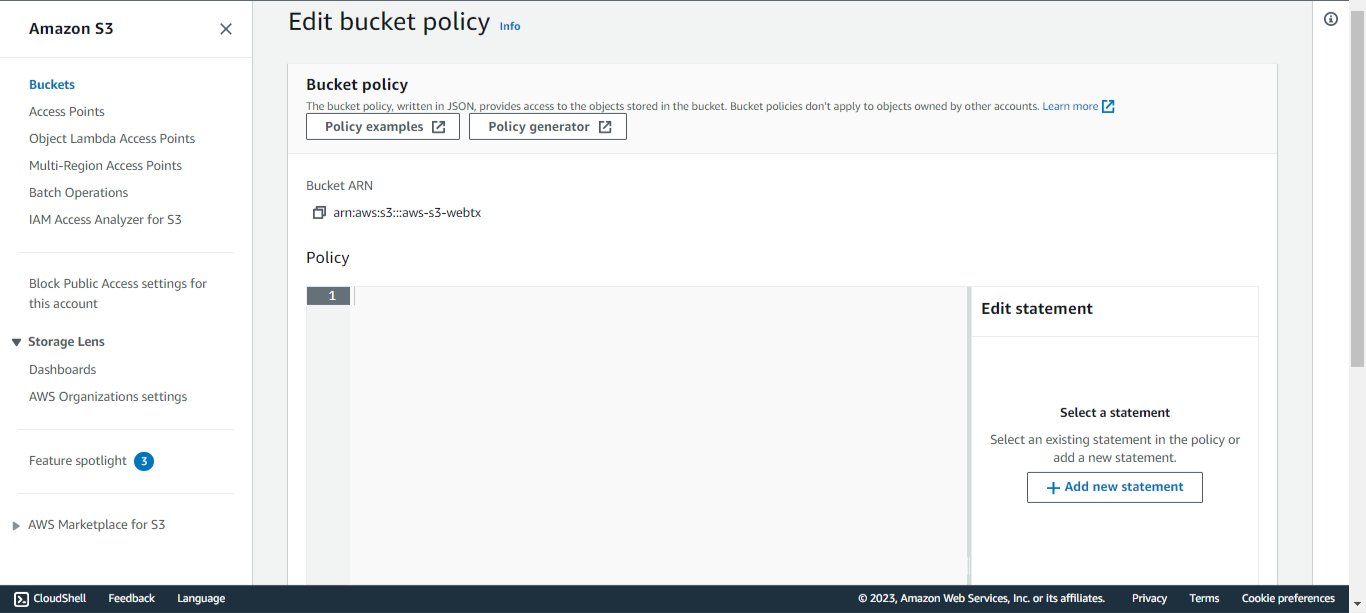
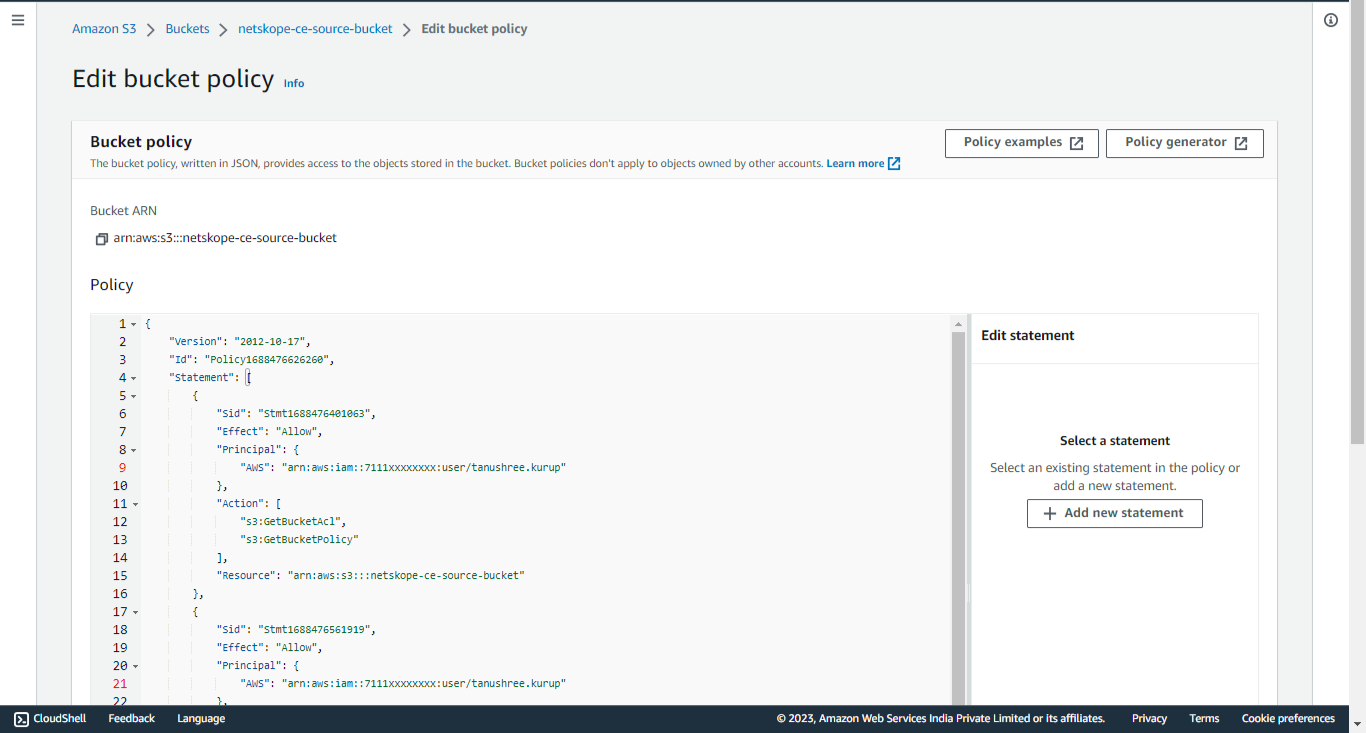
Under the Permissions tab in the bucket, click Edit in the Bucket Policy section.
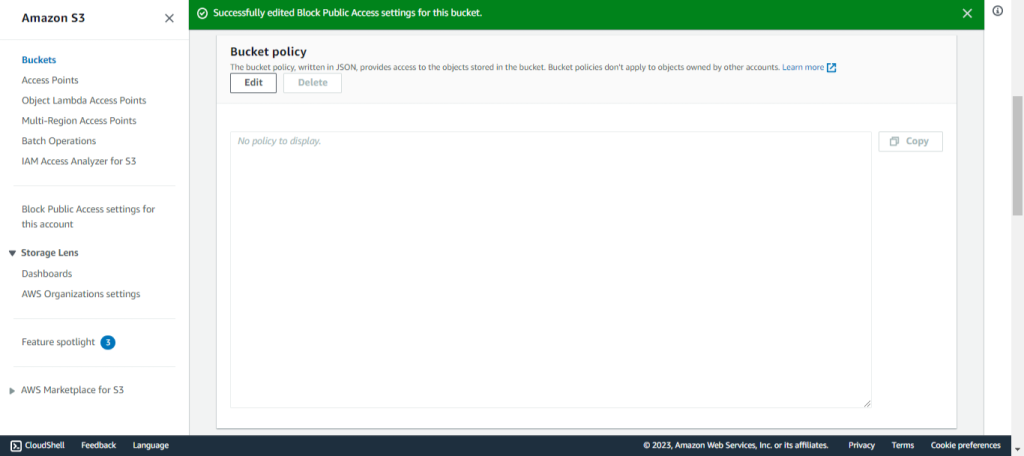
-
Cliquez sur Policy Generator.
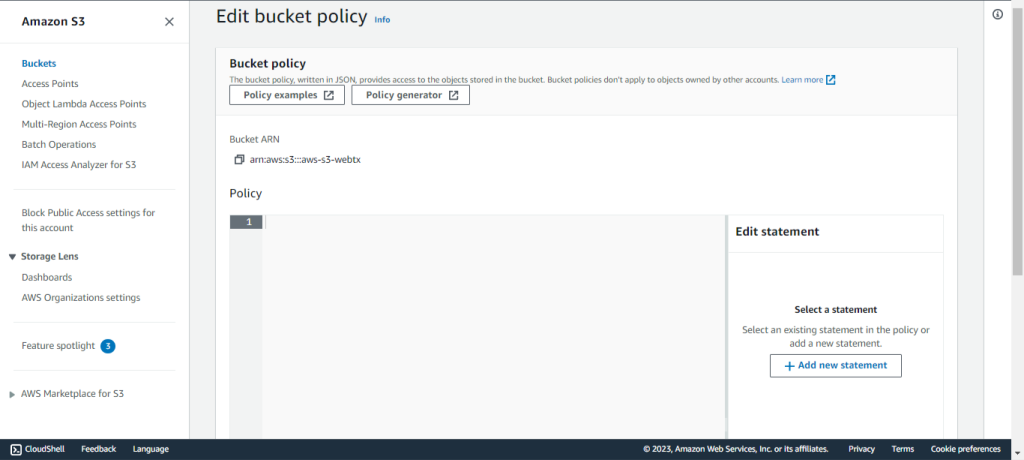
-
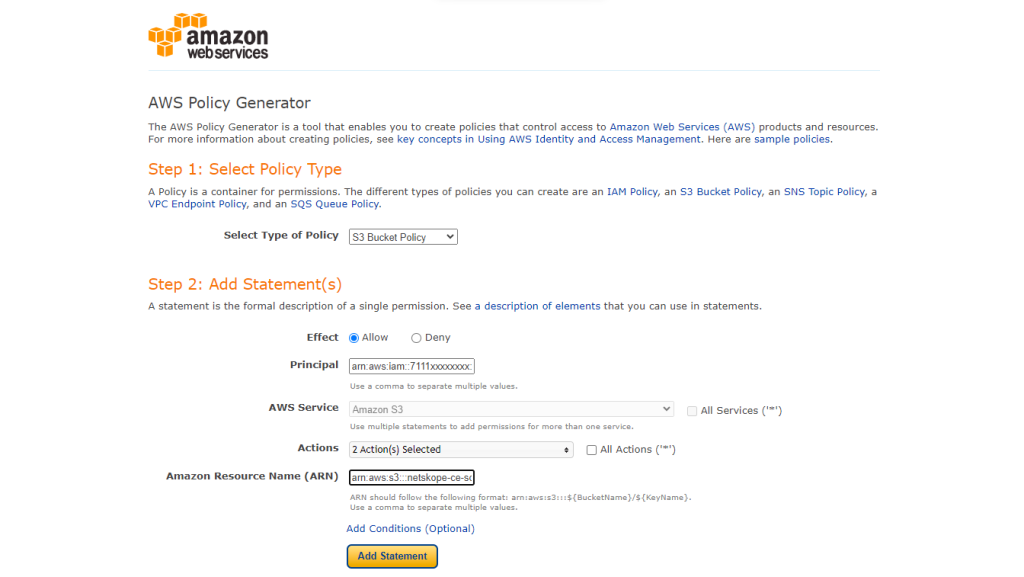
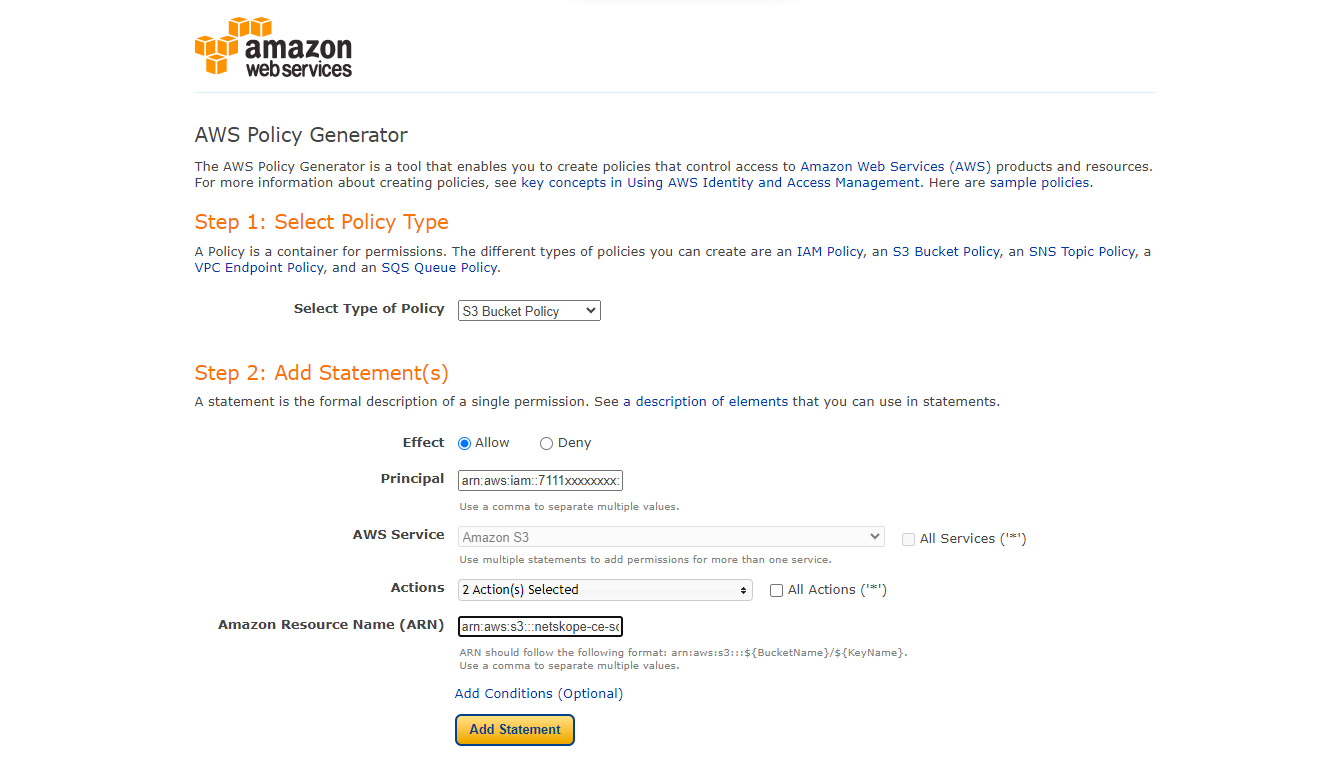
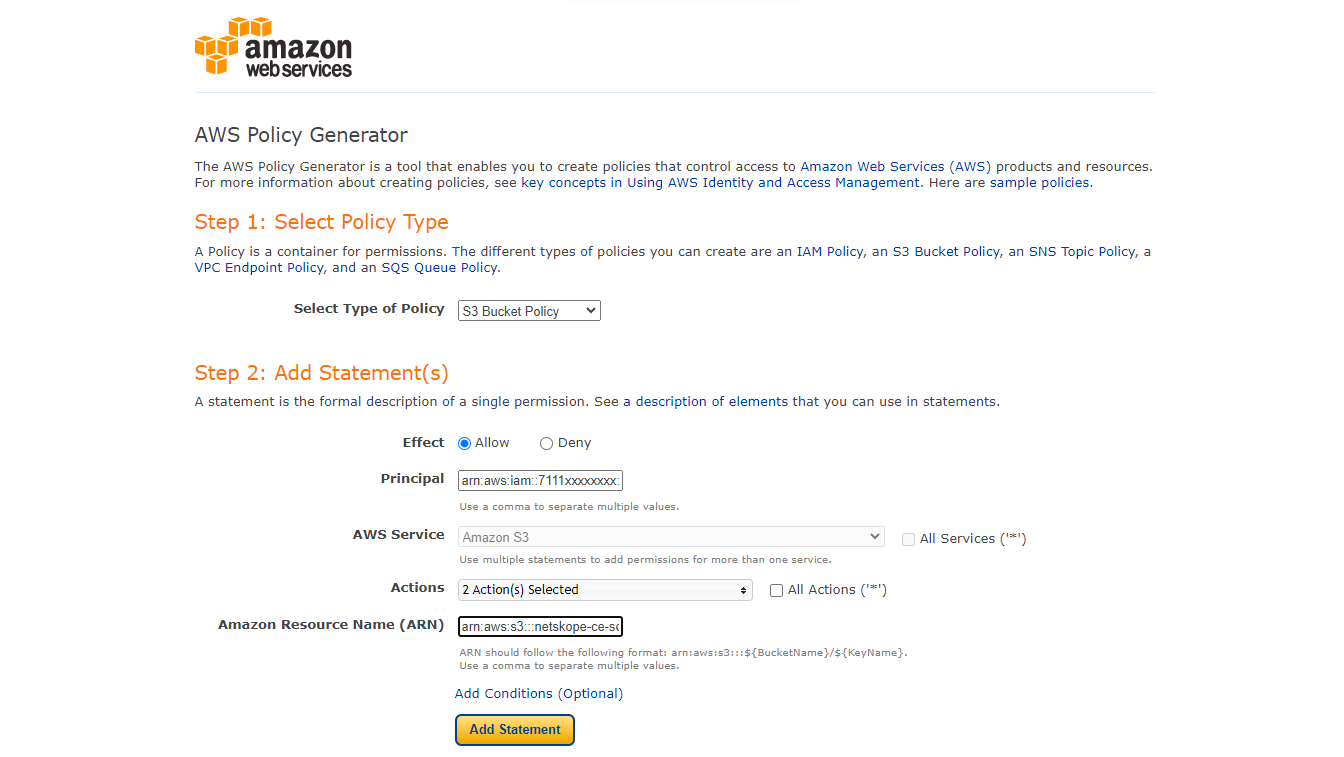
Select S3 Bucket Policy as the policy type, add statement details, and generate a policy. Replace the <user-arn> with the user ARN used for accessing the source bucket, and <bucket-name> with the source bucket created above. Example:
<user-arn>: arn:aws:iam::7111xxxxxxxx:user/xxxxxxxx, and<bucket-name>: netskope-ce-source-bucket.- Select Type de politique : Politique relative aux seaux S3
- Effet : Autoriser
- Principal: <user-arn>
- Actions :
- GetBucketAcl
- GetBucketPolicy
- ARN: arn:aws:s3:::<bucket-name>
- Cliquez sur Add Statement.
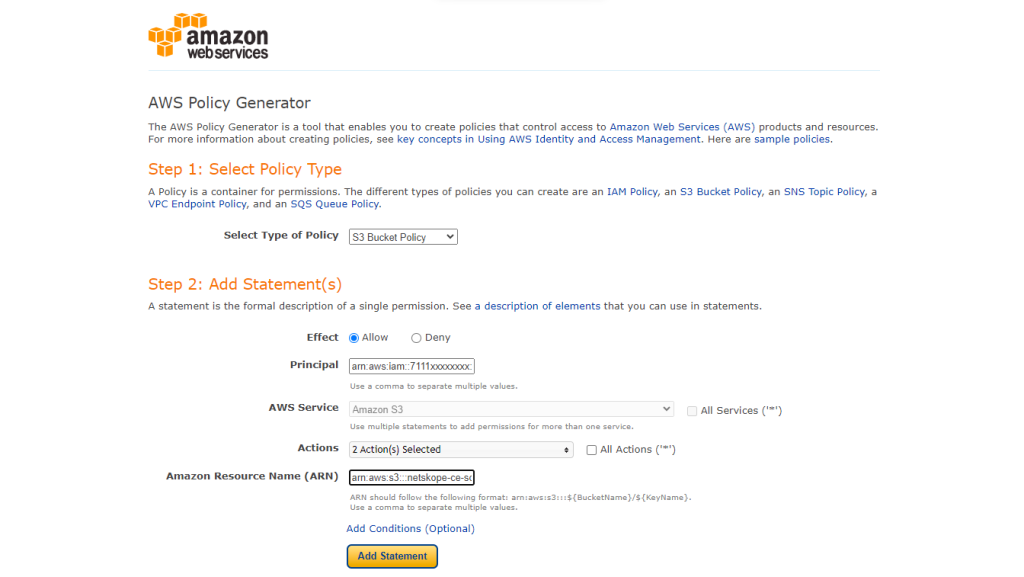
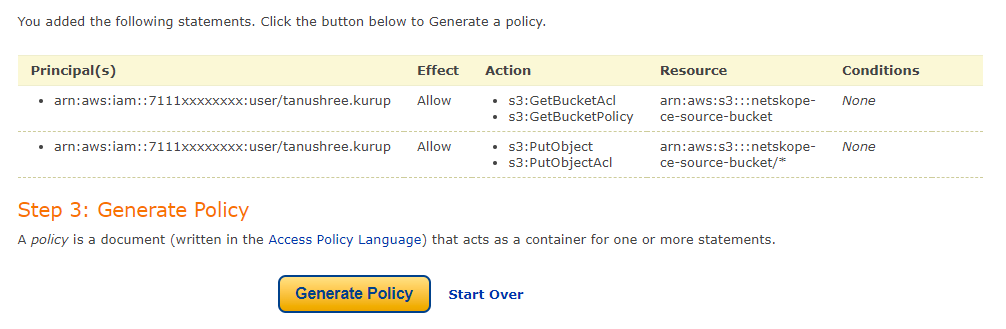
- Remontez vers le haut et ajoutez une autre déclaration.
- Select Type de politique : Politique relative aux seaux S3
- Effet : Autoriser
- Principal: <user-arn>
- Actions :
- PutObject
- PutObjectAcl
- ARN: arn:aws:s3:::<bucket-name>/*
- Cliquez sur Add Statement.
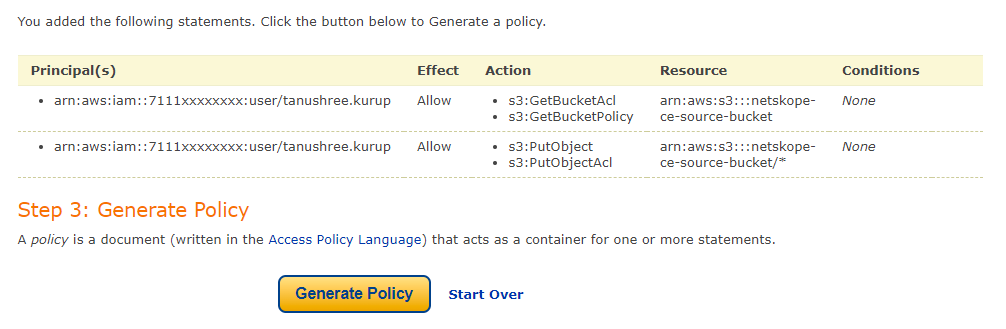
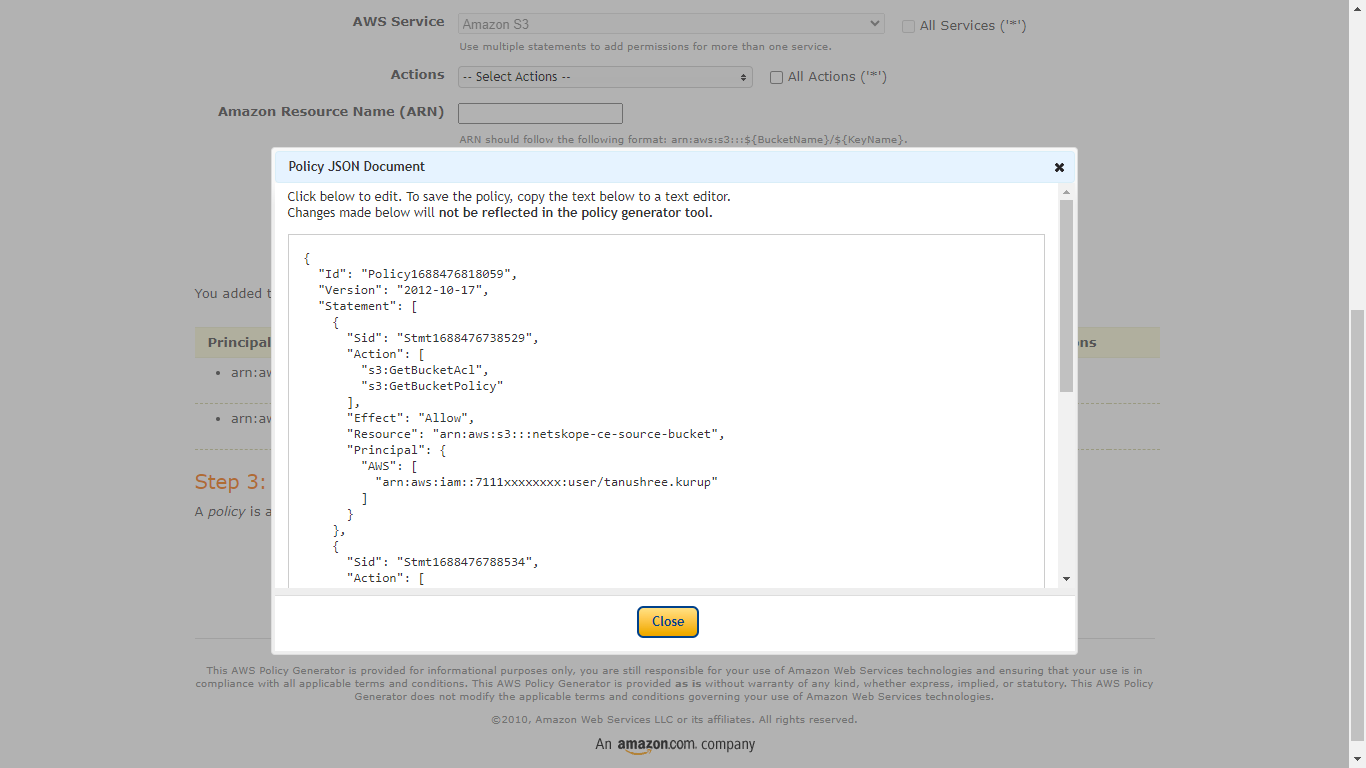
- Cliquez sur Generate Policy. Veillez à copier la politique générée à cette étape, car elle sera utilisée à l'étape suivante pour attacher le seau source.
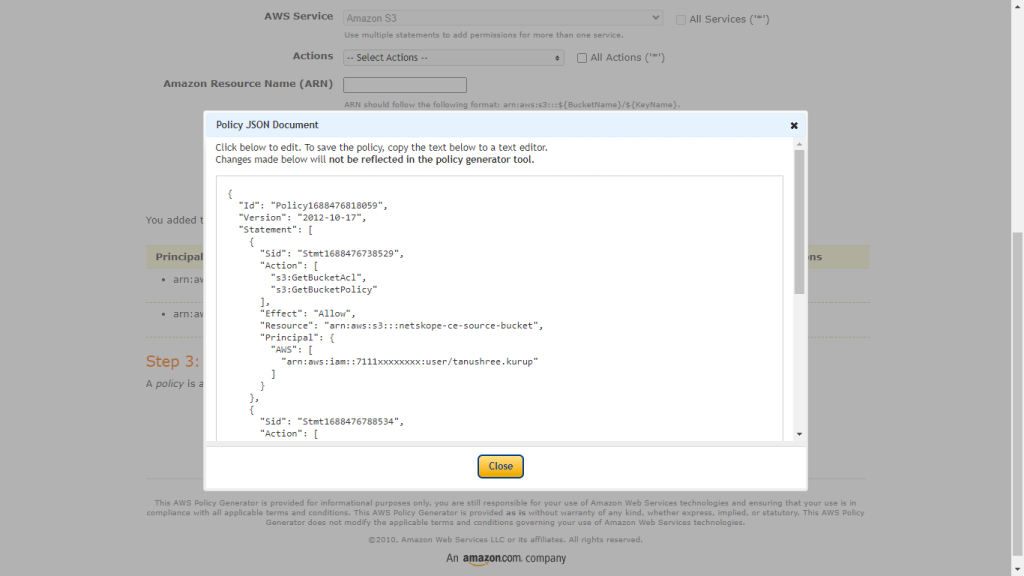
-
Add this policy to the Textbox, scroll to the bottom, and click Save Changes.
Création d'une politique de gestion des seaux
A Policy required for accessing the source bucket by the plugin.
-
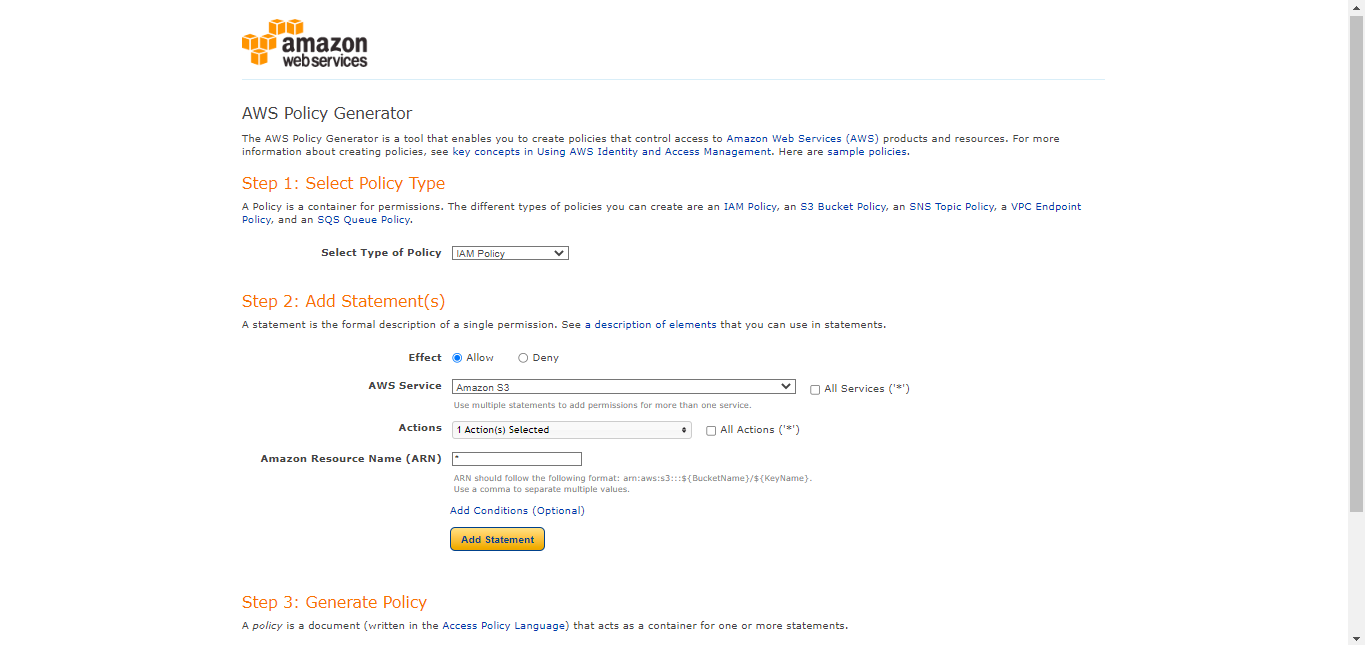
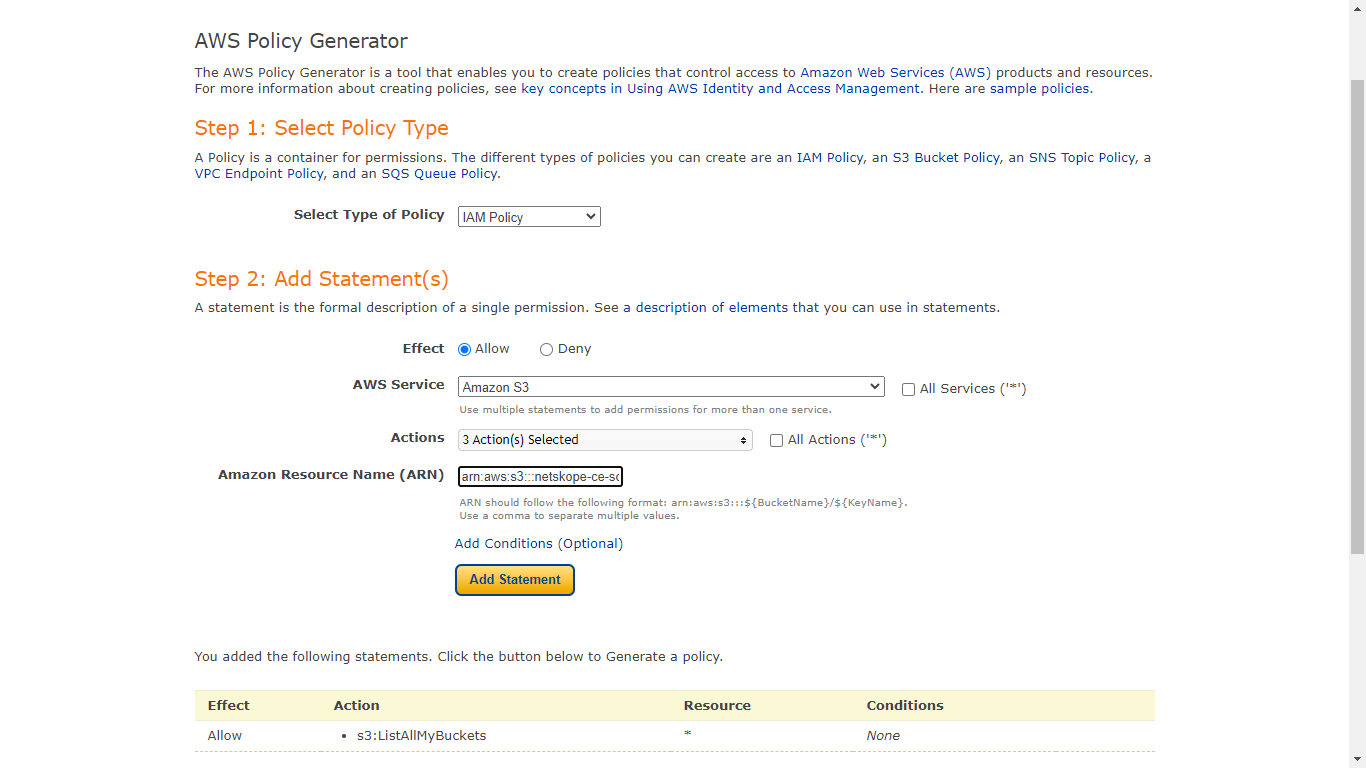
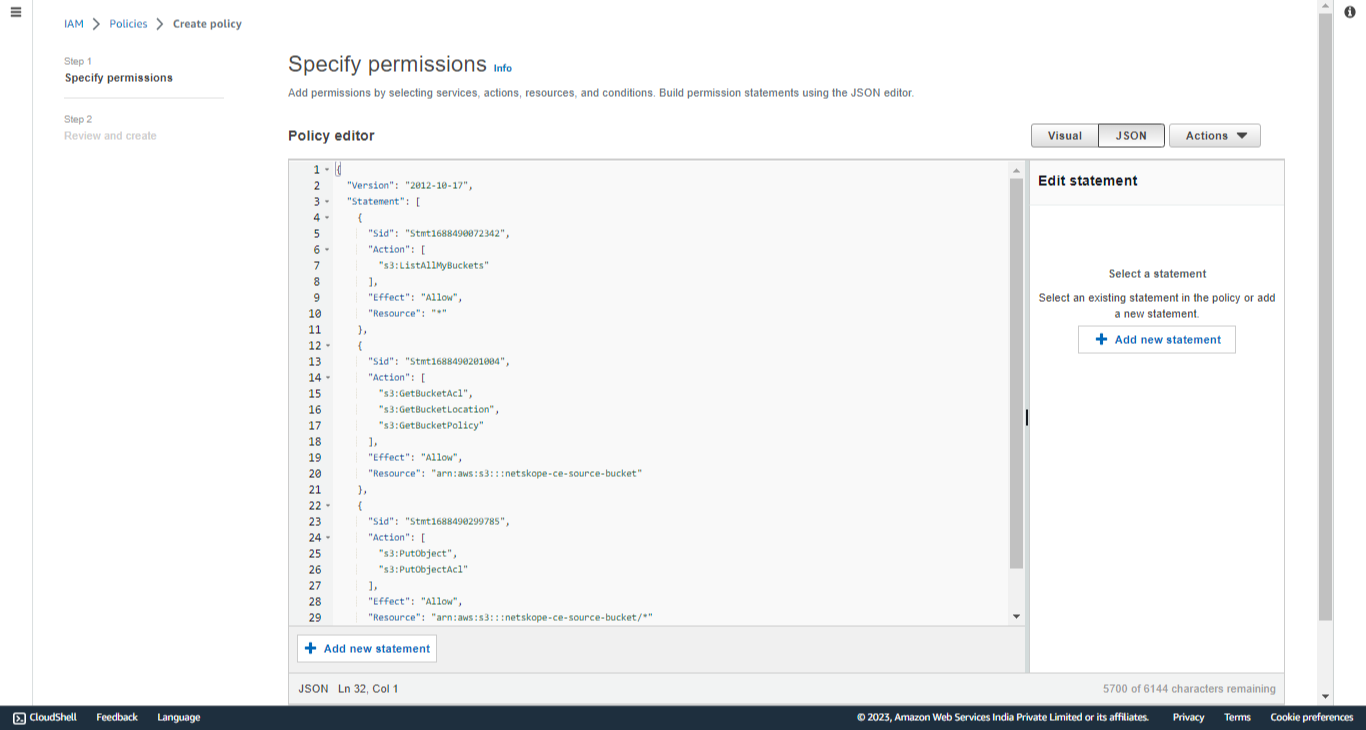
Go to Policy Generator and Select IAM Policy as the policy type and generate policy.
Replace the <bucket-name> with the AWS S3 Source Bucket created previously.
(like netskope-ce-source-bucket).- Select Type de politique : Politique IAM
- Effet : Autoriser
- Service AWS : Amazon S3
- Actions :
- ListAllMyBuckets
- ARN : *
- Cliquez sur Add Statement.
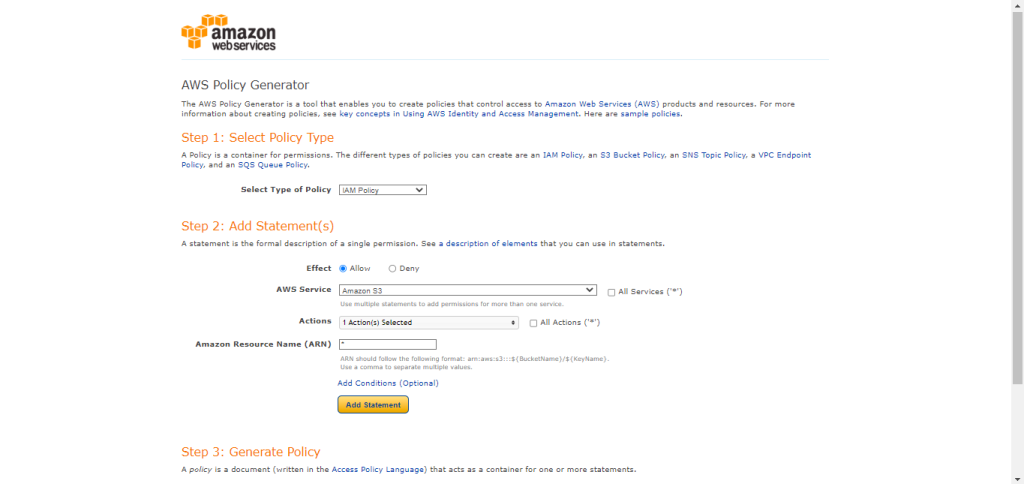
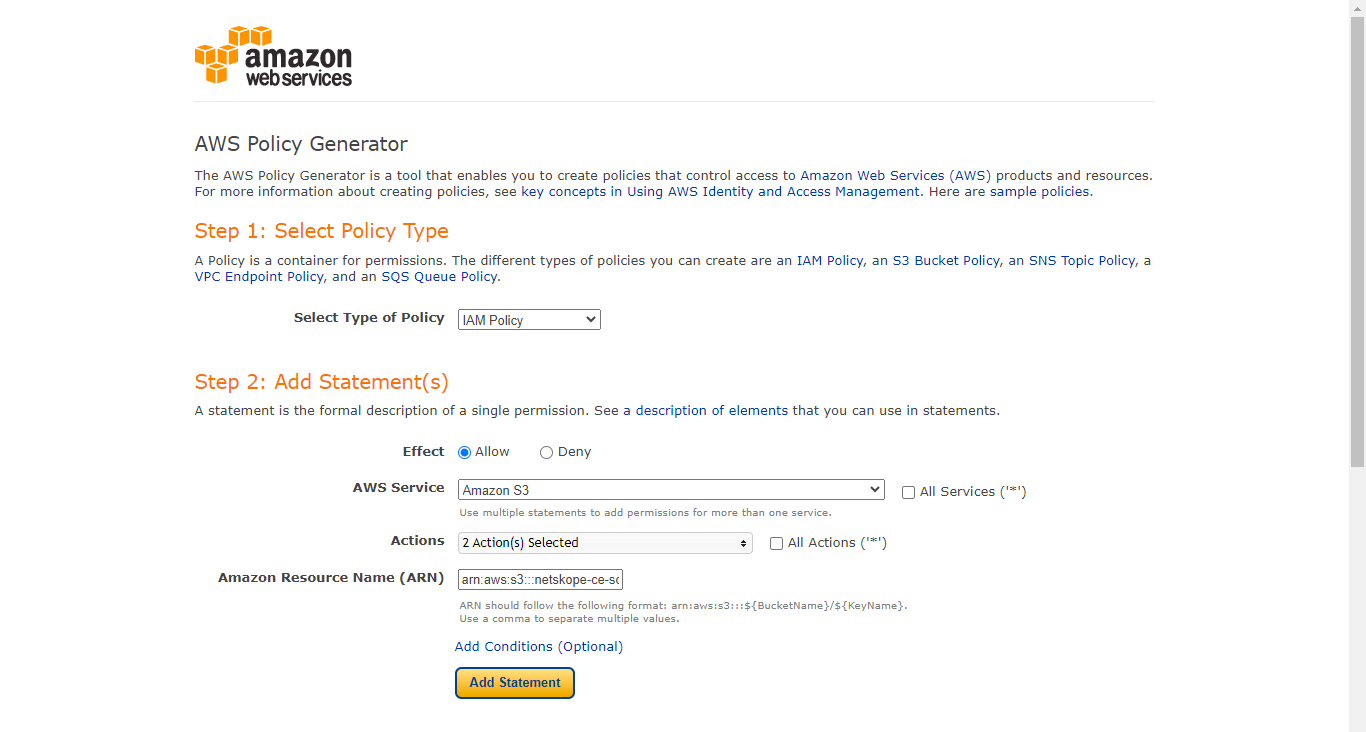
- Faites défiler l'écran vers le haut pour ajouter une autre déclaration.
- Select Type de politique : Politique IAM
- Effet : Autoriser
- Service AWS : Amazon S3
- Actions :
- GetBucketAcl
- GetBucketPolicy
- GetBucketLocation
- ARN: arn:aws:s3:::<bucket-name>
- Cliquez sur Add Statement.
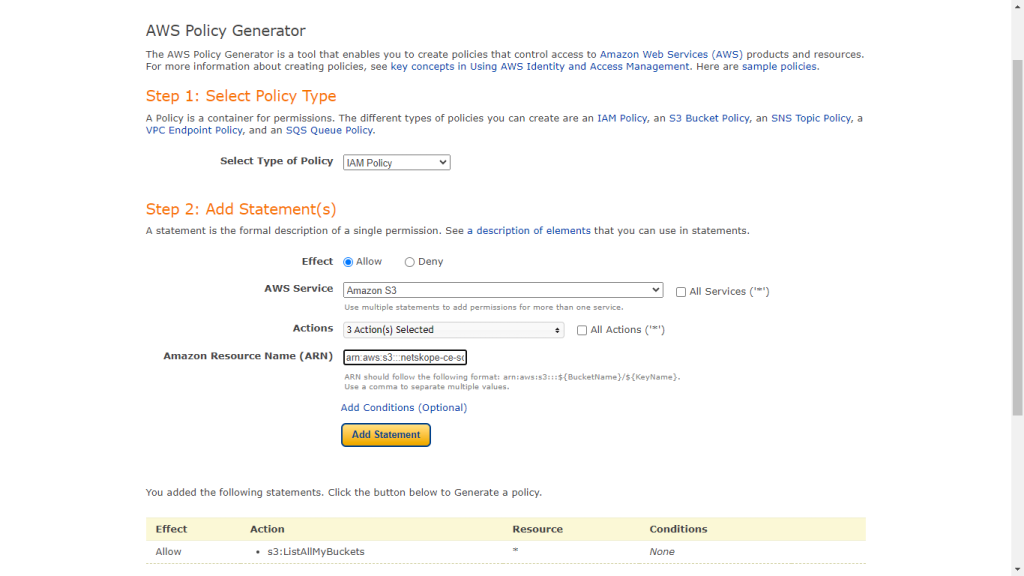
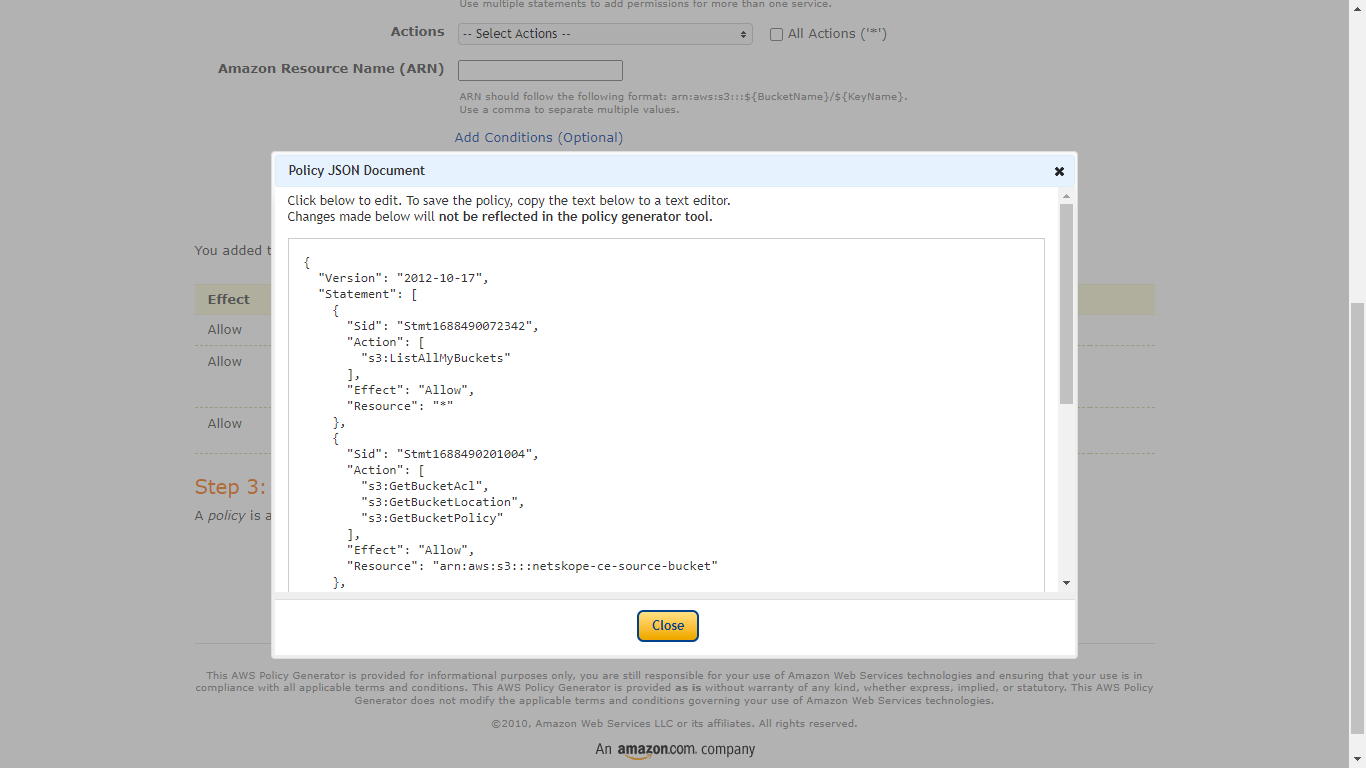
- Scroll back up to add another statement
- Select Type de politique : Politique IAM
- Effet : Autoriser
- Service AWS : Amazon S3
- Actions :
- PutObject
- PutObjectAcl
- ARN: arn:aws:s3:::<bucket-name>/*
- Cliquez sur Add Statement.
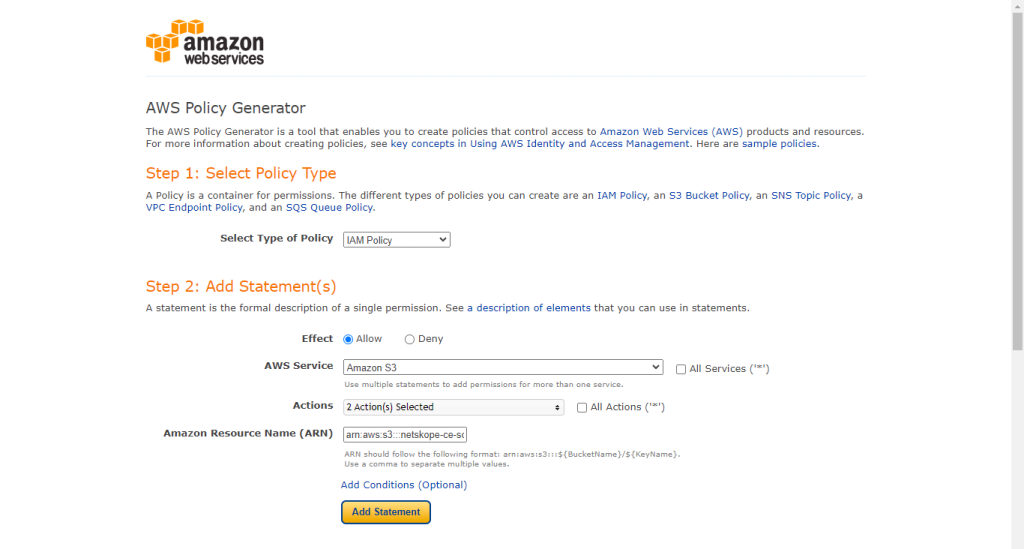
- Click Generate Policy. Make sure to copy the policy generated in this step, as it will be used in the next step to create a policy that will be attached to the user for accessing the source bucket.
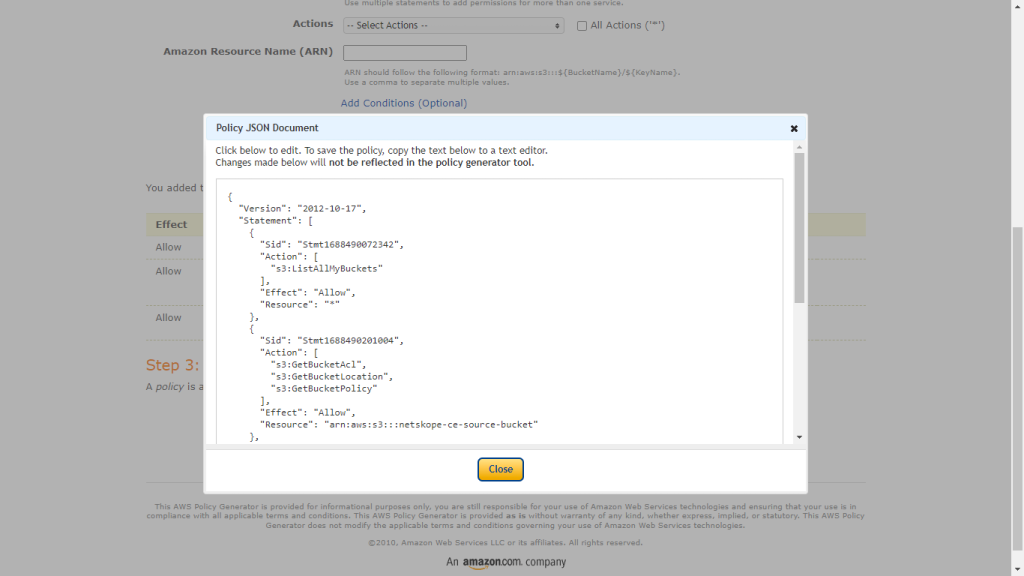
-
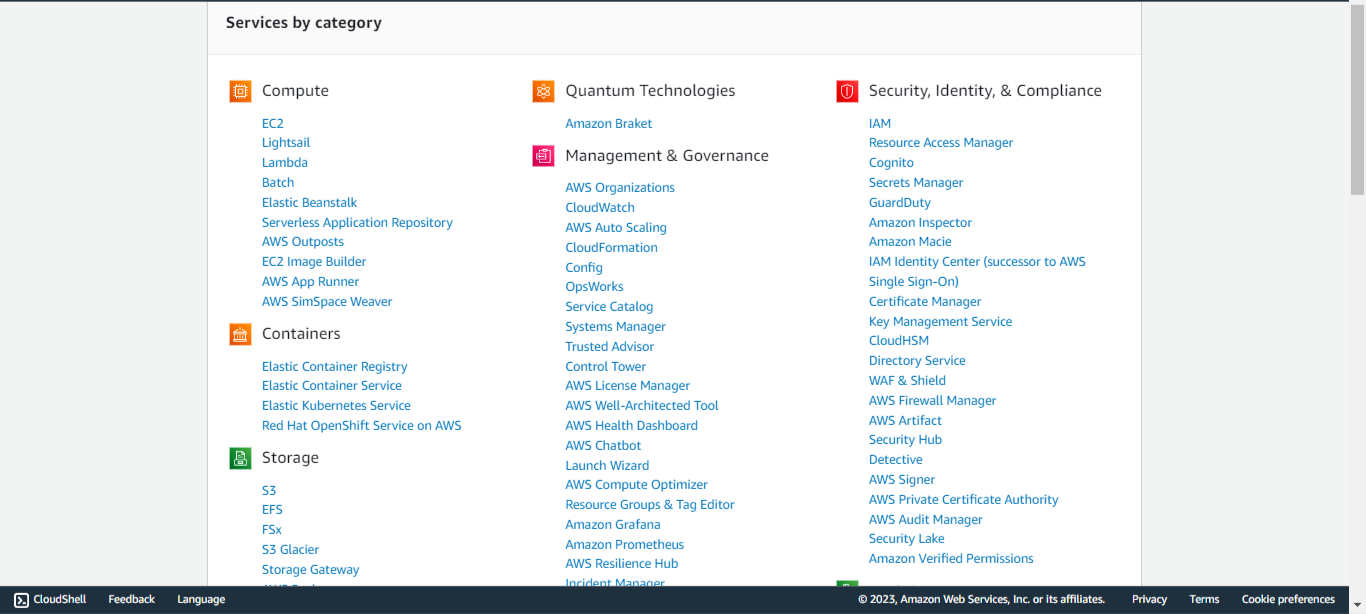
Go to AWS Console and select IAM from All Services.
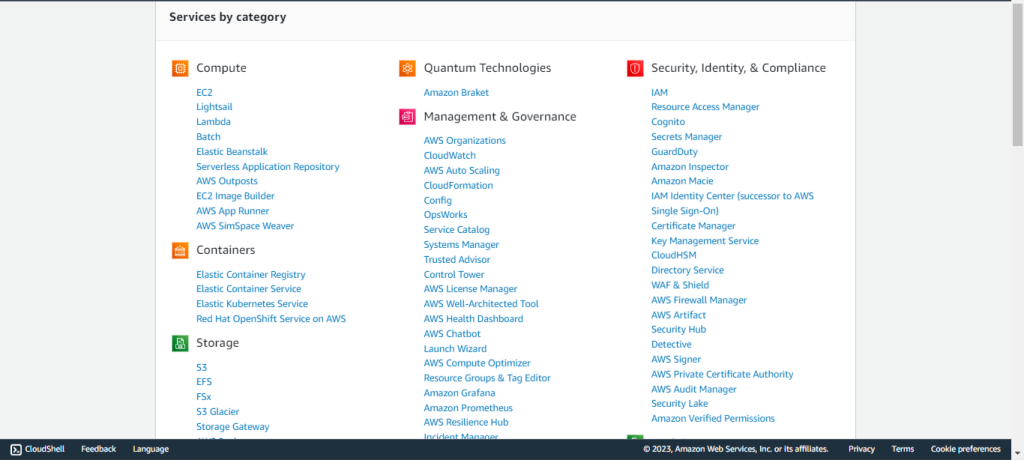
-
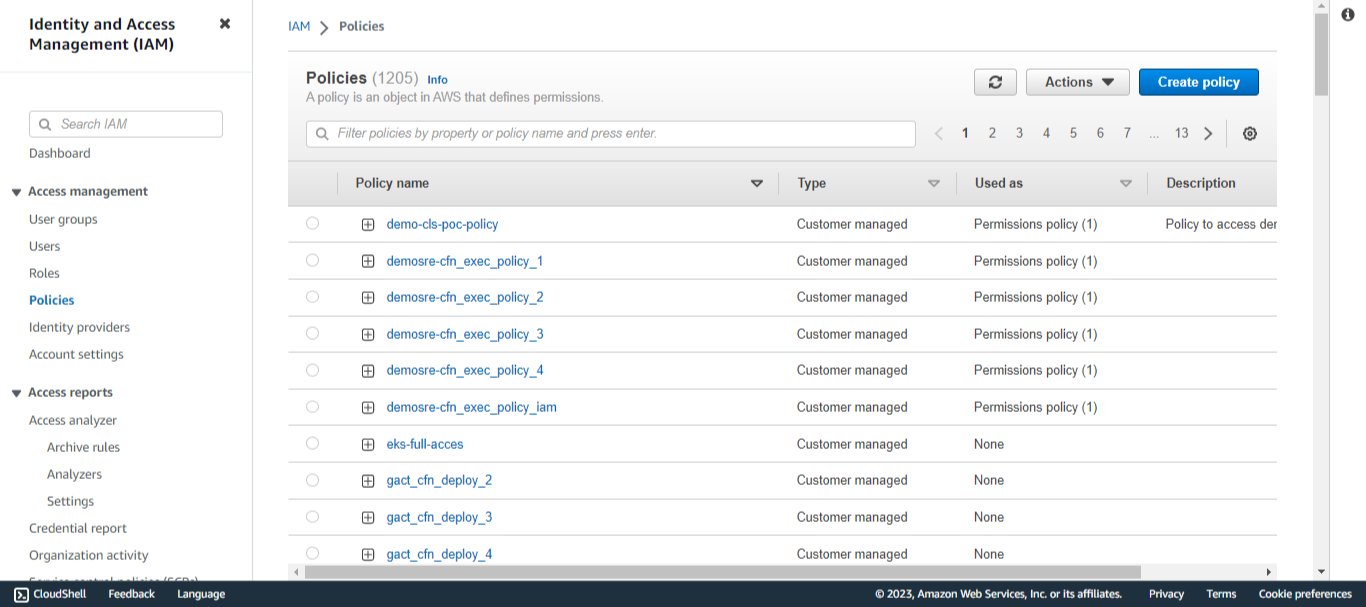
Click Policies in the left panel and click Create Policy.
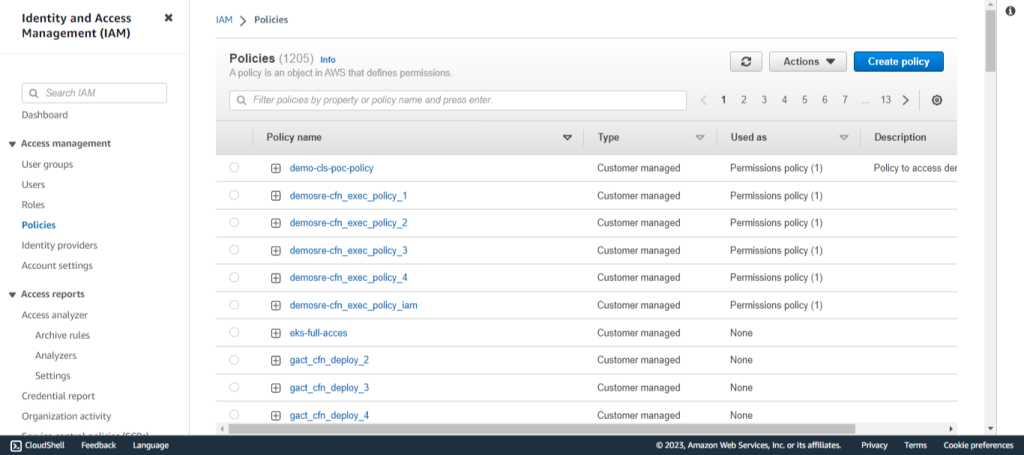
-
Paste the policy created in the previous step to the JSON tab, click Next: Tags, and then click Next: Review.
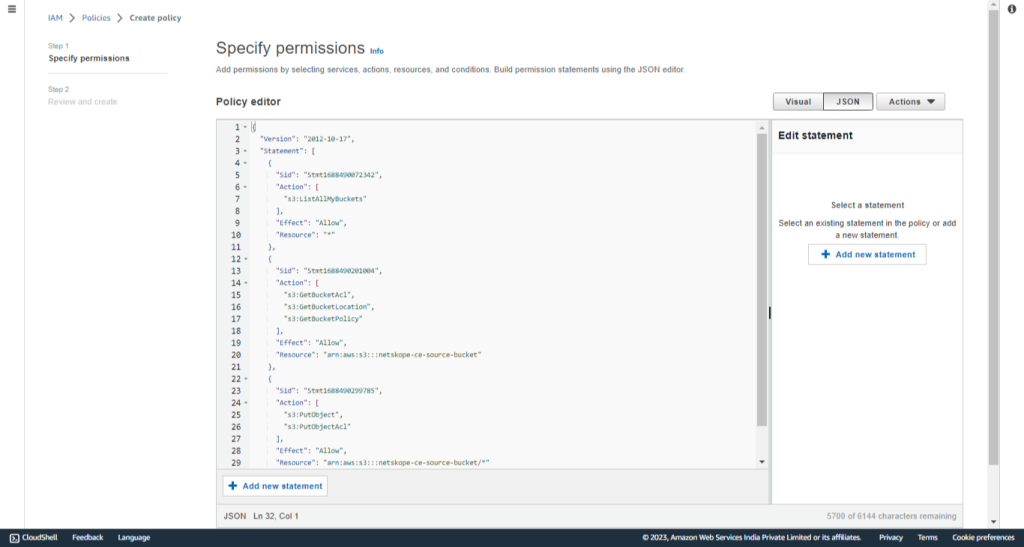
-
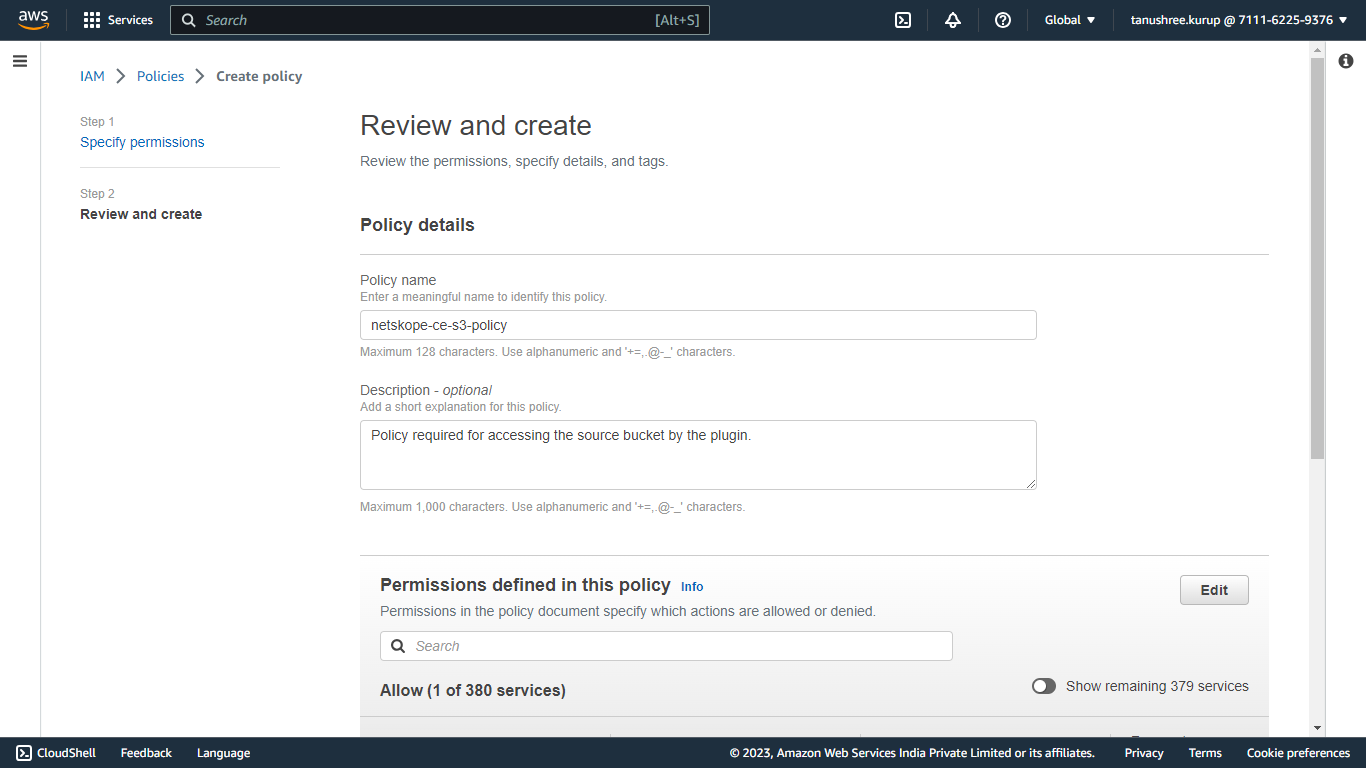
Enter a Name (like netskope-ce-s3-policy) and click Create Policy.
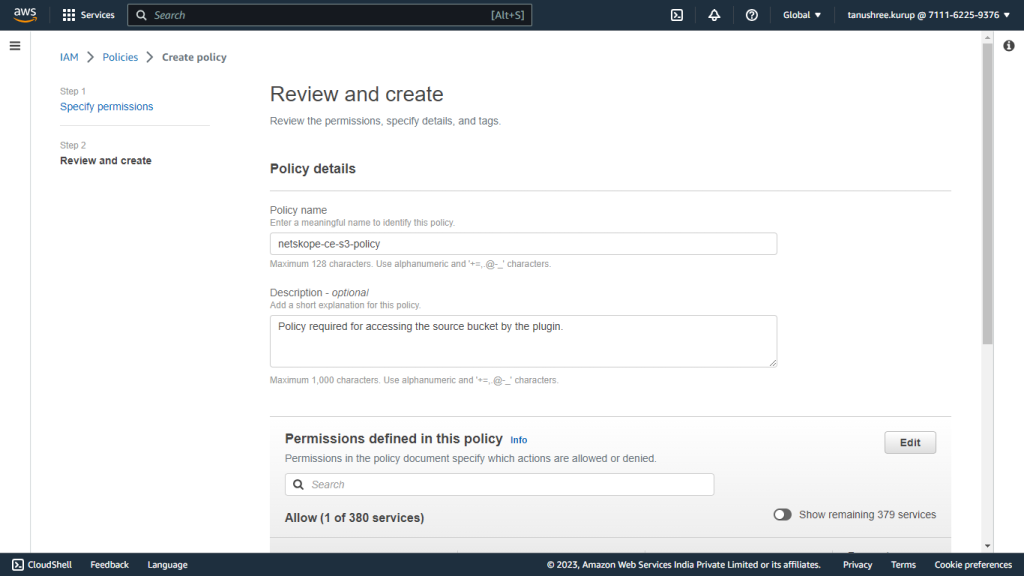
-
Attach this policy to the user, using the following steps:
-
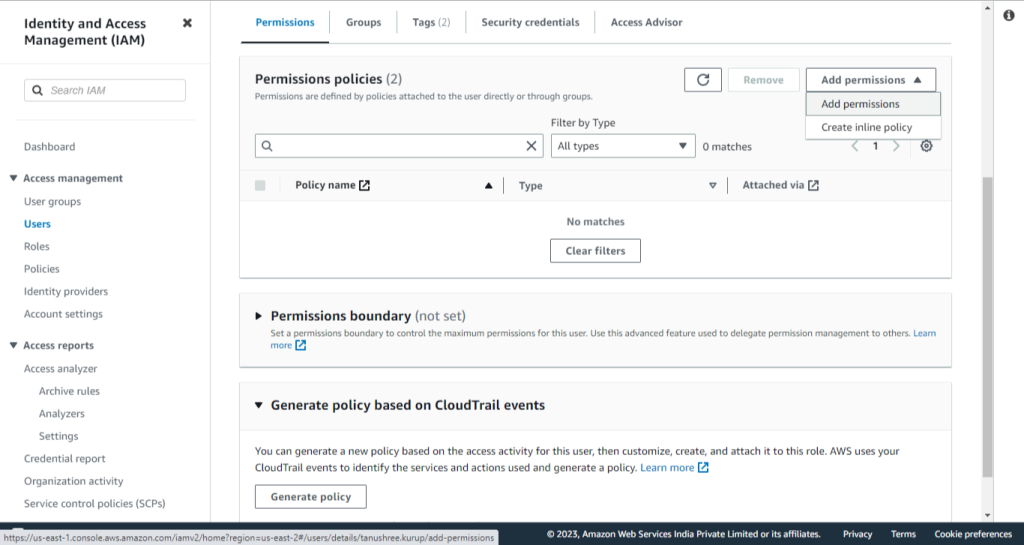
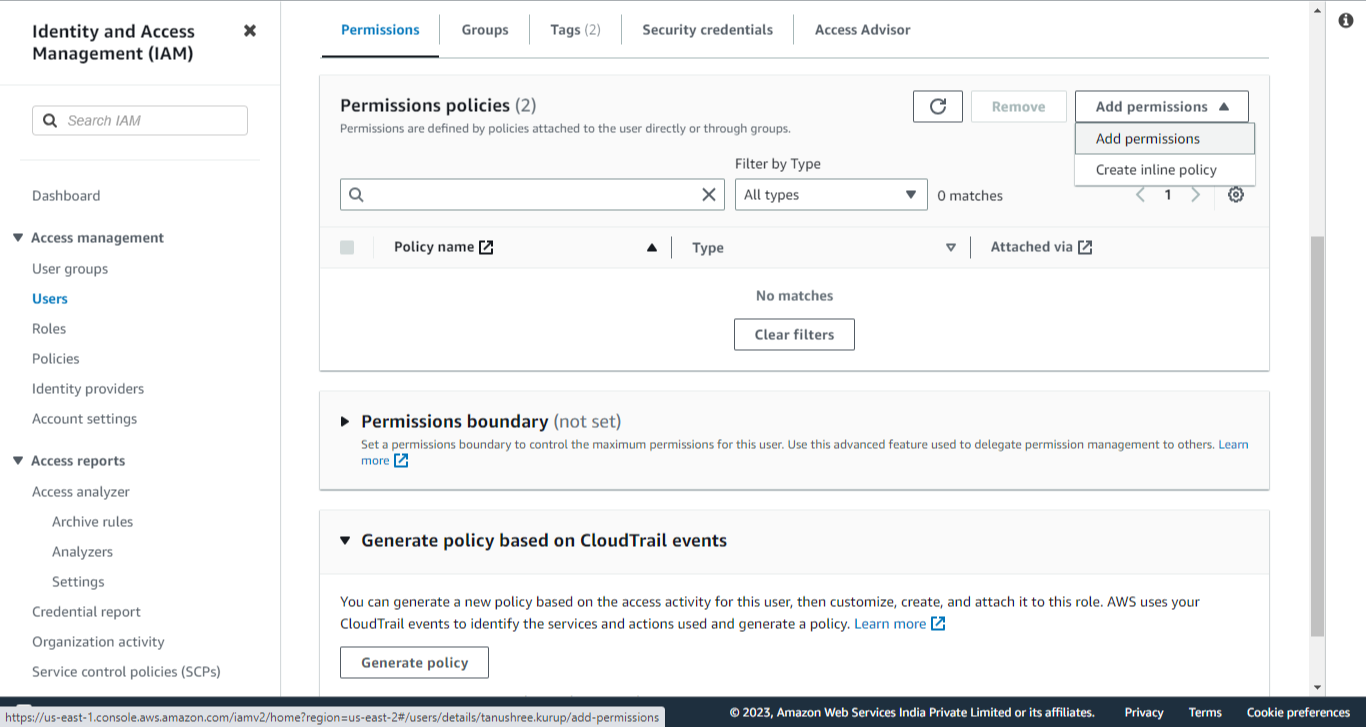
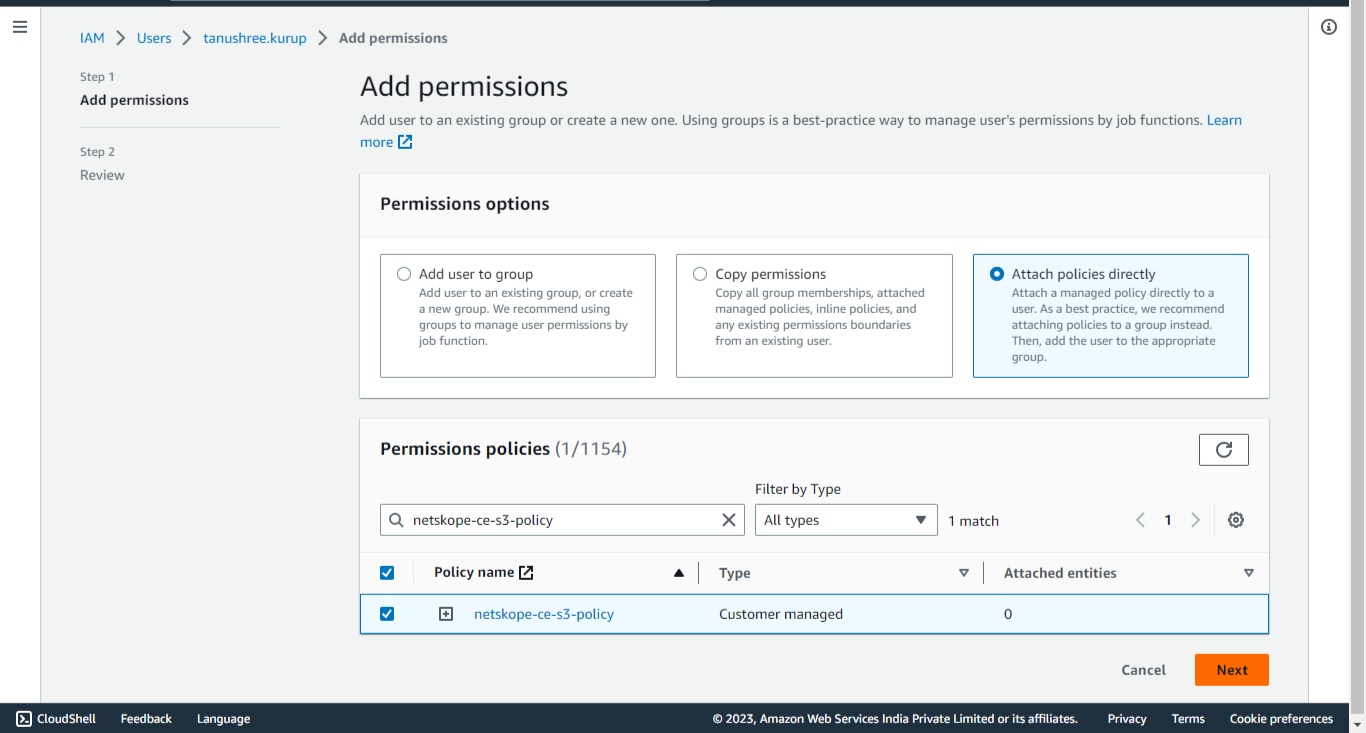
Go to IAM > Users. Select the user for which you want to attach a policy, click Add permissions, and click Add permissions.
-
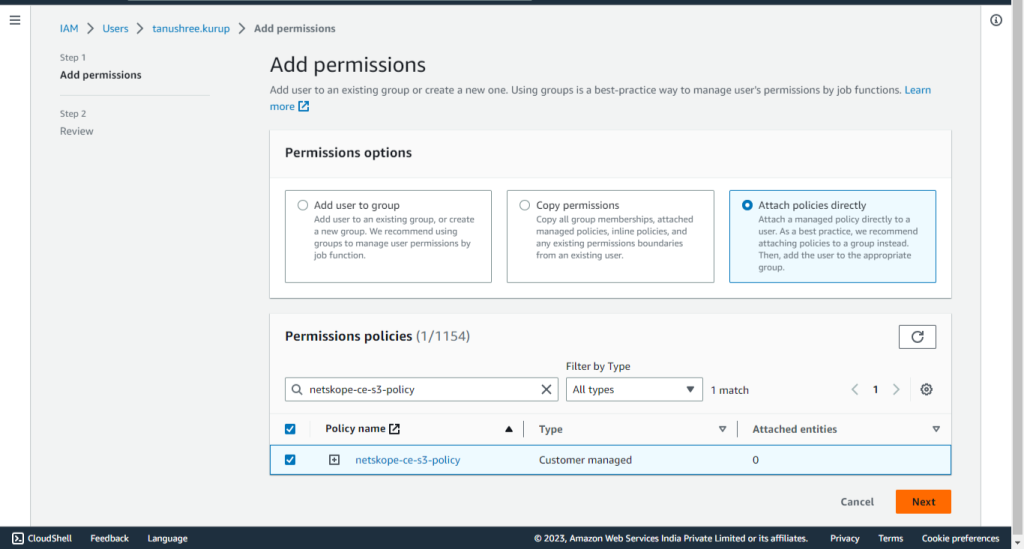
Select Attach policies directly under Permissions options. Search and select the policy created in the previous step for source bucket (netskope-ce-s3-policy).
-
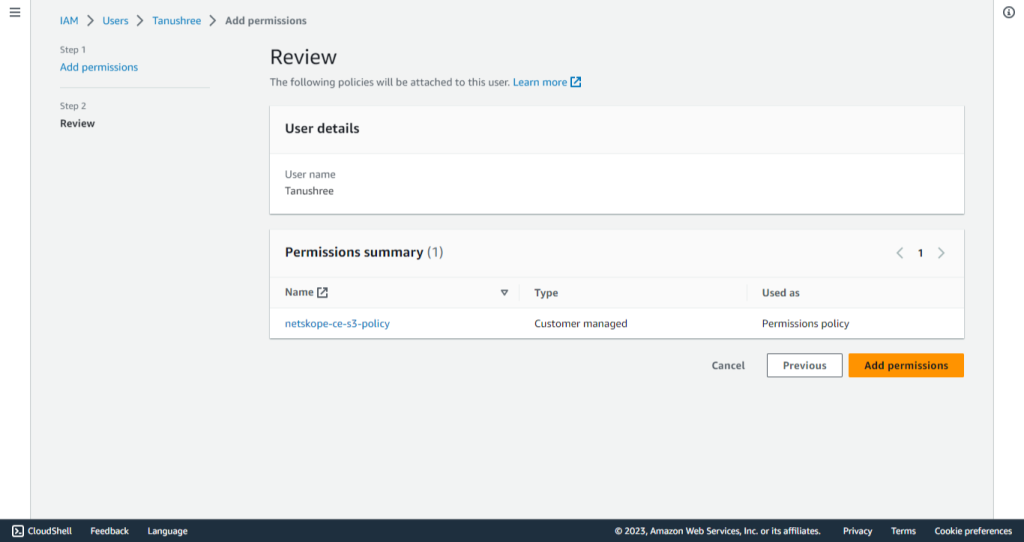
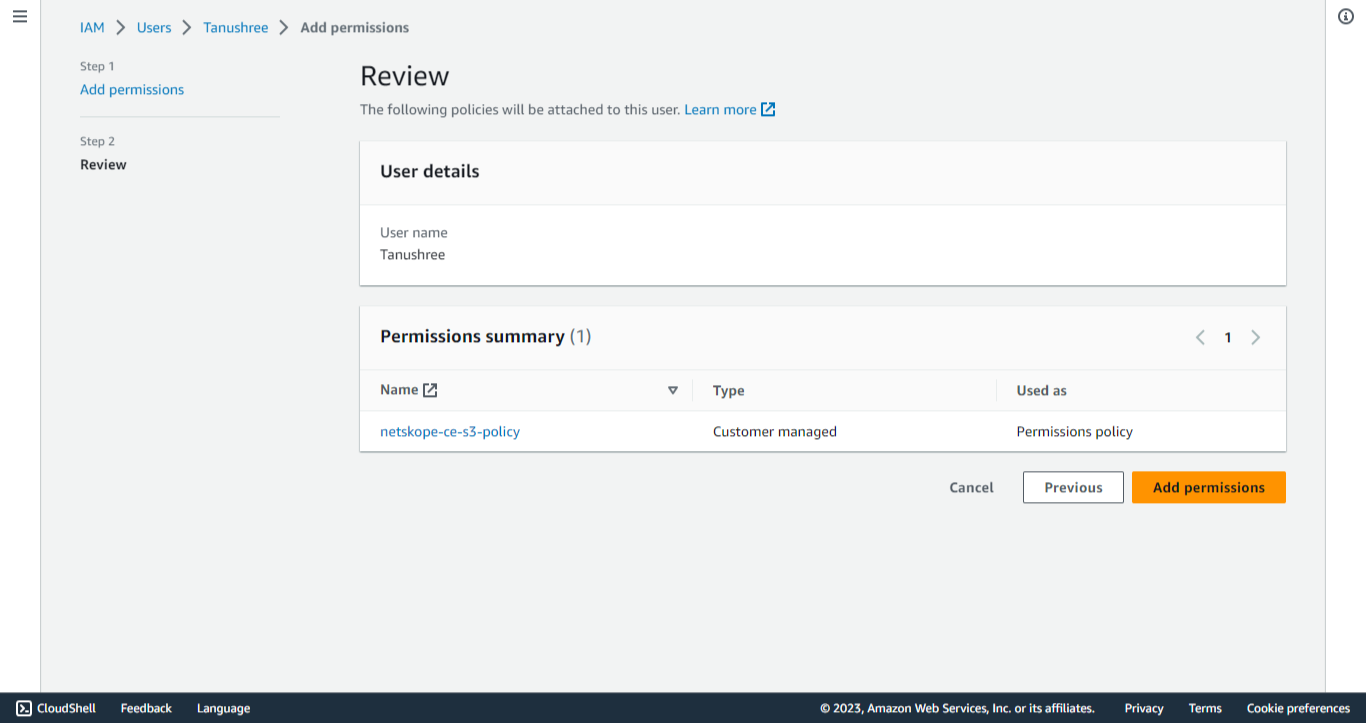
Cliquez sur Next, puis sur Add permissions. La politique sera jointe à l'utilisateur.
-
Méthodes d'authentification des plugins
Configuration de IAM Role Anywhere
Conditions préalables
Le service AWS Certificate Manager doit être activé pour authentifier le plugin à l'aide de la méthode d'authentification AWS IAM Roles Anywhere.
Créer une politique
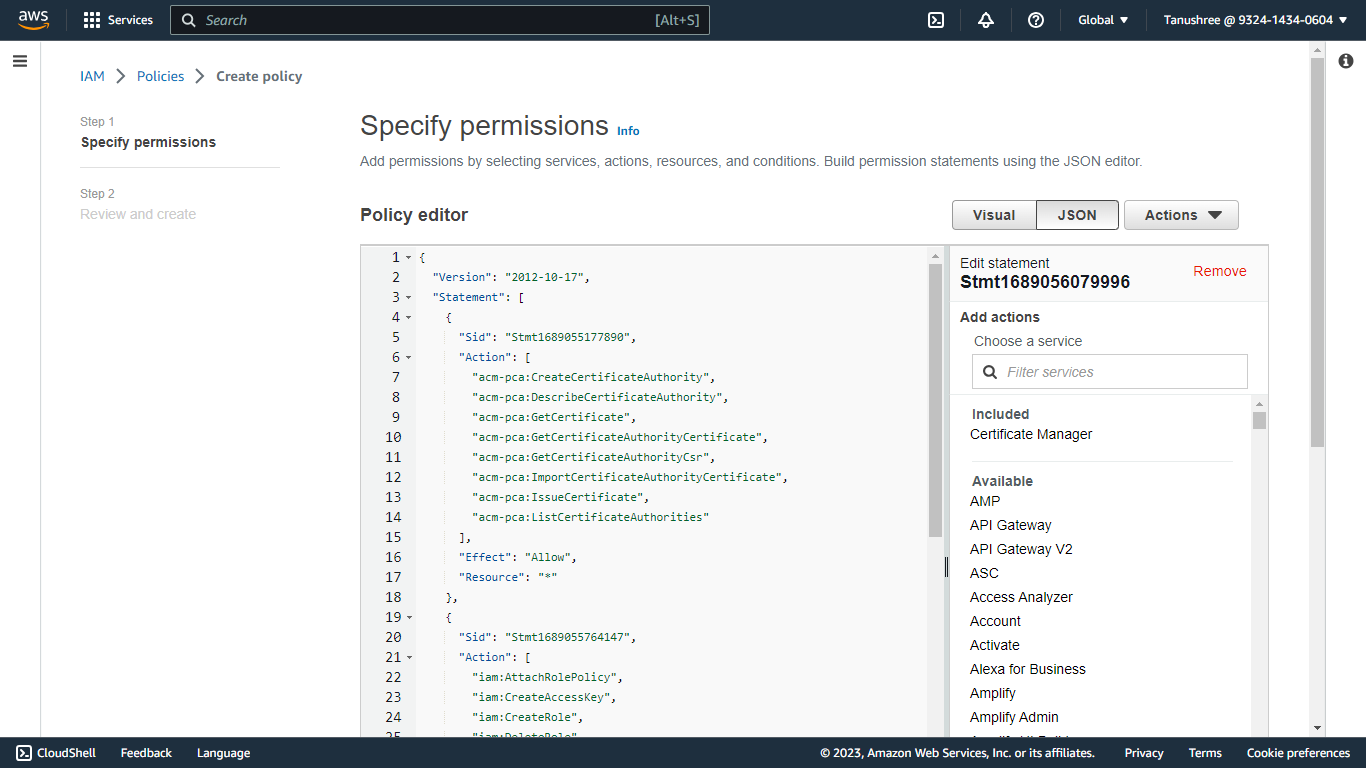
Cette politique contient les autorisations requises pour la création d'un certificat d'autorité de certification privée (y compris les autorisations pour la création d'une ancre de confiance et d'un profil) et pour l'utilisation des rôles IAM Anywhere.
-
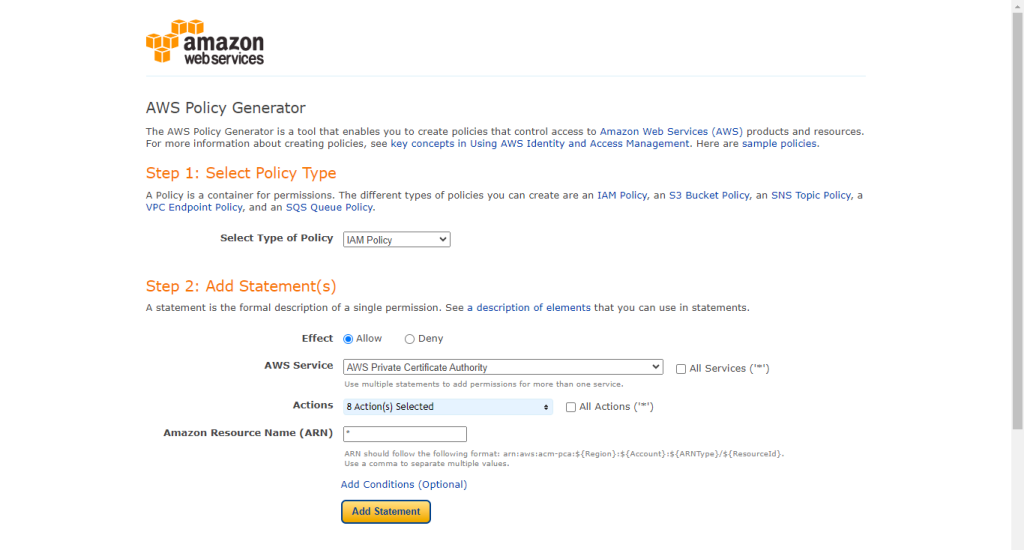
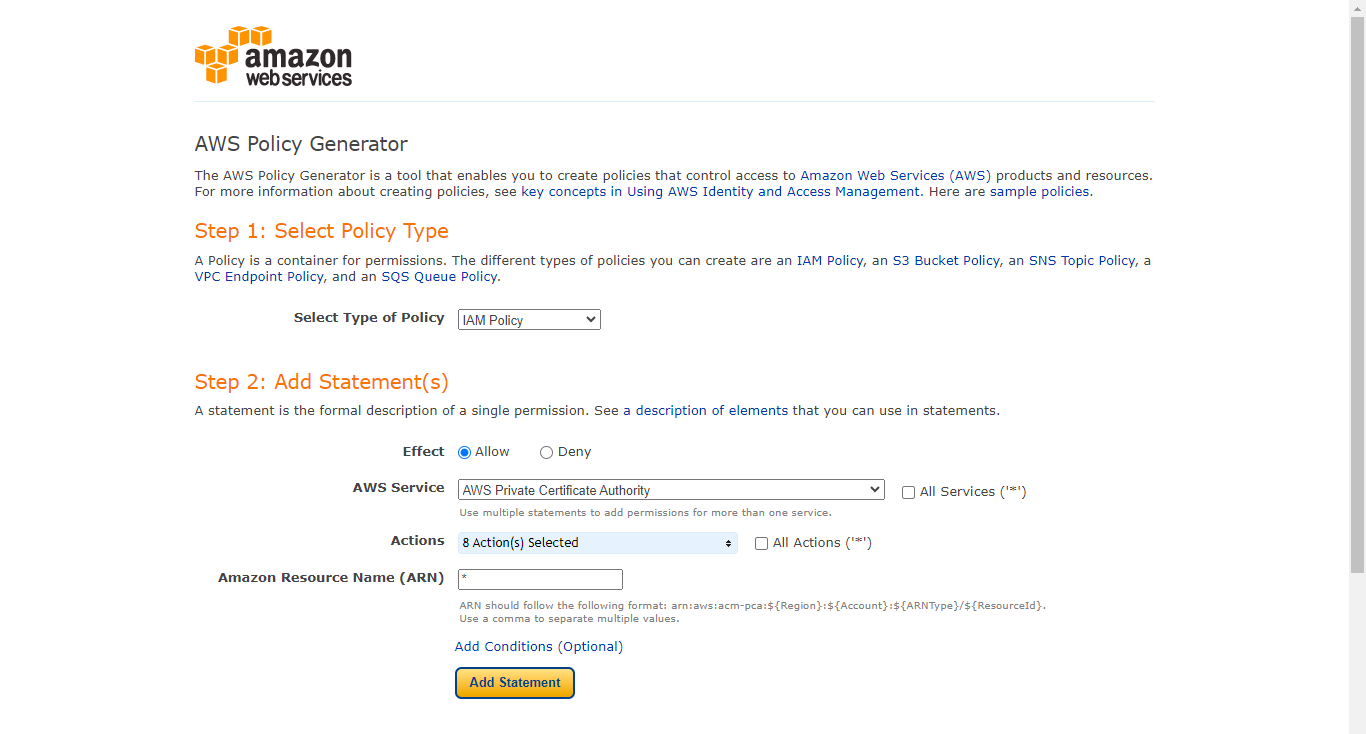
Go to Policy Generator, select IAM Policy as the policy type, and generate a policy.
- Select Type de politique : Politique IAM
- Effet : Autoriser
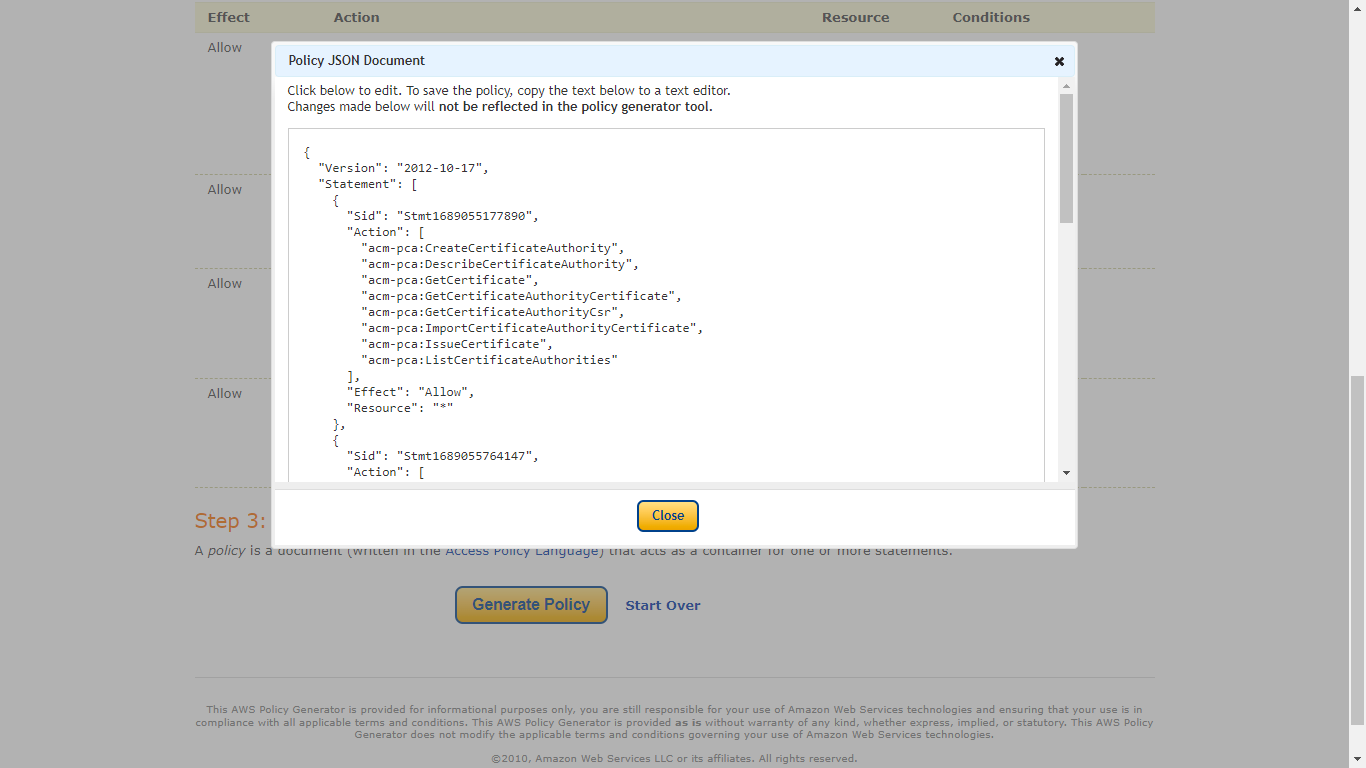
- Service AWS : Autorité de certification privée AWS
- Actions :
- Créer une autorité de certification
- DescribeCertificateAuthority
- Obtenir un certificat
- Obtenir un certificat d'autorité
- Obtenir l'autorité de certification (GetCertificateAuthorityCsr)
- ImportCertificateAuthorityCertificate
- Délivrer un certificat
- Liste des autorités de certification
- ARN : *
- Cliquez sur Add Statement.
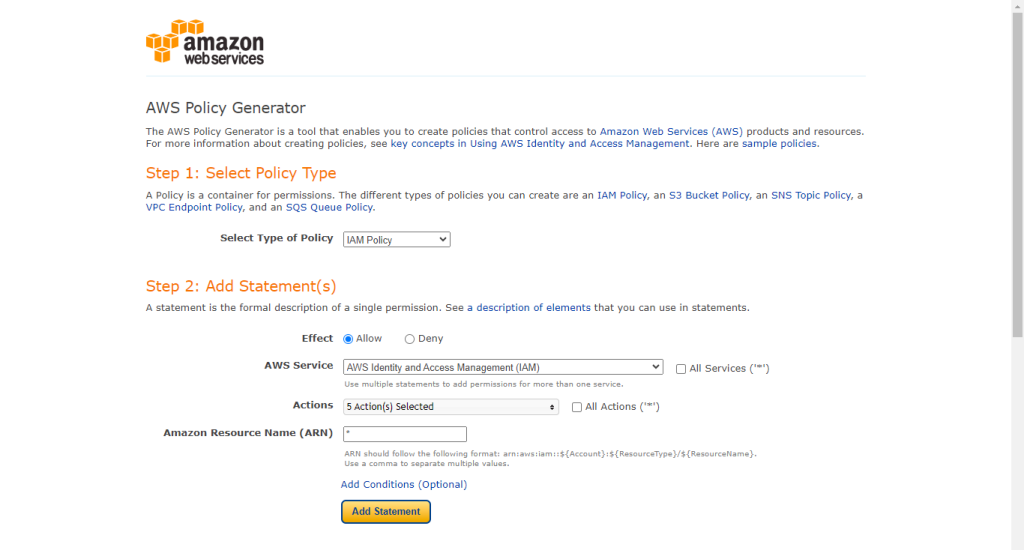
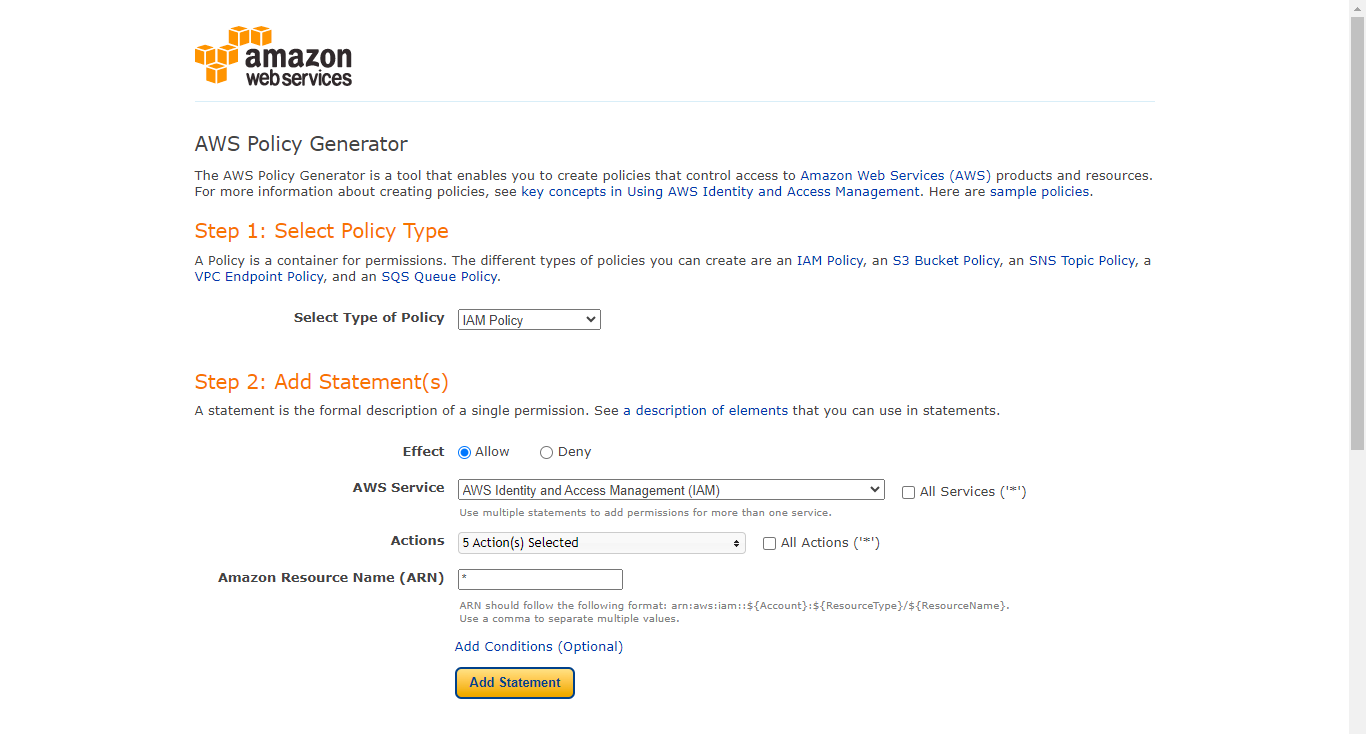
- Select Type de politique : Politique IAM
- Effet : Autoriser
- Service AWS : Gestion des identités et des accès (IAM) d'AWS
- Actions :
- Politique de rattachement des rôles
- Créer une clé d'accès
- Créer un rôle
- Supprimer un rôle
- PassRole
- ARN : *
- Cliquez sur Add Statement.
- Select Type de politique : Politique IAM
- Effet : Autoriser
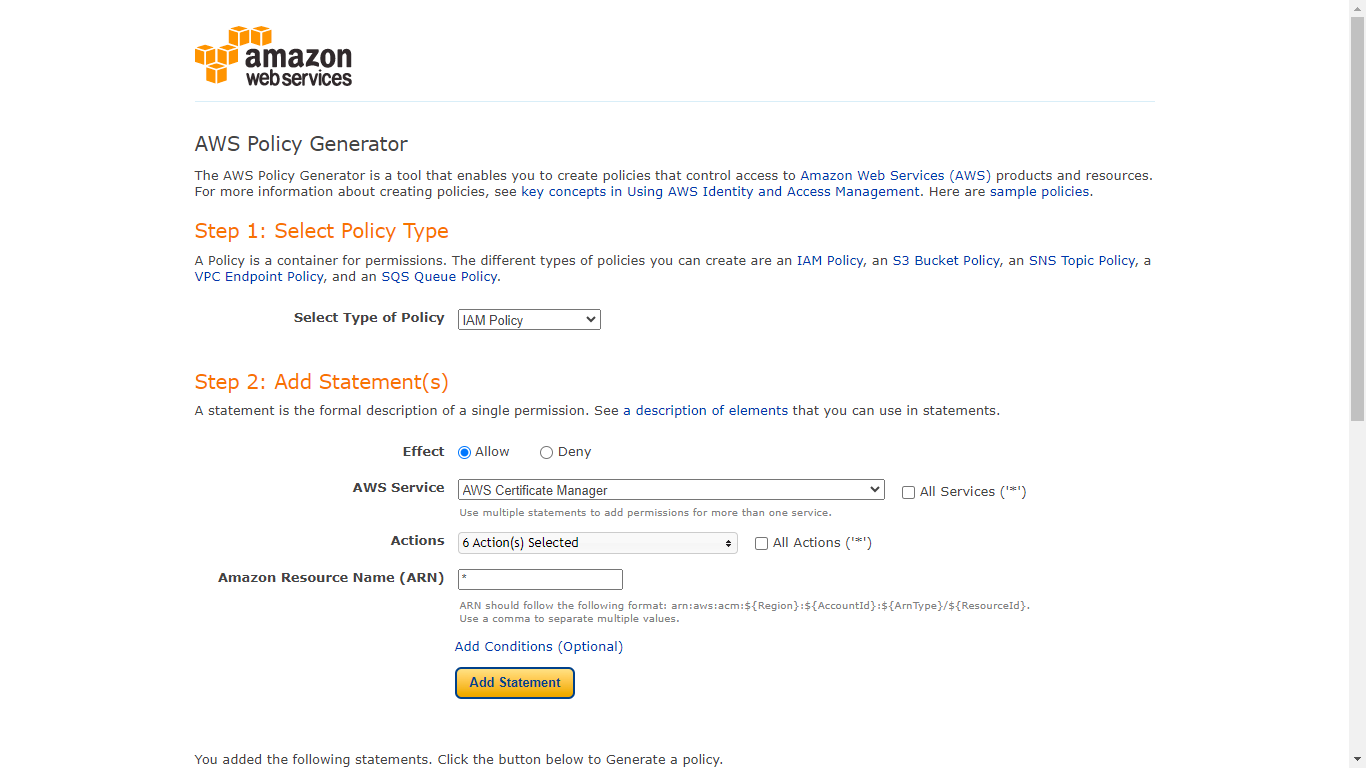
- Service AWS : Gestionnaire de certificats AWS
- Actions :
- Décrire le certificat
- Certificat d'exportation
- Obtenir un certificat
- Liste des certificats
- ListTagsForCertificate
- Demande de certificat
- ARN : *
- Cliquez sur Add Statement.
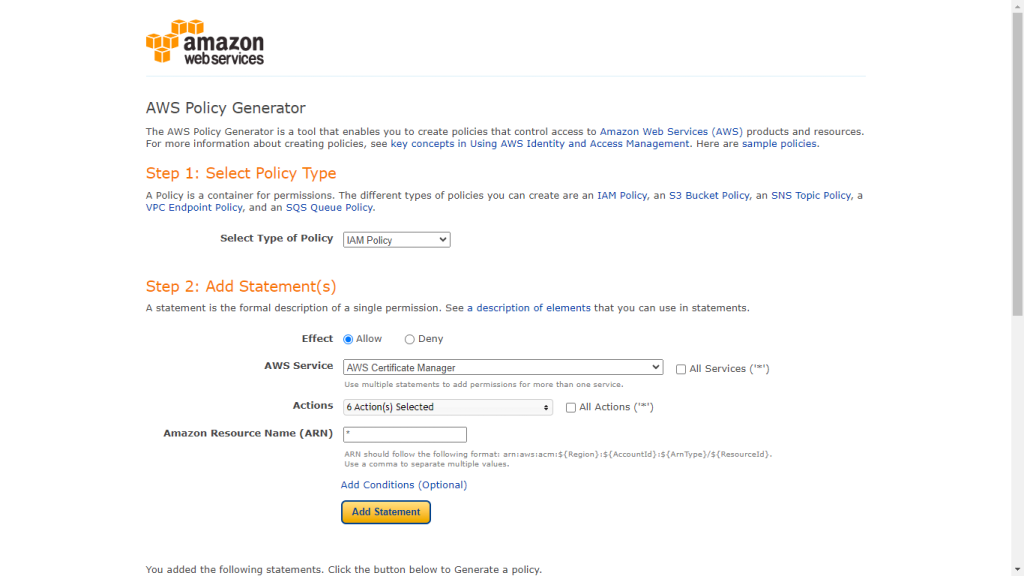
- Select Type de politique : Politique IAM
- Effet : Autoriser
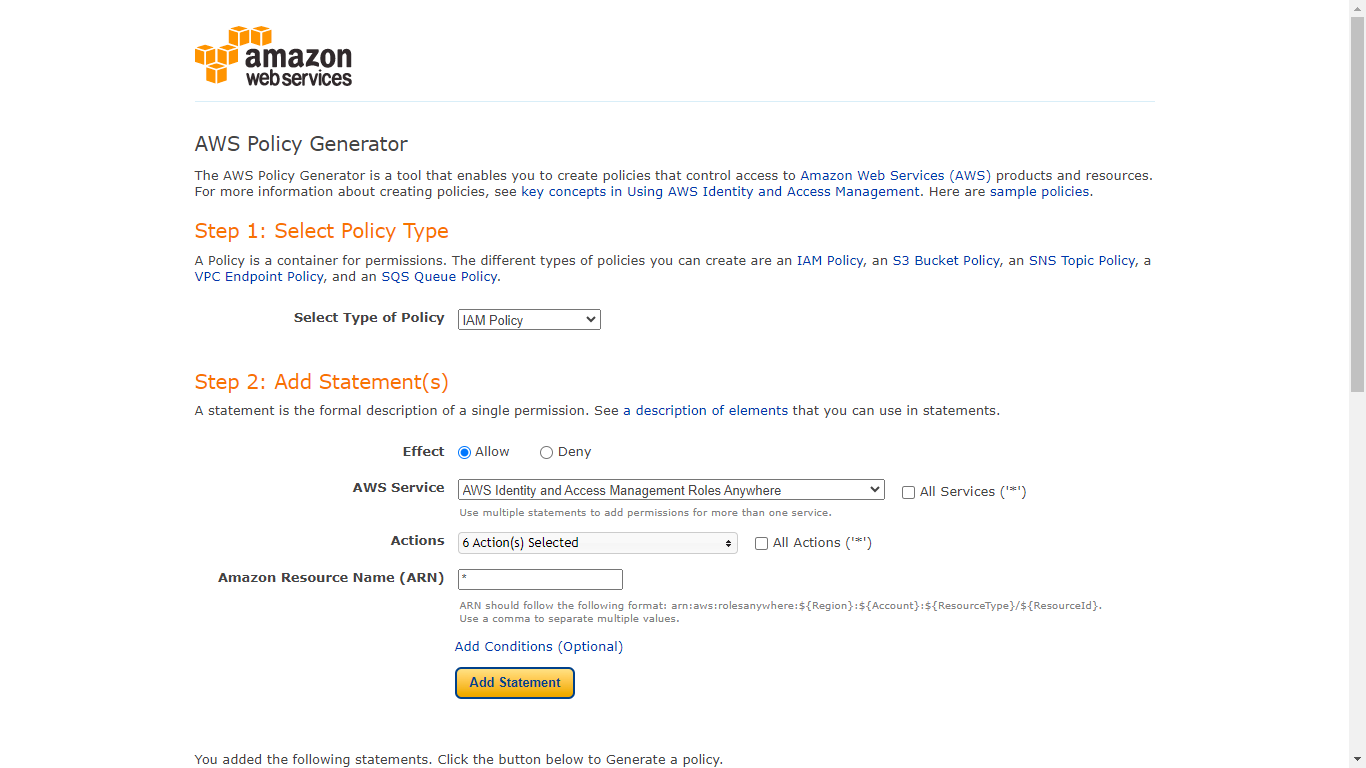
- Service AWS : Gestion des identités et des accès AWS Rôles en tout lieu
- Actions :
- Créer un profil
- CreateTrustAnchor
- Obtenir un profil
- GetTrustAnchor
- Liste des profils
- ListTrustAnchors
- ARN : *
- Cliquez sur Add Statement.
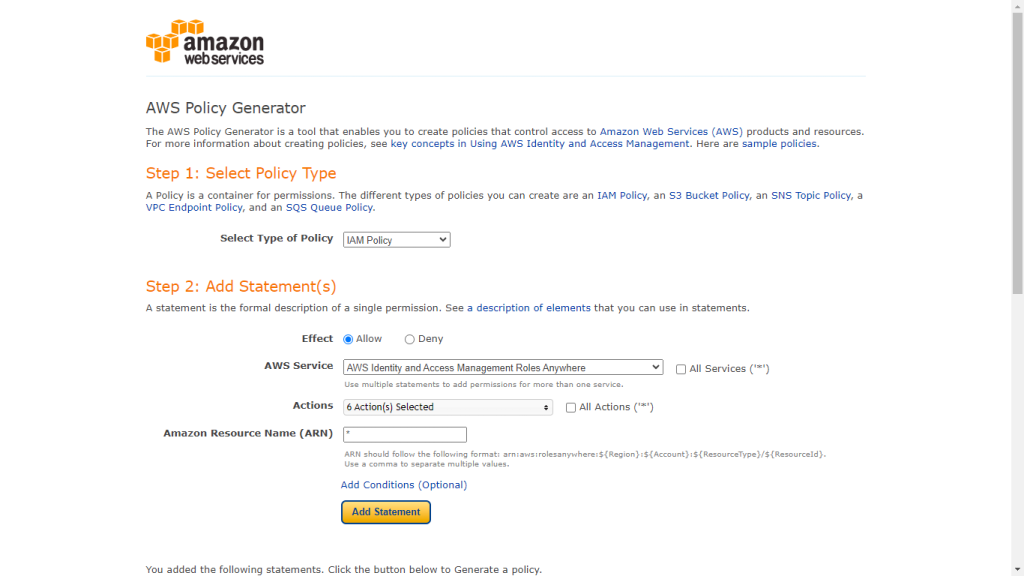
- Cliquez sur Generate Policy.
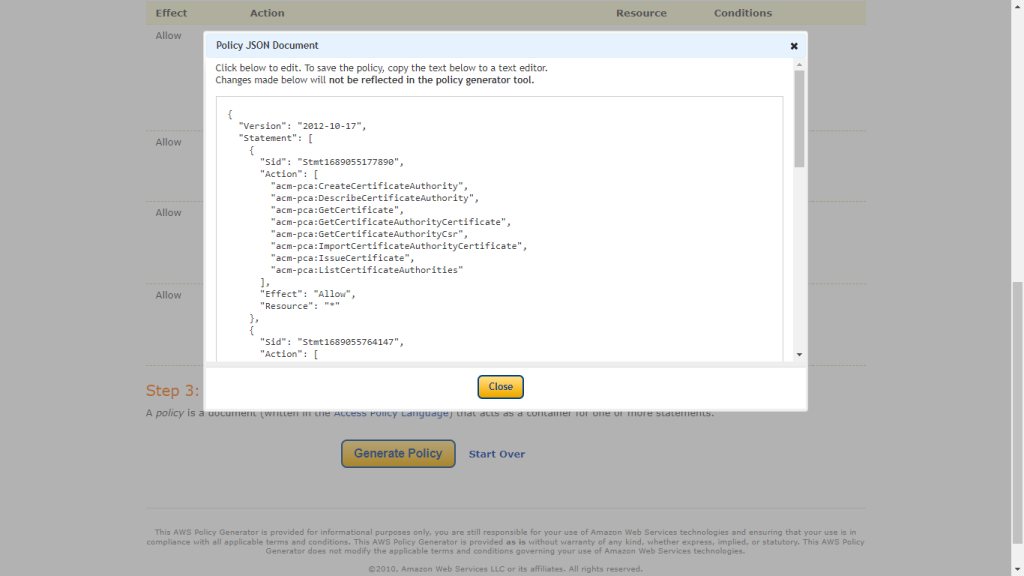
- Copiez la politique car elle sera utilisée dans l'étape suivante pour créer la politique nécessaire à la création des certificats de l'AC privée.
-
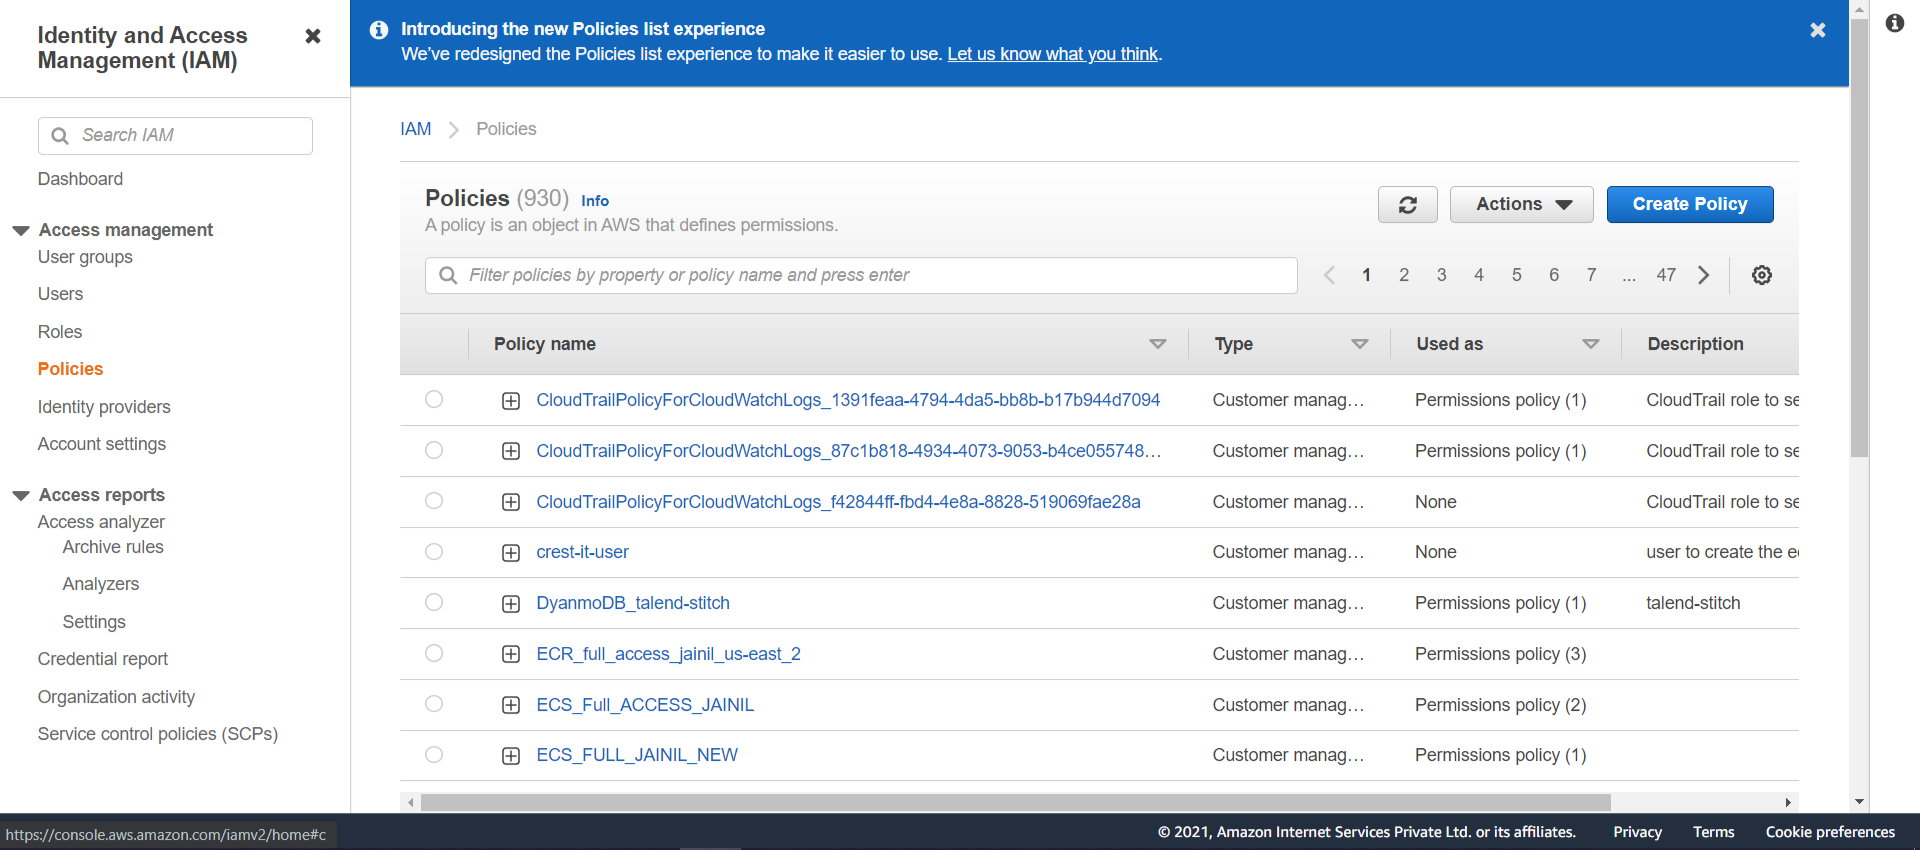
Go to AWS Console and select IAM from All Services. Click Policies in the left panel, and then click Create Policy.
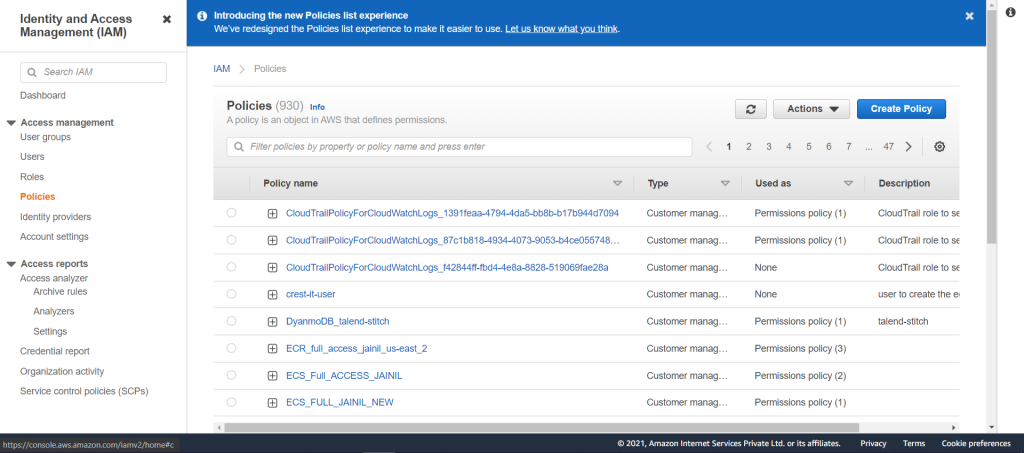
-
Copy the policy to the JSON tab. Click Next: Tags, and then click Next: Review.
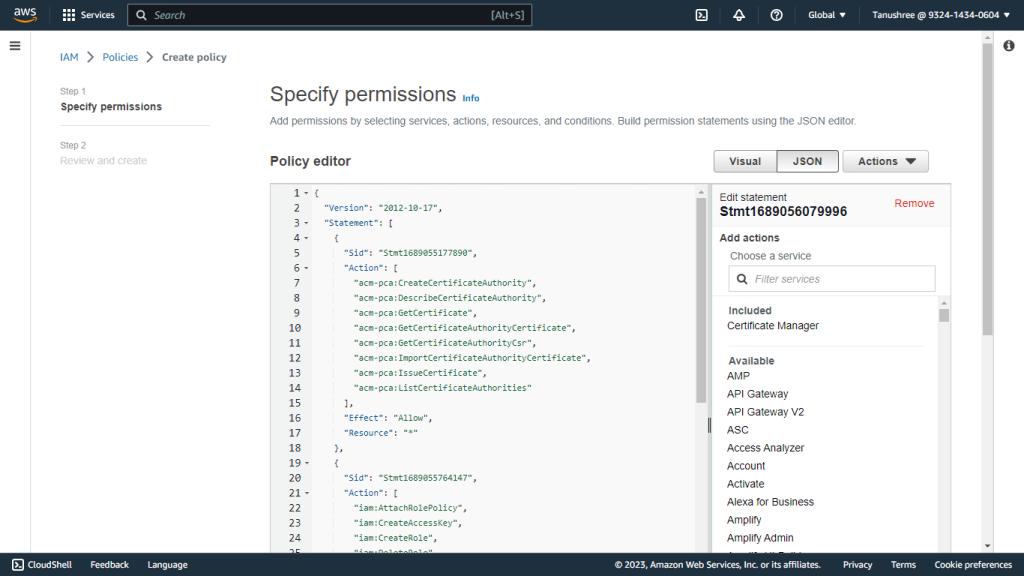
-
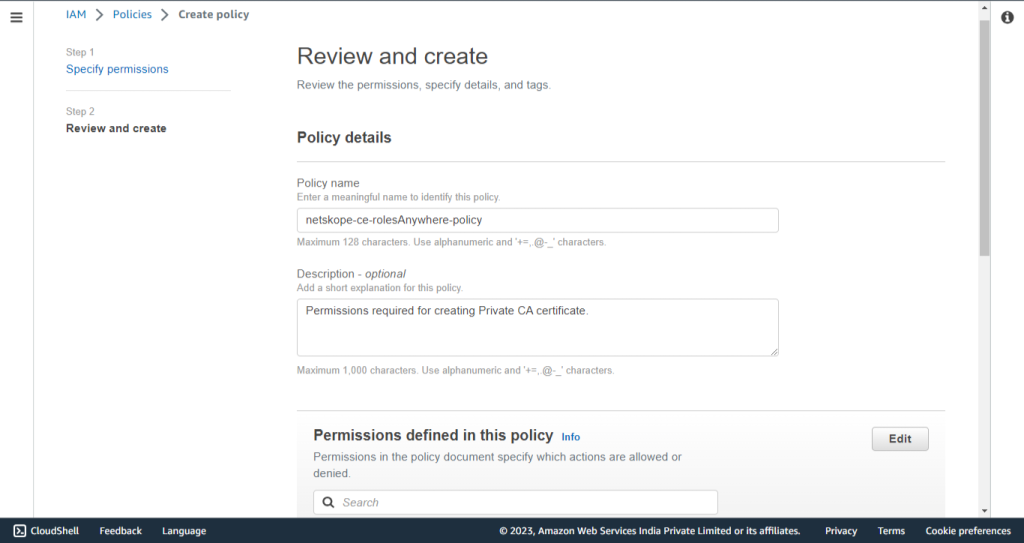
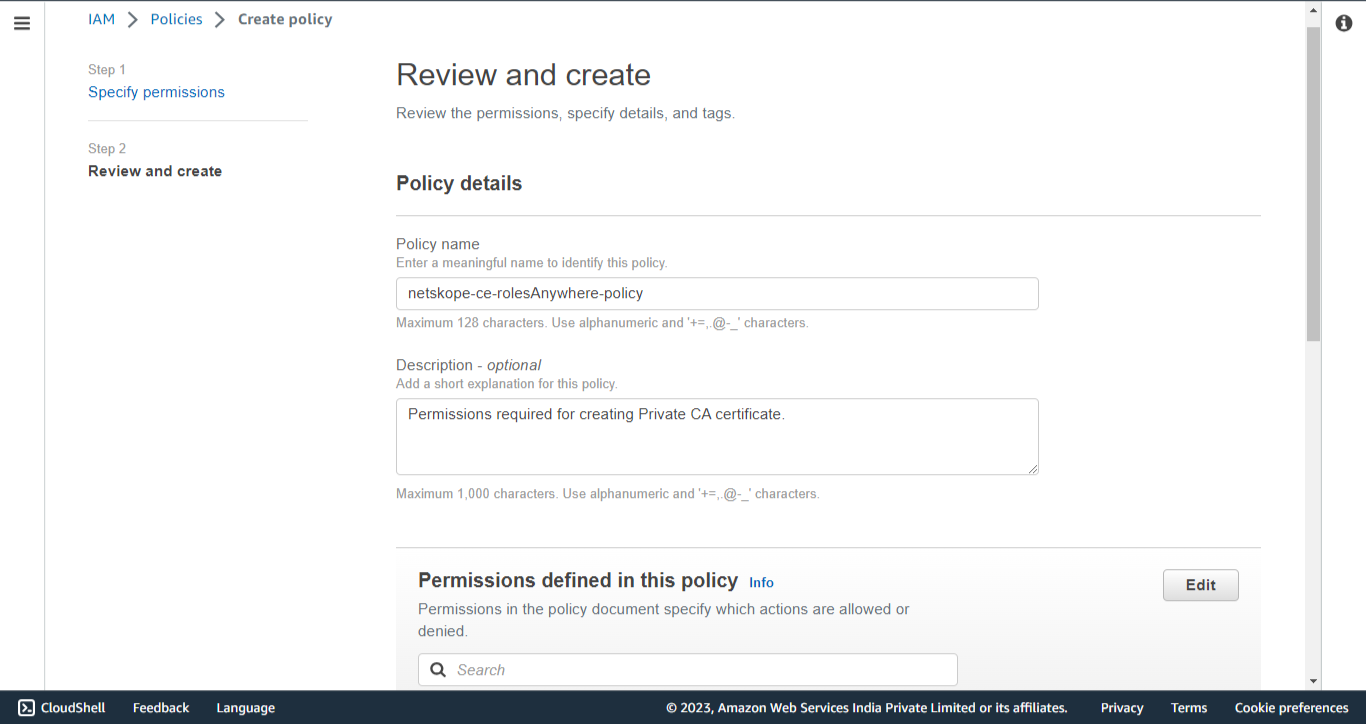
Enter a Name (like netskope-ce-rolesAnywhere-policy) and click Save Changes.
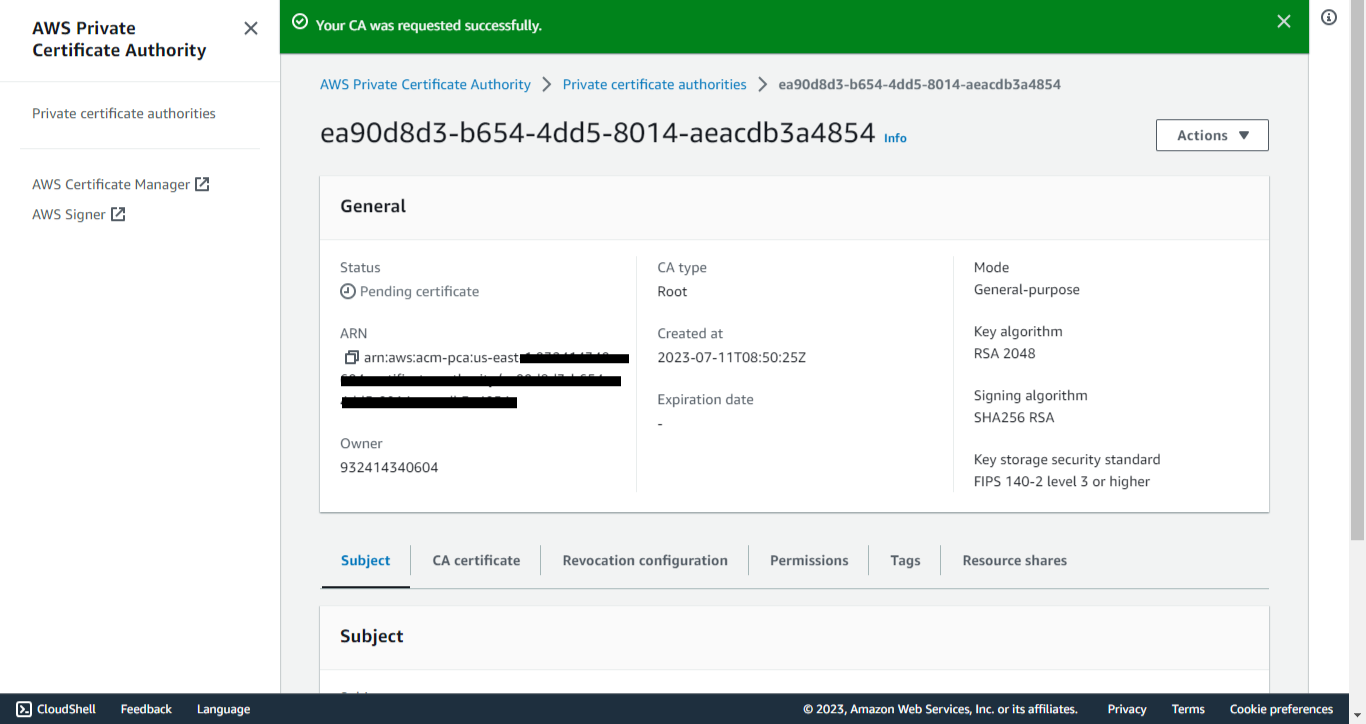
Créer une autorité de certification privée
-
Connectez-vous à la console AWS.
-
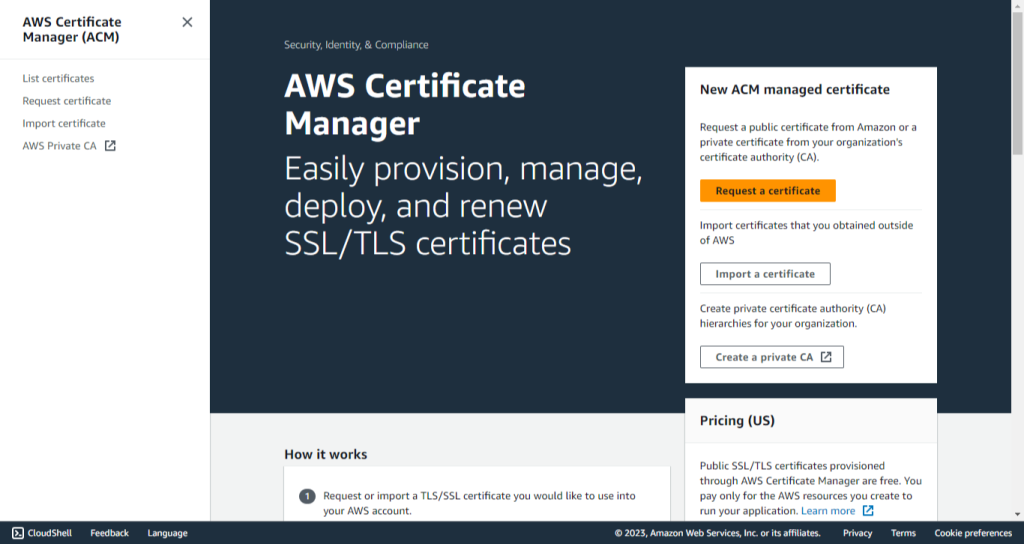
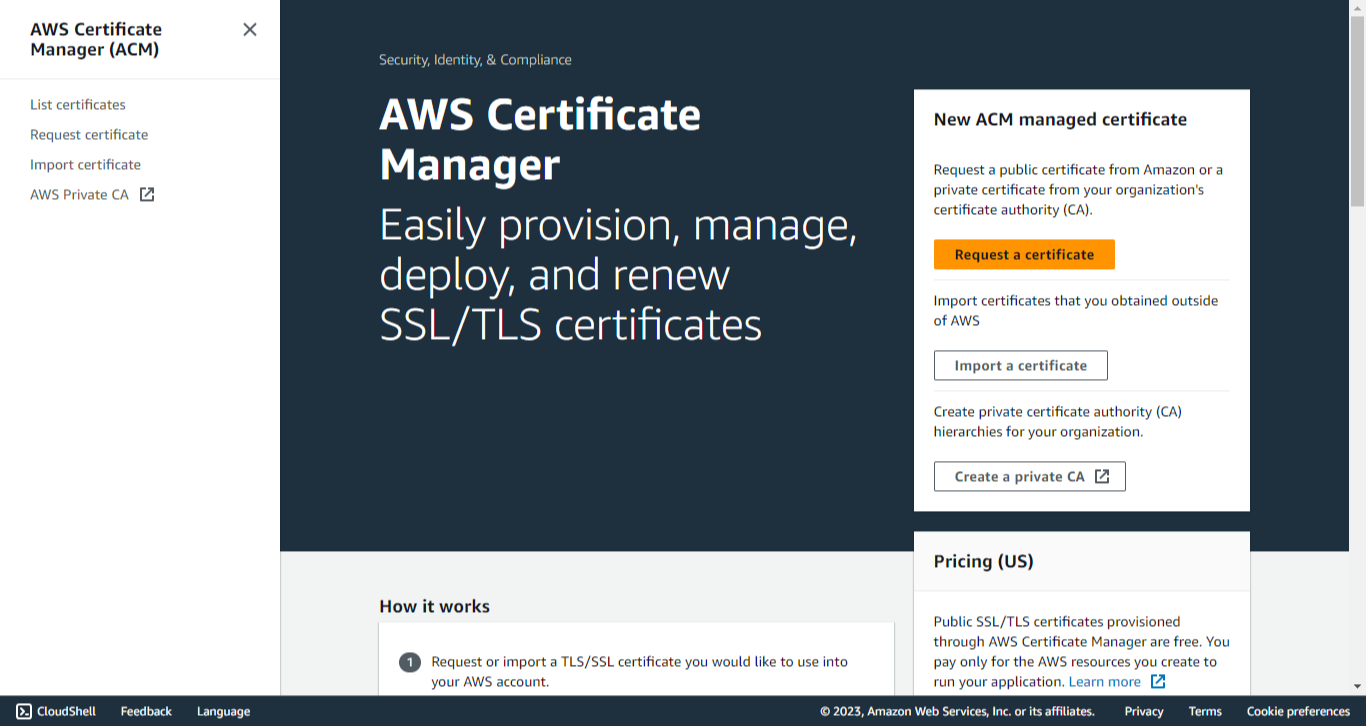
Search for Certificate Manager.
-
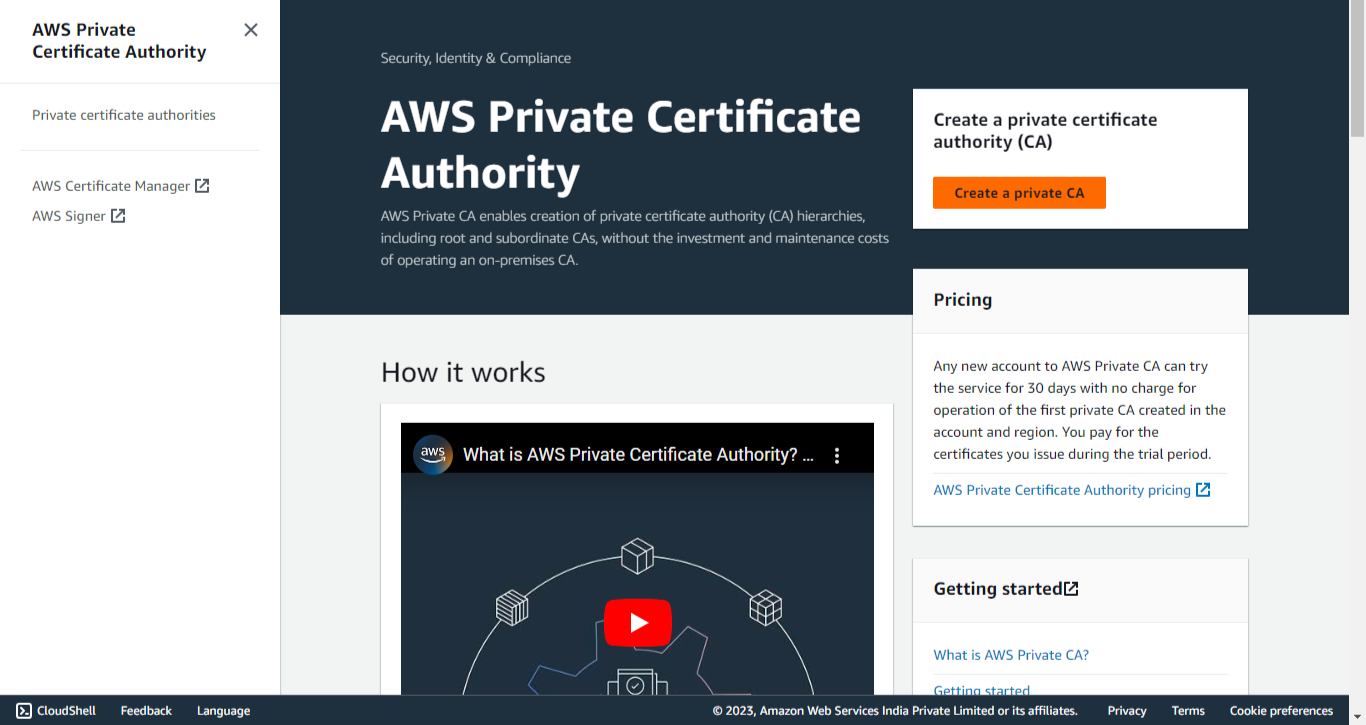
Cliquez sur AWS Private CA.
-
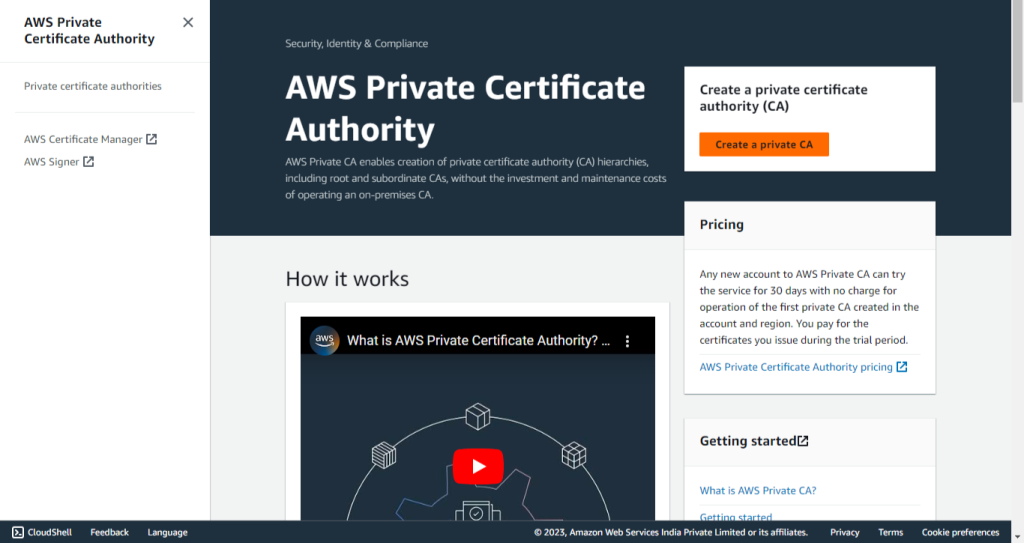
Cliquez sur Create a private CA.
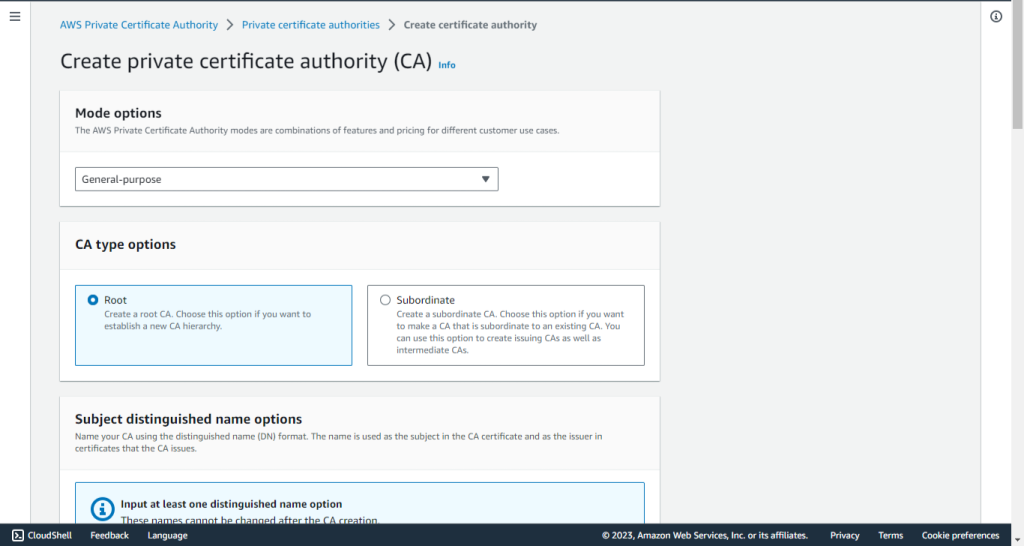
-
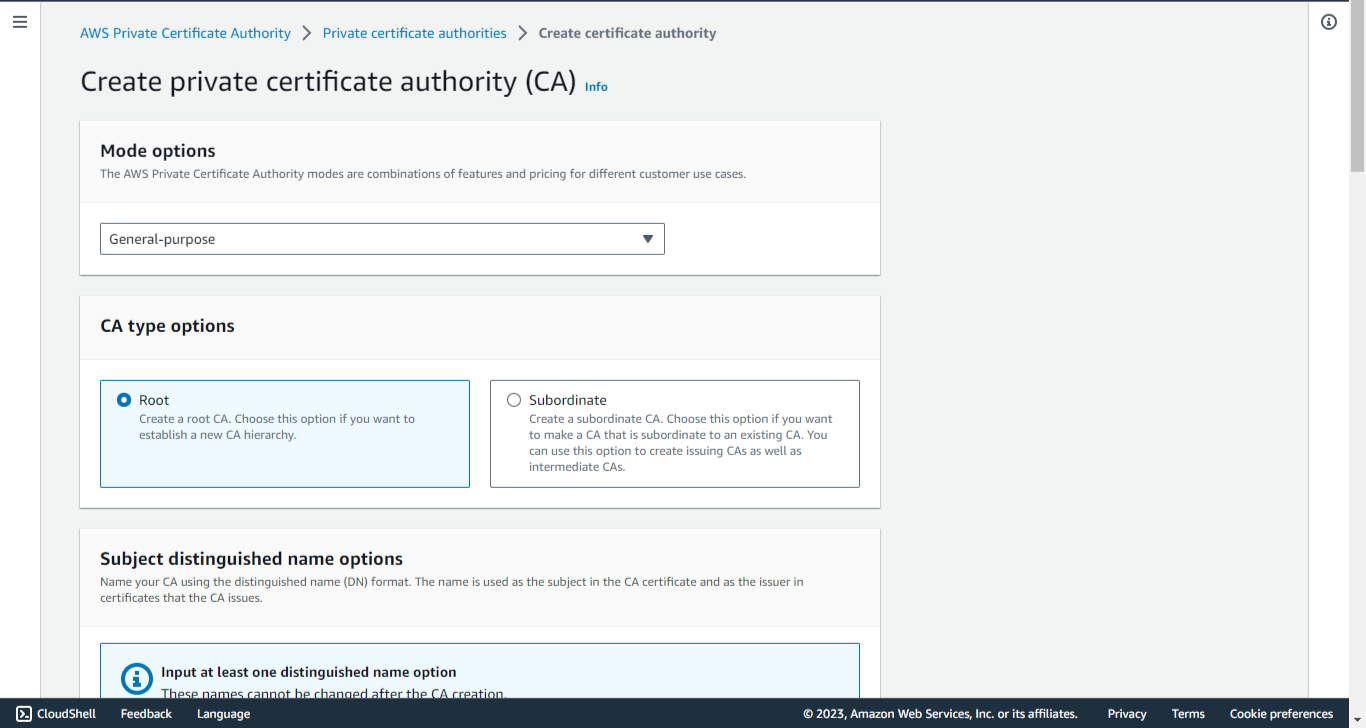
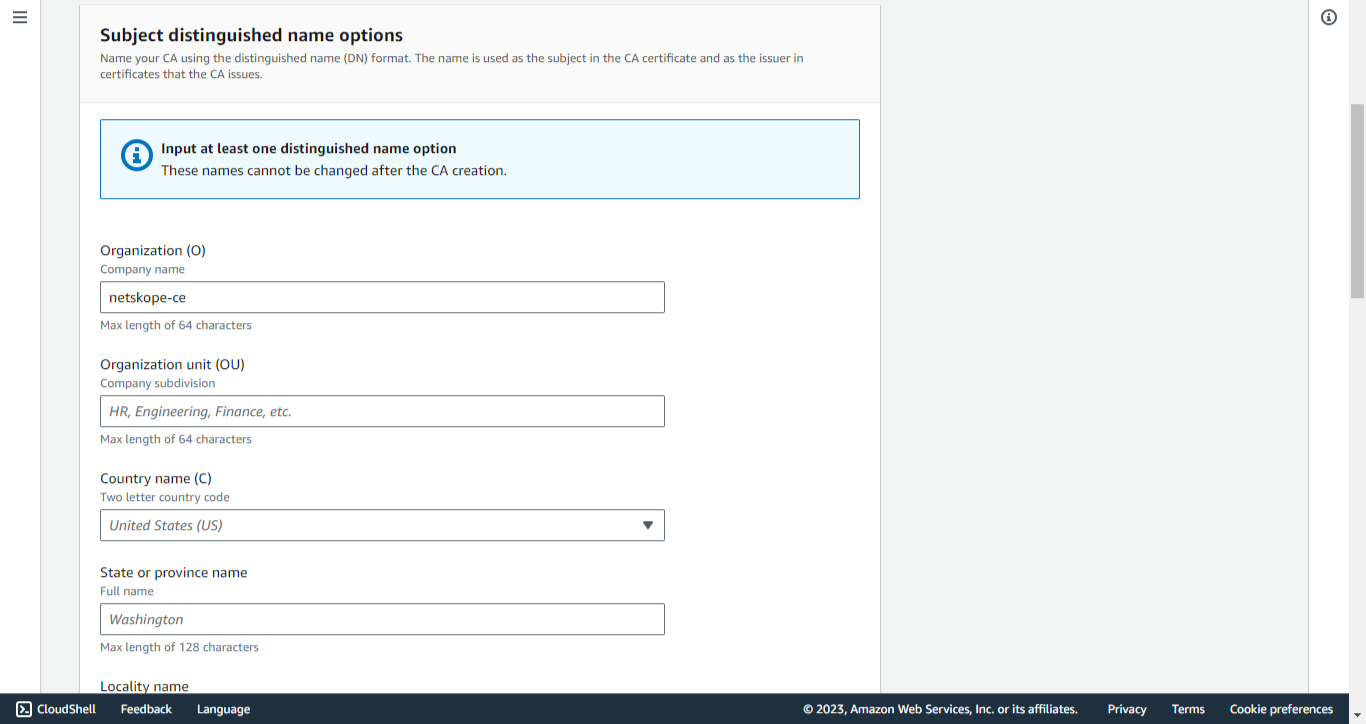
Pour les options de mode, sélectionnez General-purpose.
-
For CA Type Options, select Root.
-
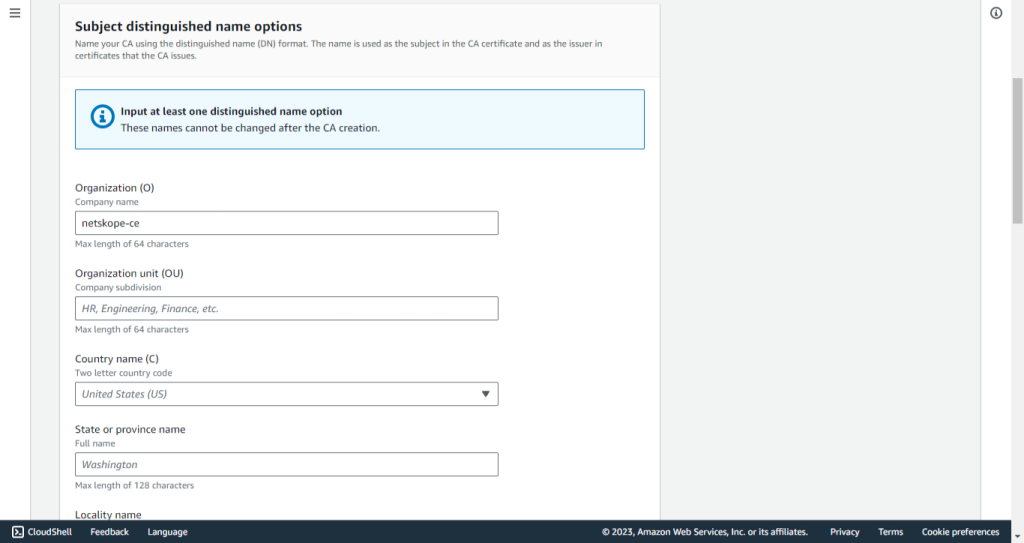
Saisissez une organisation (O).
-
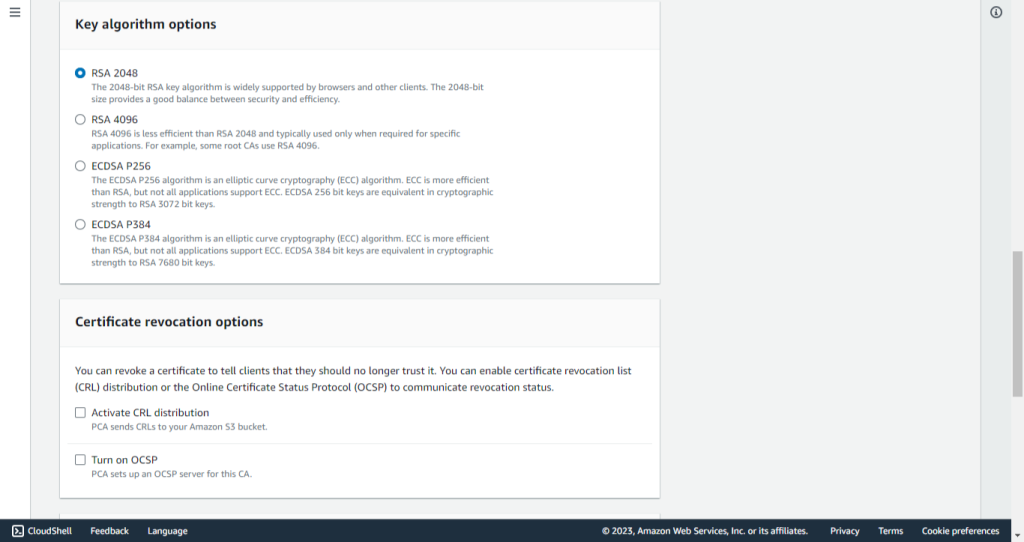
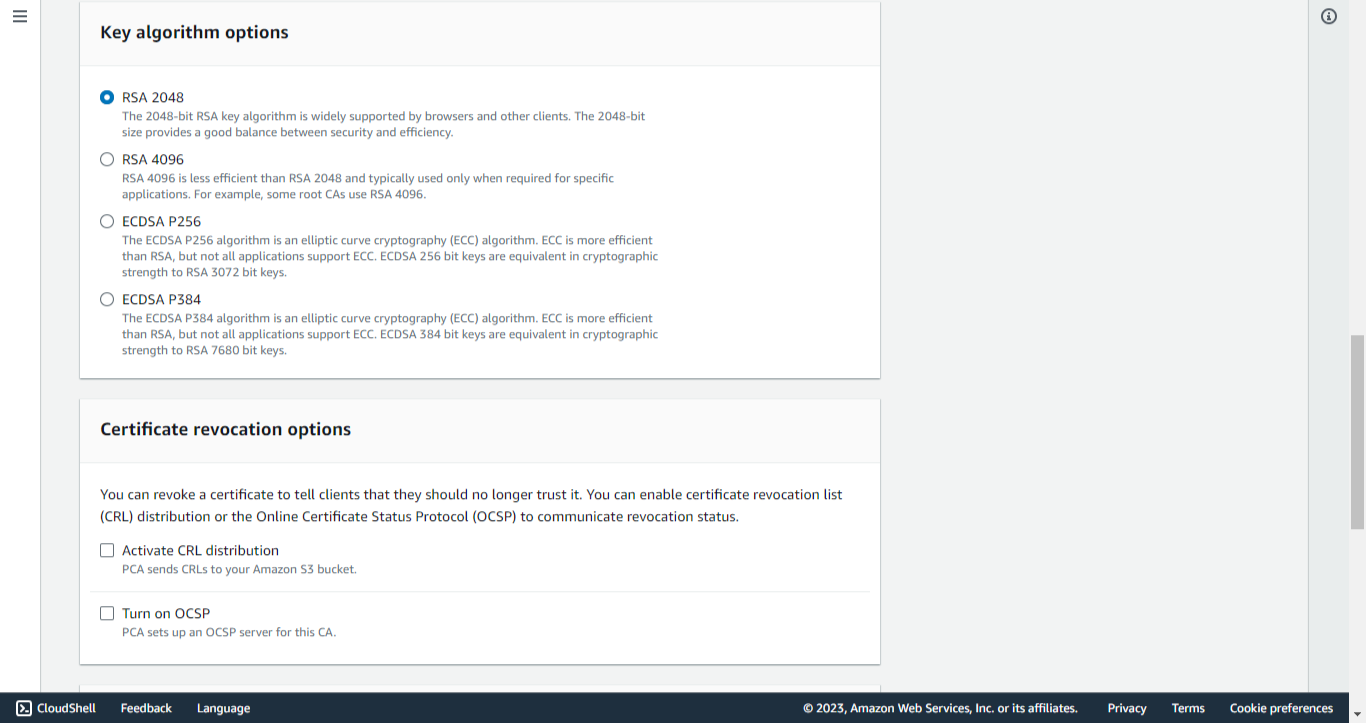
For Key Algorithm Options, select RSA 2048.
-
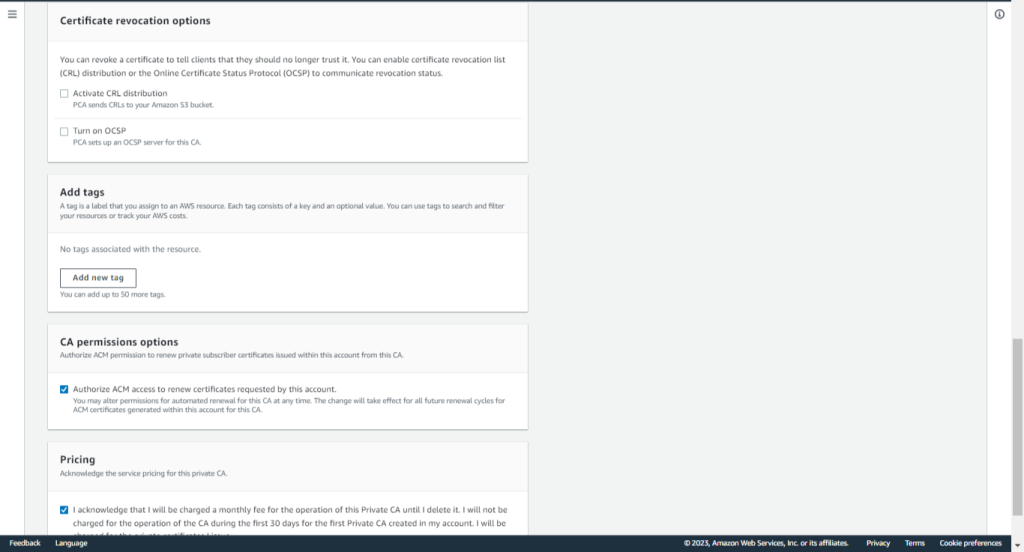
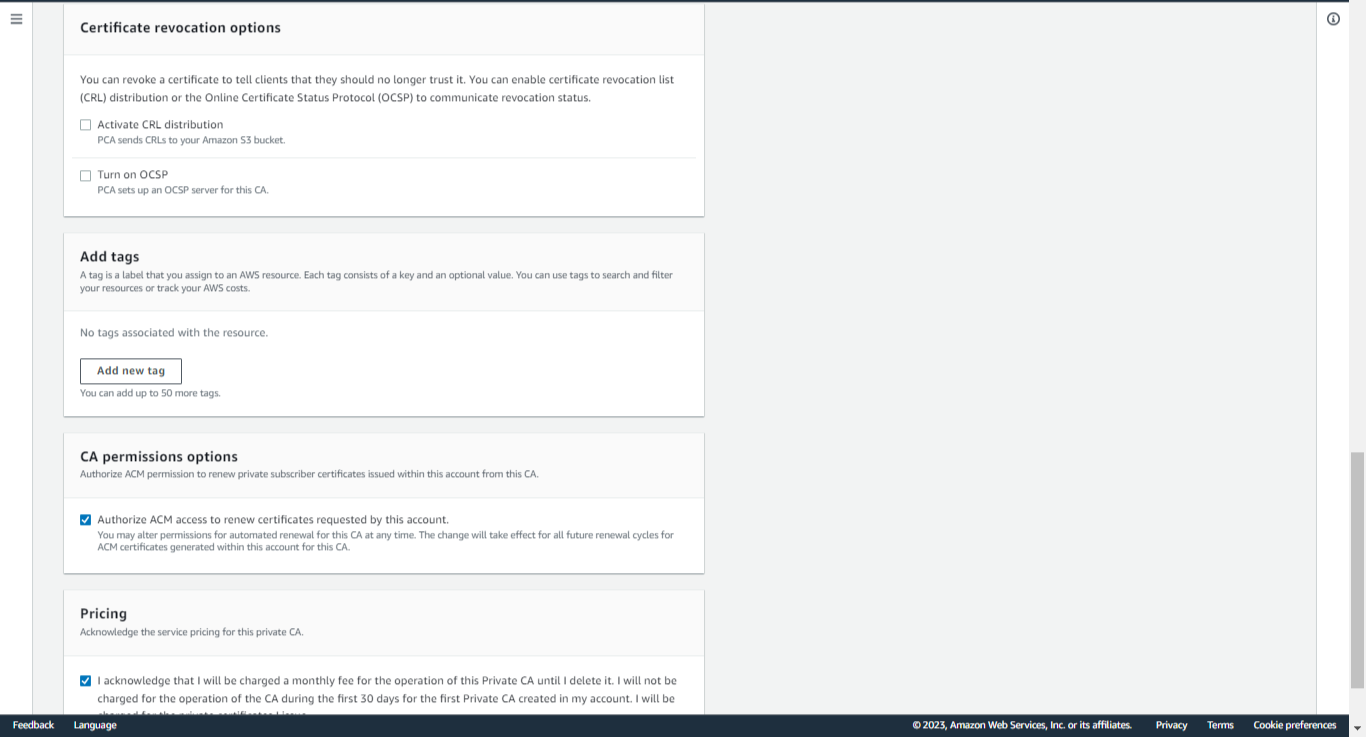
Add tags if any (optional)
-
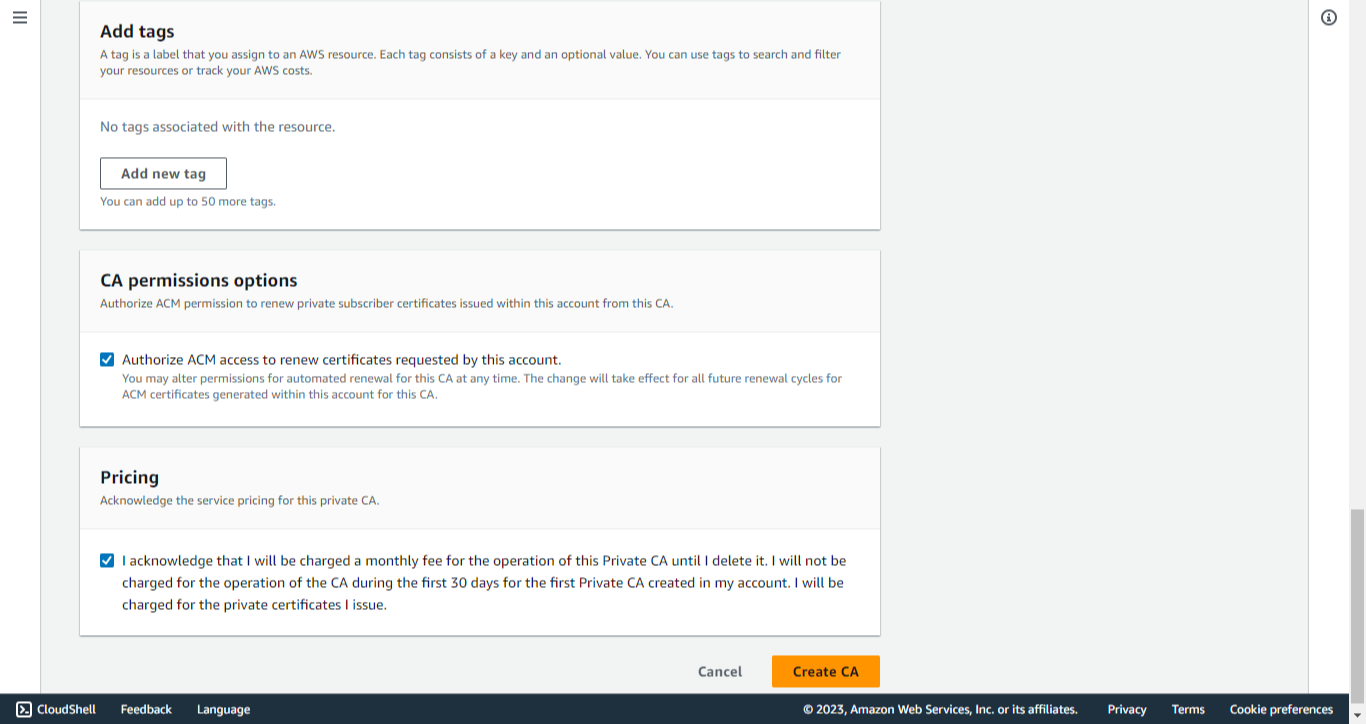
Check the checkbox in the CA Permissions Options section.
-
Check the checkbox in the Pricing section.
-
Click Create to generate the CA certificate.
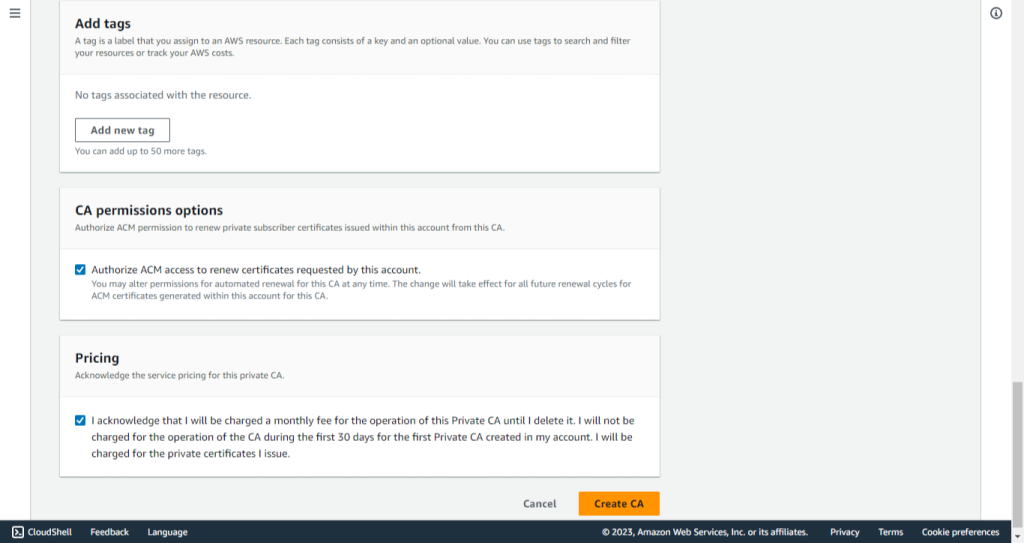
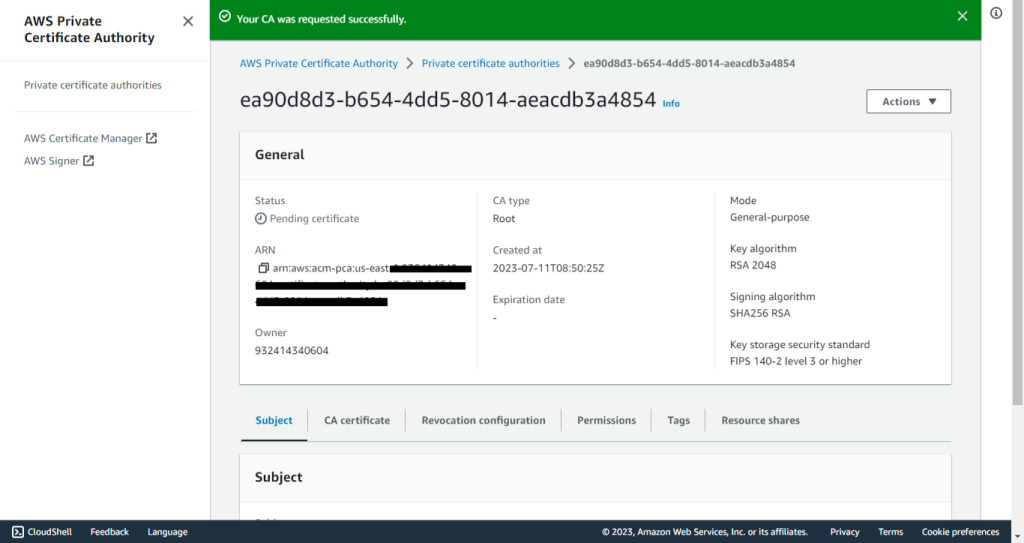
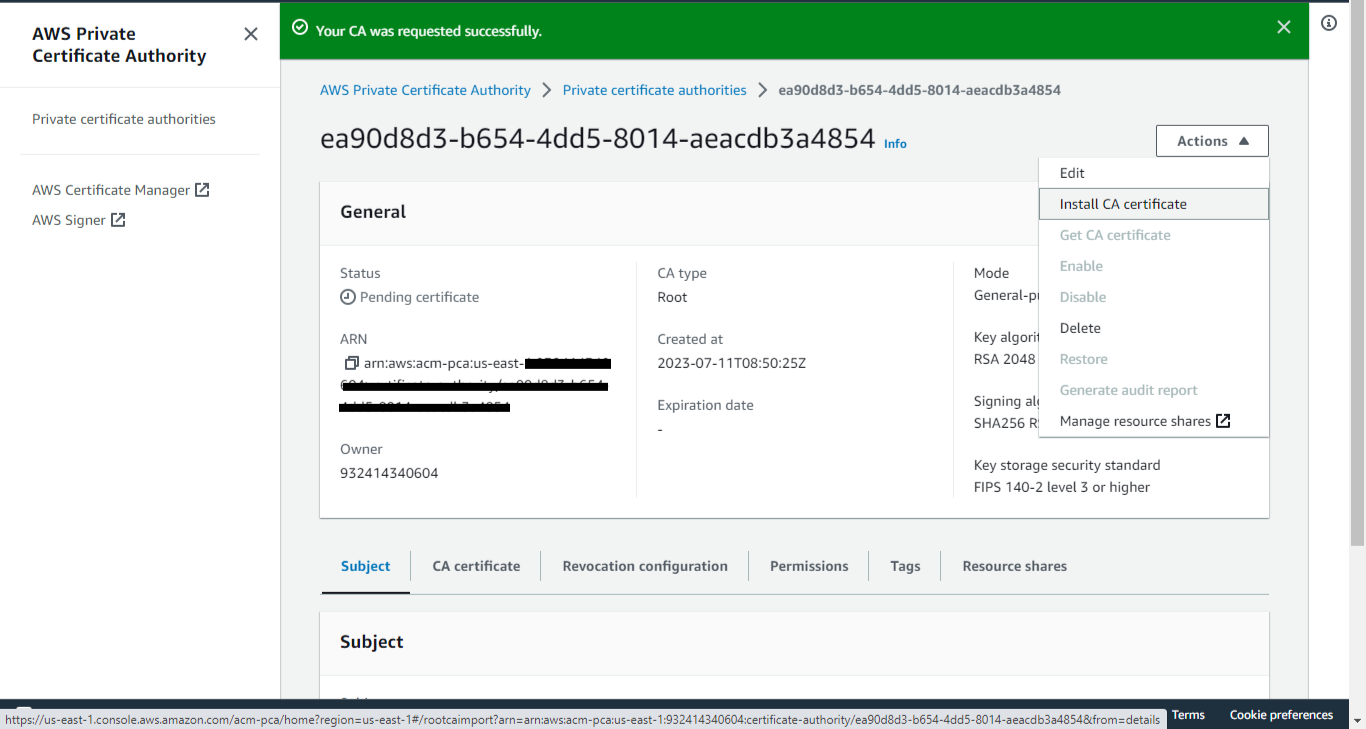
-
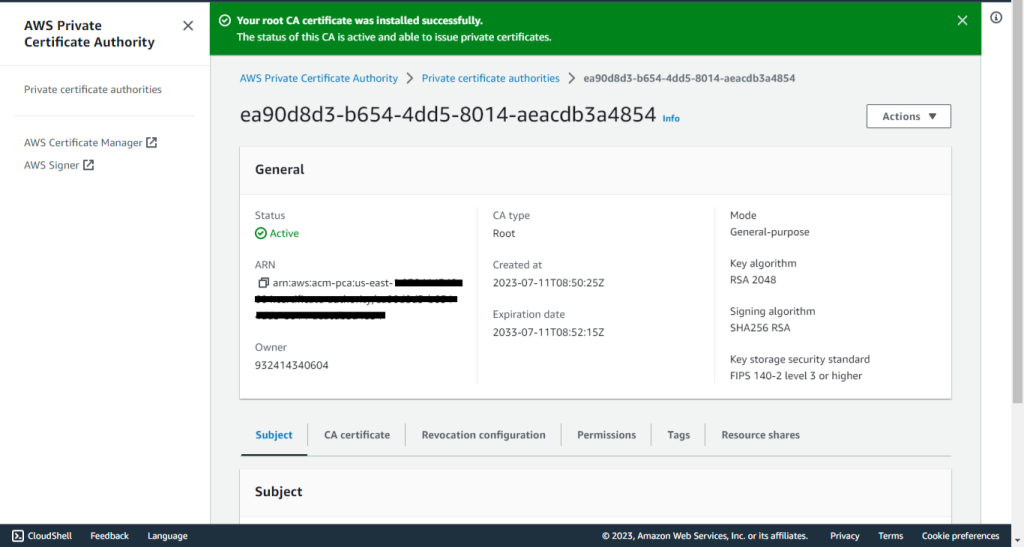
From Actions, select Install CA certificate.
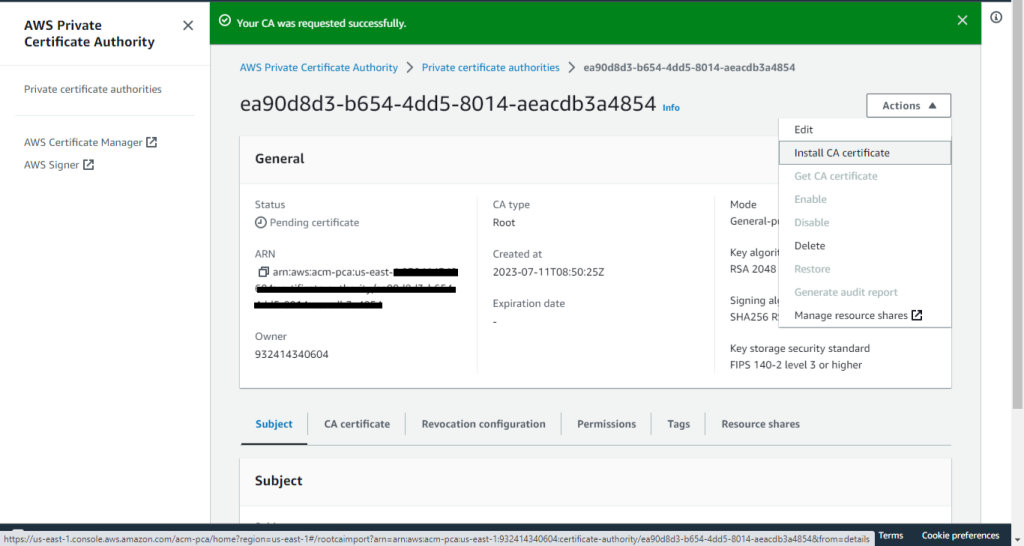
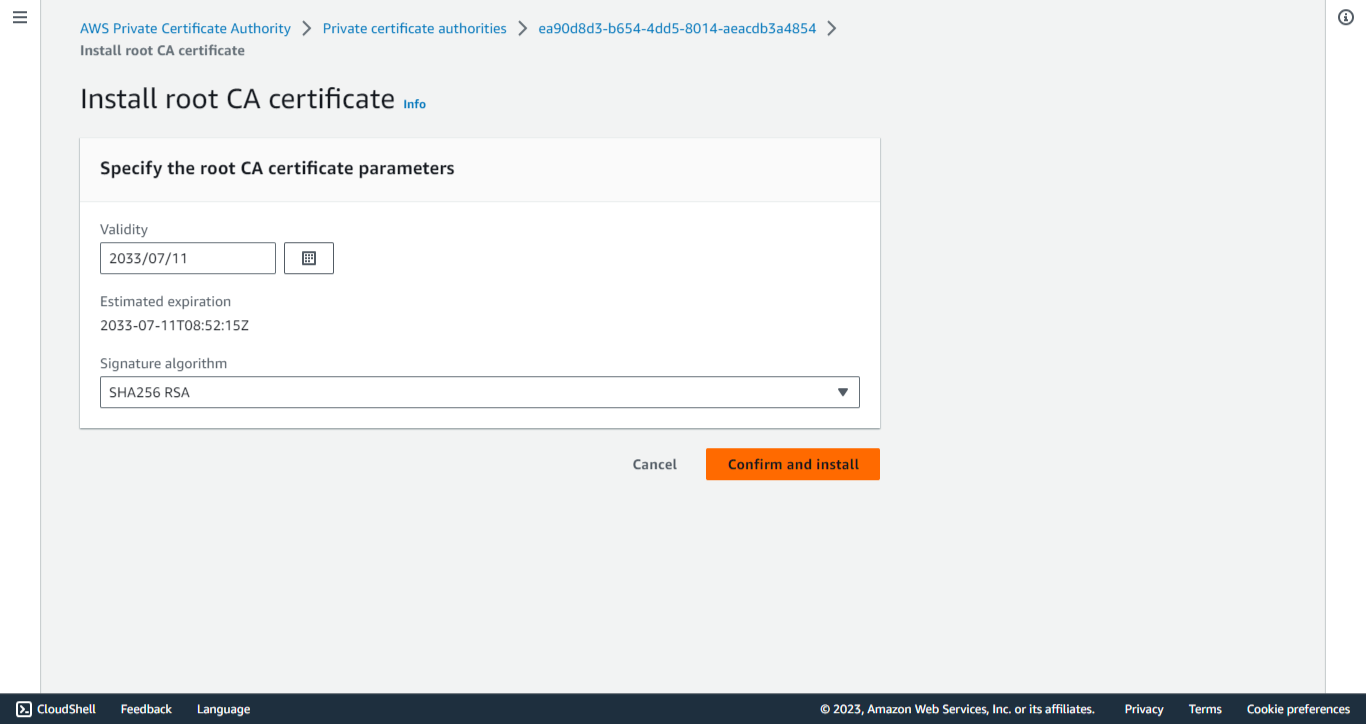
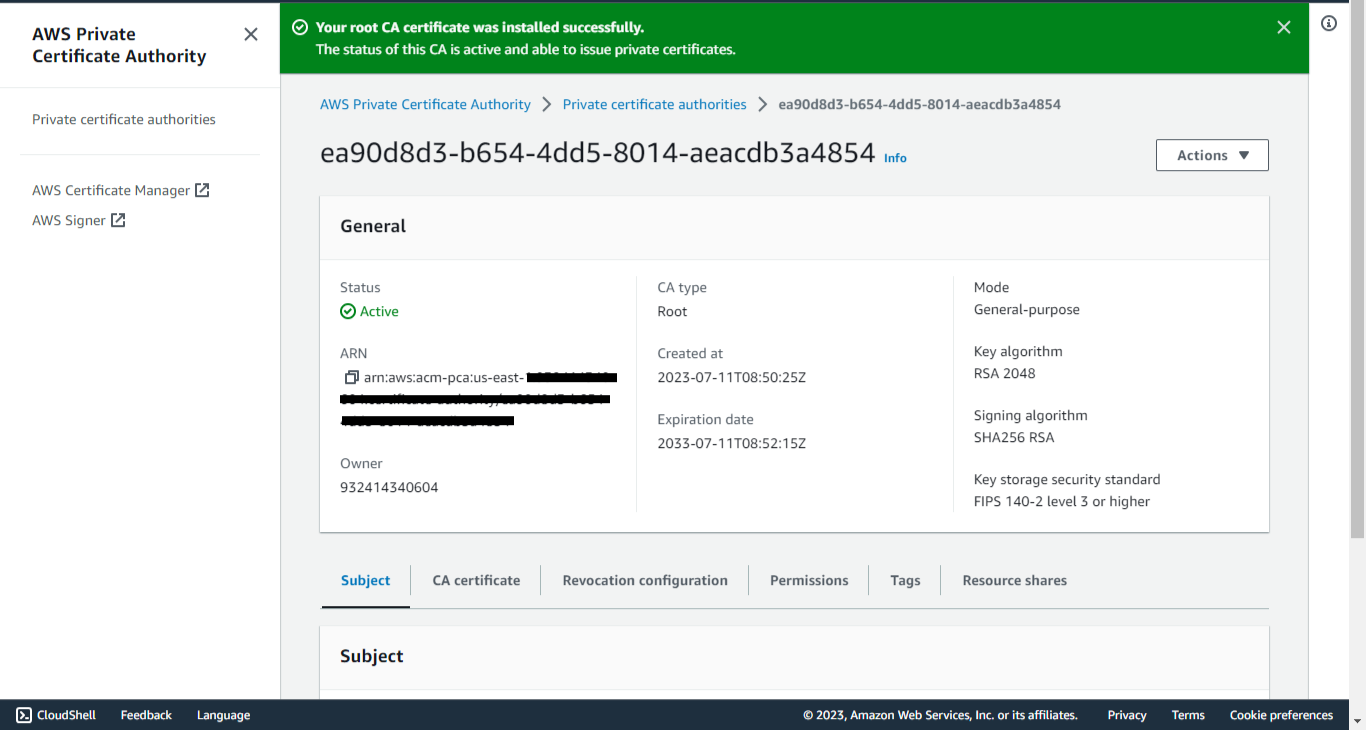
-
Cliquez sur Confirm and Install.
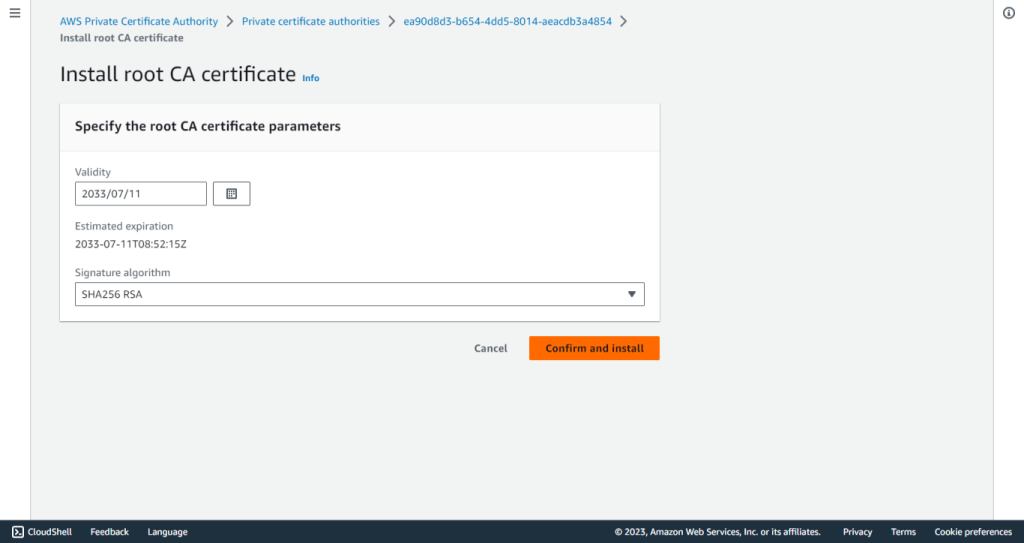
Créer une ancre de confiance
-
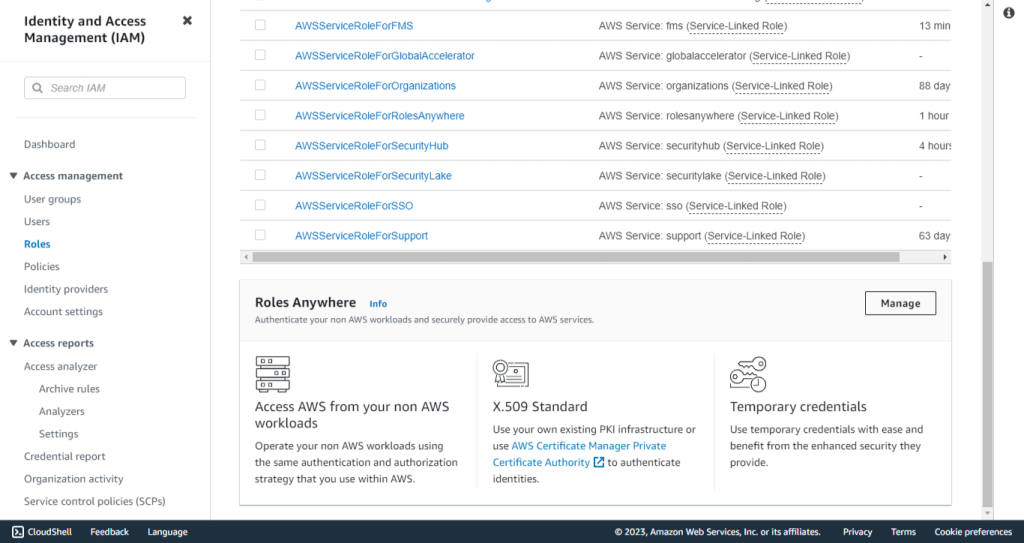
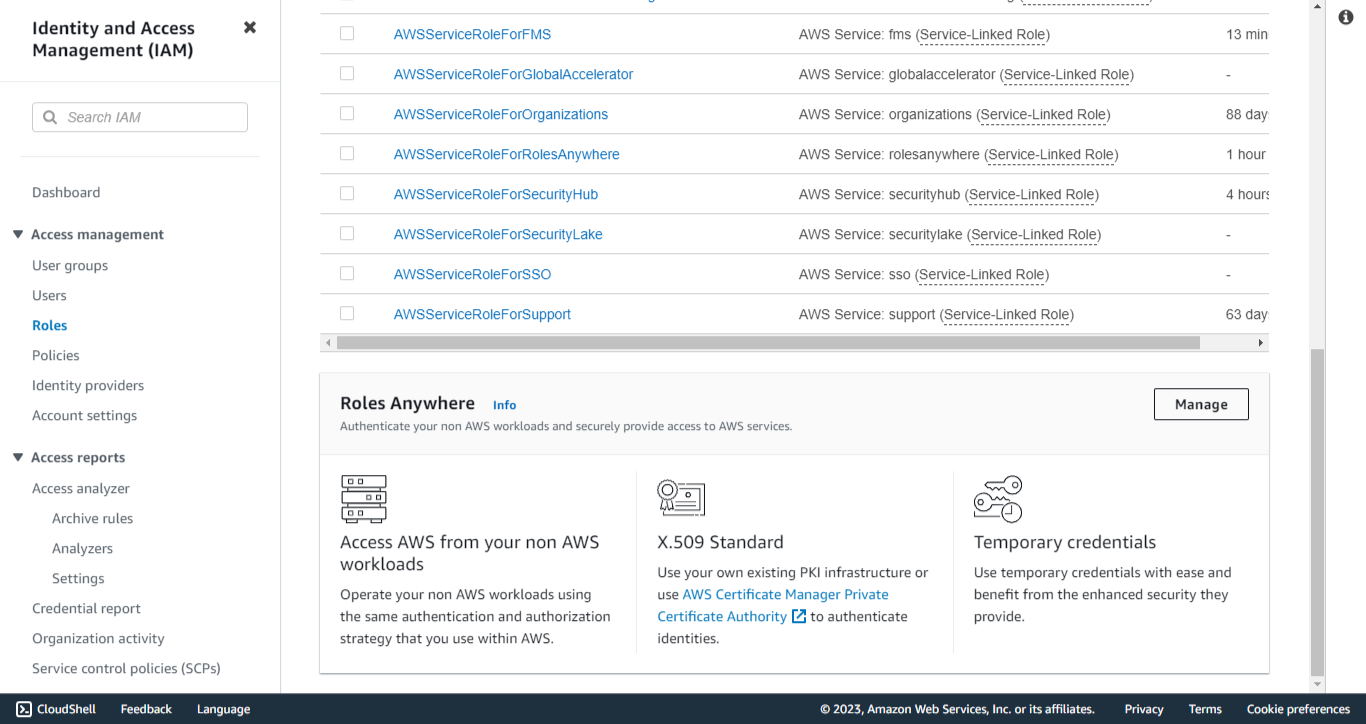
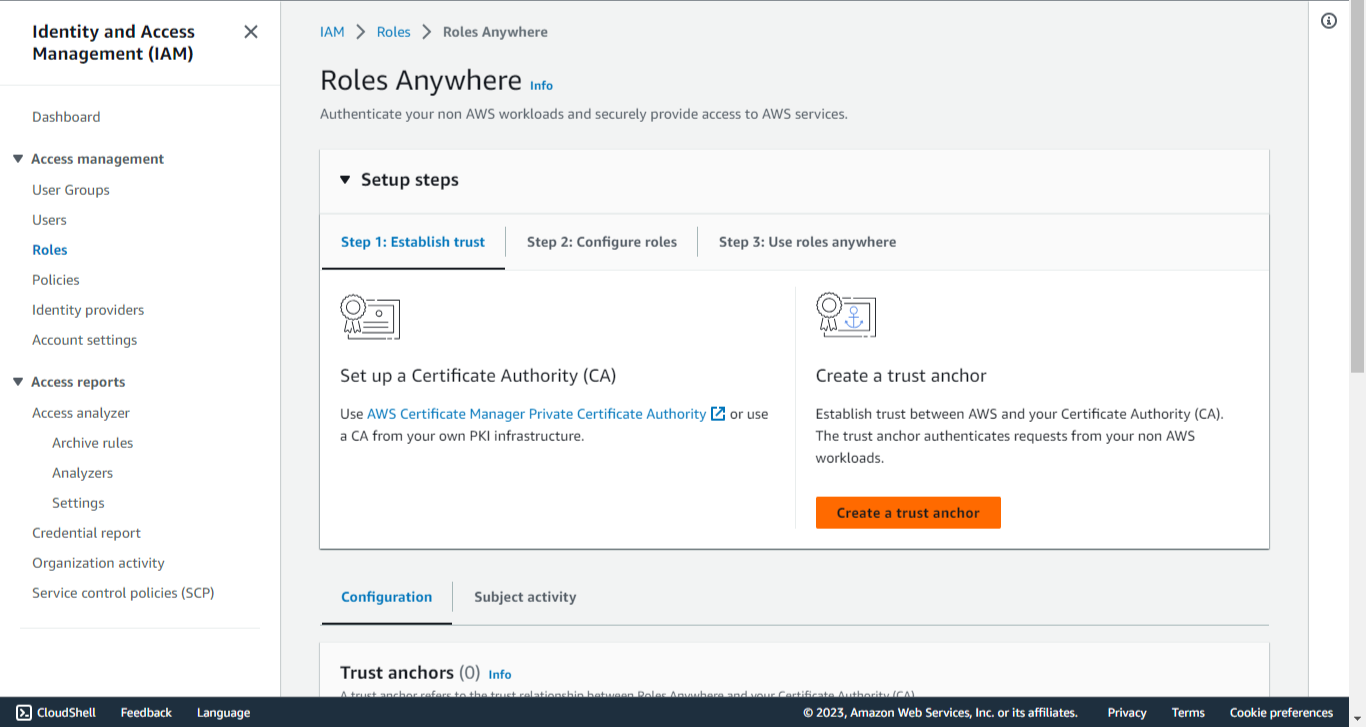
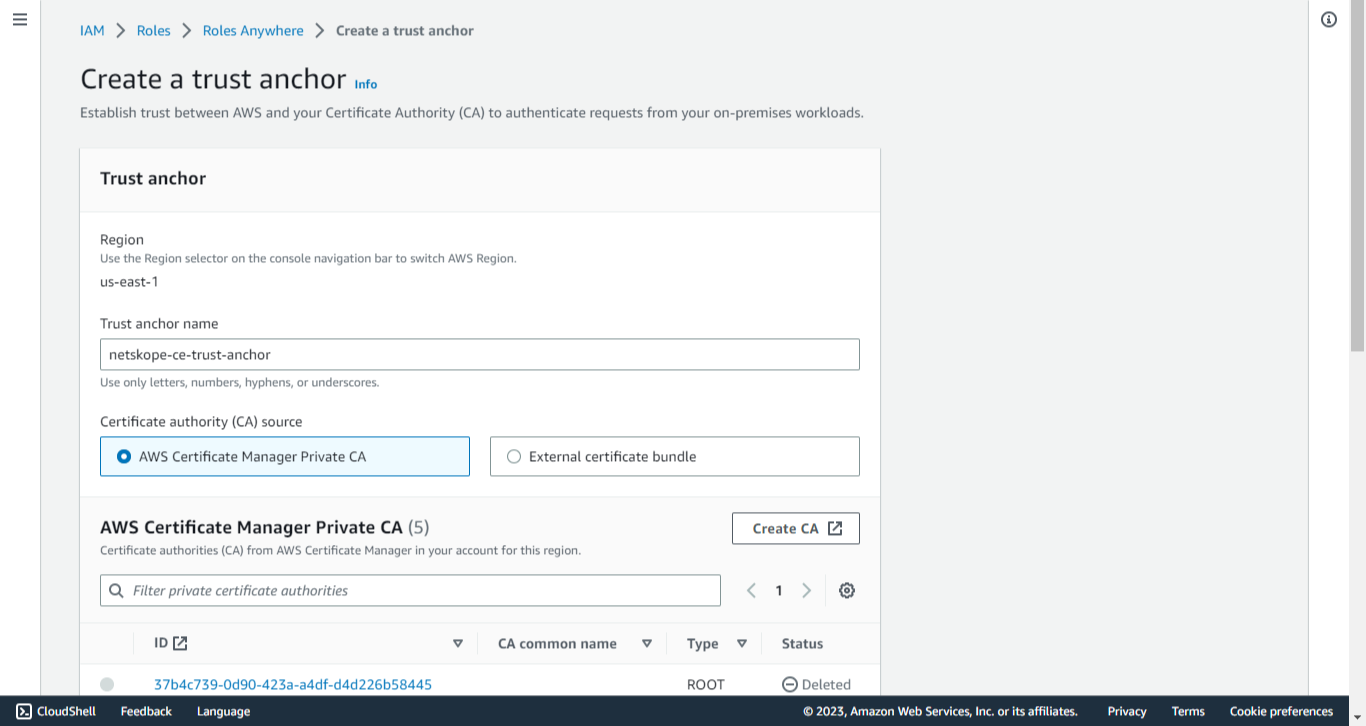
Go to IAM Services in the AWS Console and click Roles under Access management. Scroll down to Roles Anywhere and select Manage.
-
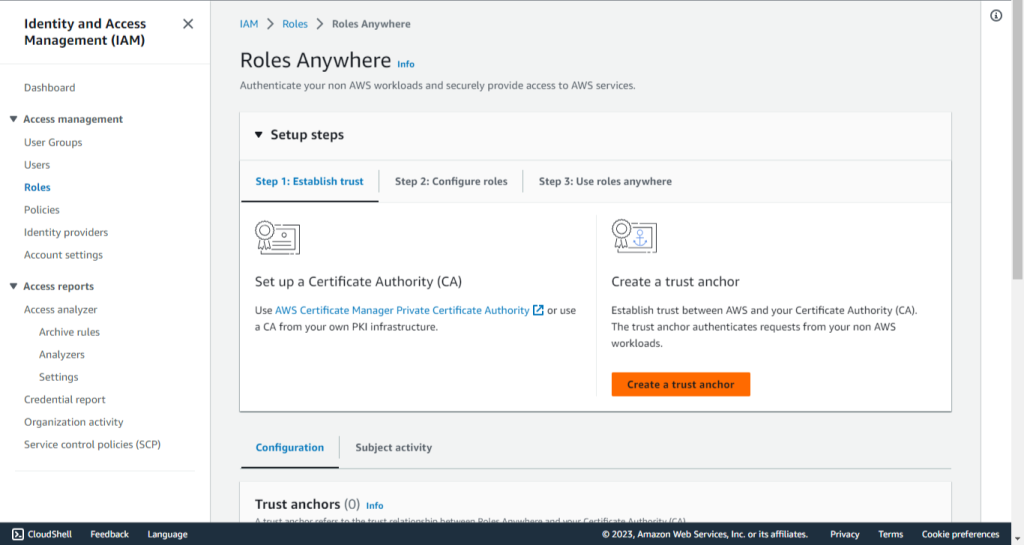
Cliquez sur Create a Trust anchor.
-
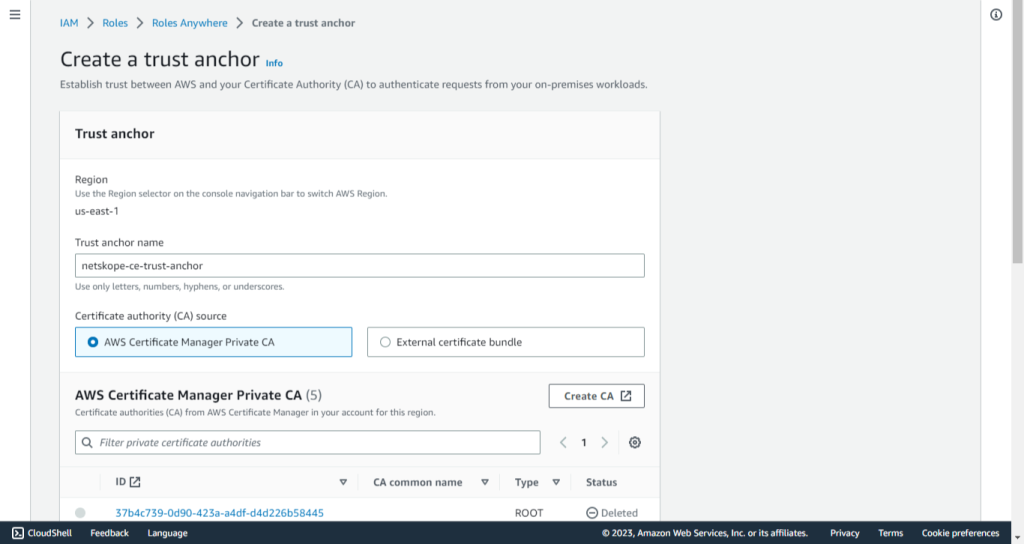
Enter a Trust anchor name (like netskope-ce-trust-anchor).
-
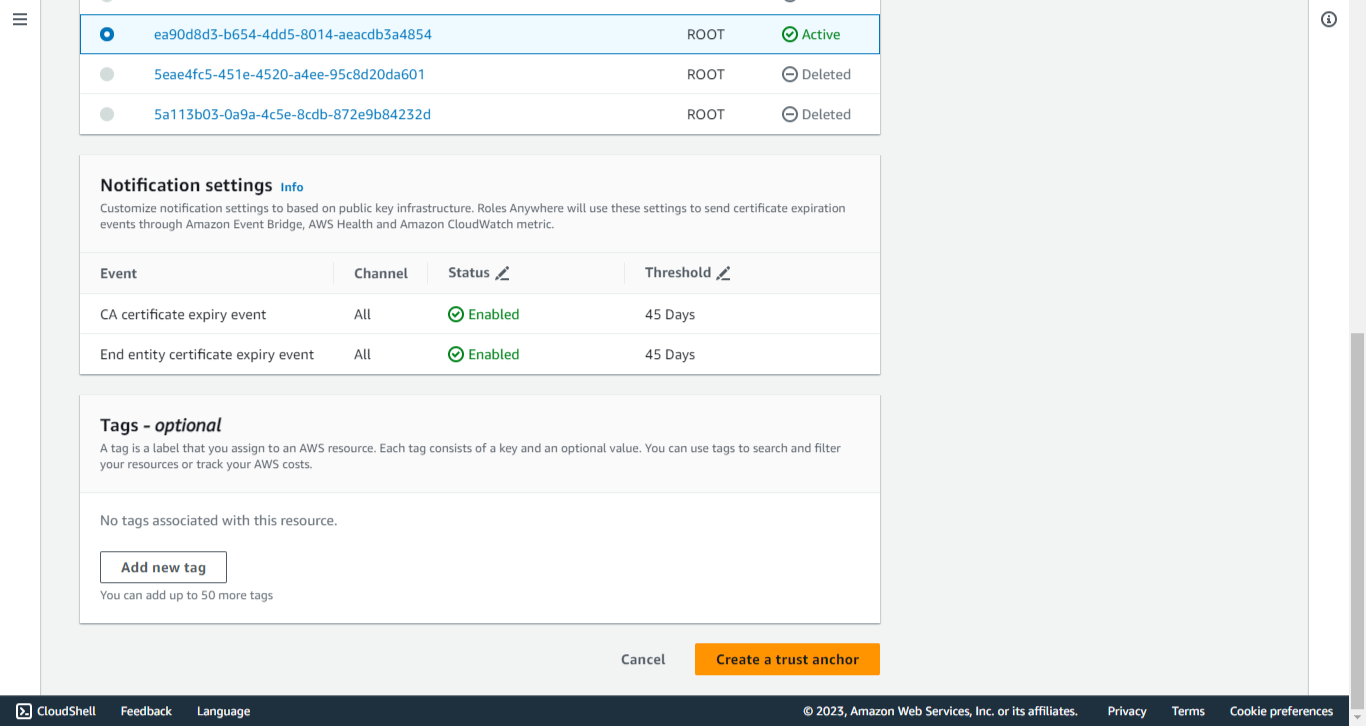
Select the AWS Certificate Manager Private CA (created in the previous steps) as a Certificate authority (CA) source.
-
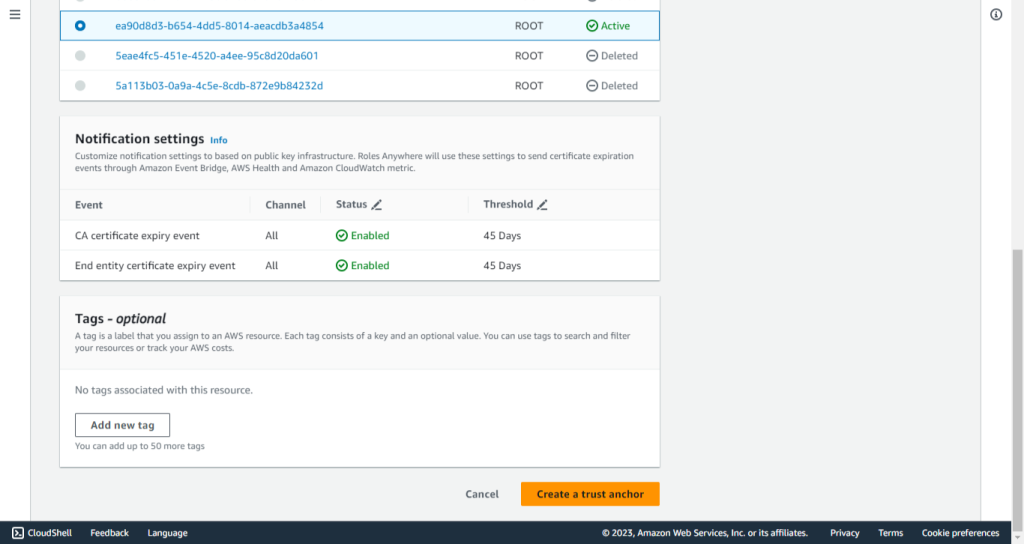
Ajoutez des étiquettes si nécessaire.
-
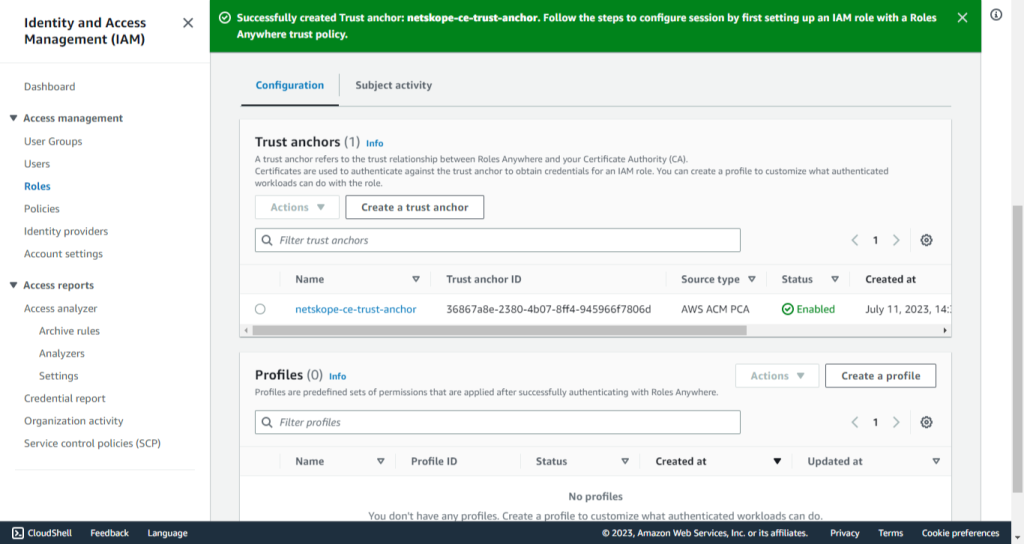
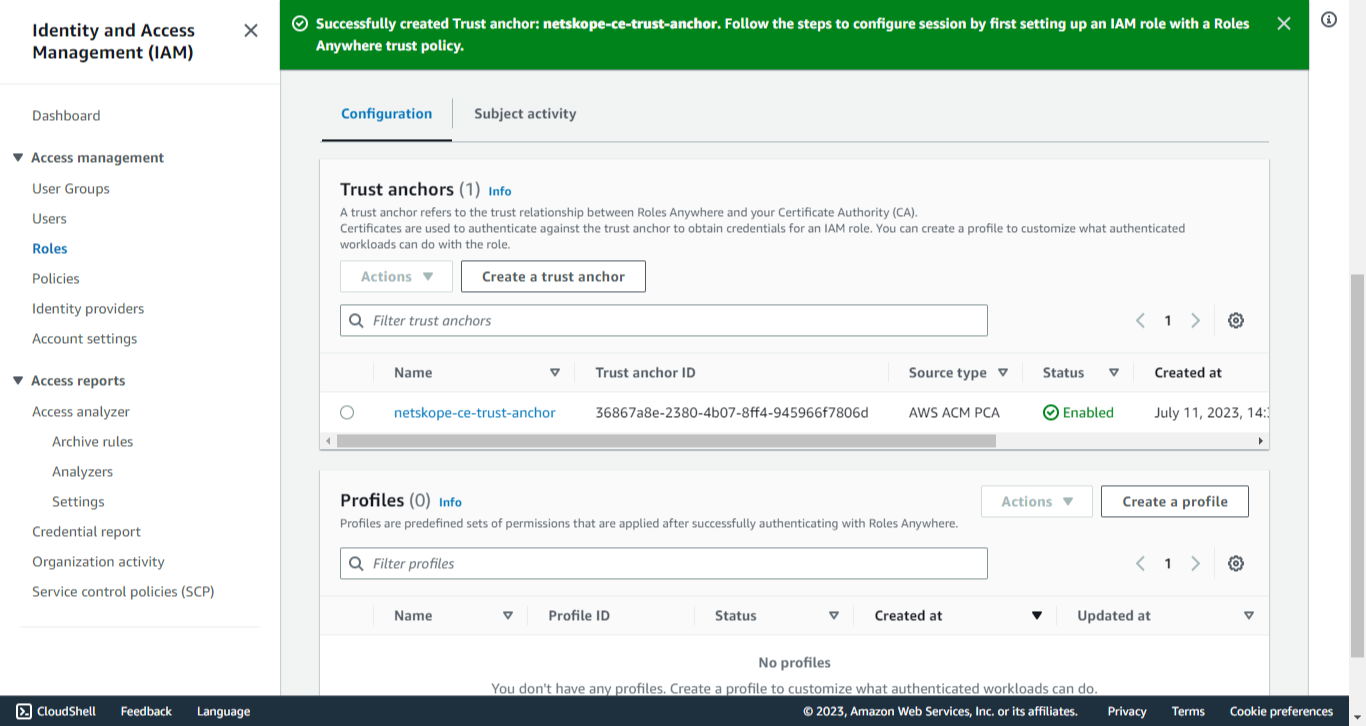
Cliquez sur Create a trust anchor.
-
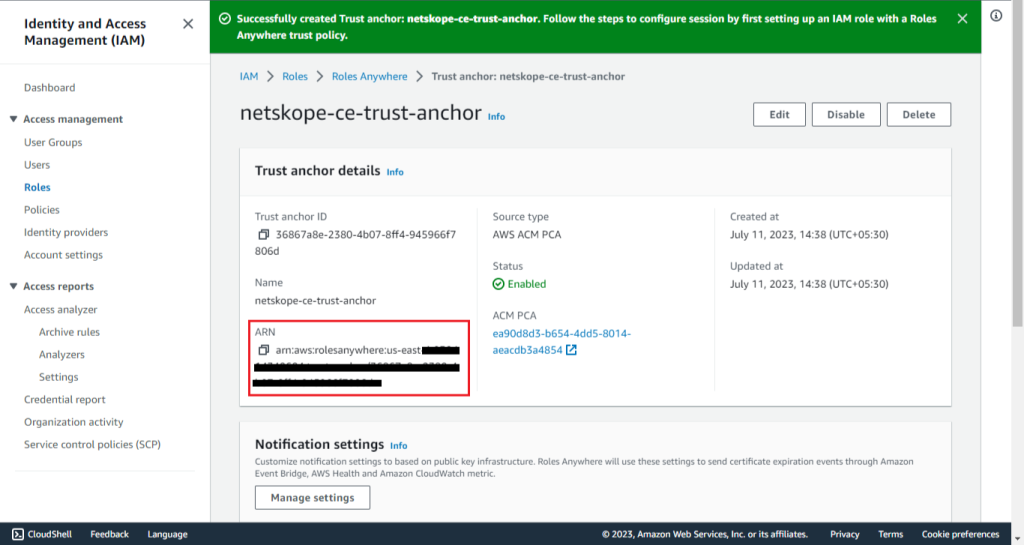
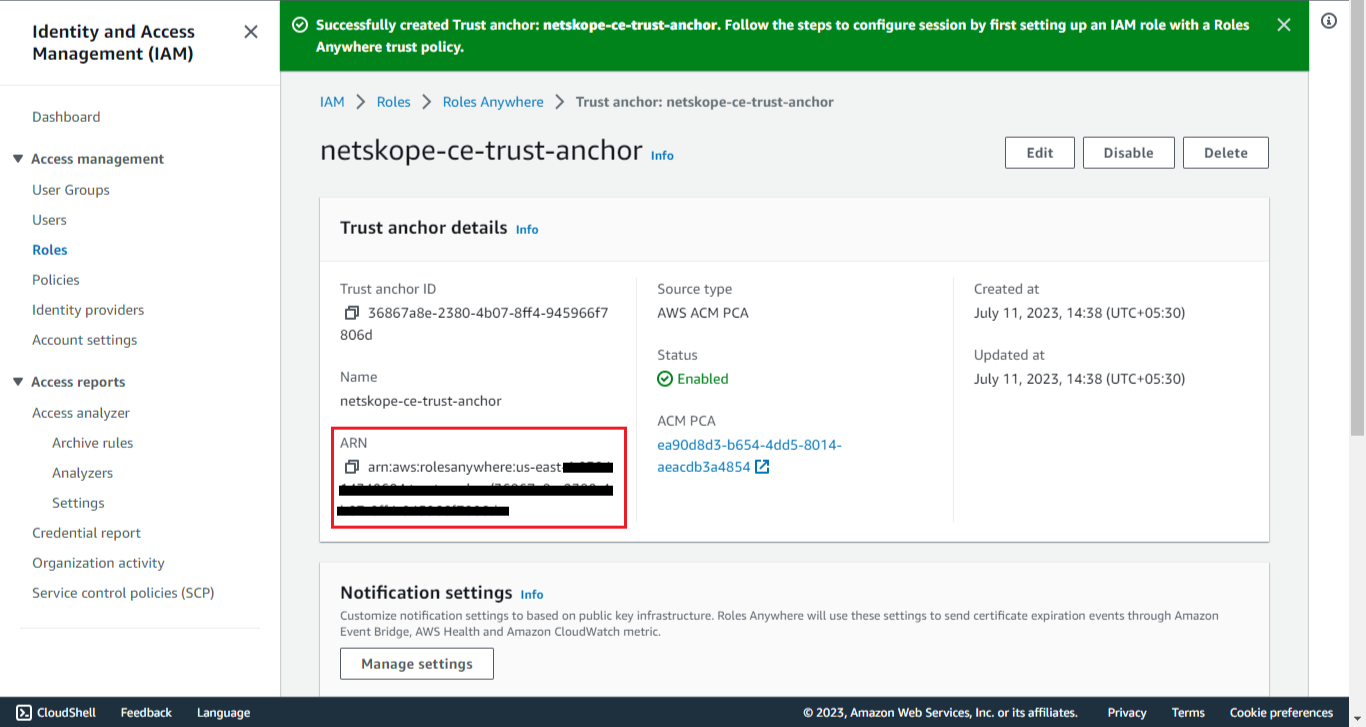
Cliquez sur l'Ancre de confiance créée et copiez l'ARN de l'Ancre de confiance.
Créer un rôle IAM
-
Allez sur IAM Services dans la console AWS.
-
Click Role under Access management.
-
Cliquez sur Create Role.

-
Pour le type d'entité de confiance, sélectionnez Custom Trust Policy.

-
Allez sur Policy Generator.
-
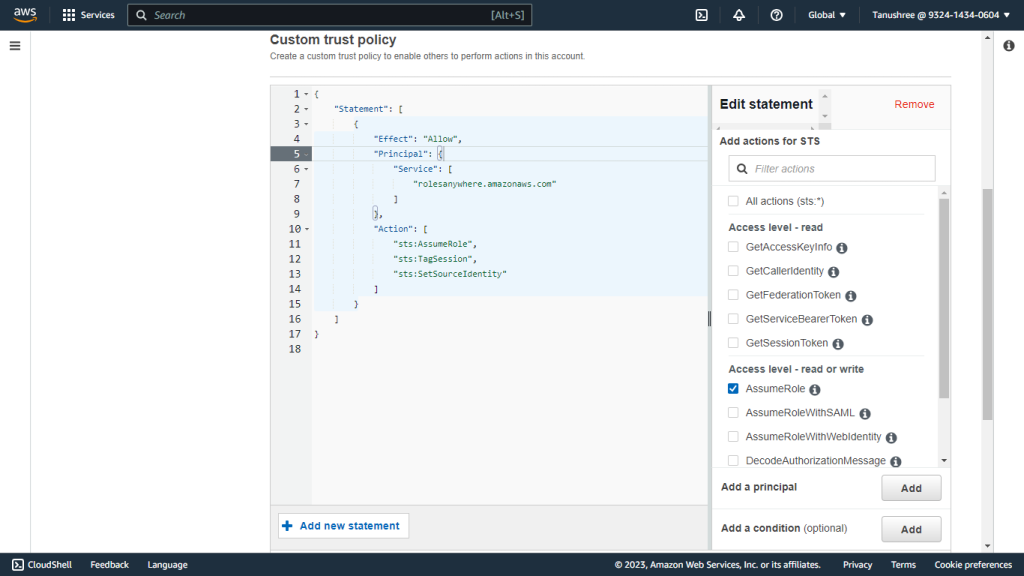
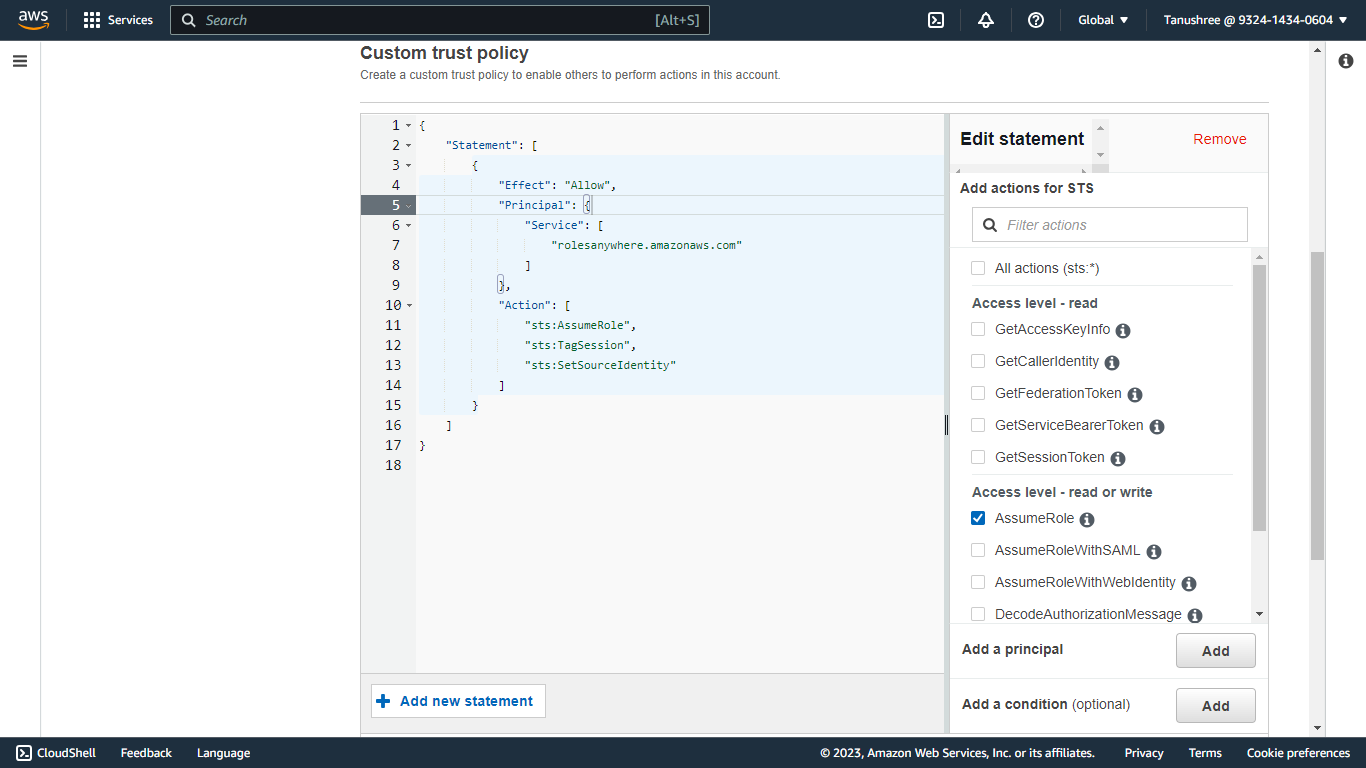
Replace the Custom trust Policy with this Trust Policy.This policy contains the permissions for using the roles anywhere service:
{
    "Version": "2012-10-17",
    "Statement": [
        {
            "Effect": "Allow",
            "Principal": {
                "Service": [
                    "rolesanywhere.amazonaws.com"
                ]
            },
            "Action": [
                "sts:AssumeRole",
                "sts:TagSession",
                "sts:SetSourceIdentity"
            ]
        }
    ]
}
-
Cliquez sur Next.
-
Dans les politiques de permissions, sélectionnez la politique de seau créée précédemment.

-
Cliquez sur Next.
-
Provide a Role name (like netskope-ce-roleAnywhere), and add a Description for the role.
-
Cliquez sur Create role.

-
Make a note of the Role ARN as this will be required in the Plugin configuration parameter: Role ARN for the authentication method AWS IAM Roles Anywhere.

Créer un profil
-
Select Roles under Access management.
-
Faites défiler vers le bas jusqu'à Roles Anywhere et cliquez sur Manage.

-
Développez les étapes de la configuration.
-
Cliquez Configure roles.
-
Cliquez sur Configure a profile.

-
Enter a Profile name (like netskope-ce-profile).
-
Select the role created in Create IAM Role section: netskope-ce-roleAnywhere.

-
Supprimez le Inline Policy.
-
Cliquez sur Create profile.


-
Click the created Profile and copy the Profile ARN.

Demander un certificat privé
-
Allez sur AWS Certificate Manager > Request certificate.
-
Select Request a private certificate.

-
Cliquez sur Next.
-
Select l'autorité de certification créée dans les étapes précédentes.

-
Provide a domain name in the Fully qualified domain name field (like netskope-ce.com).
-
For Key Algorithm, select RSA 2048.

-
Ajoutez des étiquettes si nécessaire.
-
Confirmez les autorisations de renouvellement du certificat.
-
Cliquez sur Request.

-
Go to List certificates from the navigation panel of AWS Certificate Manager.
-
Select le certificat créé précédemment.

-
Cliquez sur Export.

-
Enter the passphrase. Make a note of the passphrase as it will be required for the Configuration of the AWS S3 Plugin using the AWS IAM Roles Anywhere Authentication method.
-
Cliquez sur Generate PEM Encoding.

-
Download all the Certificates because they won’t be visible again. For new certificates, you will need to Export it again.

For more info, go to AWS IAM Role Anywhere
Déployé sur AWS Configuration
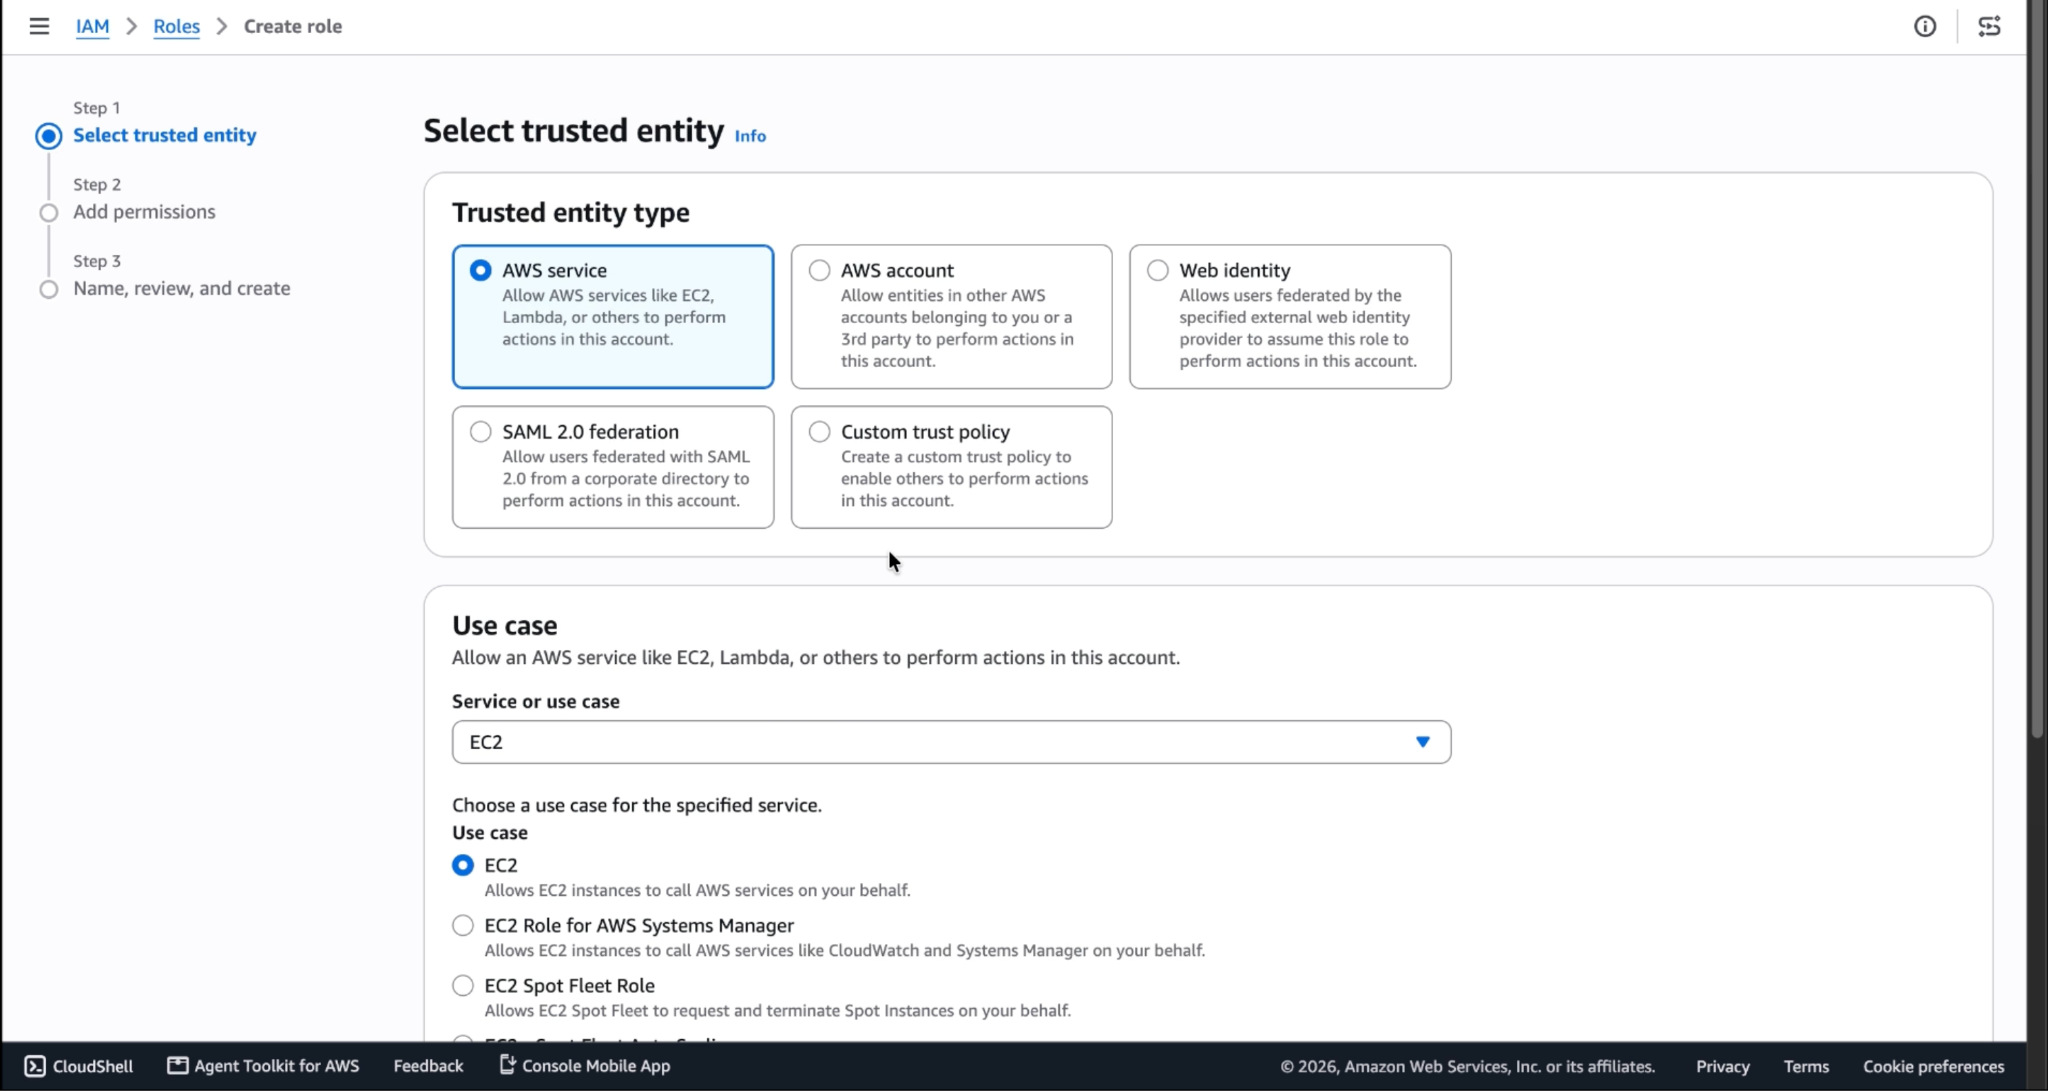
Créer un rôle
-
Allez sur IAM services dans la console AWS.
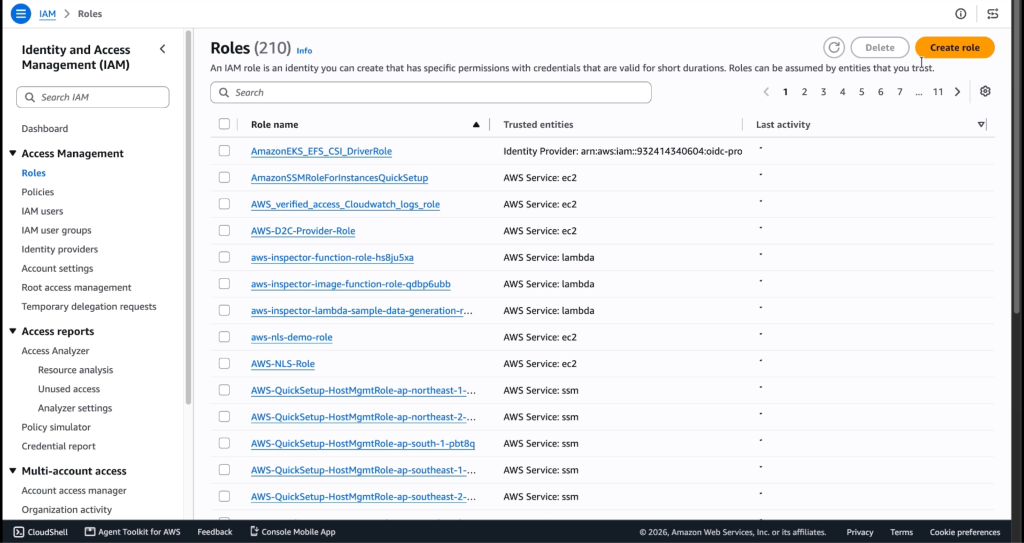
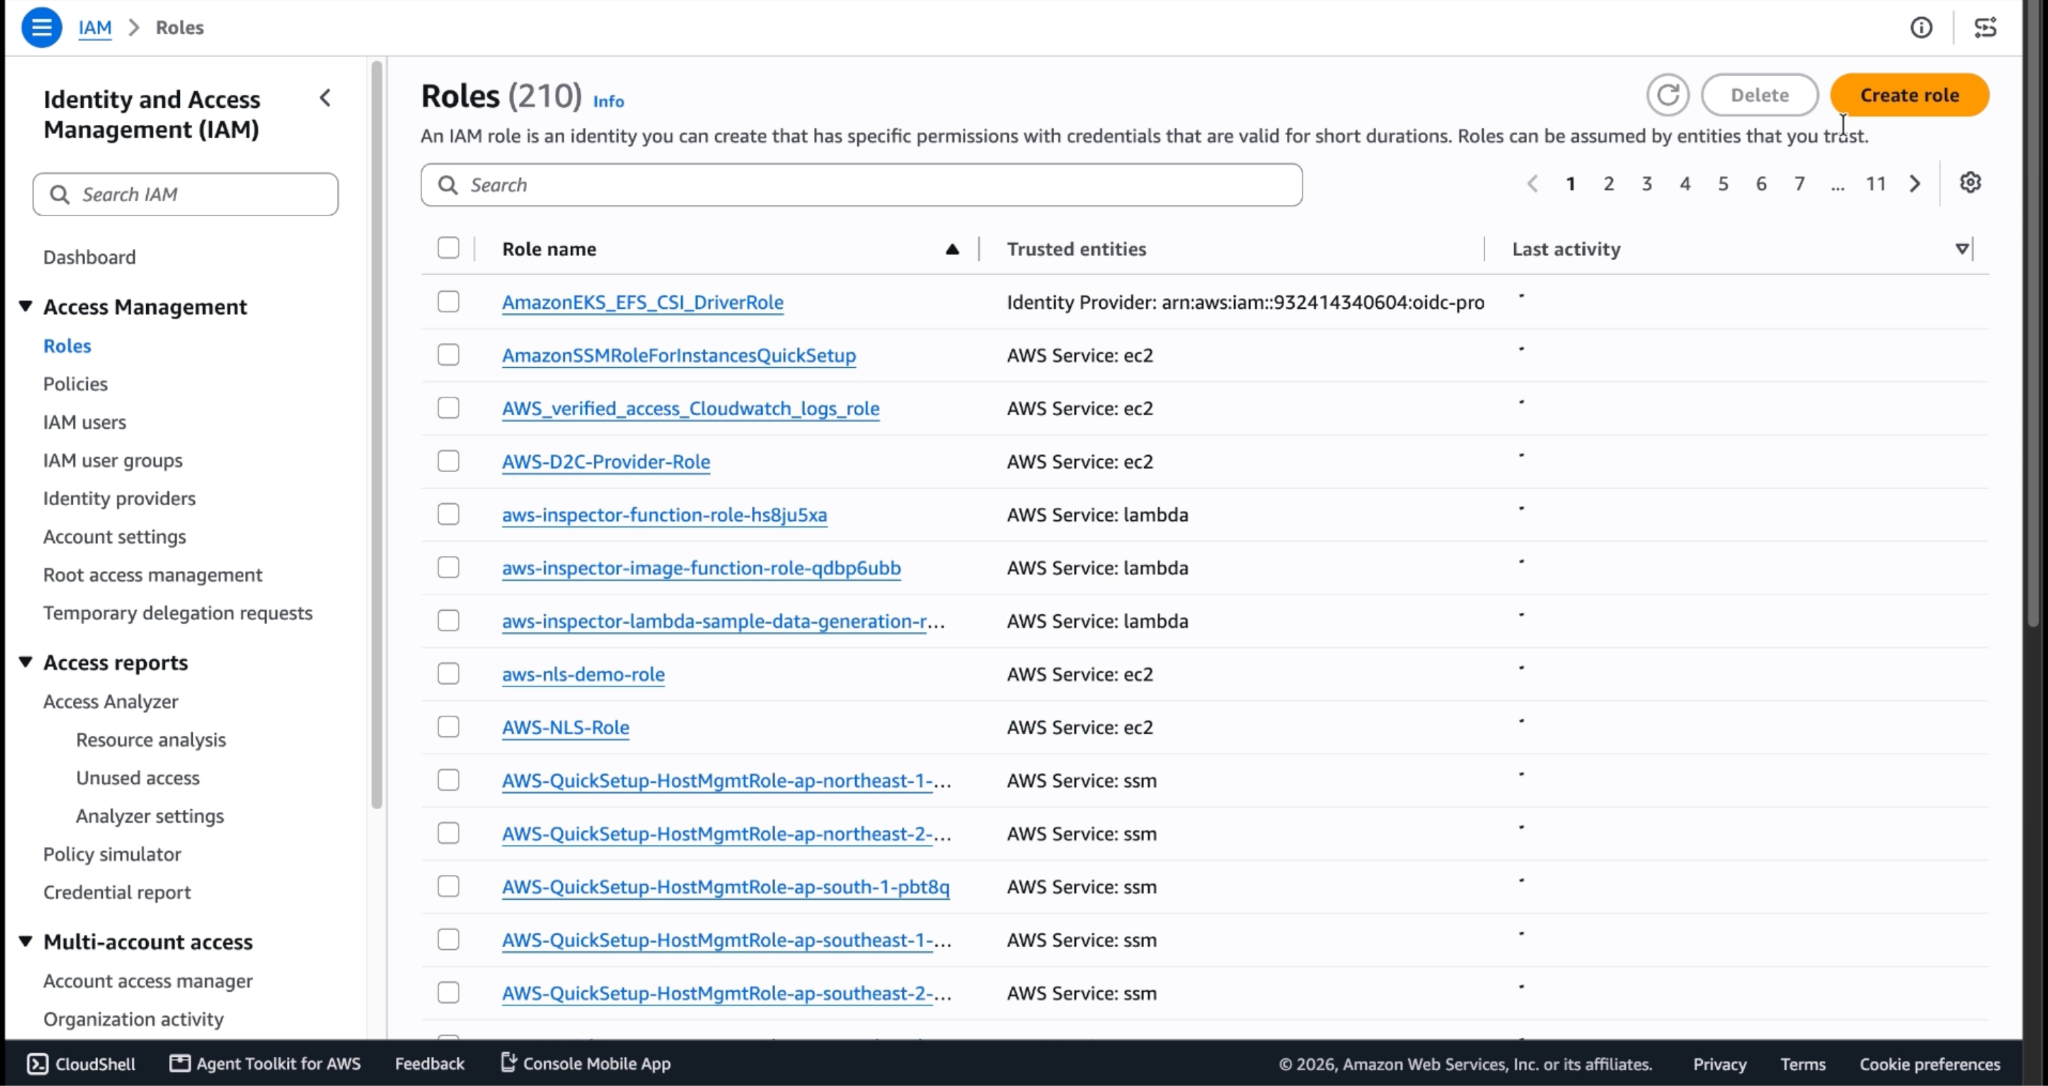
-
Cliquez sur Create role.
-
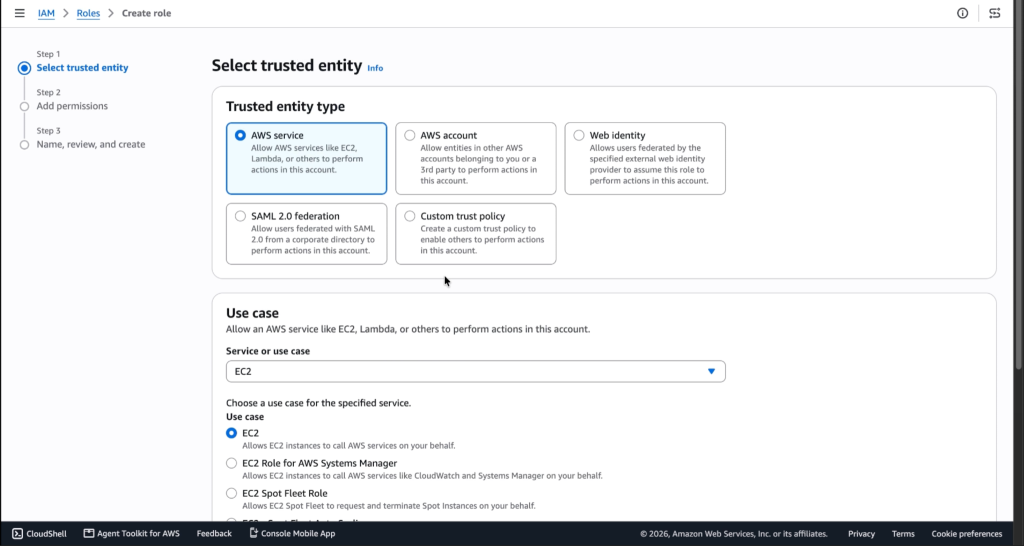
Select le AWS Service.
-
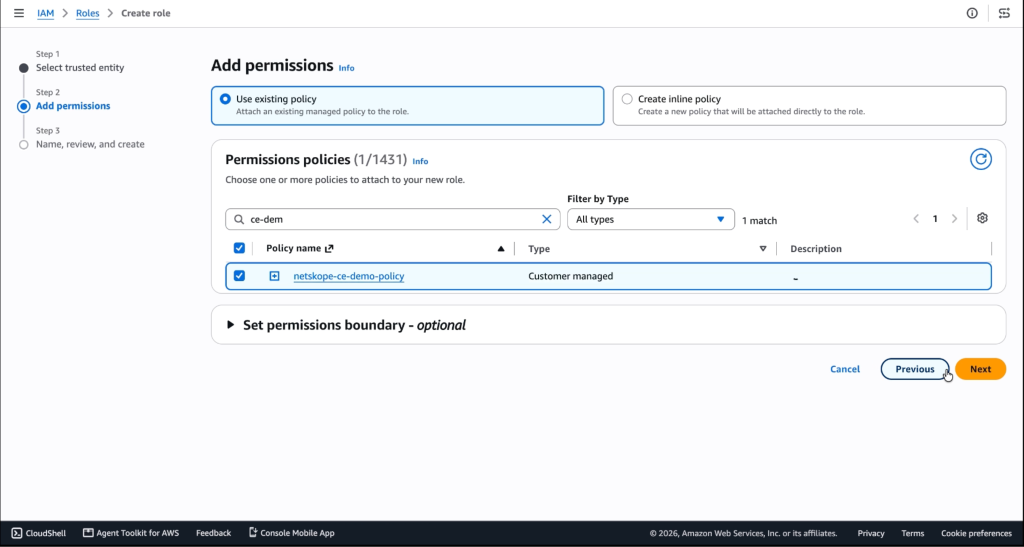
Pour le cas d'utilisation, sélectionnez EC2.
-
Cliquez sur Next.
-
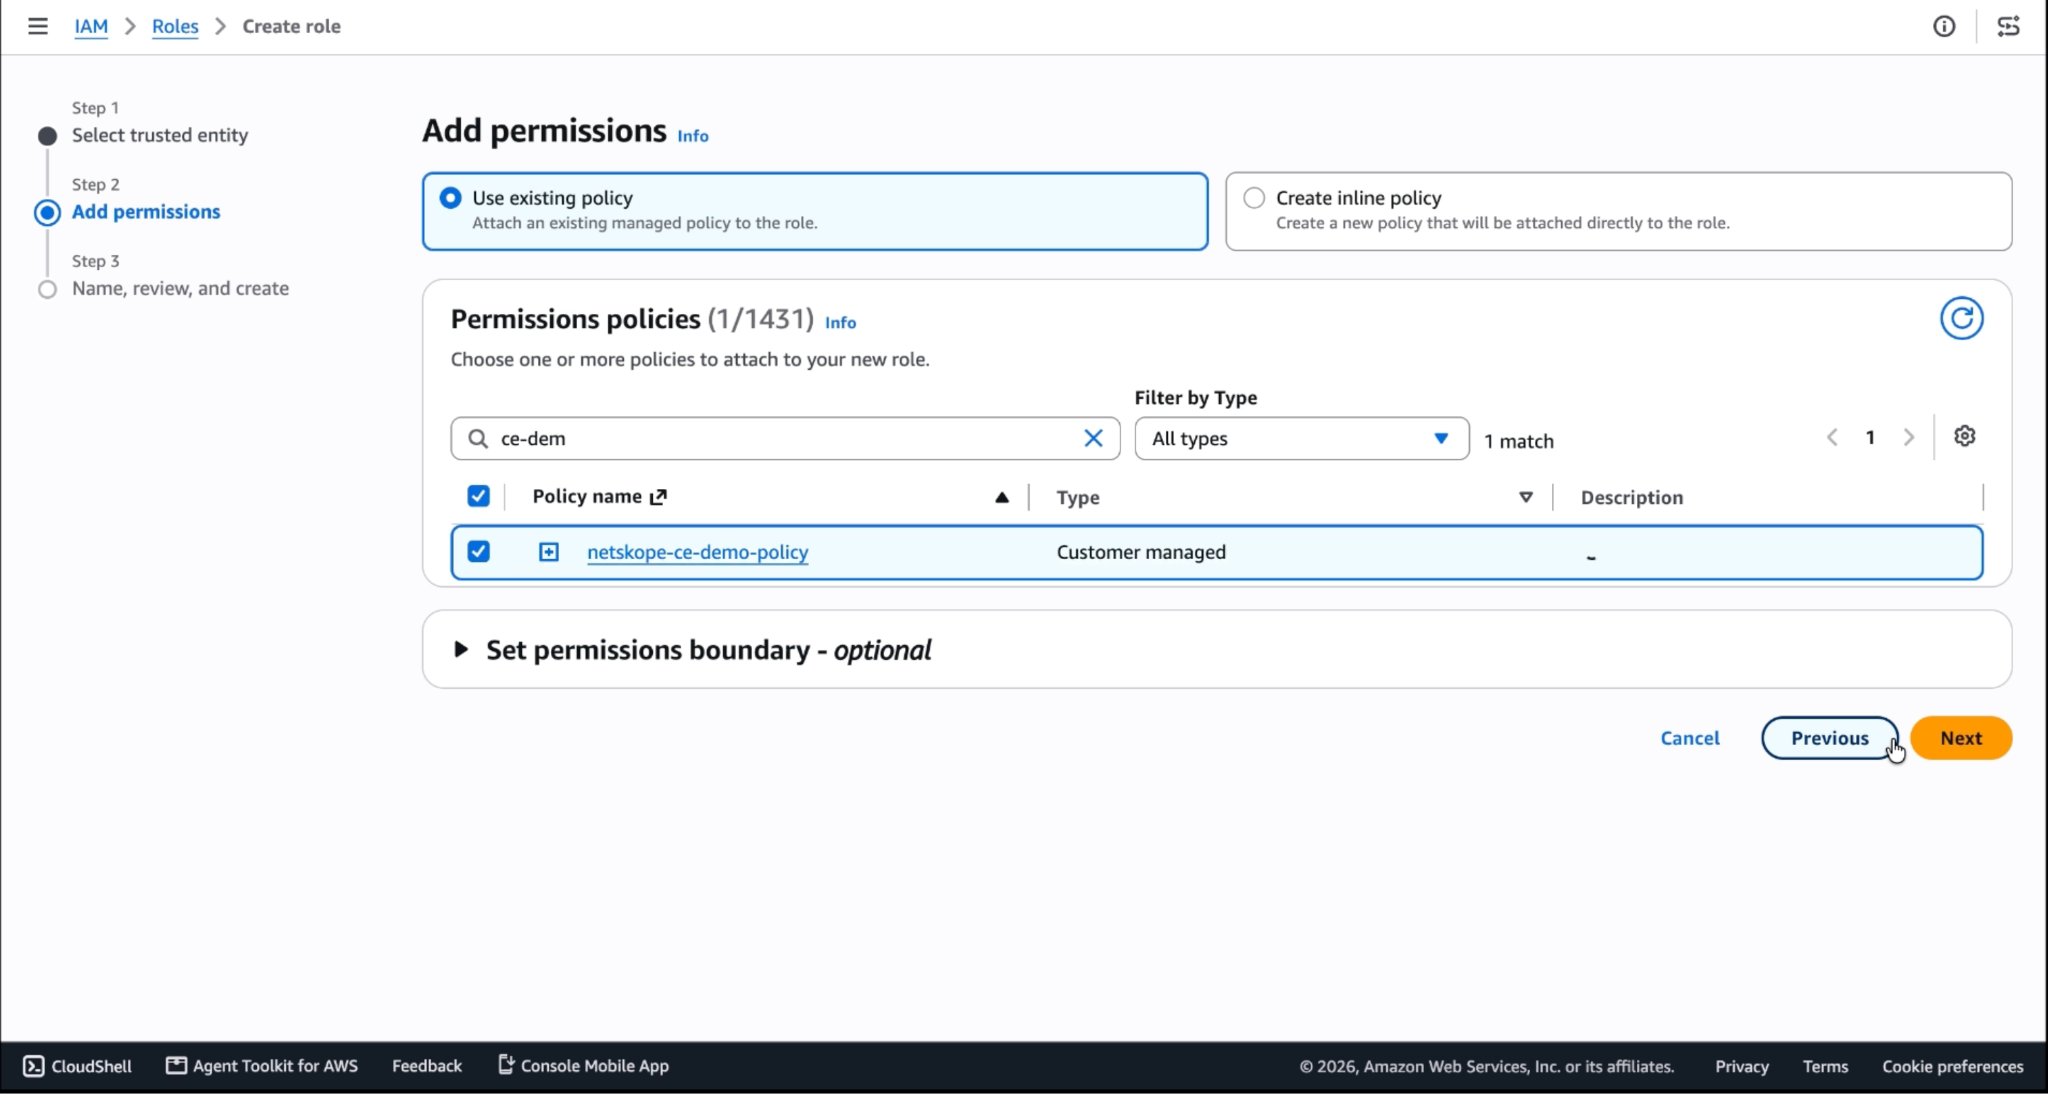
Select la politique de permission créée dans votre Bucket Policy.
Politique :
{ "Version": "2012-10-17", "Statement": [ { "Sid": "VisualEditor0", "Effect": "Allow", "Action": [ "s3:GetBucketLocation", "s3:PutObject", "s3:ListBucket", "s3:CreateBucket" ], "Resource": "*" } ] } -
Cliquez sur Next.
-
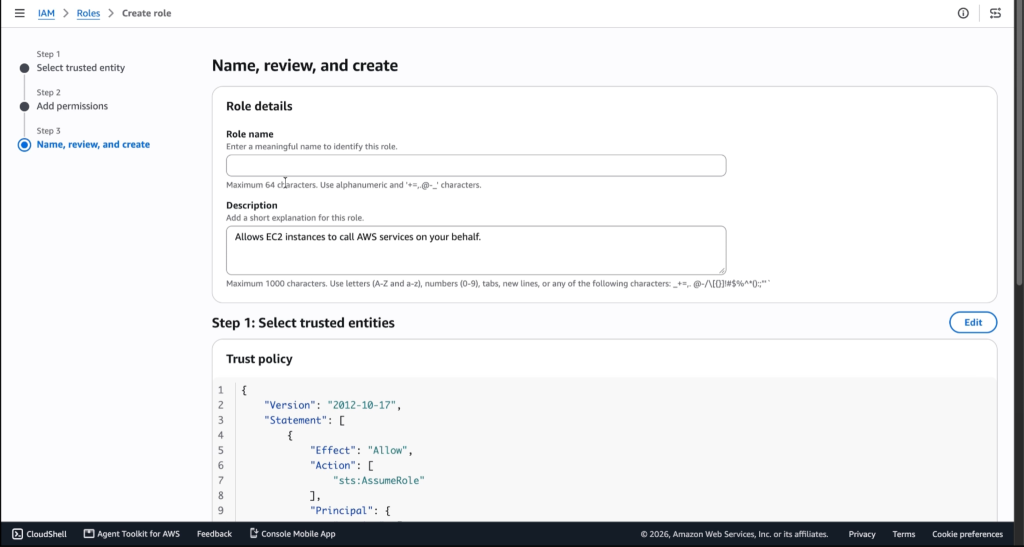
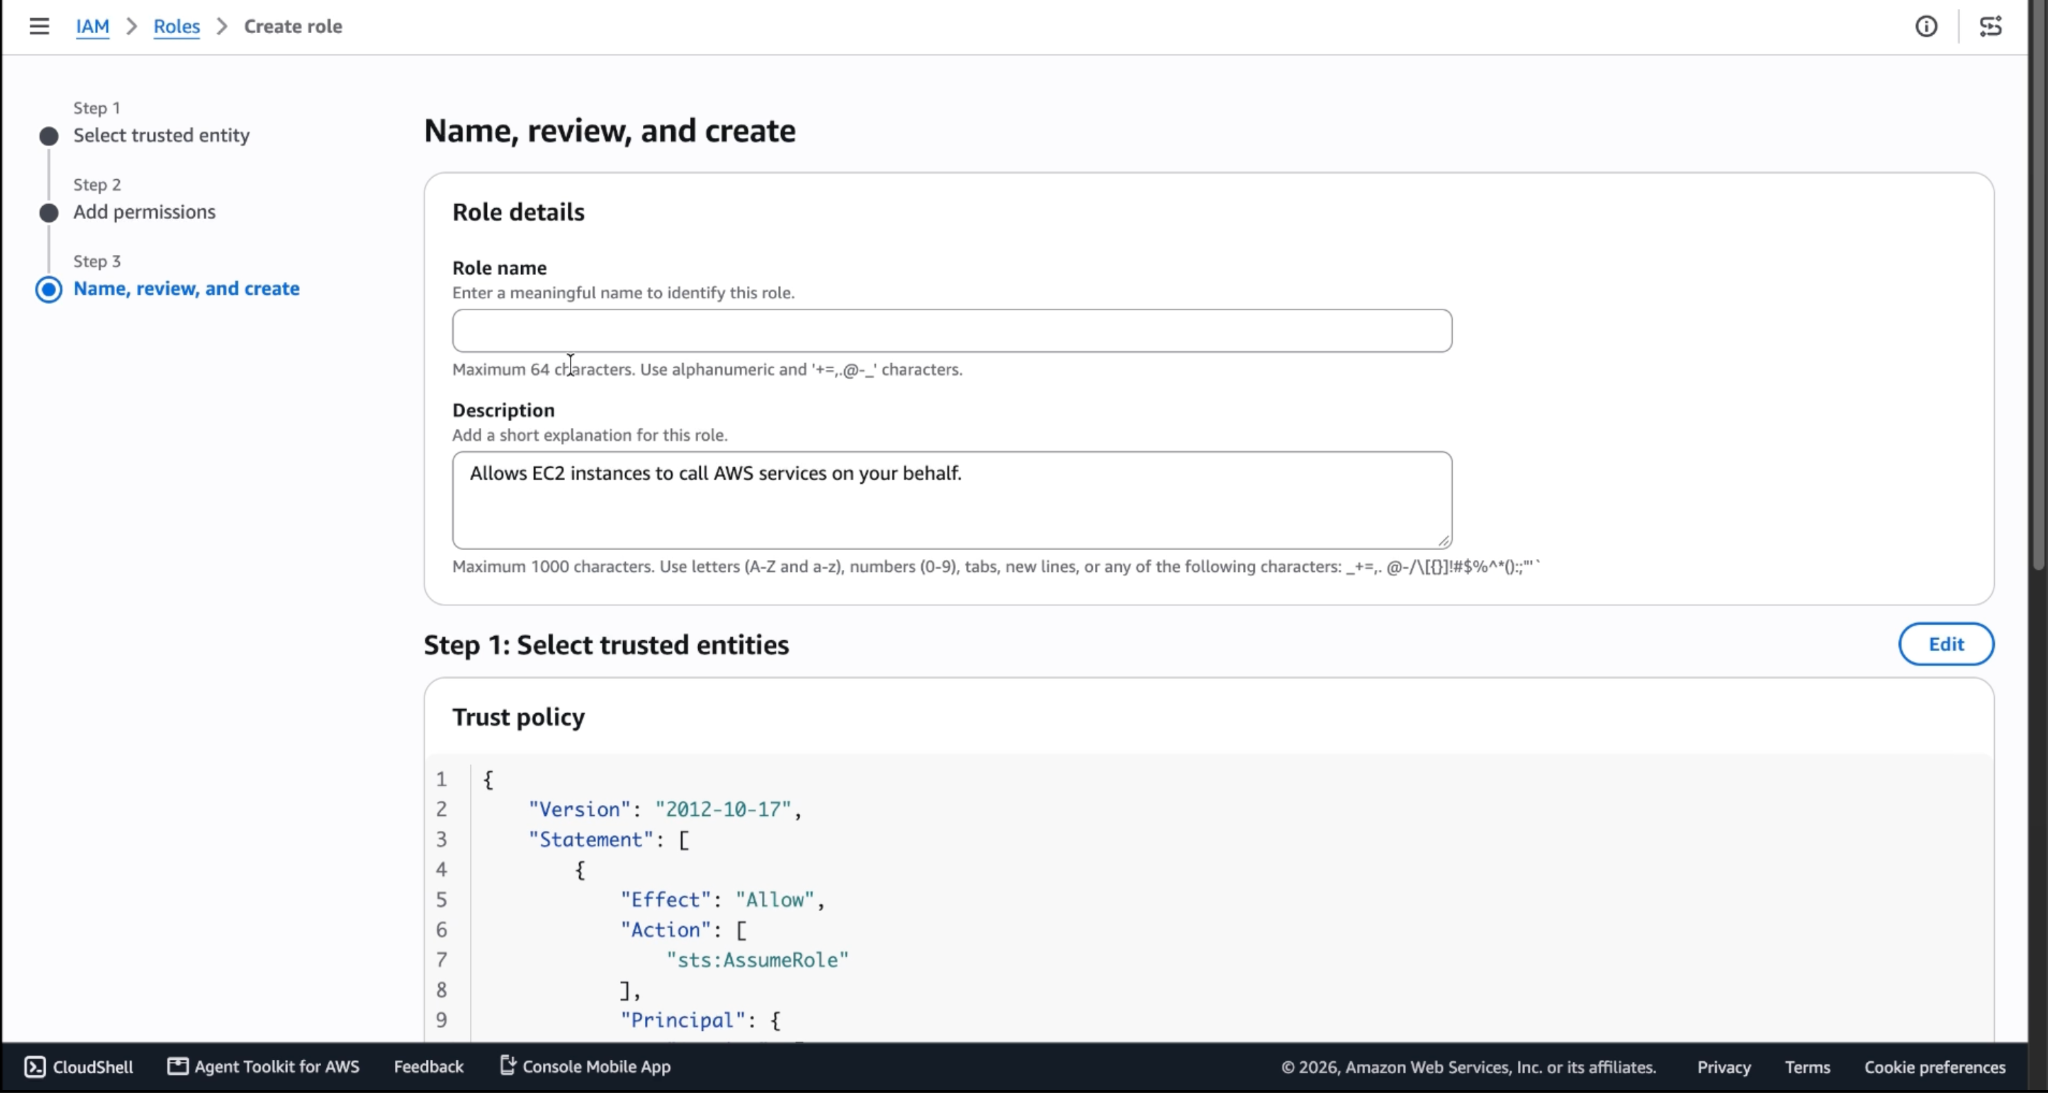
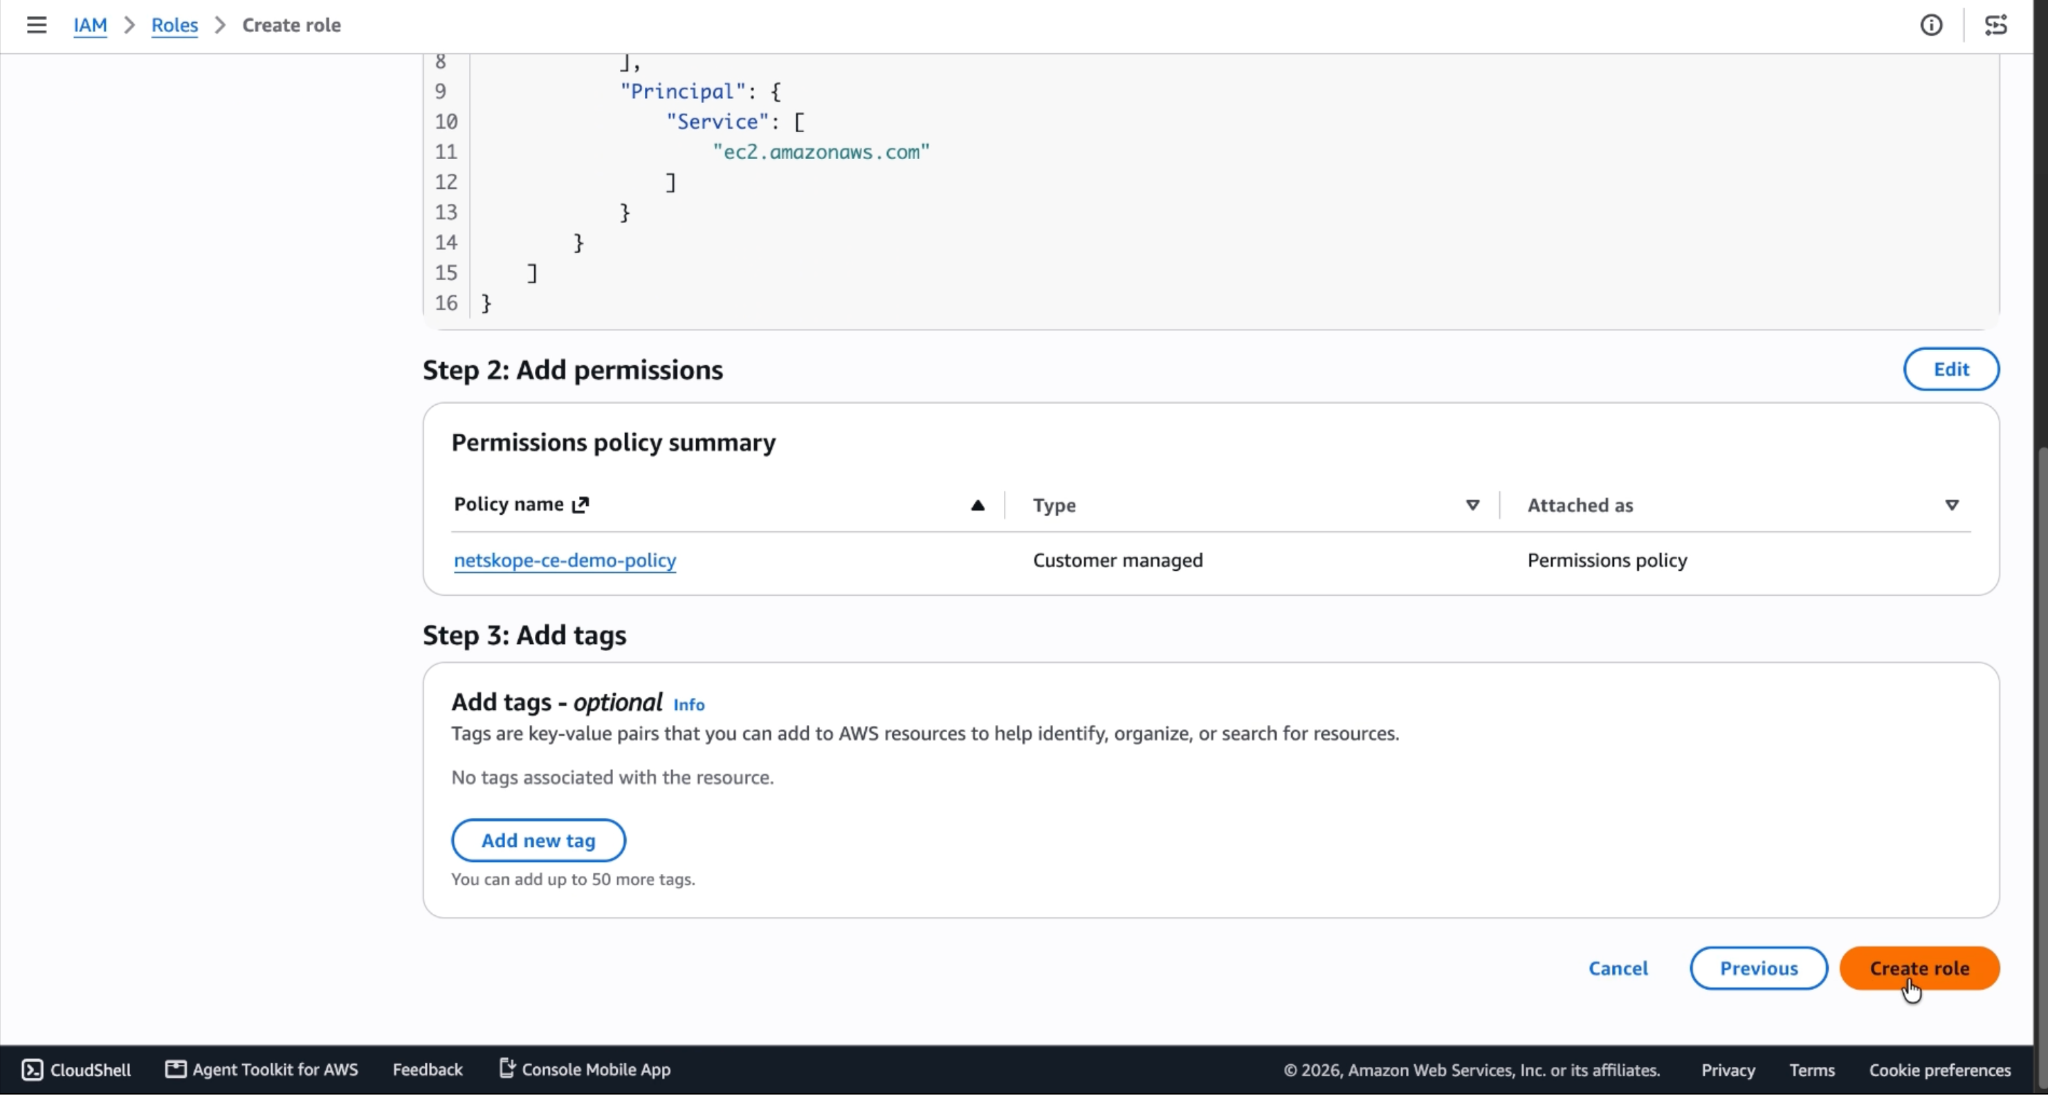
Enter a Role Name (like netskope-ce-instance-role), and add a Description.
-
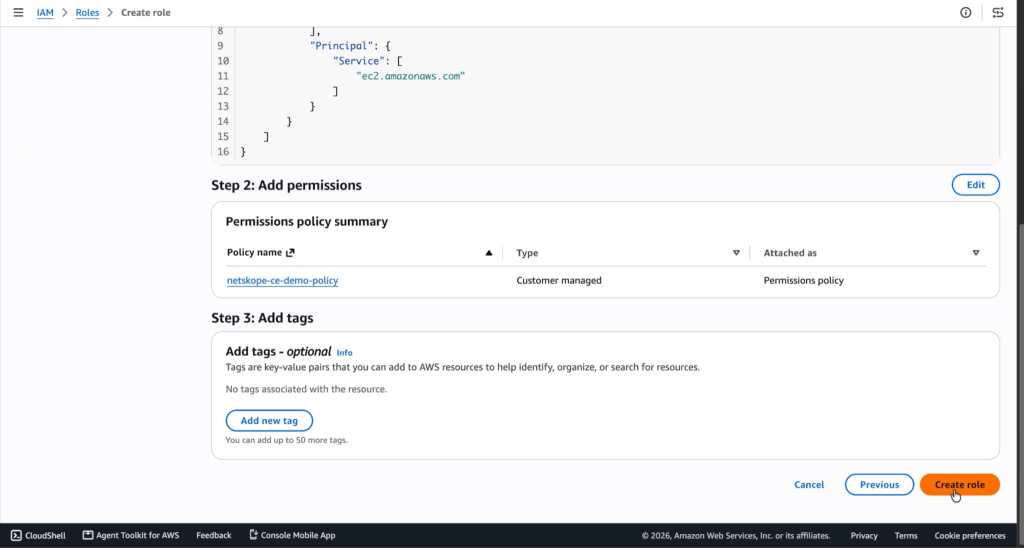
Cliquez sur Create Role.
 For this configuration, both the Netskope instance and S3 Bucket should be in the same region.
Attribuer un rôle à une instance EC2
-
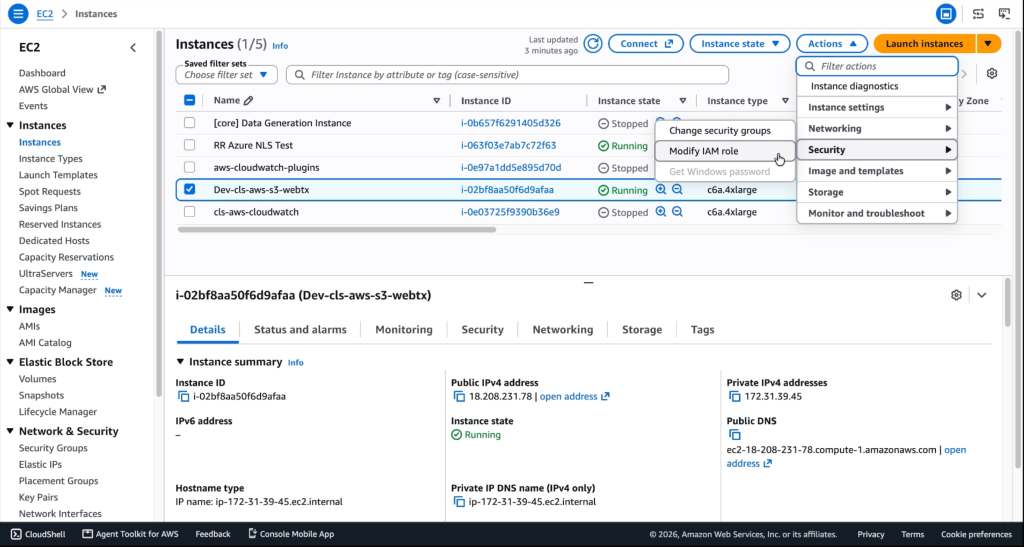
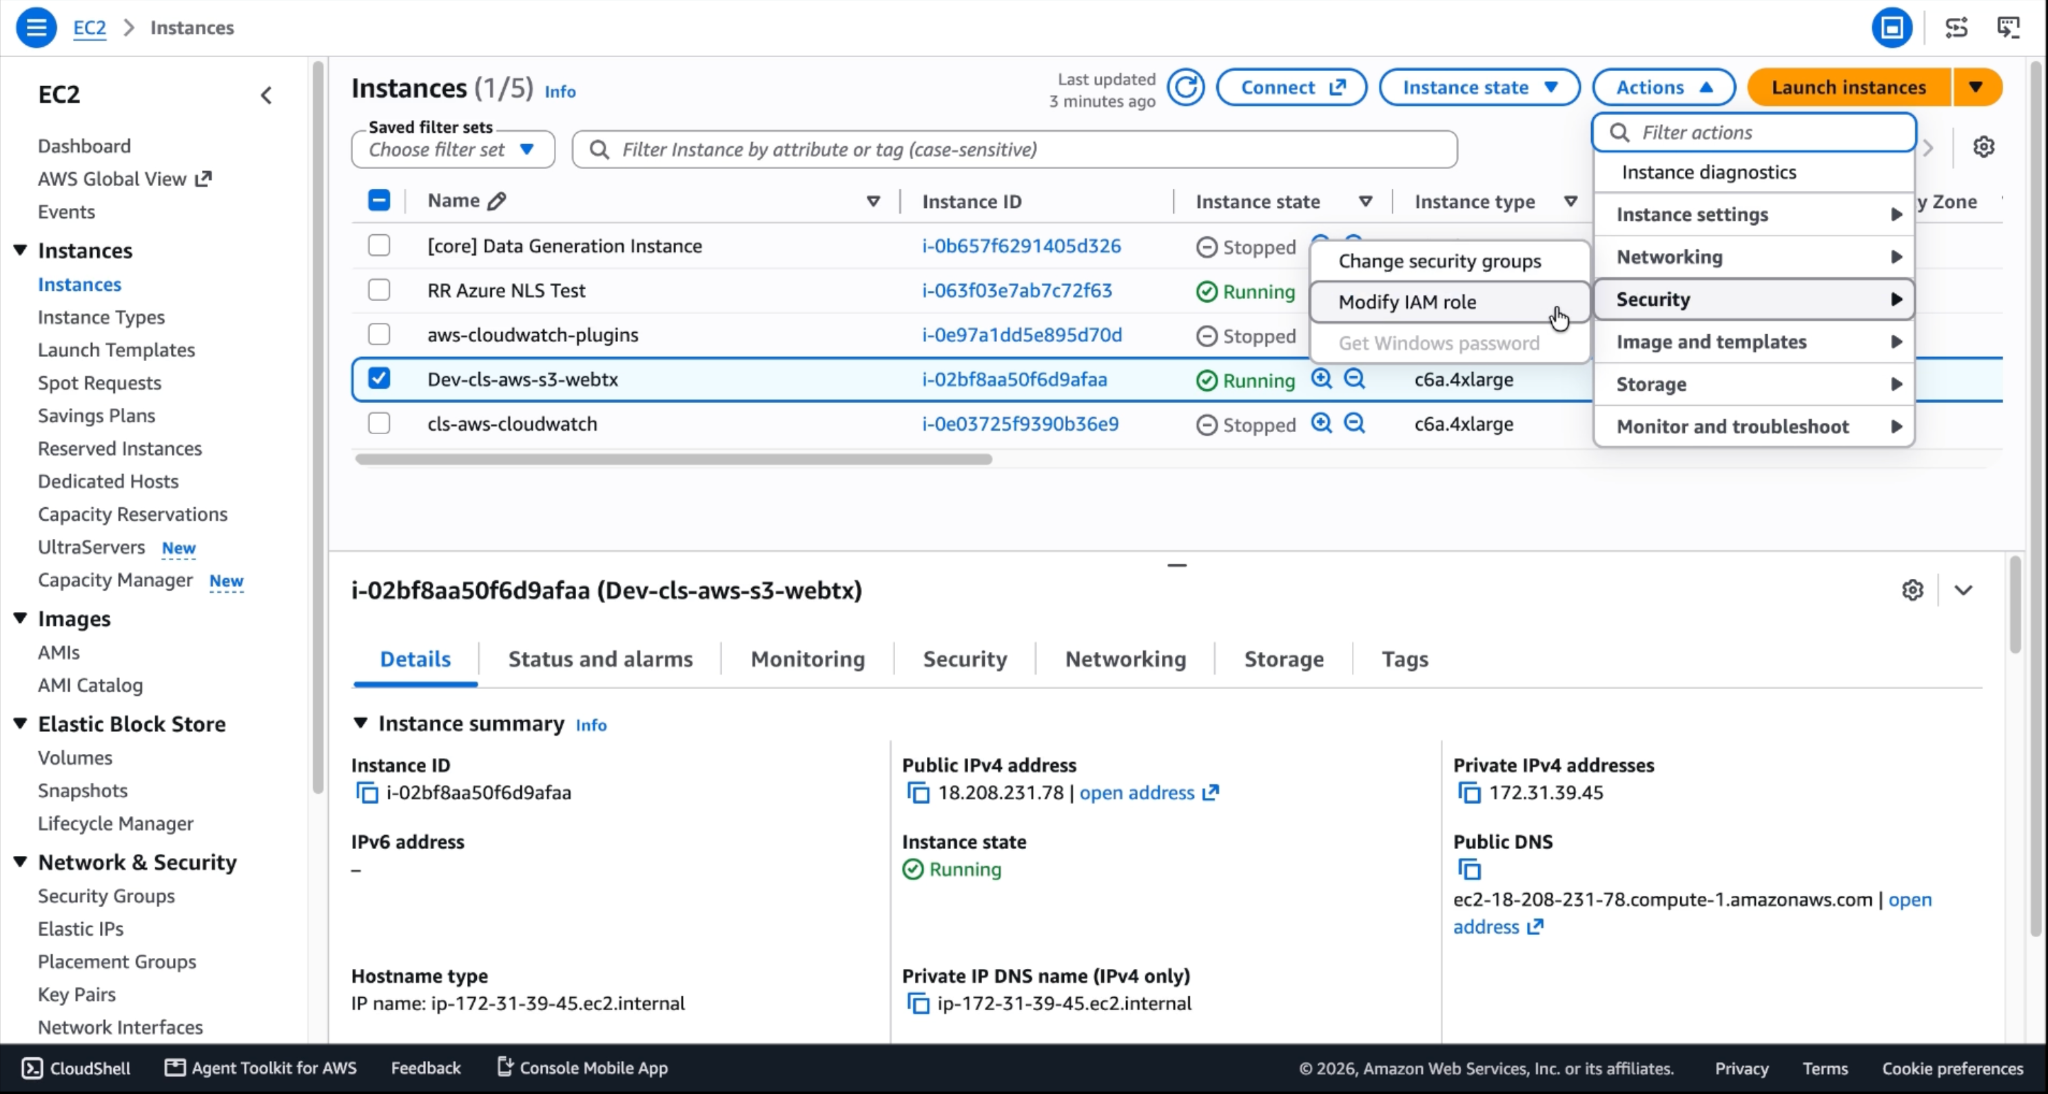
Ouvrez la console de votre instance EC2.
-
Click Instances under Instances.
-
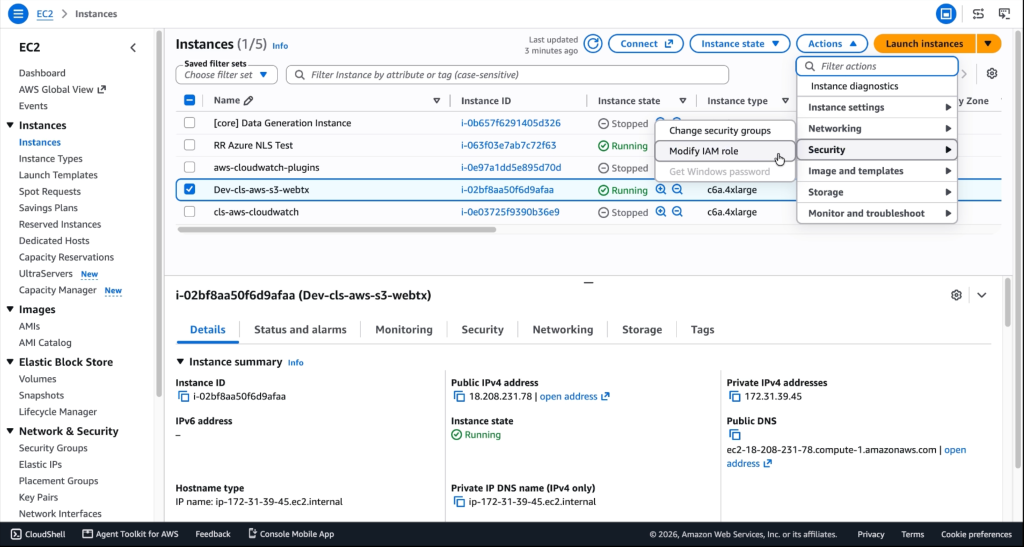
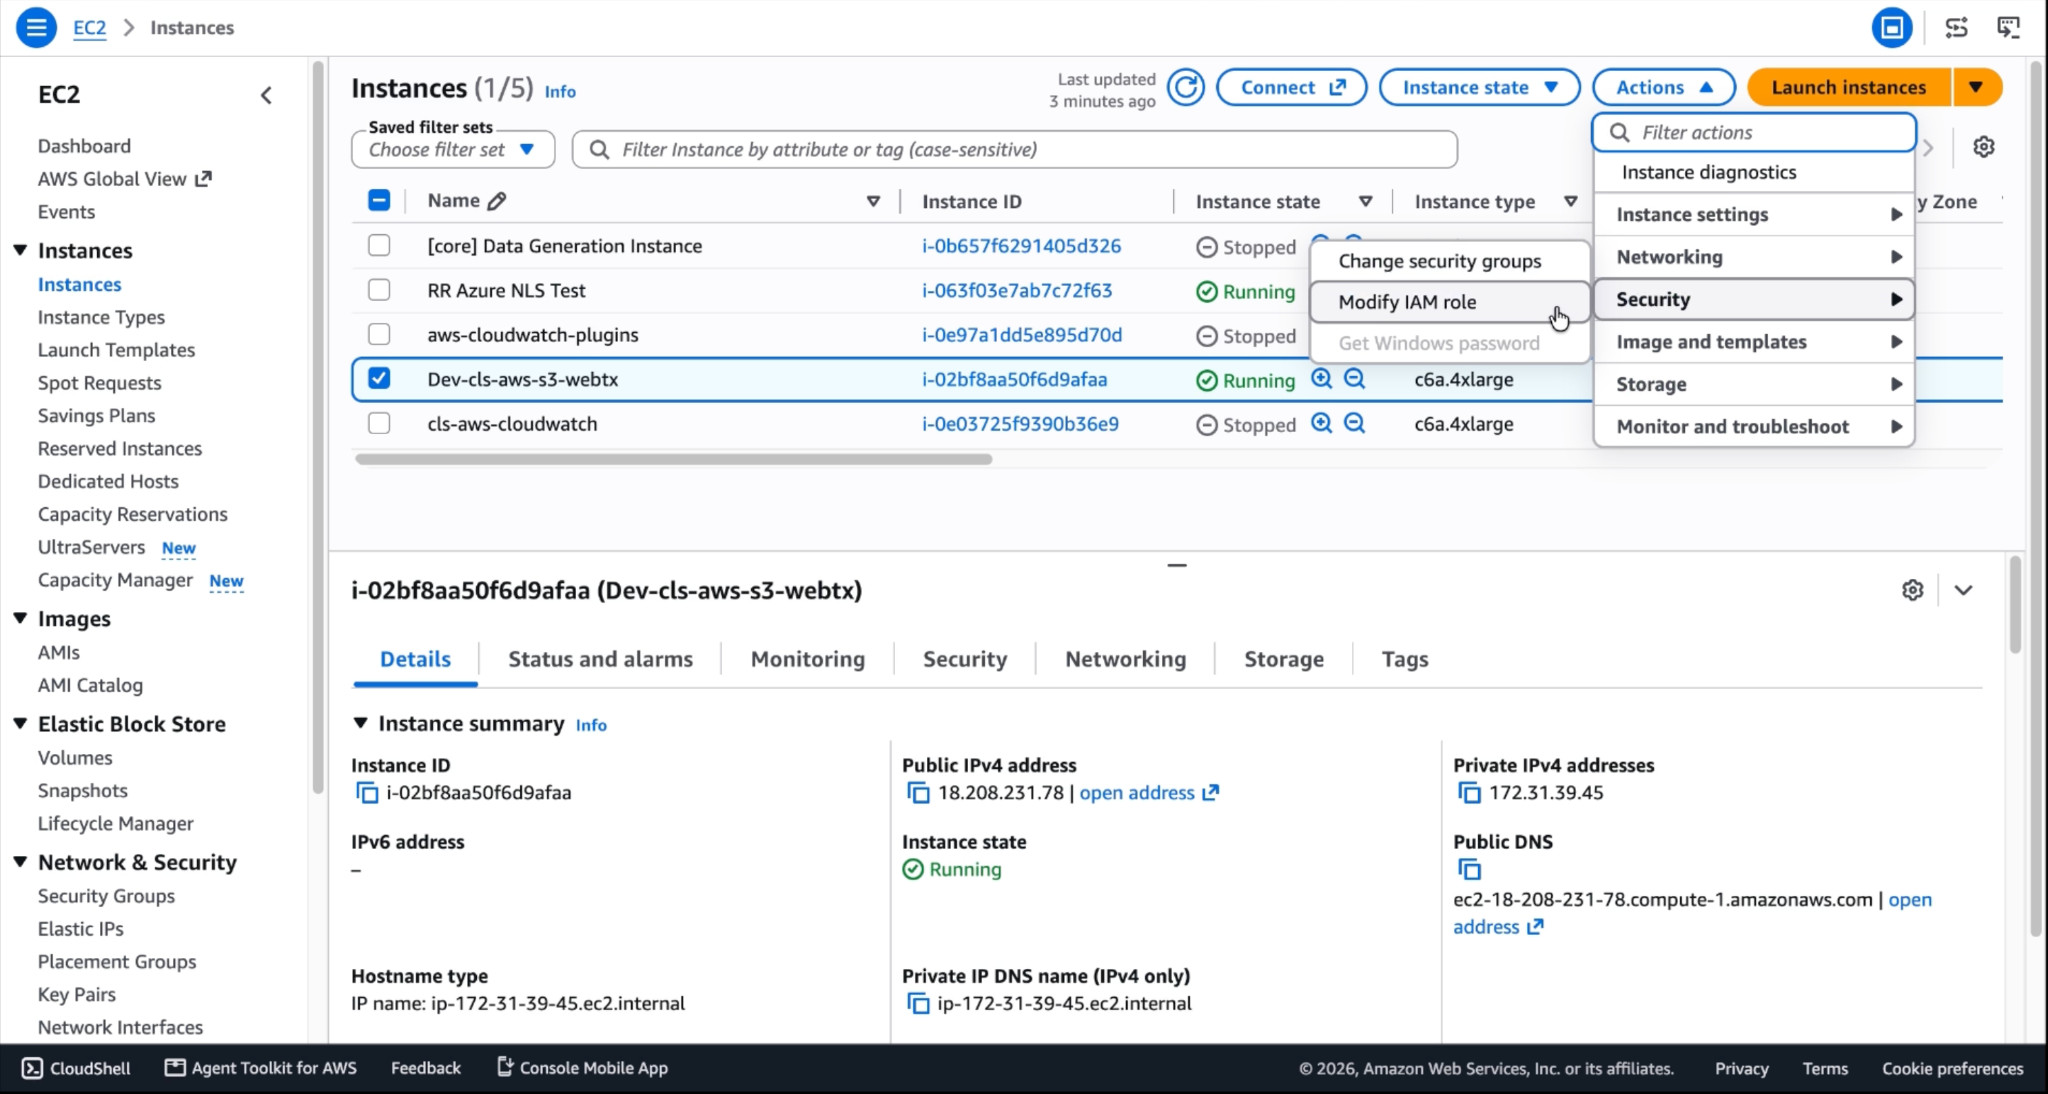
Allez sur Action > Security > Modify IAM Role.
-
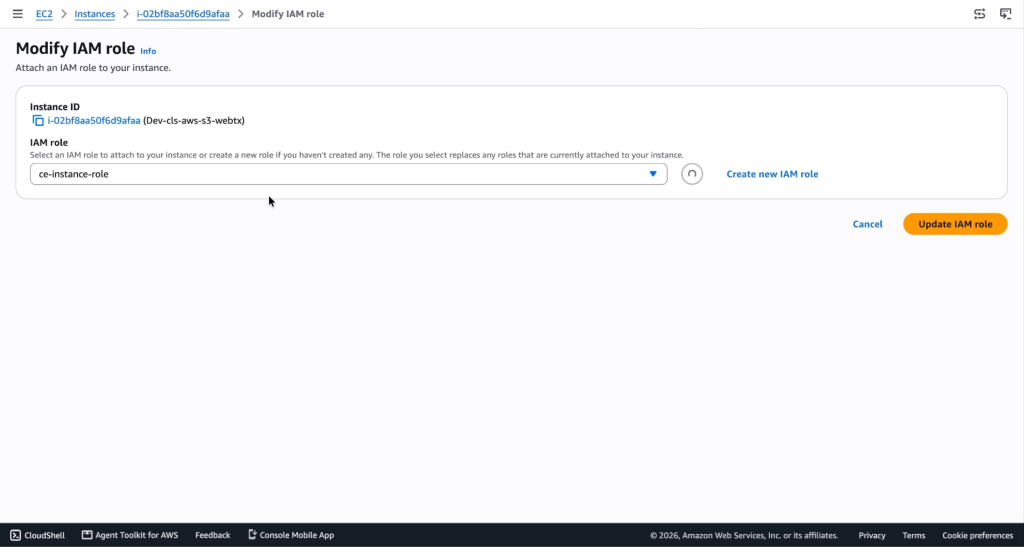
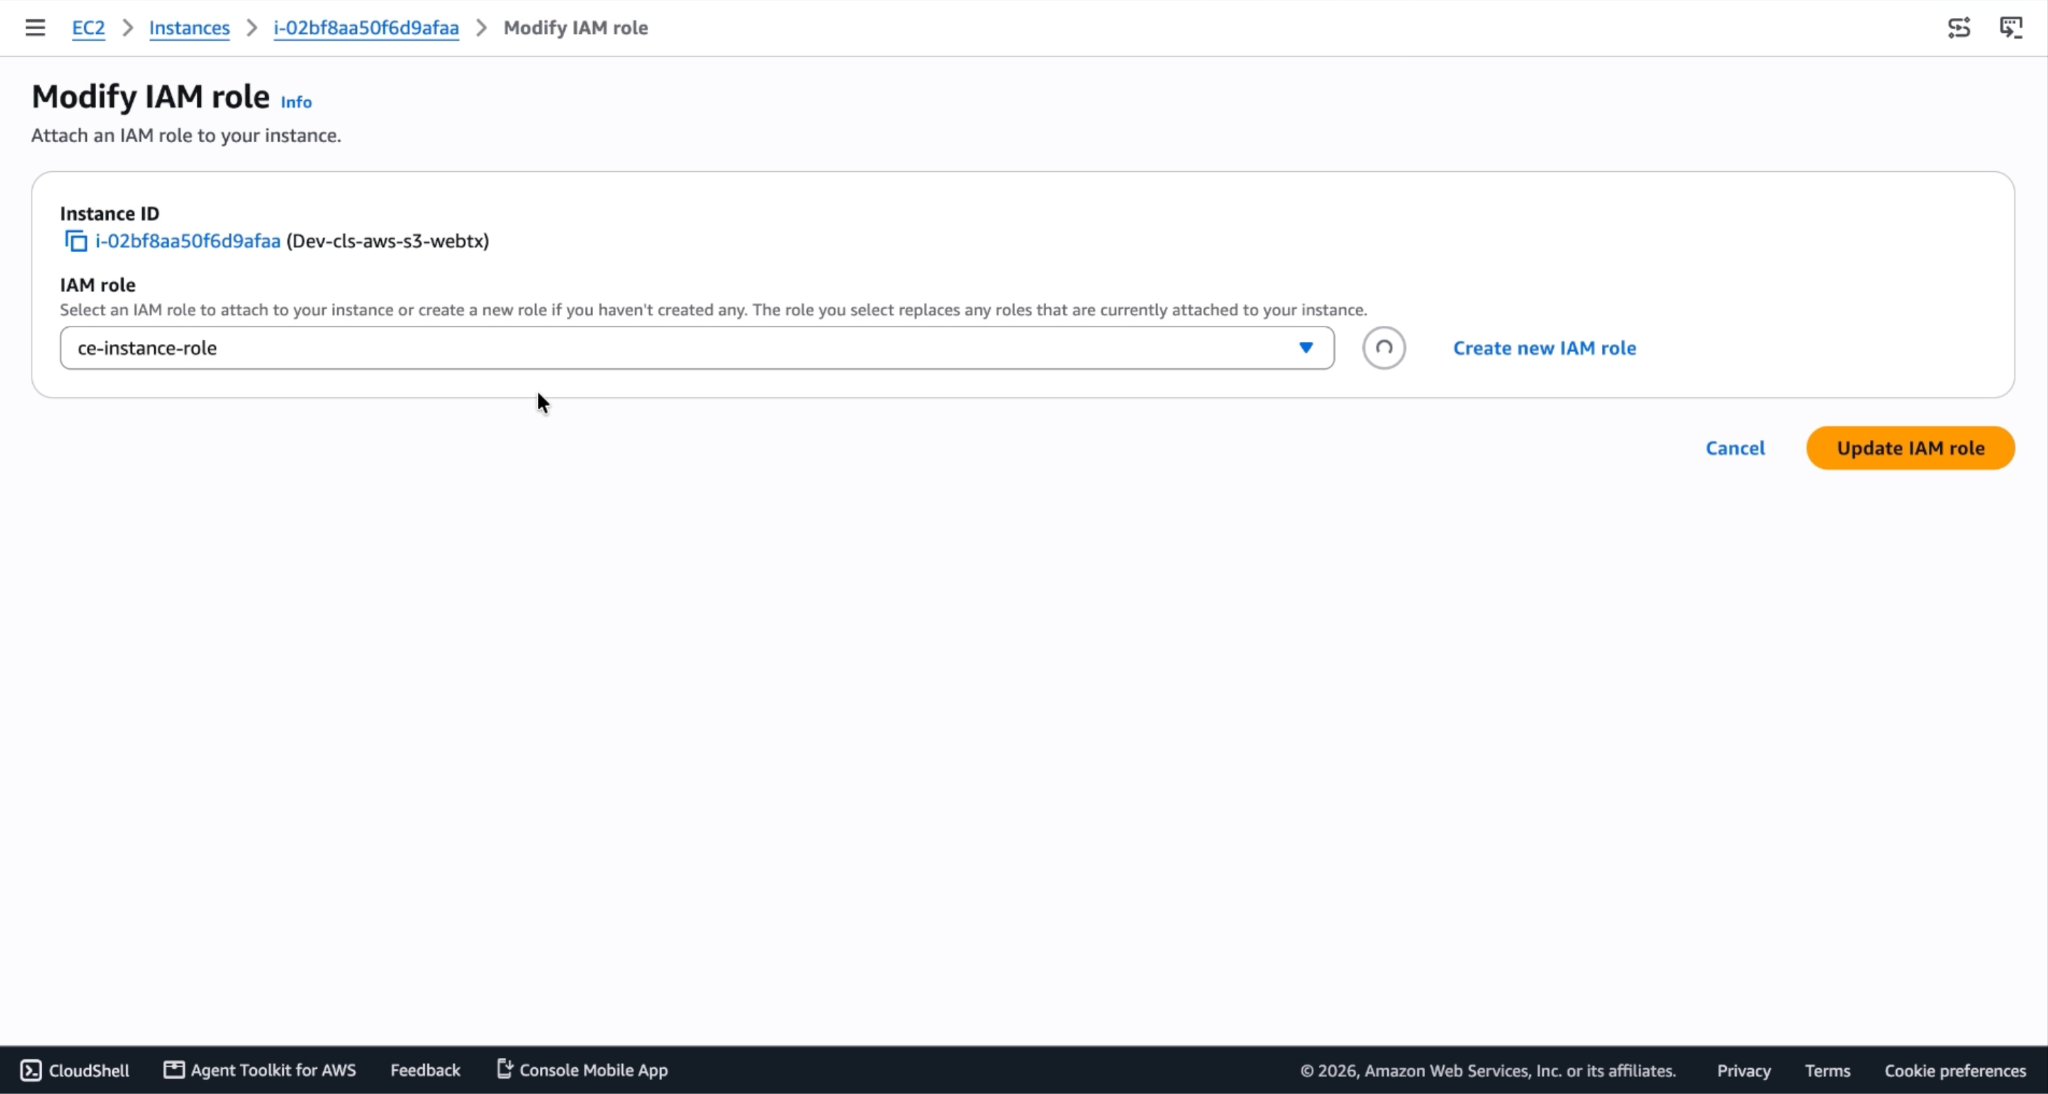
Select the Role that you created previously (like netskope-ce-instance-role).
-
Cliquez sur Update IAM Role.
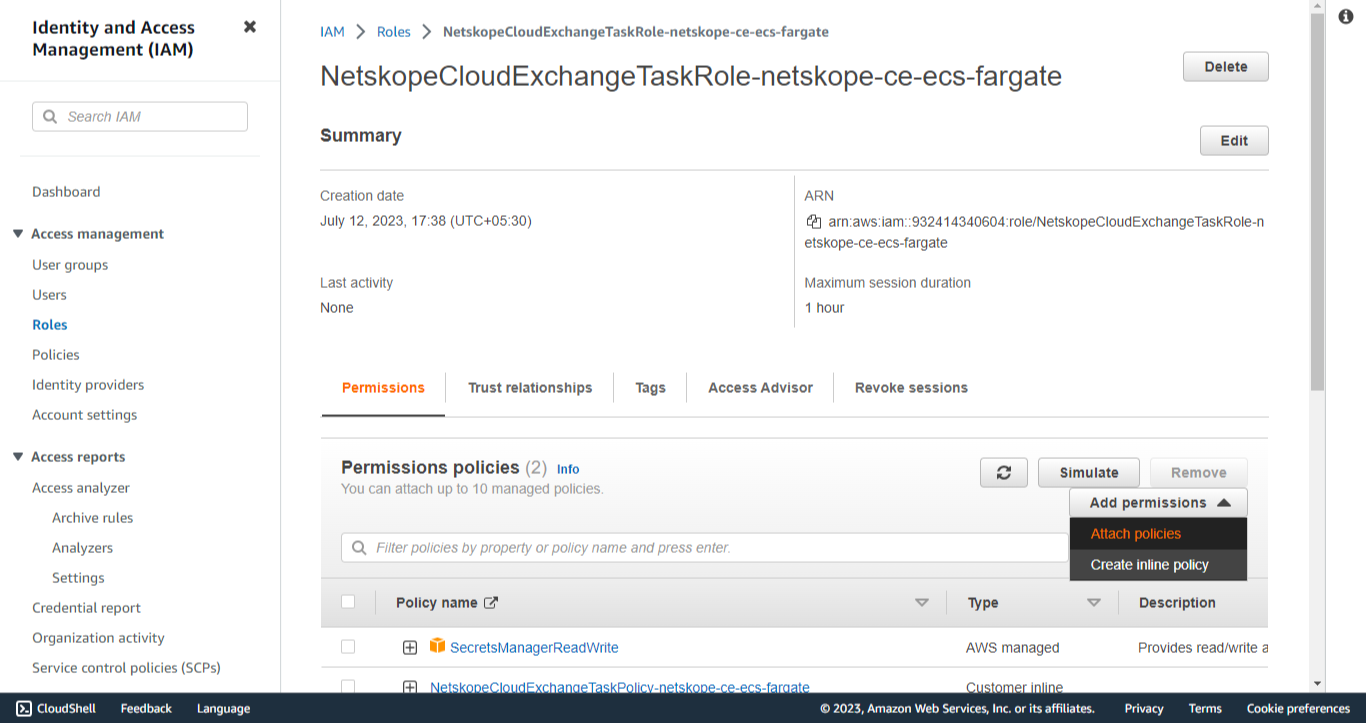
Attribuer un rôle à une instance de Fargate
-
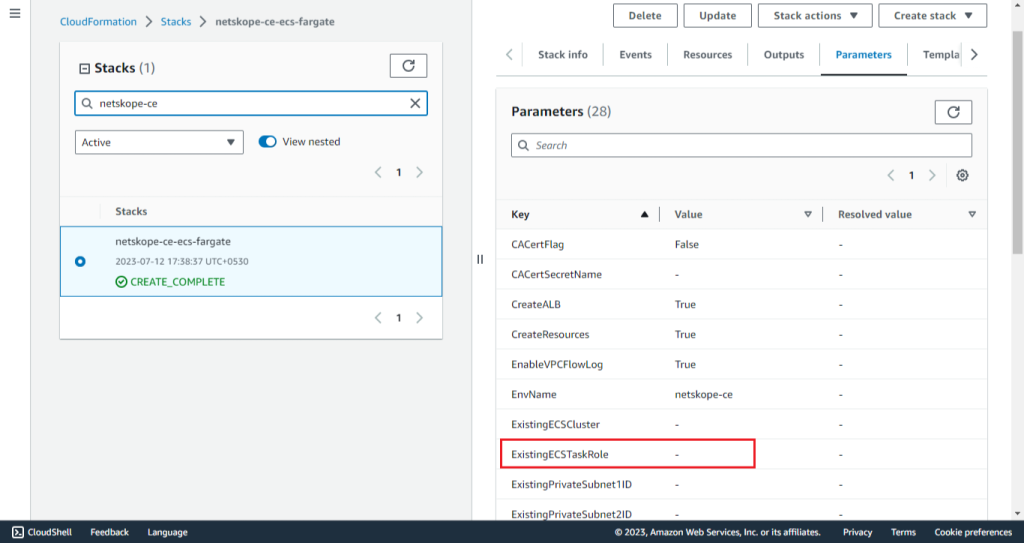
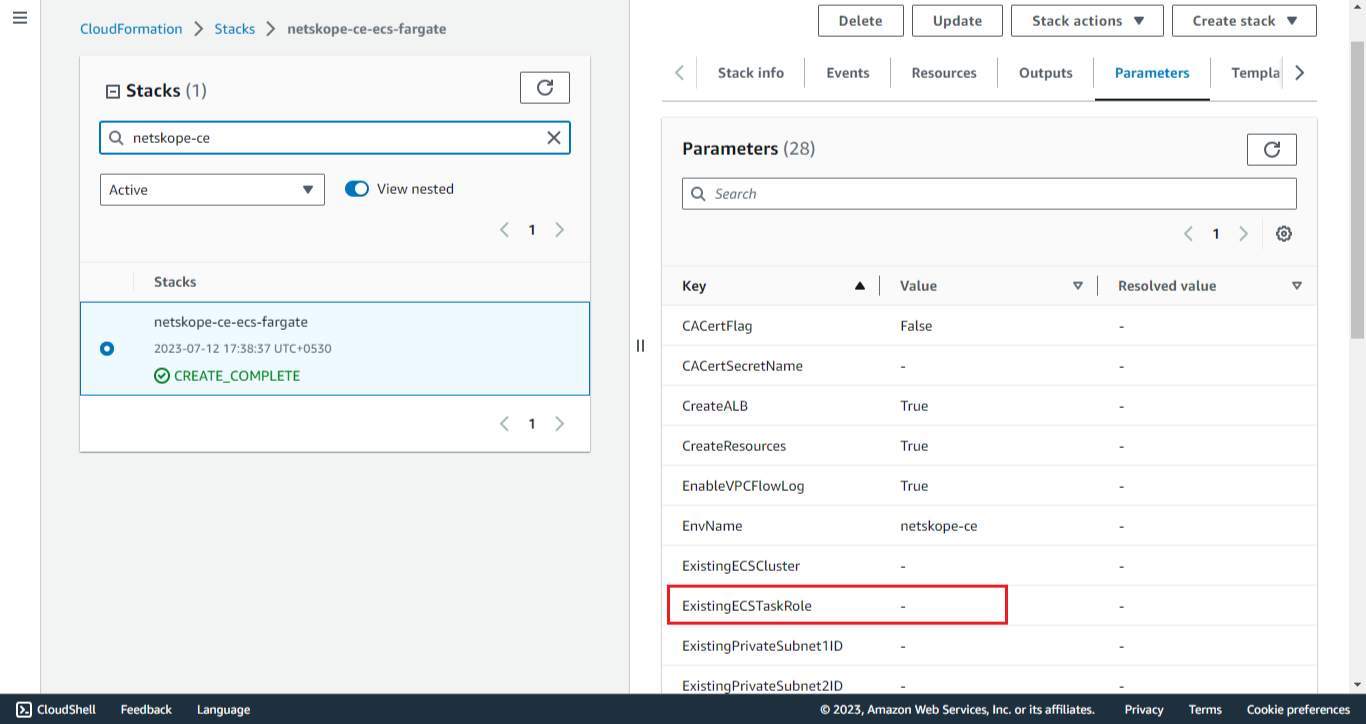
Ouvrez votre script CFN.
-
Get the ExistingECSTaskRole Parameter value if present.
-
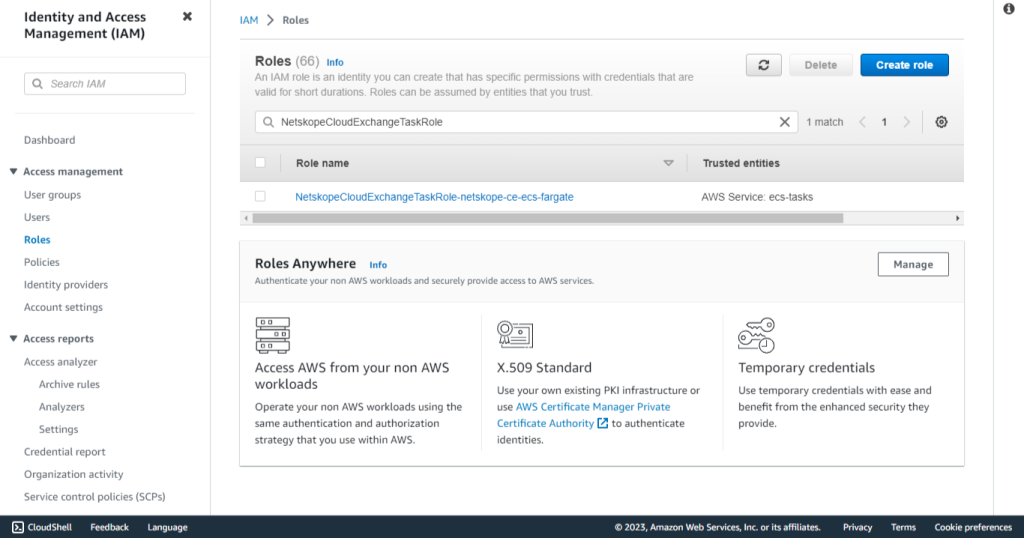
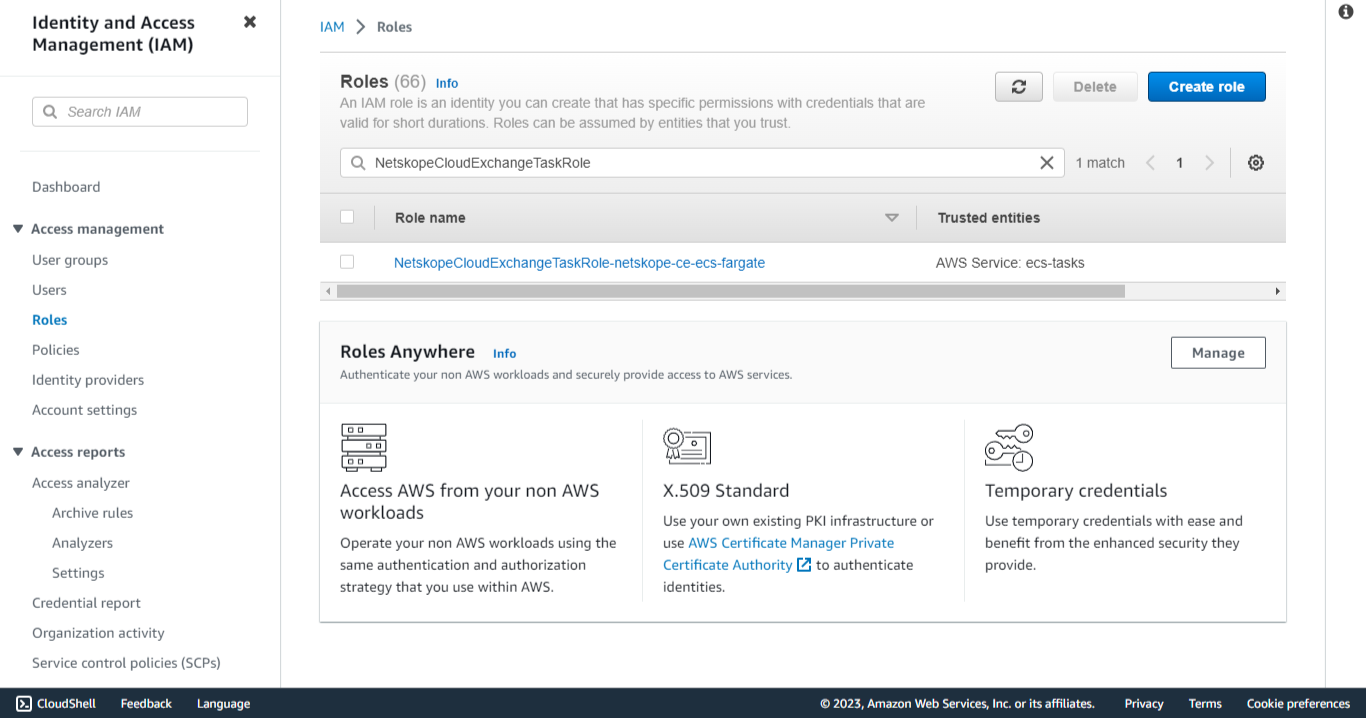
Allez sur IAM > Roles.
-
Search for the ExistingECSTaskRole parameter value. Otherwise, search for NetskopeCloudExchangeTaskRole-<CFN name> and select the role.
-
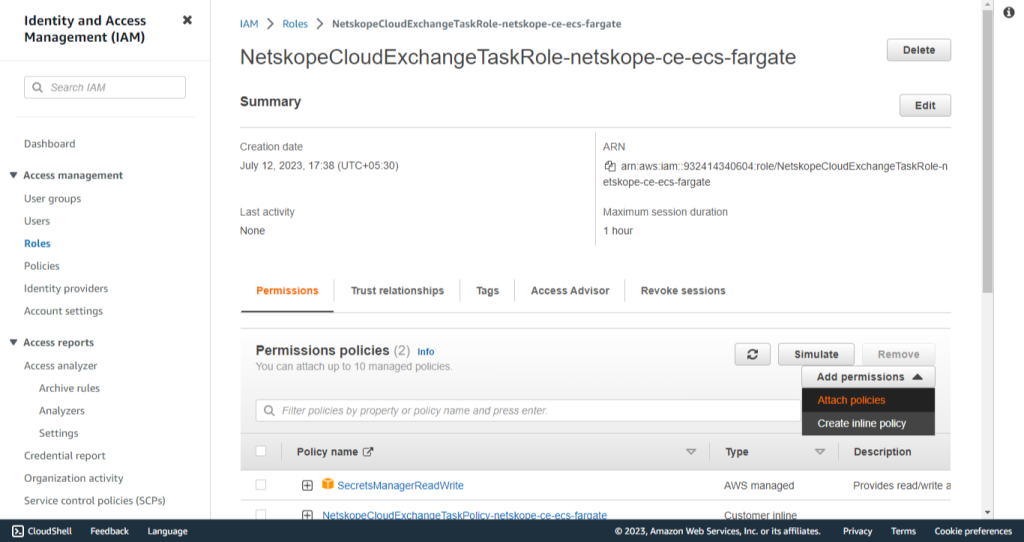
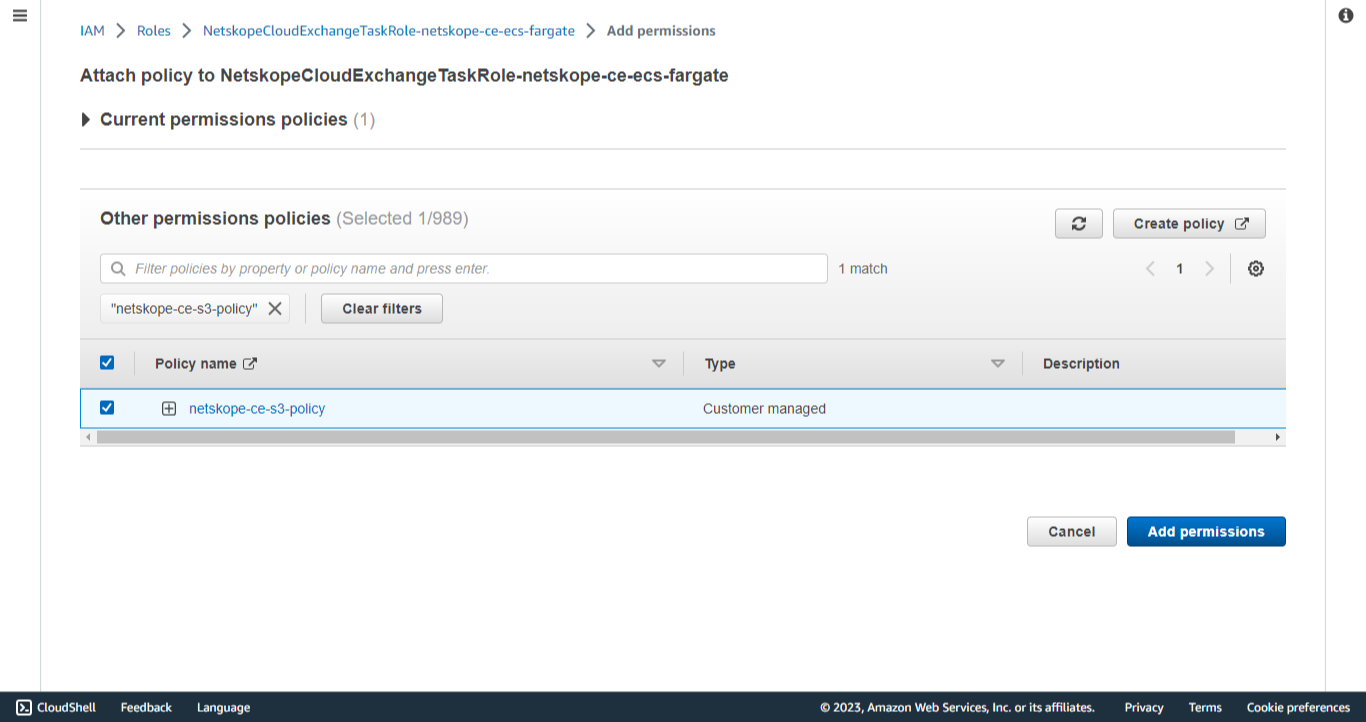
Attachez à ce rôle la politique de création de seaux créée précédemment.
-
Cliquez sur Add permission > Attach policies.
-
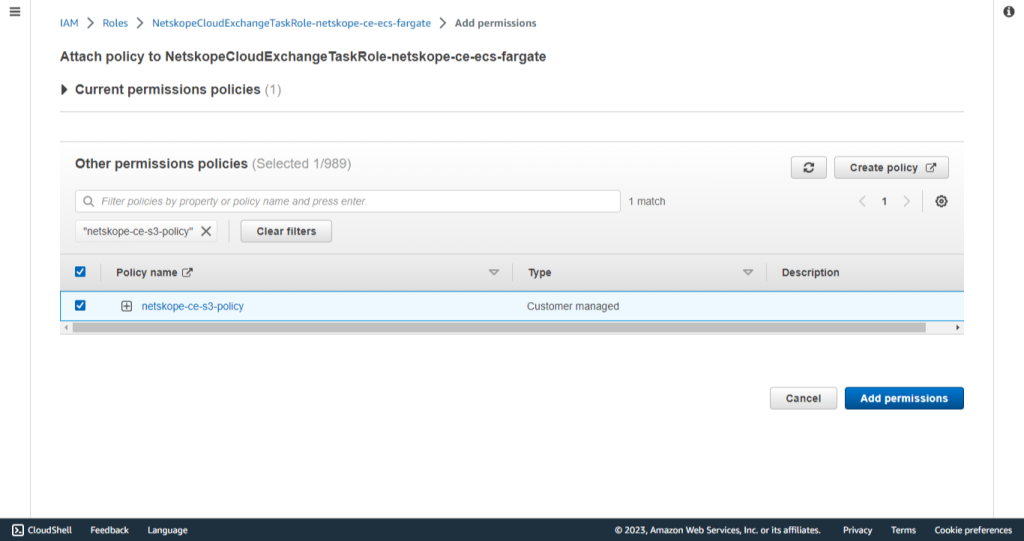
Recherchez et sélectionnez la politique de seau précédemment créée (Netskope-ce-s3-policy).
-
Cliquez sur Add permissions.
Attribuer le rôle à une instance de K8s
-
Ouvrez votre rôle créé pour ServiceAccount lors de la création de l'instance K8s.
-
Rattachez la politique de gestion des seaux créée précédemment.
Configurer un compartiment provisionné en externe
If the bucket is in an external AWS account, you work with two accounts:
- Account A (Plugin Account): The account that runs the Cloud Exchange instance (for example, an EC2 or Ubuntu VM that uses IAM Roles Anywhere).
- Account B (Core Account): The account that owns the externally provisioned S3 bucket.
Both policies below are required. AWS evaluates the policy on the Cloud Exchange role and the bucket policy on the external bucket, and the request fails with a 403 (AccessDenied) error if either one is missing.
On Account A (Plugin Account):
-
Allez sur IAM > Roles > <CE_ROLE_NAME>.
-
Add this policy:
{
    "Version": "2012-10-17",
    "Statement": [
        {
            "Effect": "Allow",
            "Action": [
                "s3:ListBucket",
                "s3:GetBucketLocation"
            ],
            "Resource": "arn:aws:s3:::<external bucket name>"
        },
        {
            "Effect": "Allow",
            "Action": [
                "s3:PutObject"
            ],
            "Resource": "arn:aws:s3:::<external bucket name>/*"
        }
    ]
}
s3:ListBucket and s3:GetBucketLocation are bucket-level actions, so the resource is the bucket ARN without /*. s3:PutObject is an object-level action, so the resource is the bucket contents with /*.
On Account B (Core Account):
-
Go to S3 > Bucket > Permissions > Bucket Policy and add this policy to grant the Cloud Exchange role in Account A access:
{ "Version": "2012-10-17", "Statement": [ { "Sid": "AllowCECrossAccountAccess", "Effect": "Allow", "Principal": { "AWS": "arn:aws:iam::<ACCOUNT_A_ID>:role/<CE_Account_A_ROLE_NAME>" }, "Action": [ "s3:ListBucket", "s3:GetBucketLocation", "s3:PutObject" ], "Resource": [ "arn:aws:s3:::<bucket name>", "arn:aws:s3:::<bucket name>/*" ] } ] } -
Go to S3 > Bucket > Permissions > Object Ownership, click Edit, and select Bucket owner enforced. Objects uploaded by Account A are then owned by Account B.
Configurer le plugin AWS S3 WebTX
-
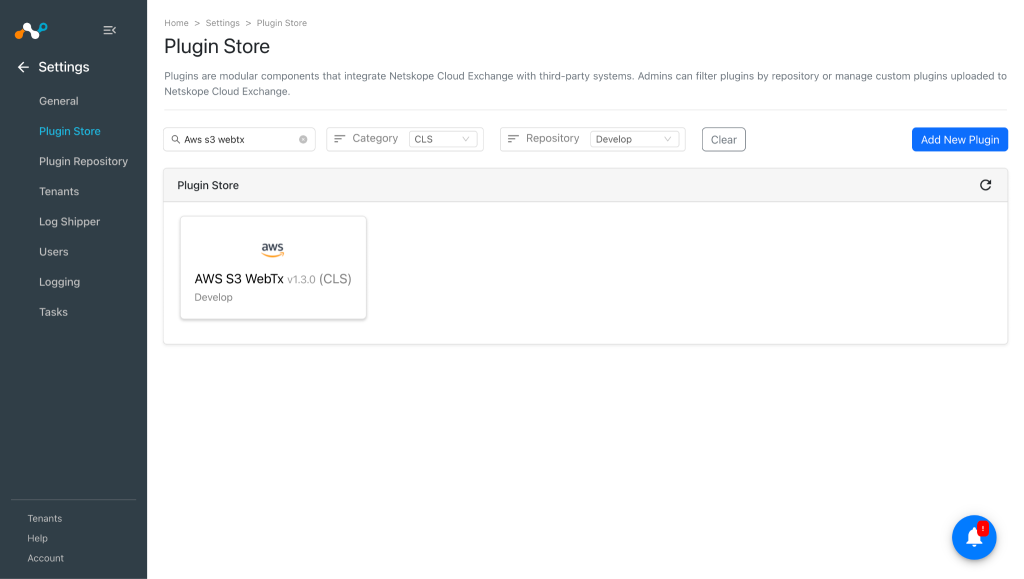
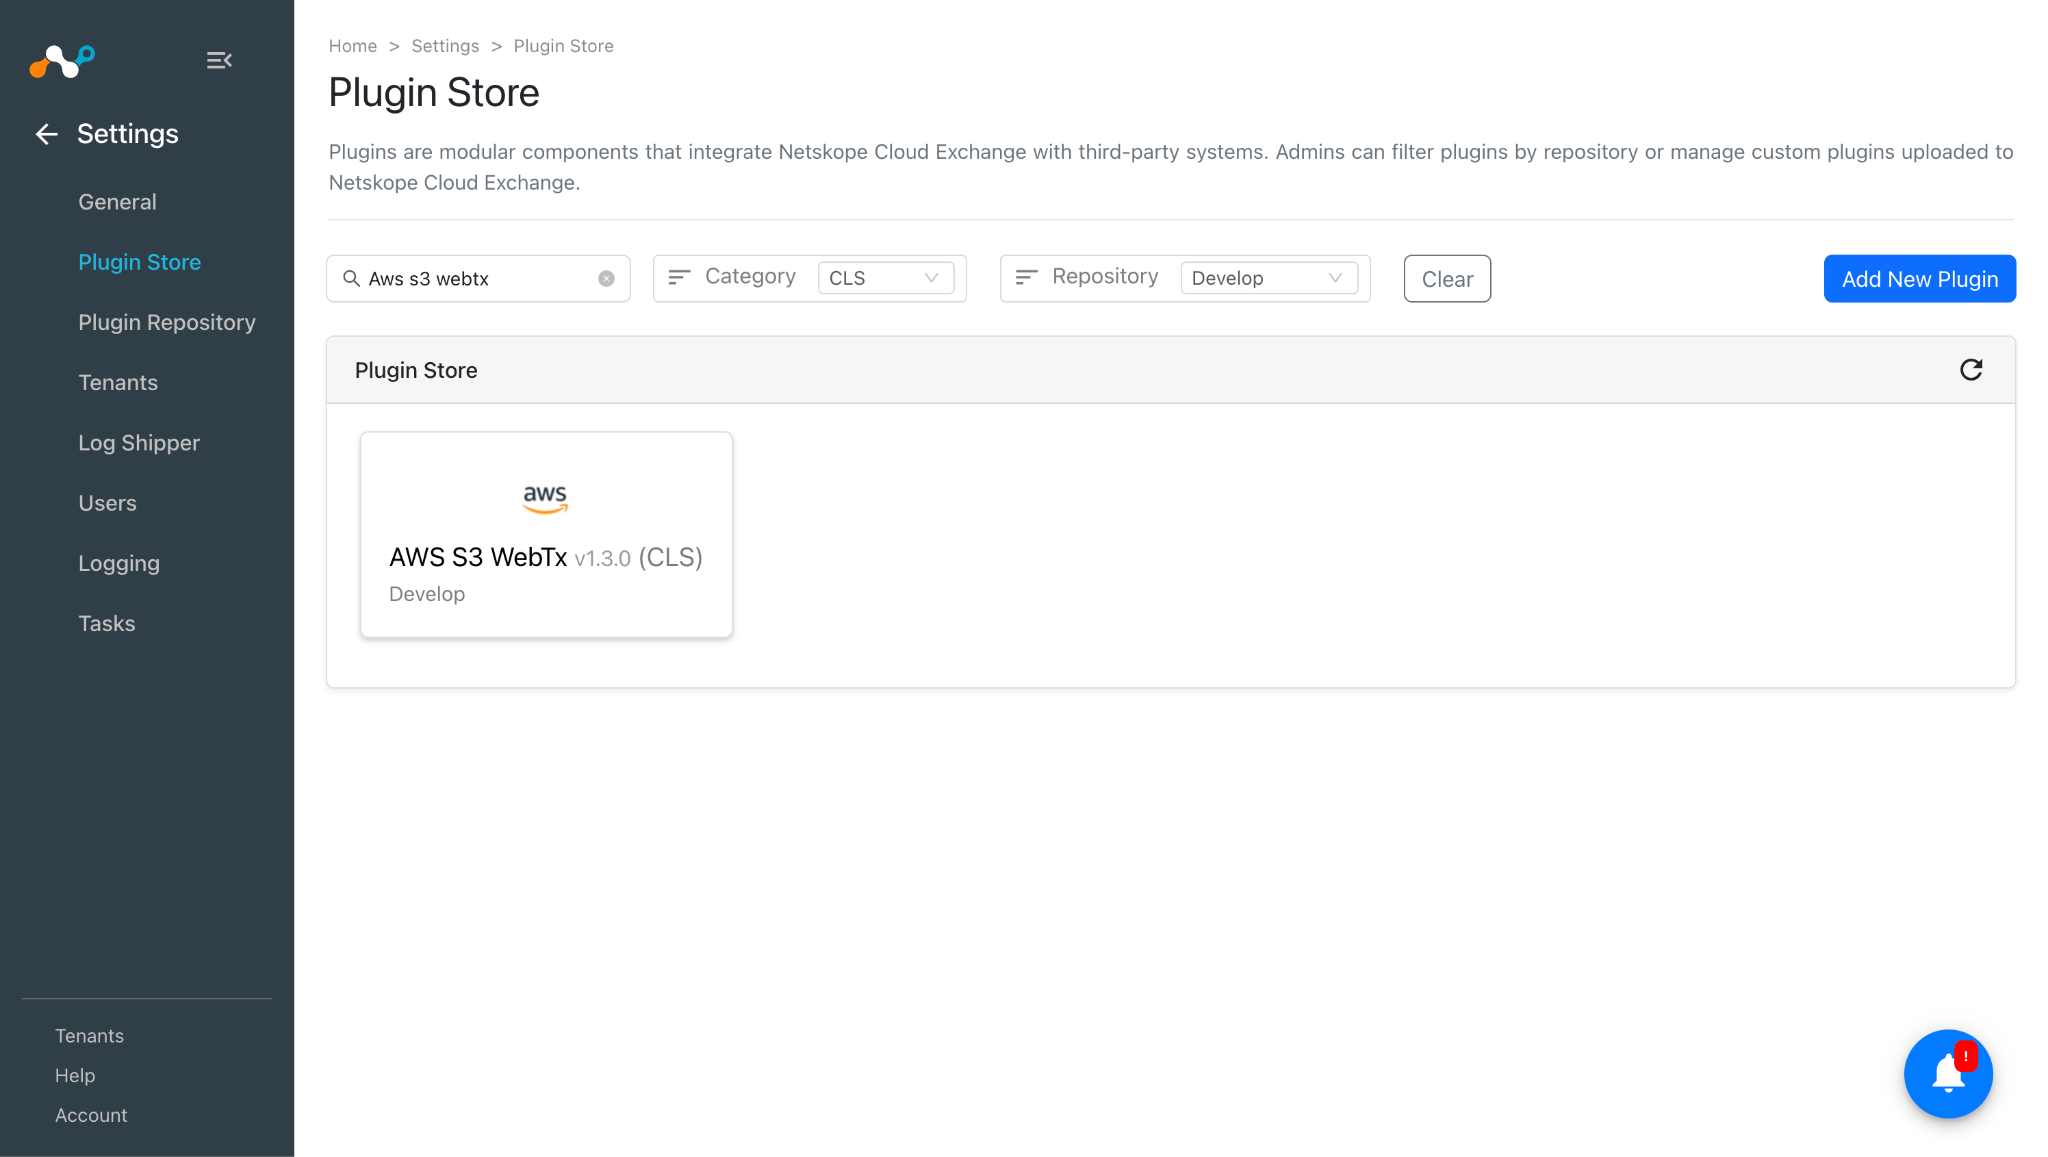
Dans Cloud Exchange, accédez à Settings > Plugin Store.
-
Recherchez et sélectionnez le plugin AWS S3 WebTx v1.3.0 (CLS).
-
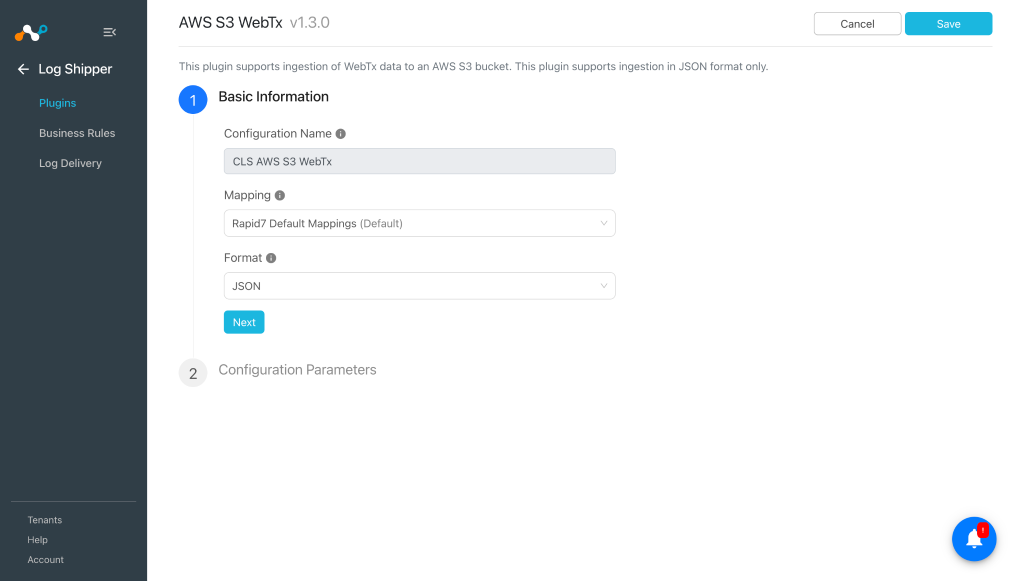
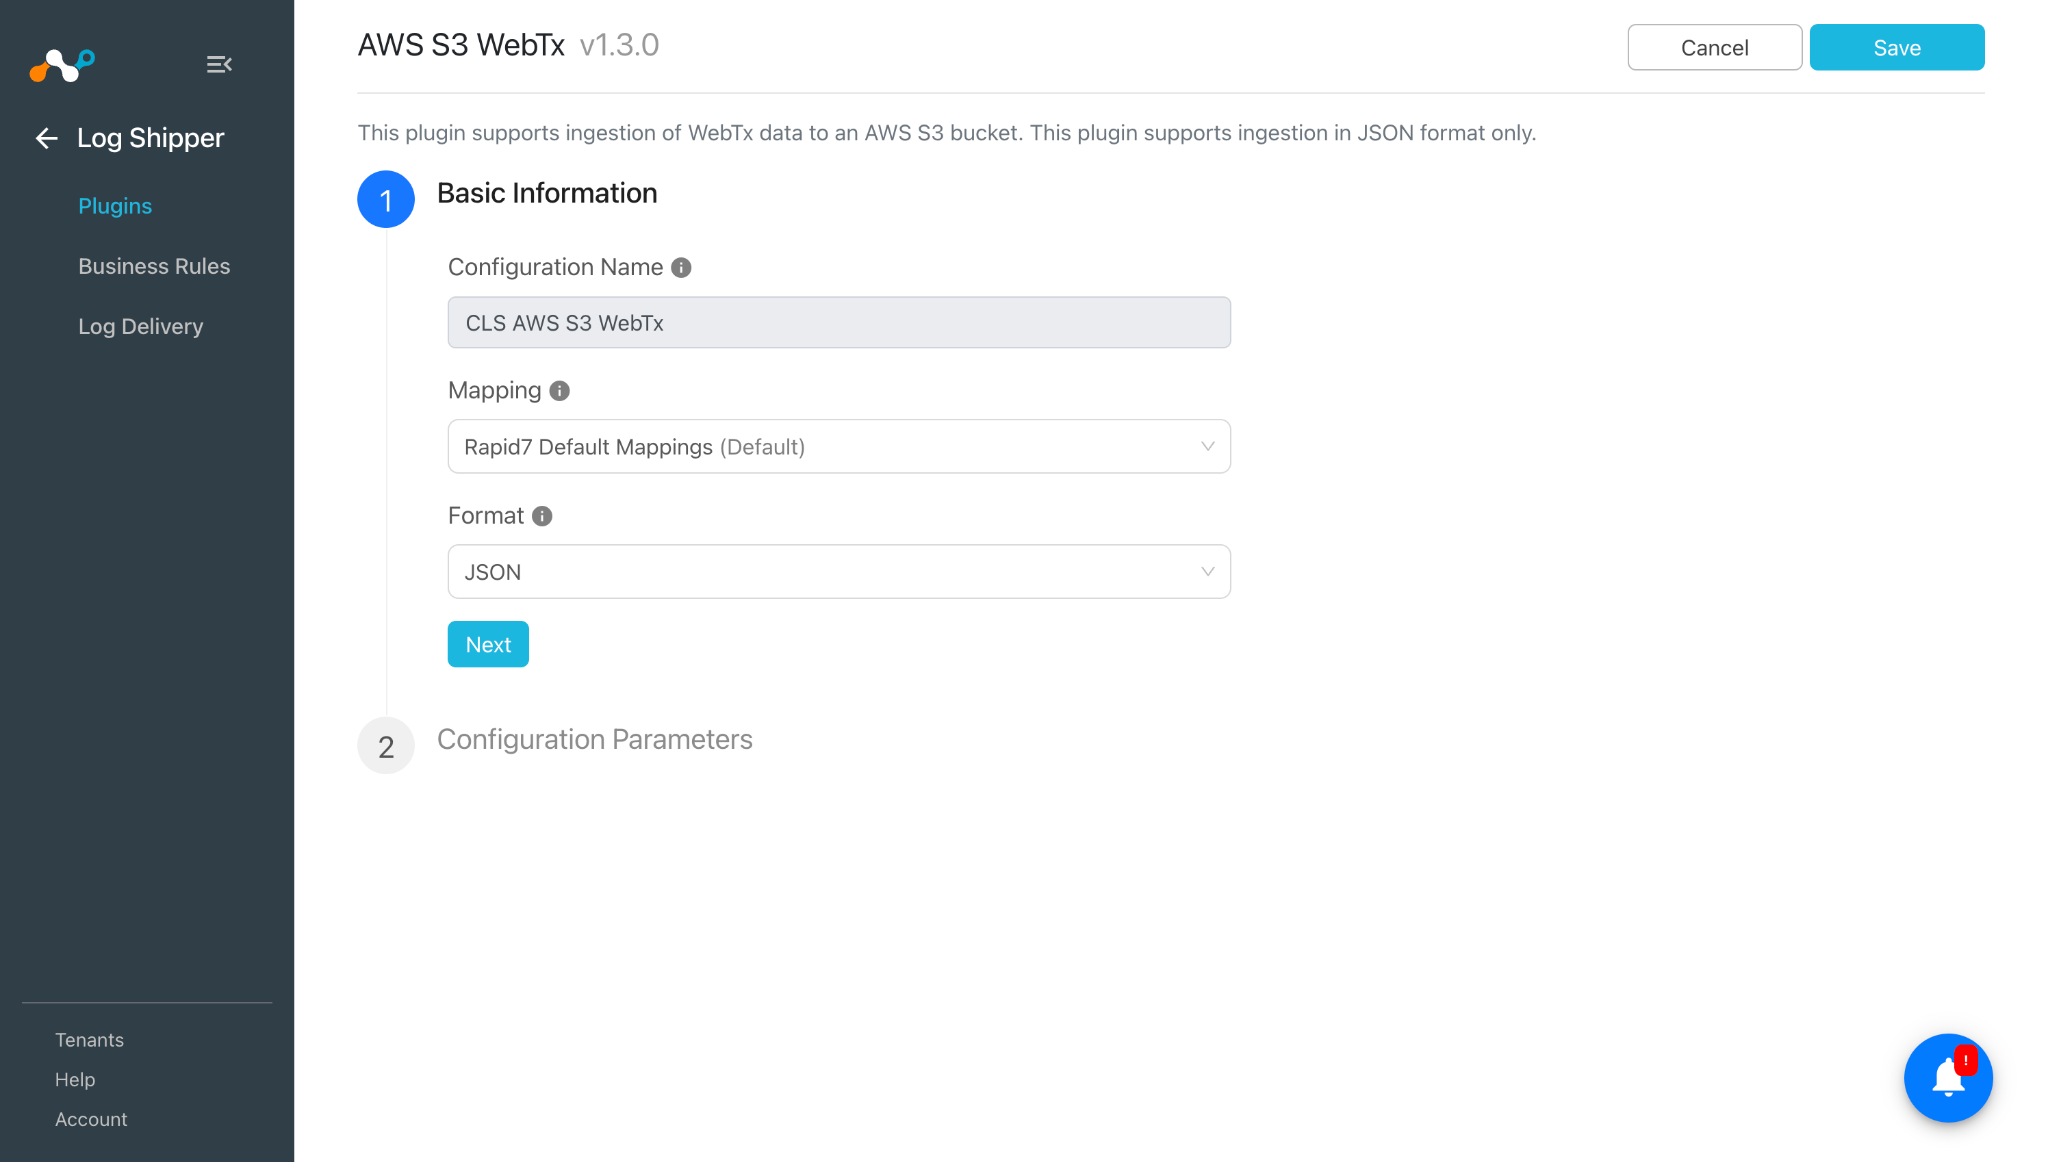
Enter a Configuration Name and keep the Mappings and Format as default. The Format is JSON.
-
Cliquez sur Next.
-
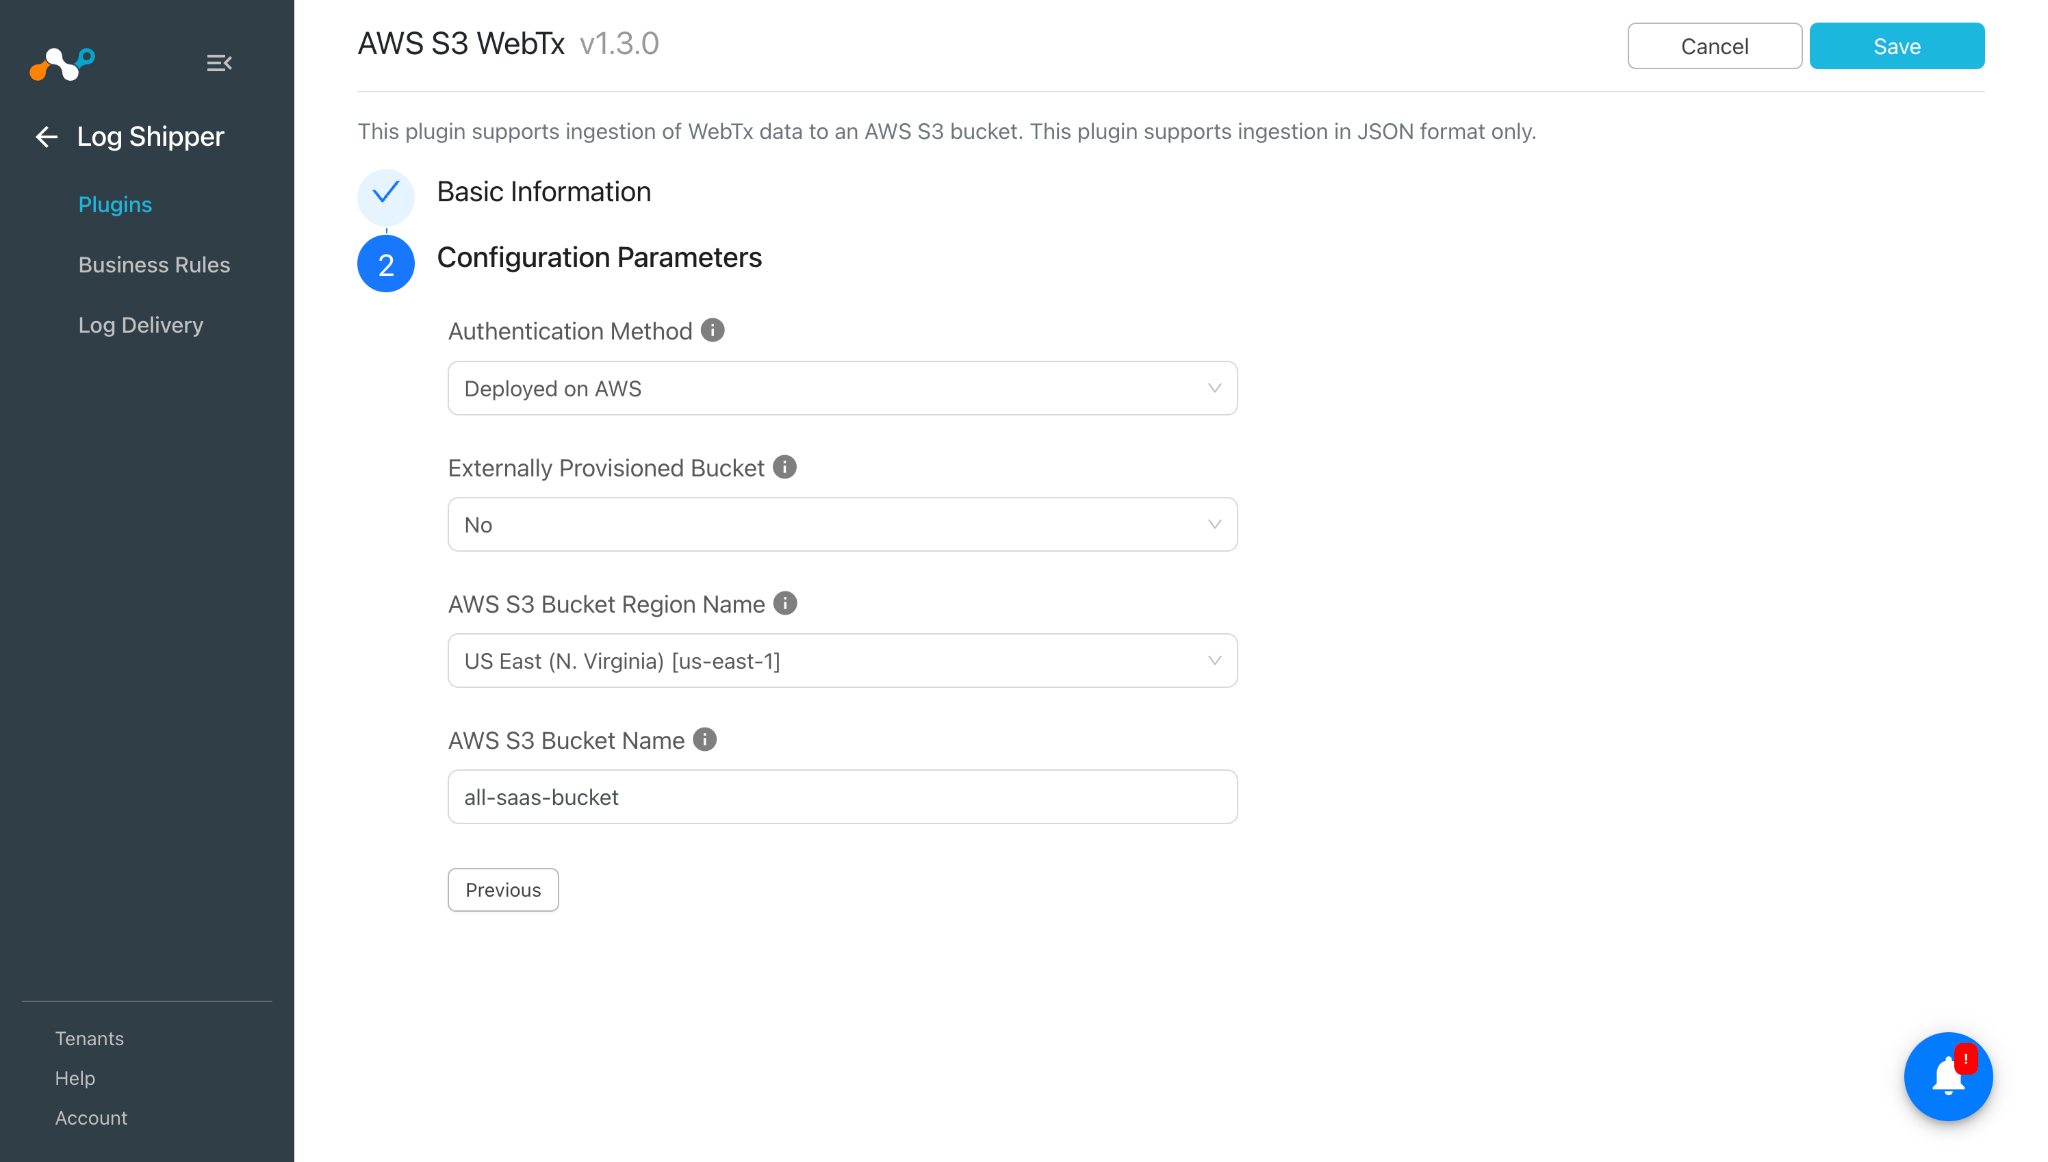
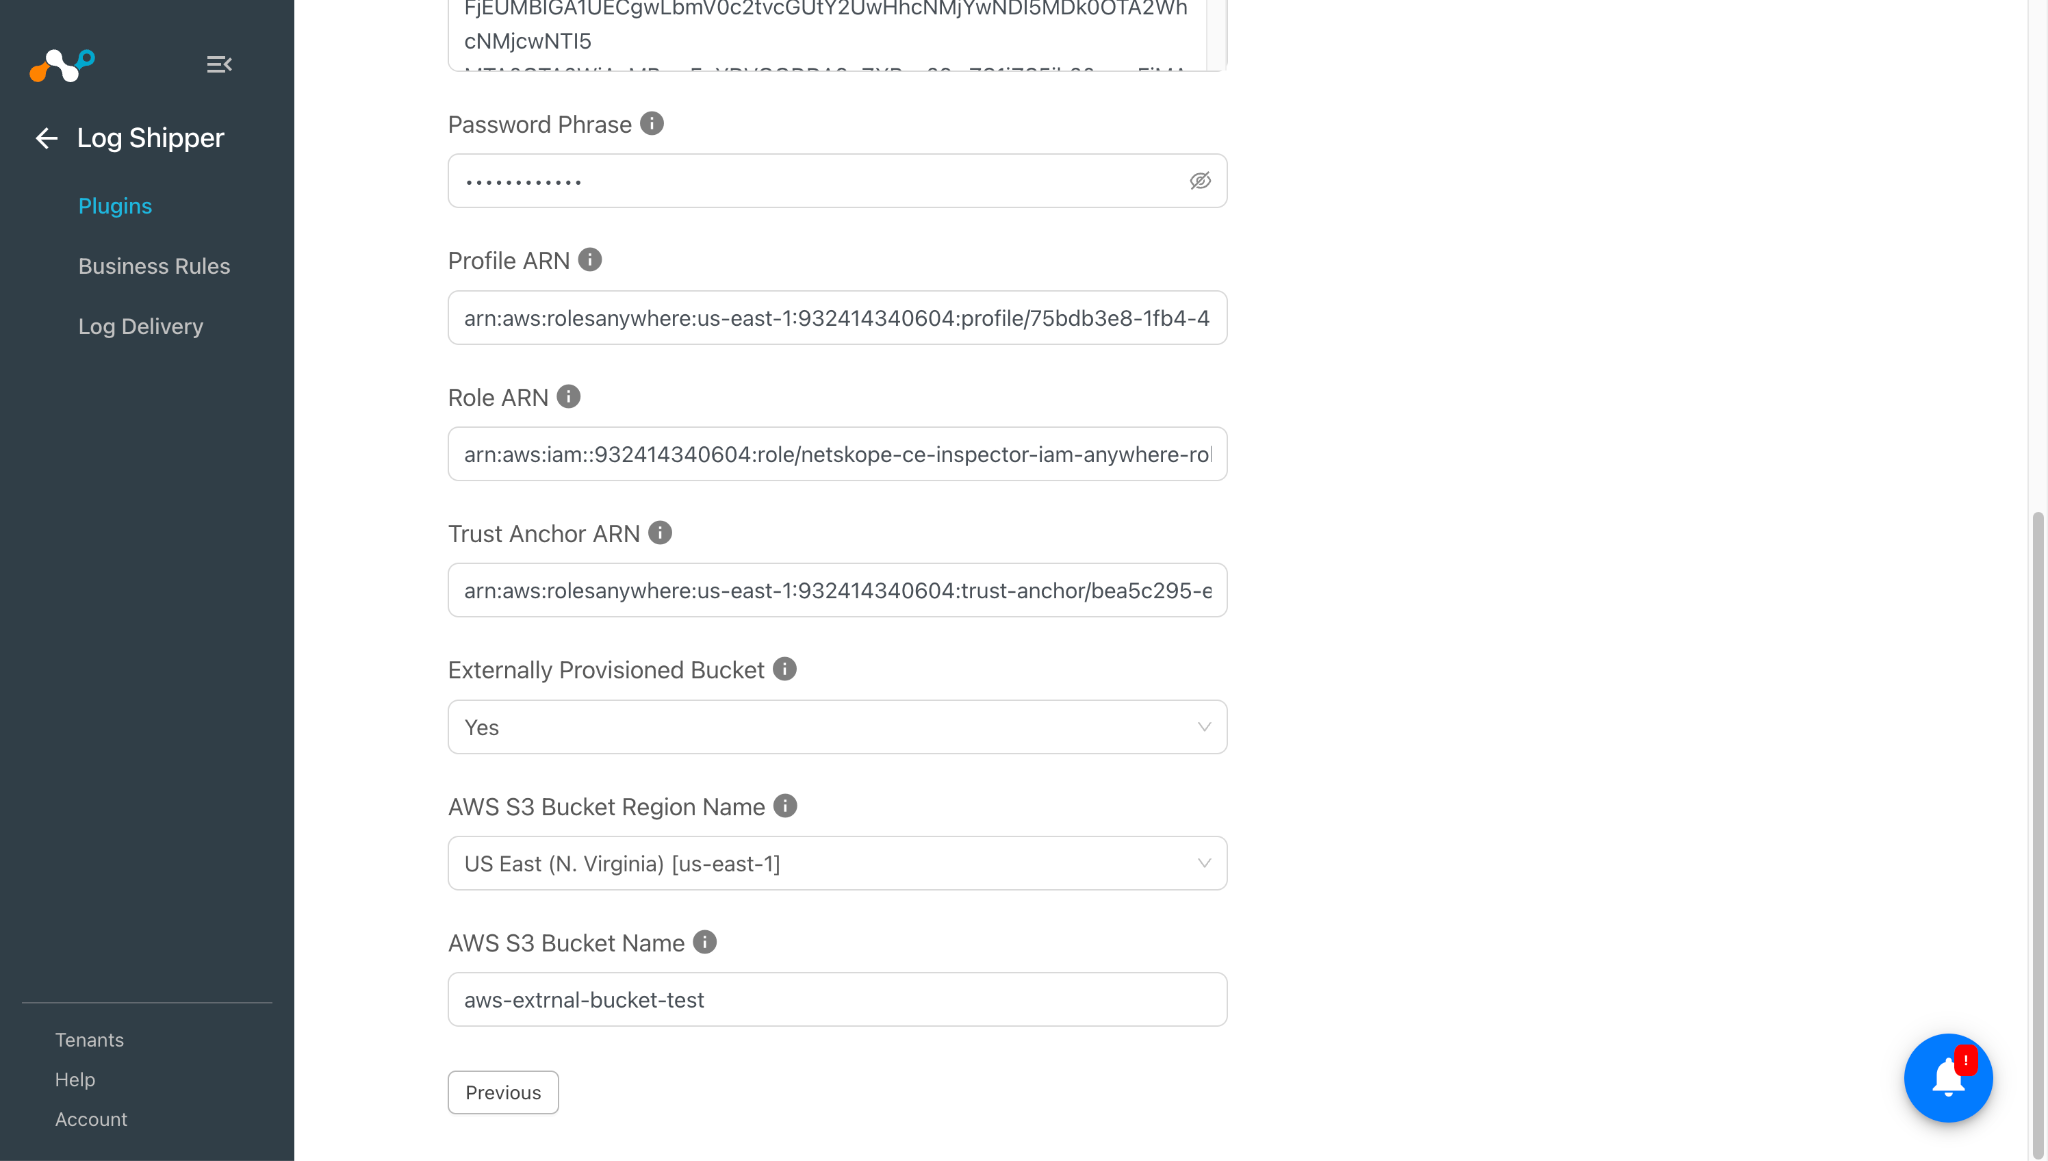
Entrez les paramètres de configuration :
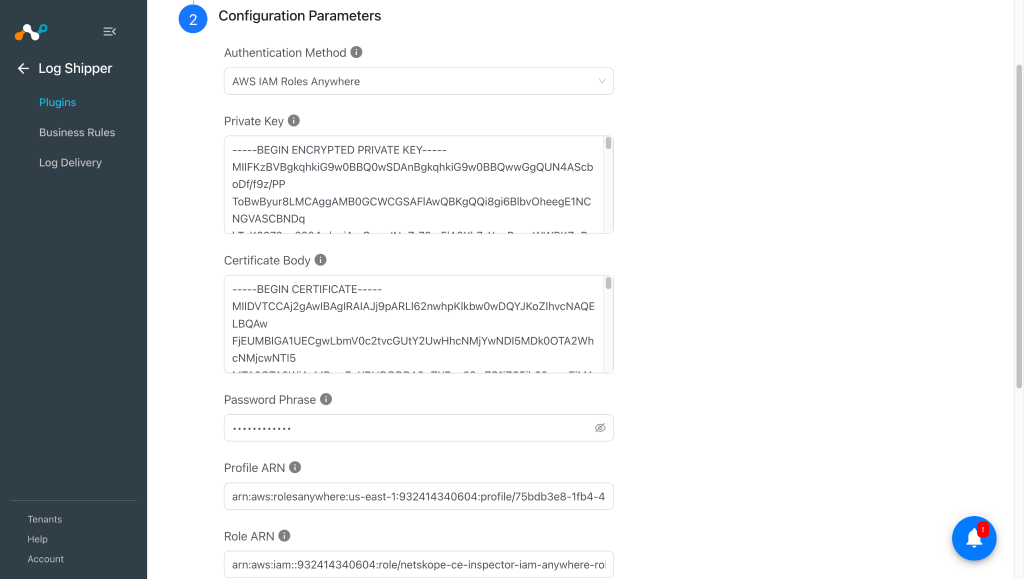
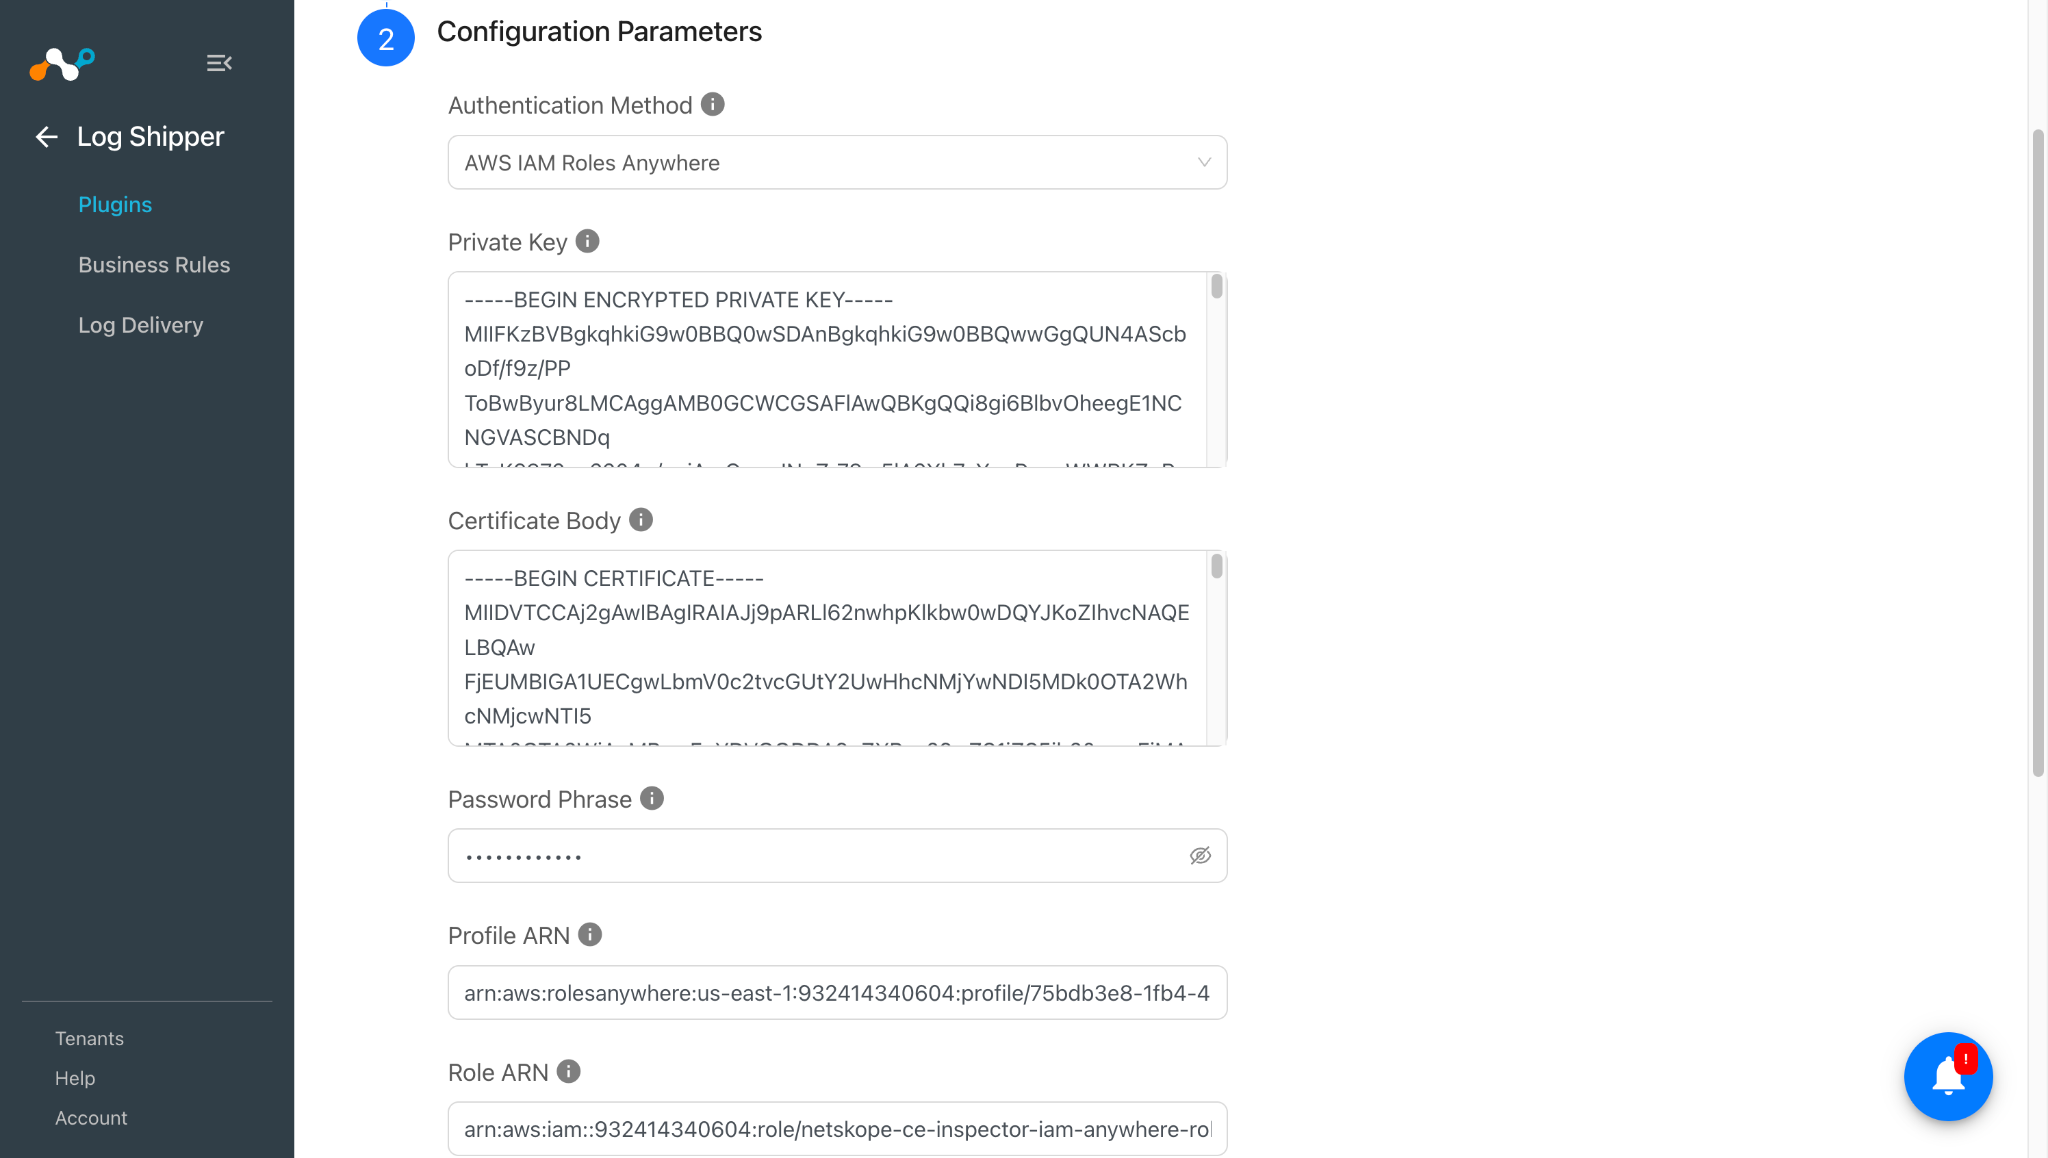
- Authentication Method: Select the method to use for authentication: Deployed on AWS or AWS IAM Roles Anywhere.
- Private Key: PEM-encoded private key used to decrypt the AWS Private CA Certificate. Required only when Authentication Method is AWS IAM Roles Anywhere.
- Certificate Body: PEM-encoded X.509 certificate body issued by your AWS Private or Public CA. Required only when Authentication Method is AWS IAM Roles Anywhere.
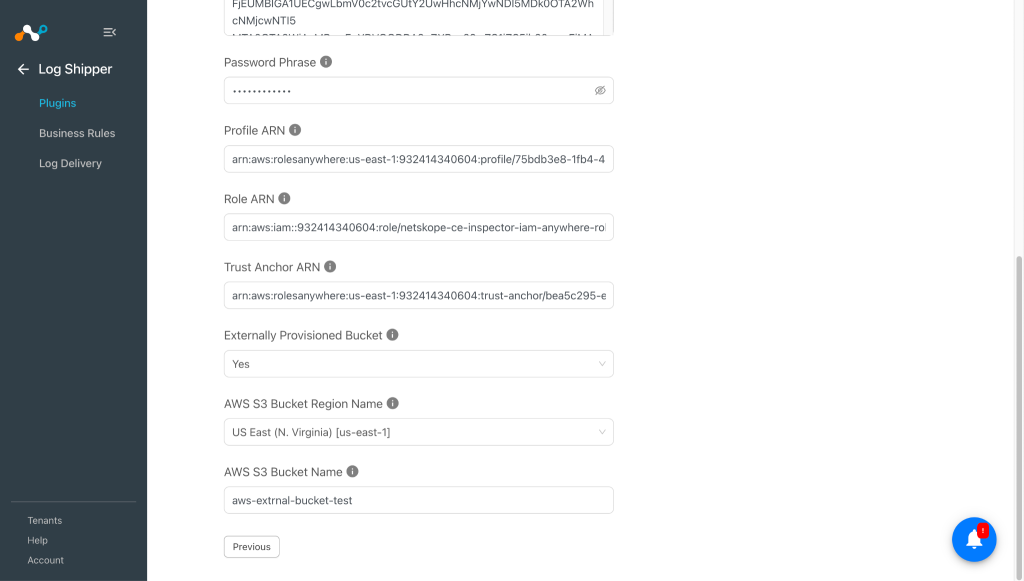
- Password Phrase: Passphrase used to decrypt the Private Key. Required only when Authentication Method is AWS IAM Roles Anywhere. Required only if the Private Key is encrypted.
- Profile ARN: ARN of the IAM Roles Anywhere profile. Required only when Authentication Method is AWS IAM Roles Anywhere.
- Role ARN: ARN of the IAM role to be assumed. Required only when Authentication Method is AWS IAM Roles Anywhere.
- Trust Anchor ARN: ARN of the IAM Roles Anywhere trust anchor. Required only when Authentication Method is AWS IAM Roles Anywhere.
- Externally Provisioned Bucket: Select Yes if the S3 bucket is in an external AWS account, or No if it is in your own AWS account. If you select No and the bucket does not exist, the plugin creates it. If you select Yes, the bucket must already exist, because the plugin does not create it.
- AWS S3 Bucket Region Name: AWS region where the AWS S3 Bucket resides. If you use AWS IAM Roles Anywhere, the region must match the region in the Profile ARN and Trust Anchor ARN. Select Custom Region to provide a region that is not in the list.
- AWS Custom Region: AWS region code of the bucket. Required only when Custom Region is selected in AWS S3 Bucket Region Name.
- AWS S3 Bucket Name: AWS S3 Bucket Name in which the WebTx data objects are stored.
The AWS IAM Roles Anywhere parameters appear only after you select AWS IAM Roles Anywhere as the Authentication Method.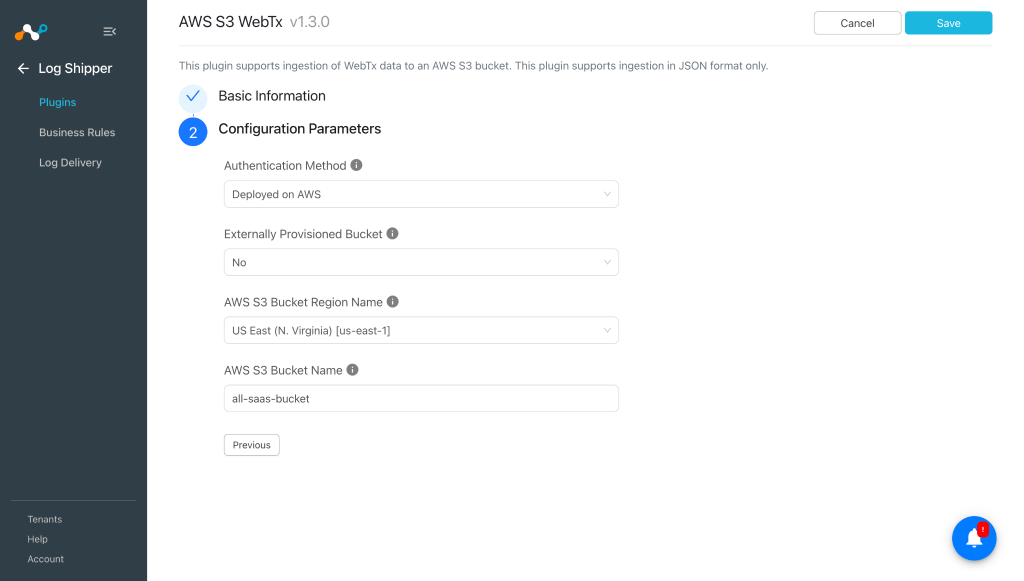
-
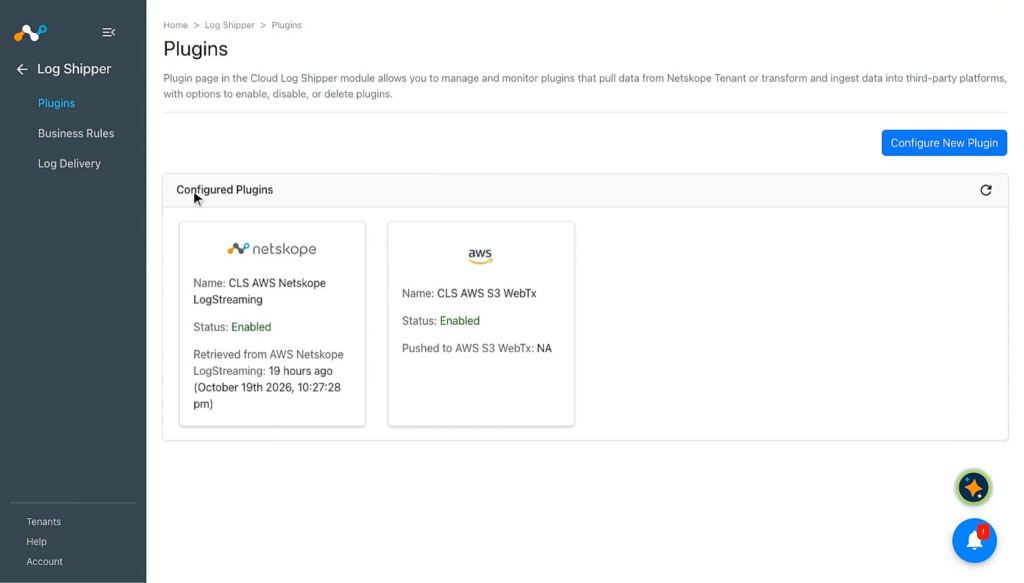
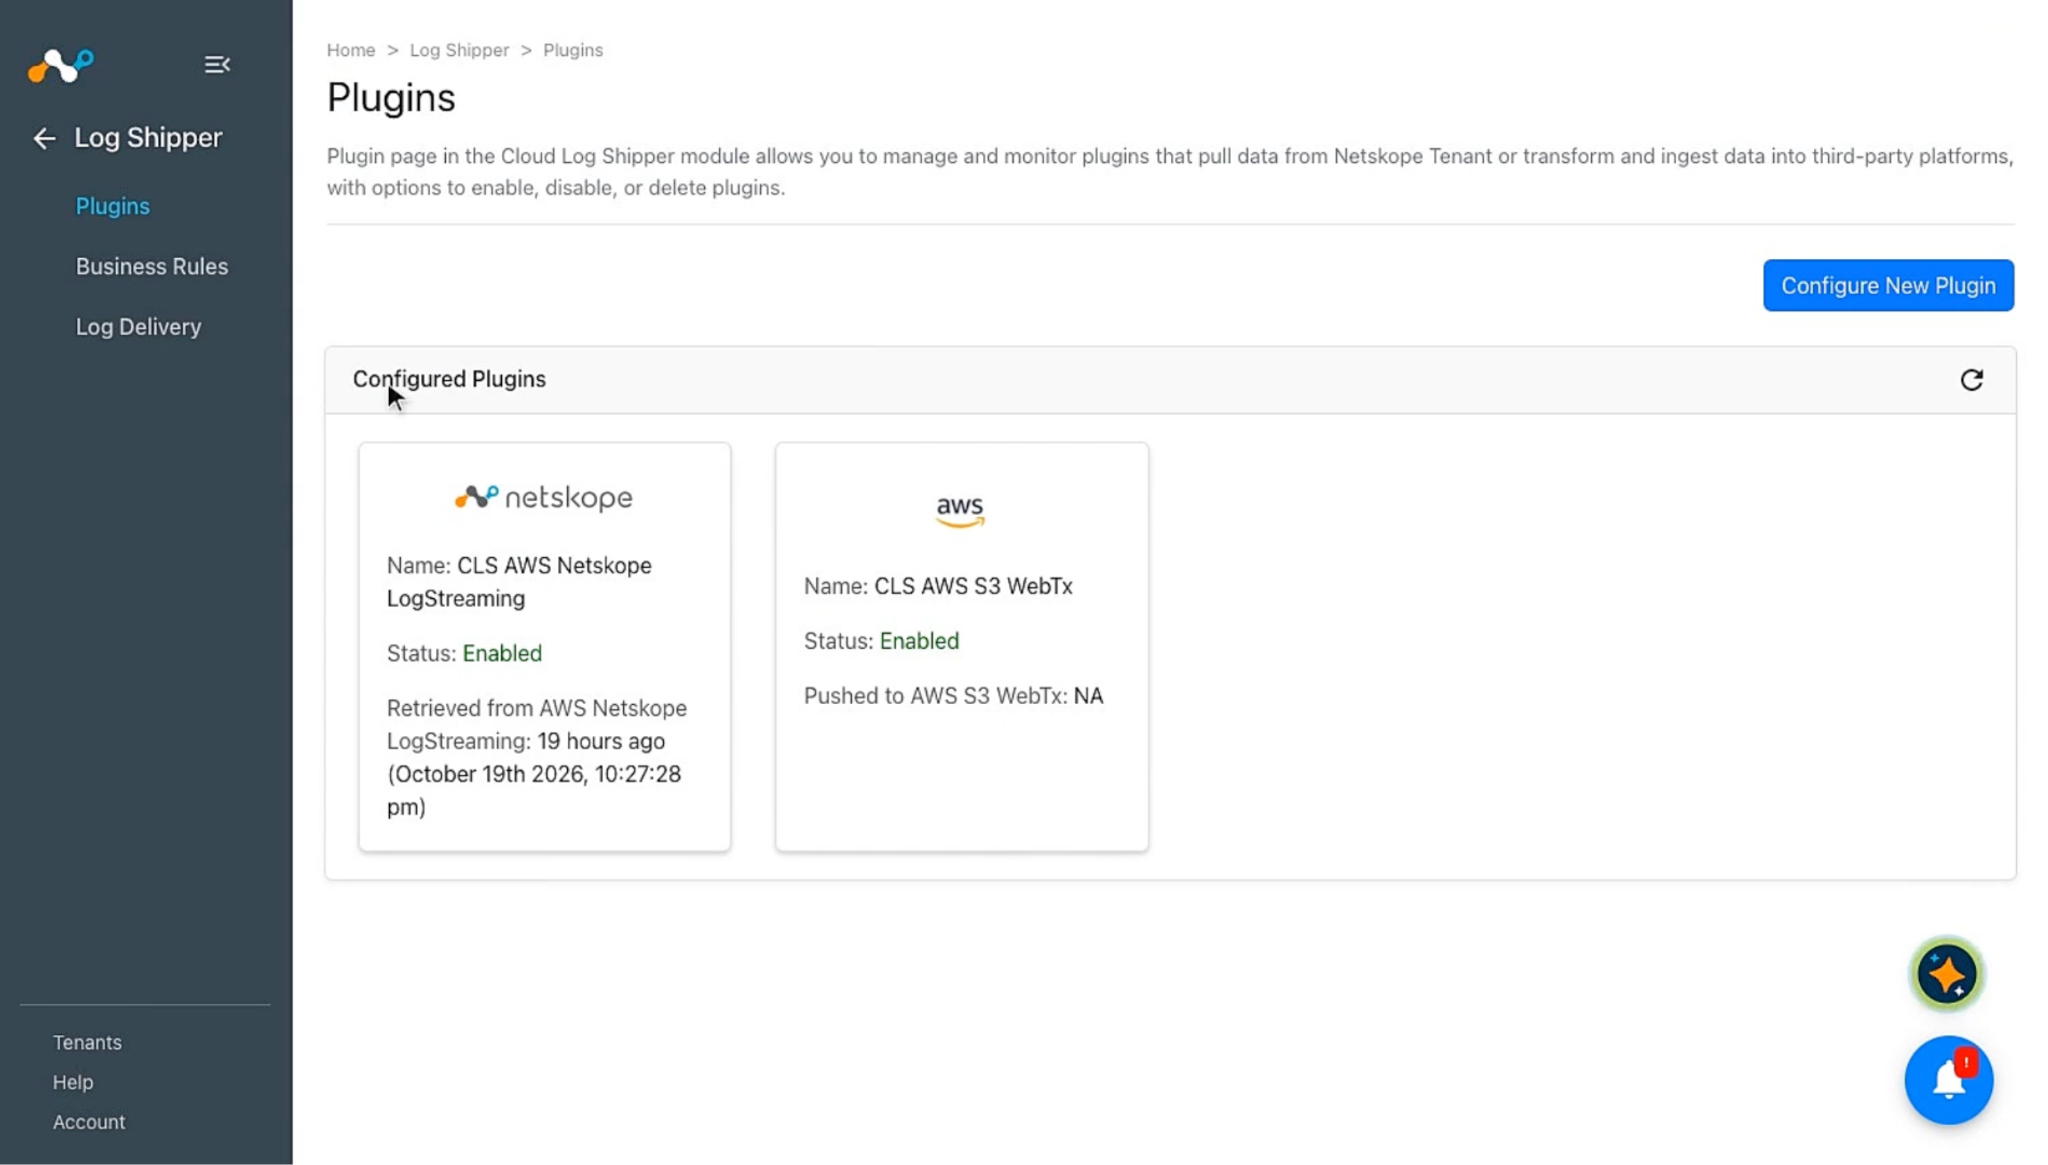
Click Save. Your plugin configuration appears on the Log Shipper > Plugins page.
Configure a Log Shipper Business Rule for AWS S3 WebTx
-
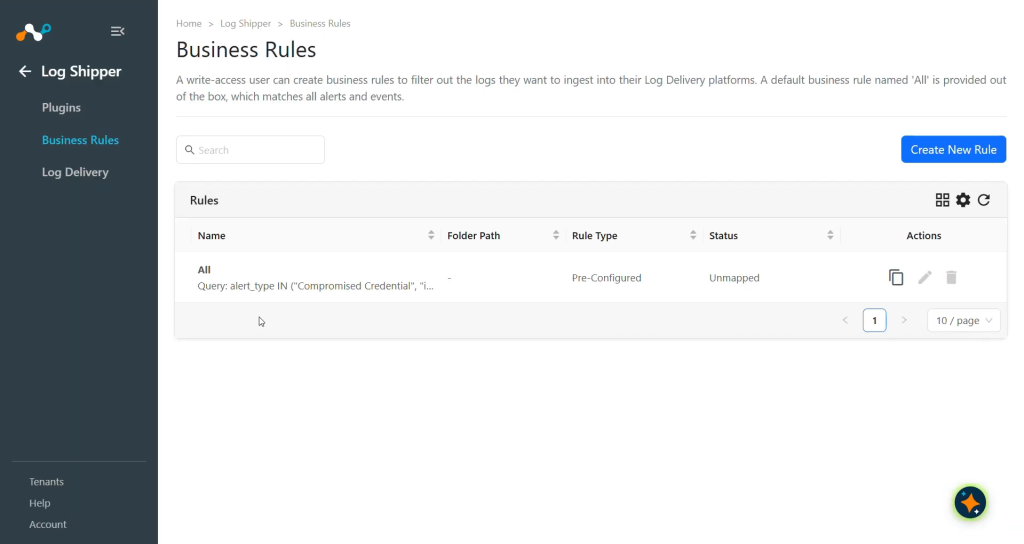
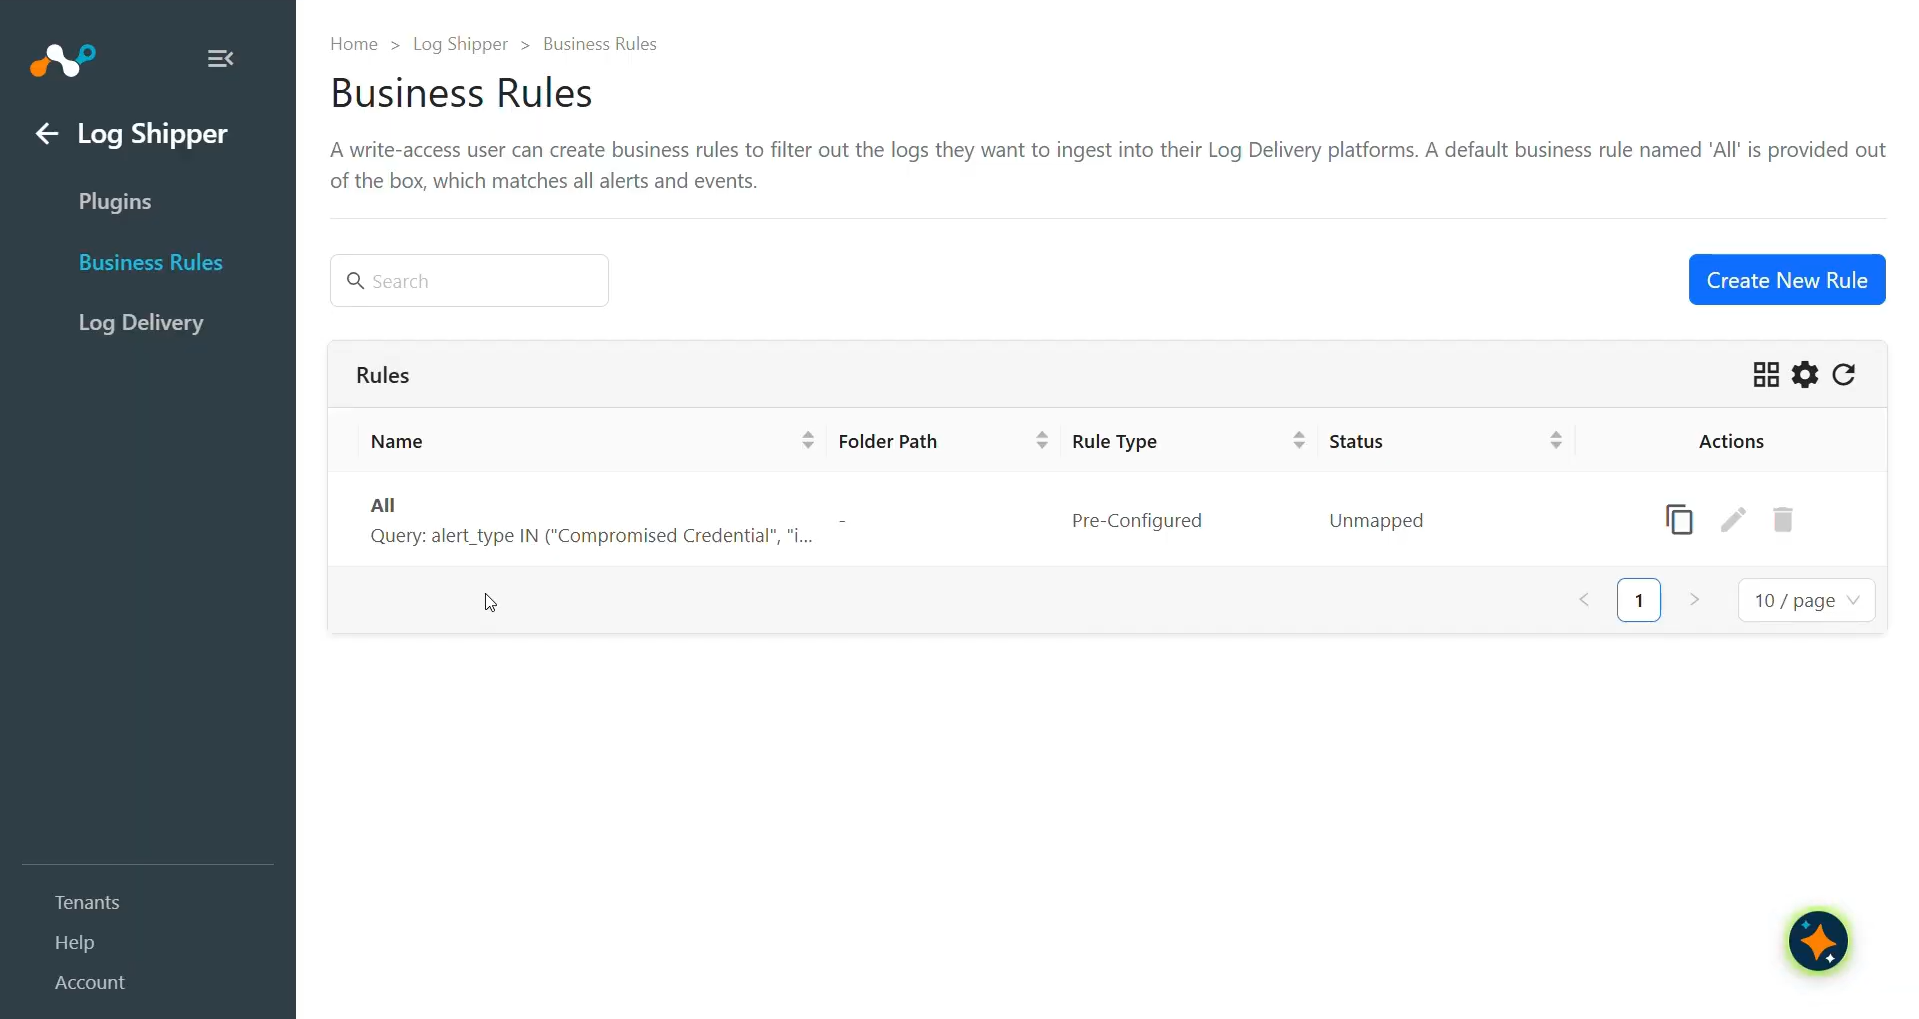
Dans Log Shipper, allez à Business Rules.
-
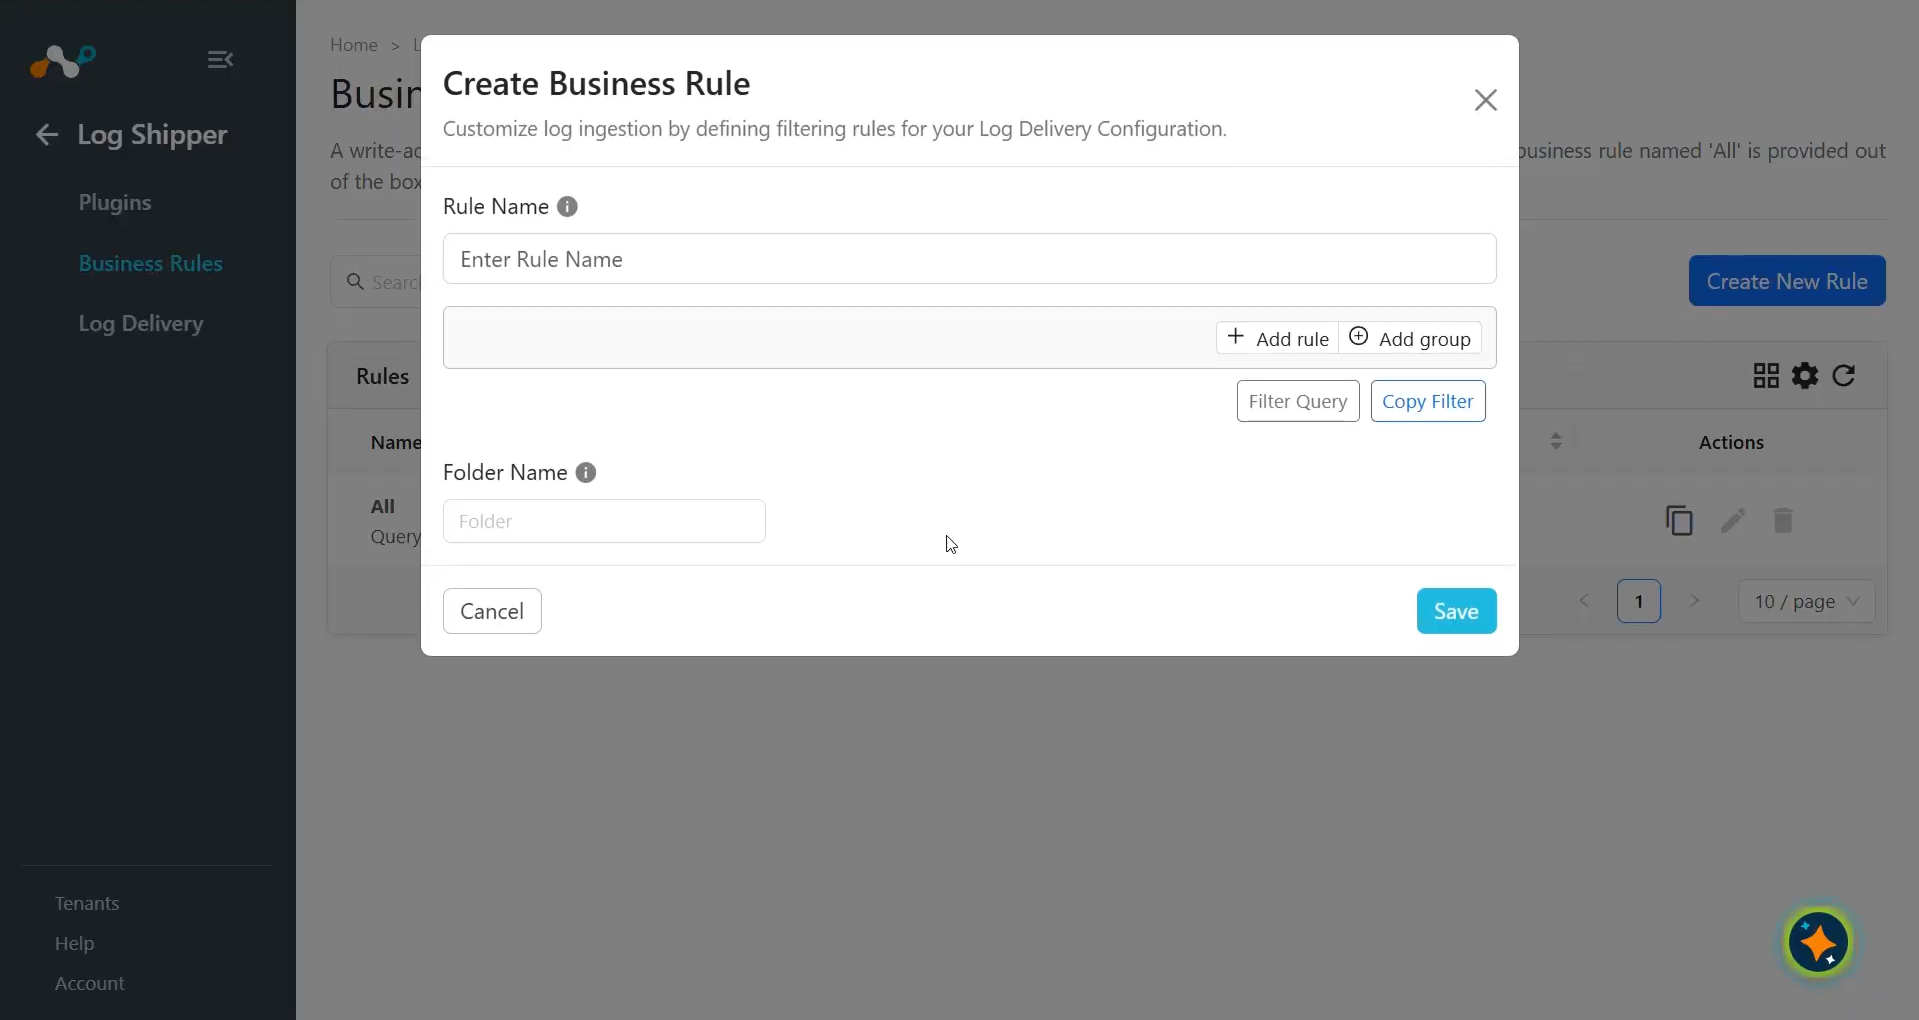
By default, there is a business rule that filters all alerts and events. To filter a specific type of alert or event, click Create New Rule and configure a new business rule by adding the rule name and filter(s).
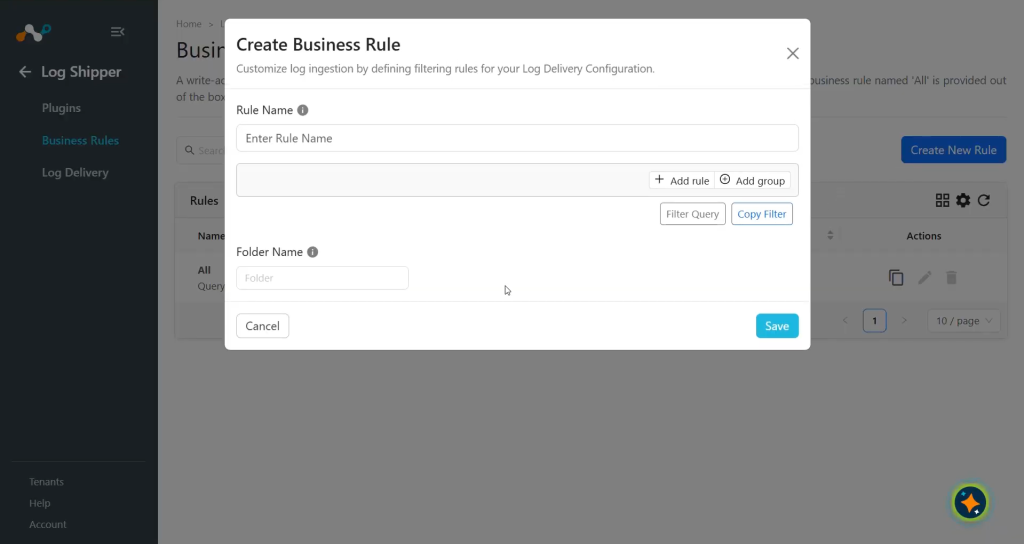
-
Cliquez sur Save.
Configurer l'expéditeur de logs Livraison de logs pour AWS S3 WebTx
-
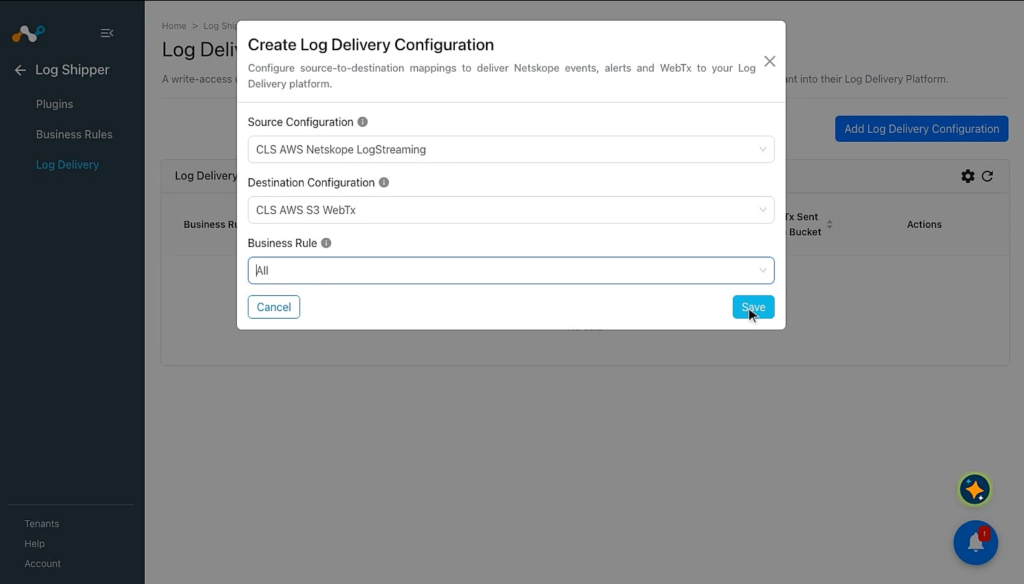
Dans Log Shipper, allez à Log Delivery et cliquez sur Add Log Delivery Configuration.
-
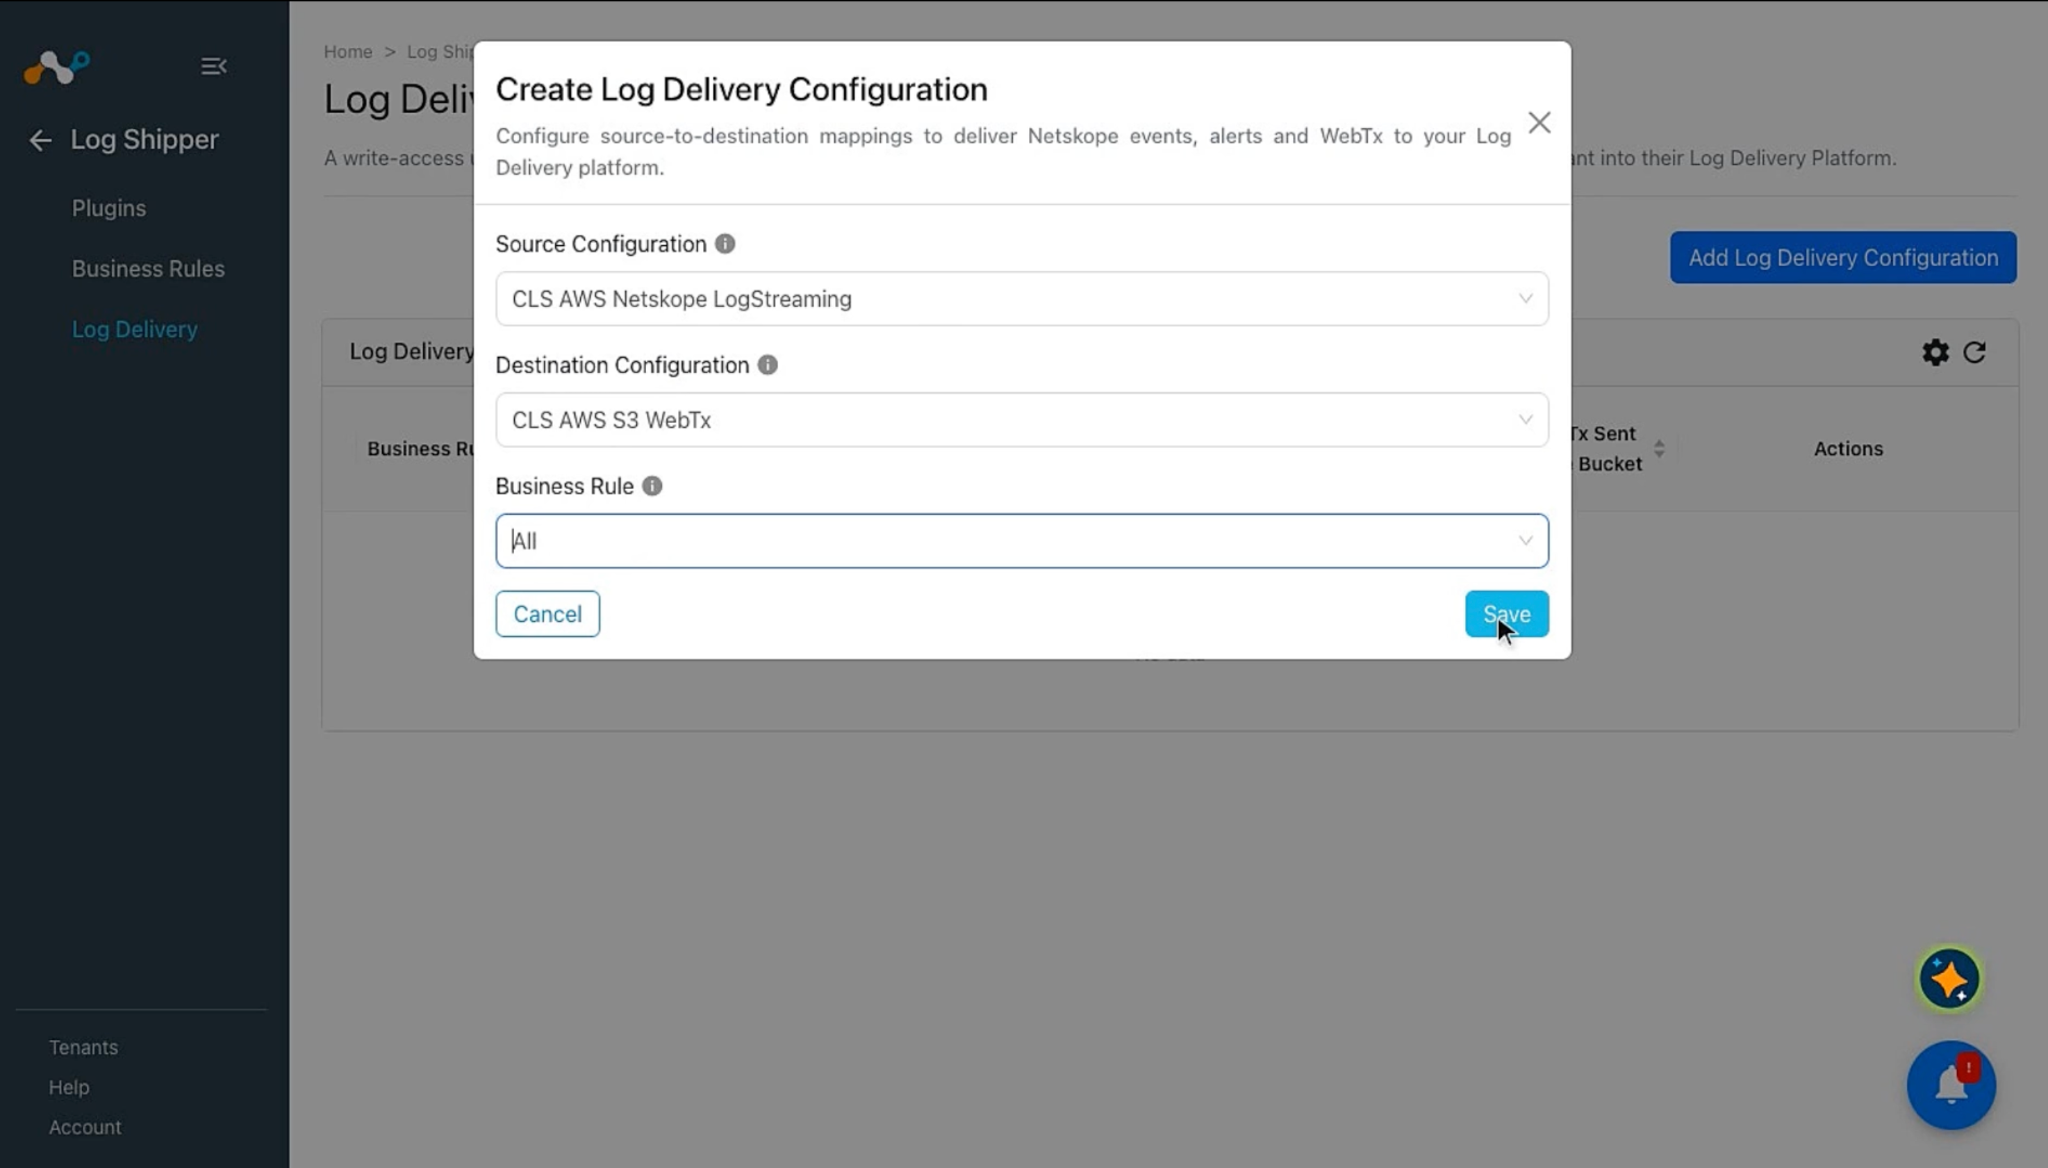
Select le plugin Source (AWS Netskope LogStreaming ou Azure Netskope LogStreaming), le plugin Destination (AWS S3 WebTx) et cliquez sur Save.
-
Une fois la configuration Log Delivery ajoutée, les données commenceront à être extraites du locataire Netskope, transformées et ingérées dans les buckets AWS S3.
Validez le plugin AWS S3 WebTx
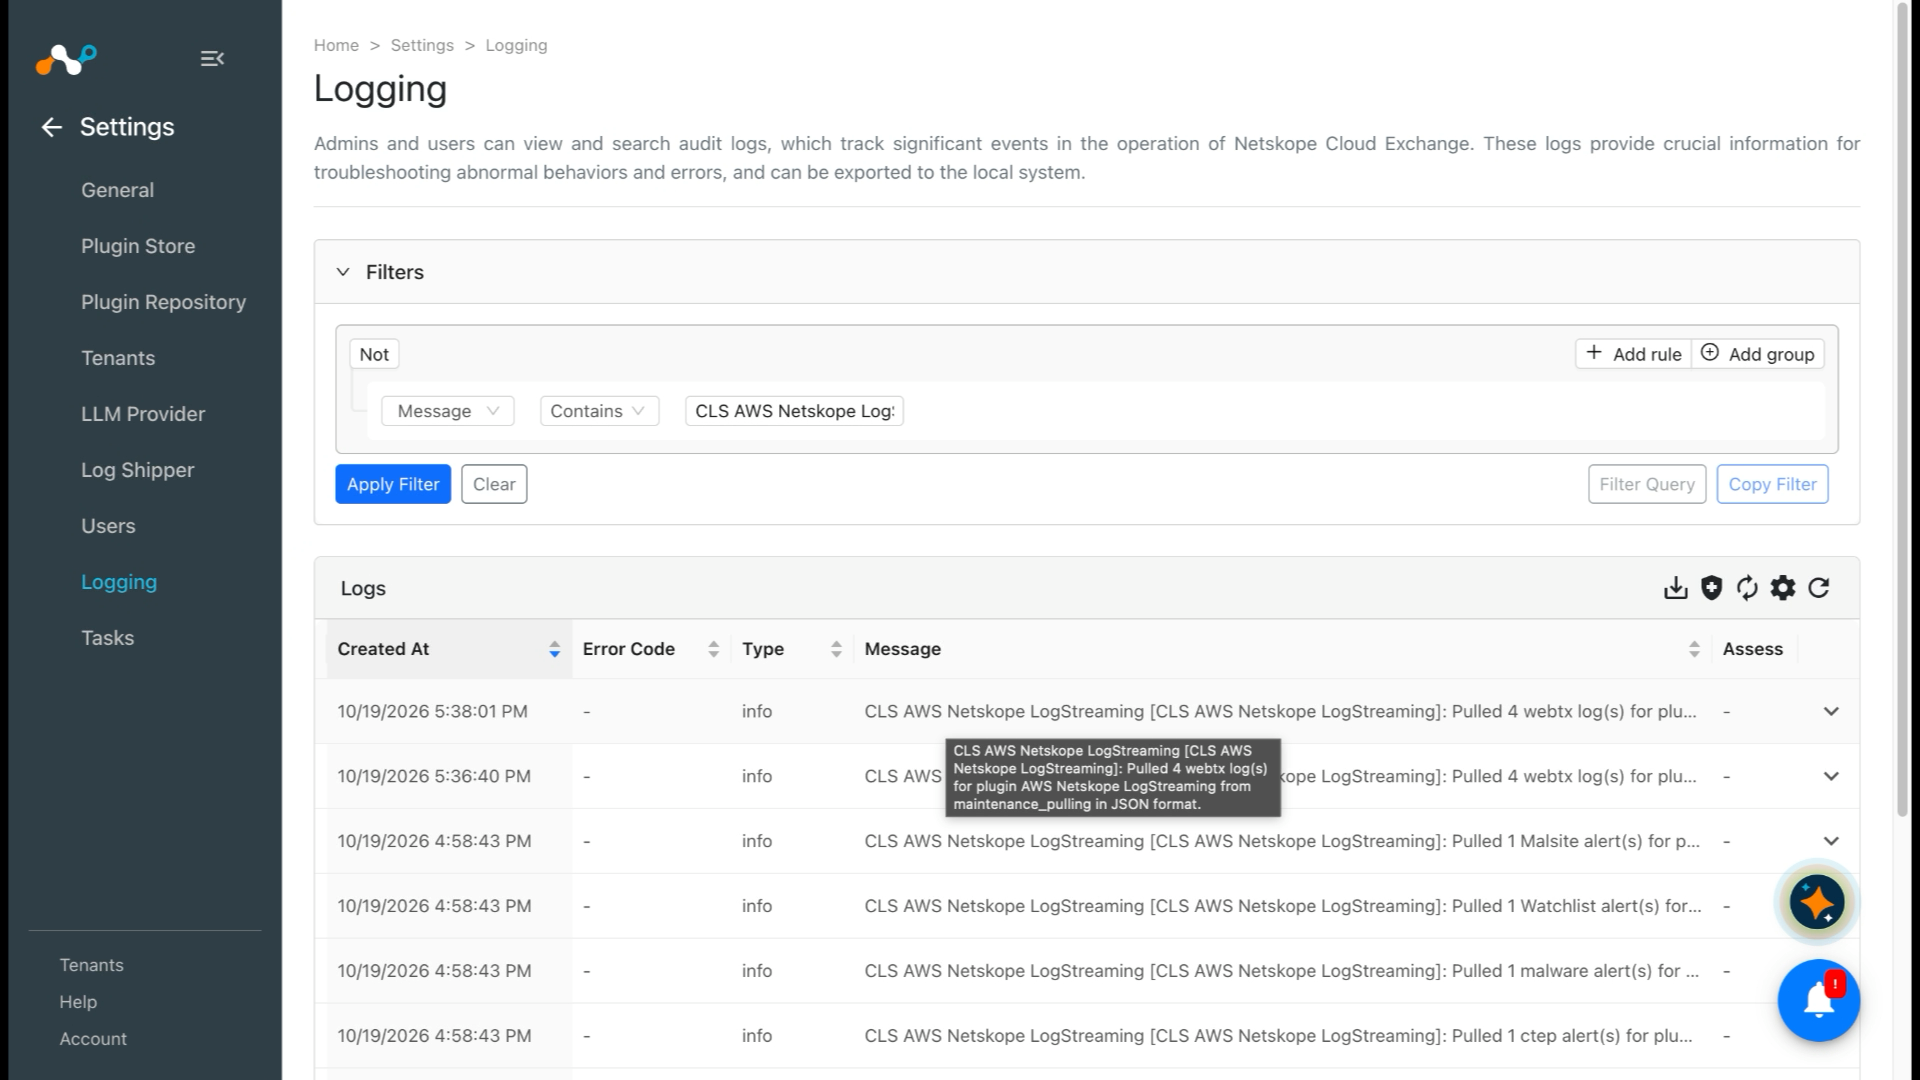
Valider le retrait
To validate the pull of WebTx from the Netskope tenant or any source platform, go to Logging in Cloud Exchange and search for the pulled logs.
Valider le push
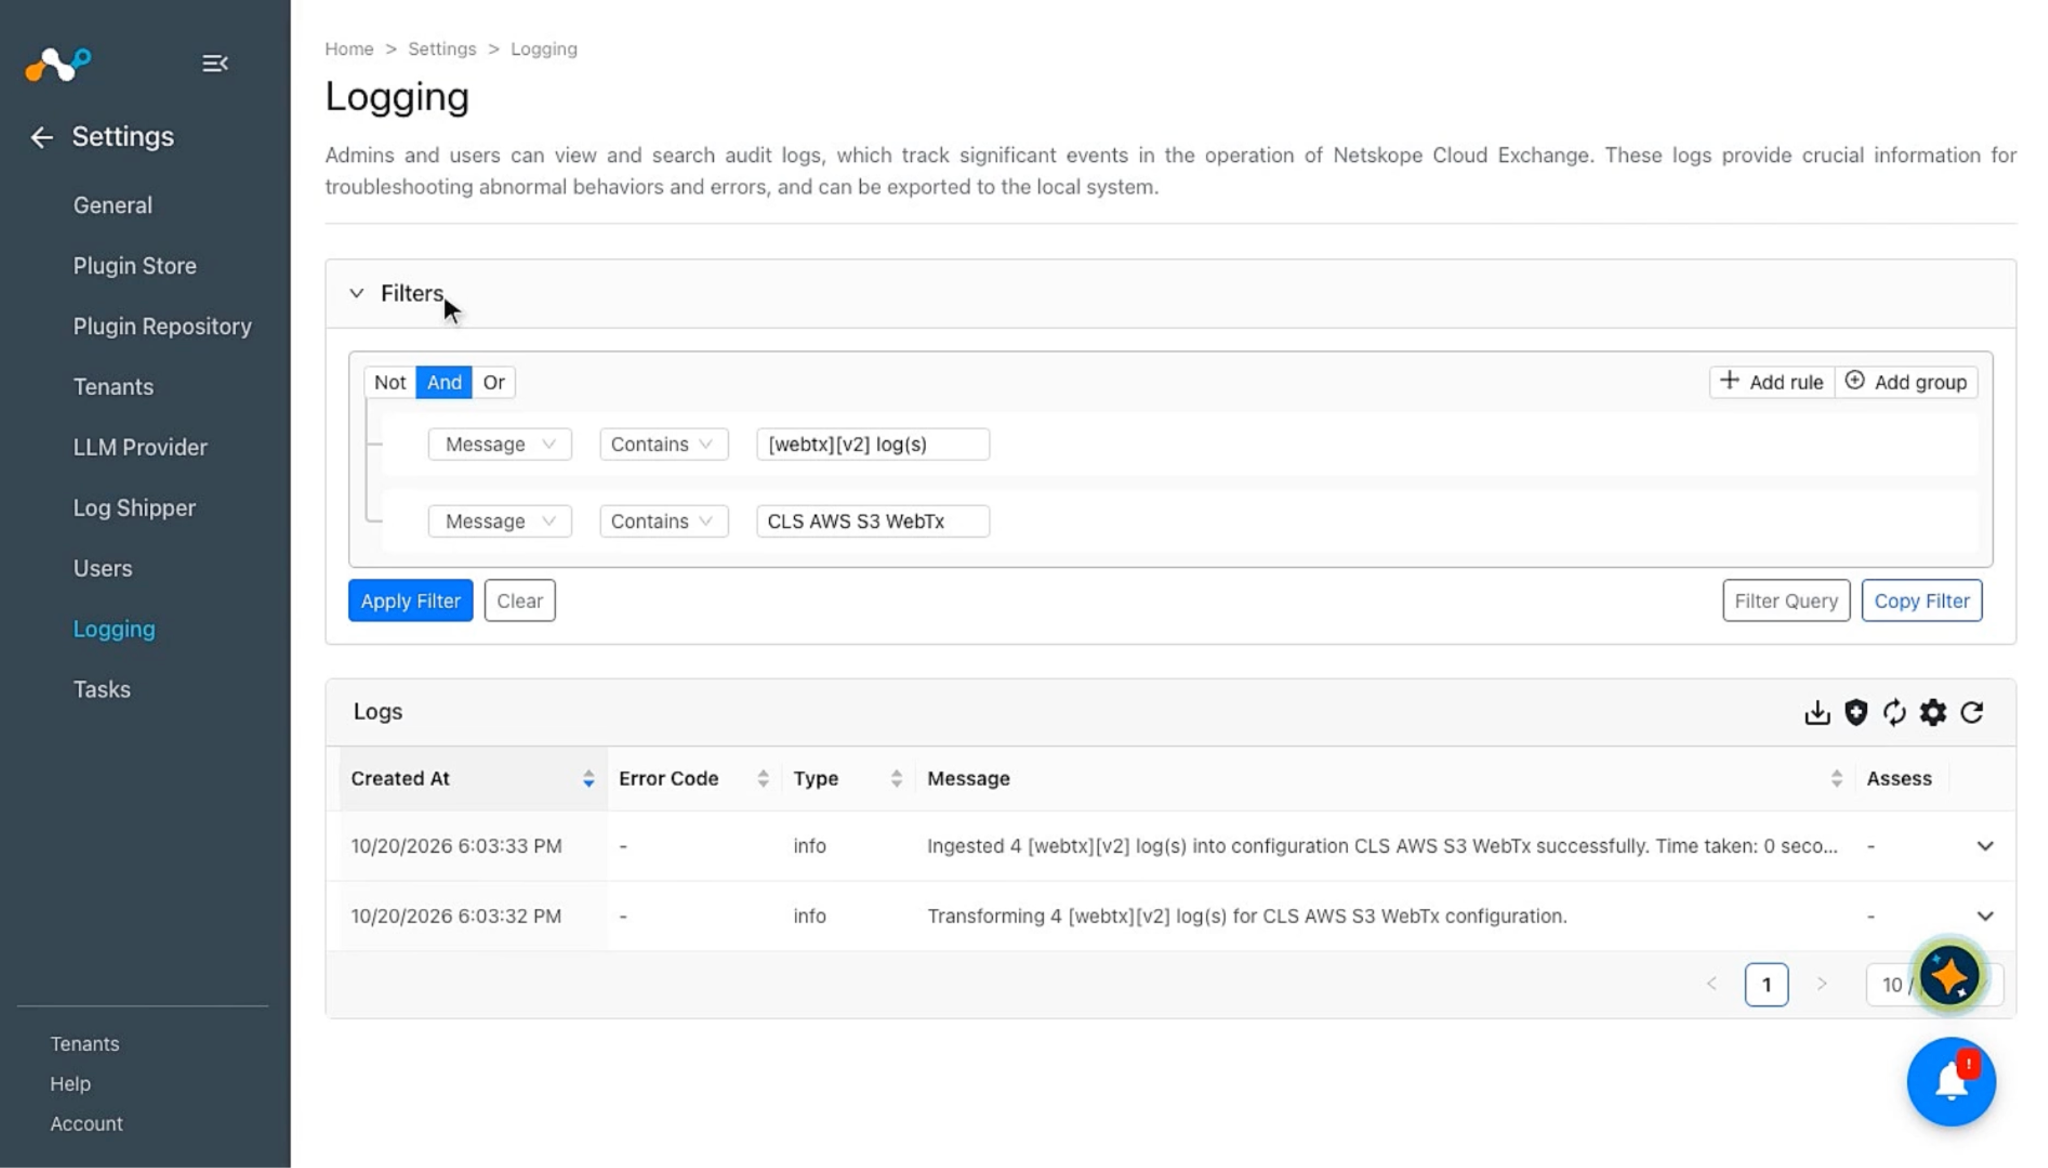
To validate the plugin workflow in Cloud Exchange, go to Logging and search for ingested WebTx with the filter message contains ingested. The ingested logs are filtered.
Pour valider le push de la plateforme AWS S3 :
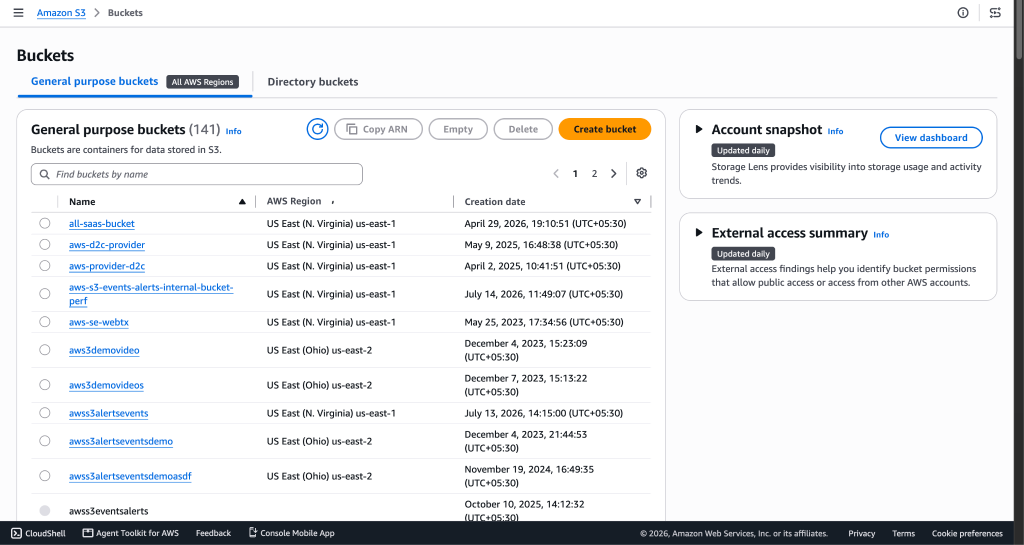
-
Go to Amazon S3 > Buckets. In the search bar, search for and click Buckets.
-
Search for the bucket you used while creating the plugin.
-
Click the bucket name.
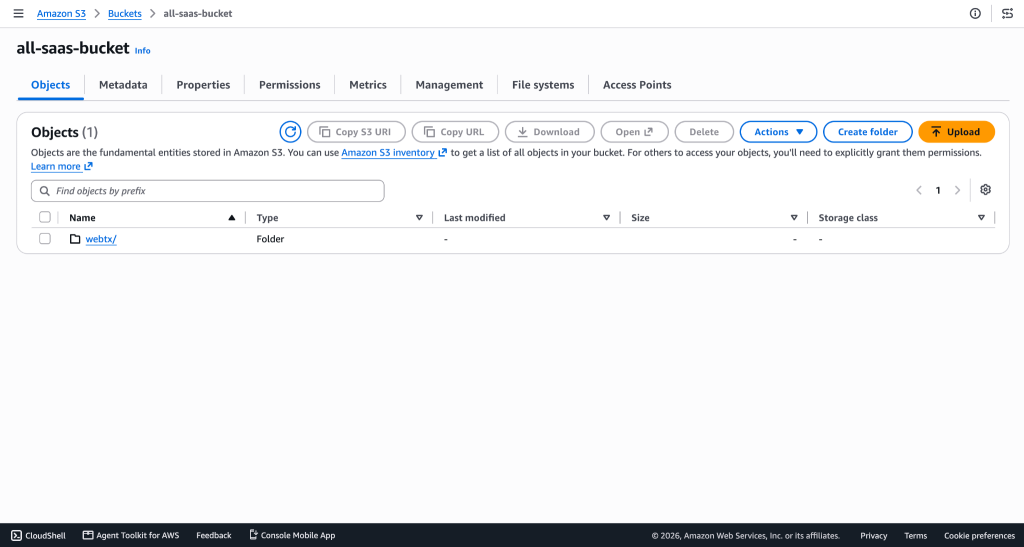
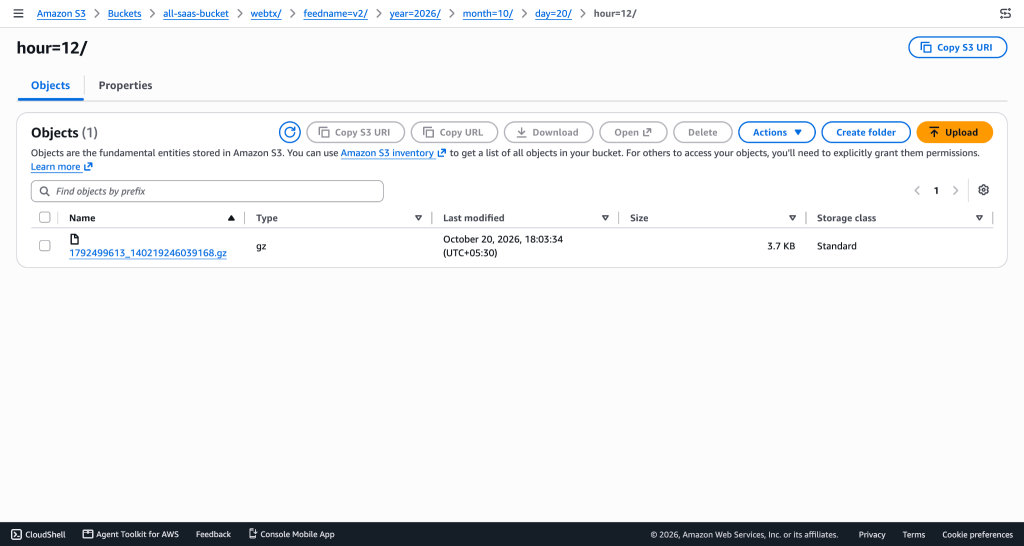
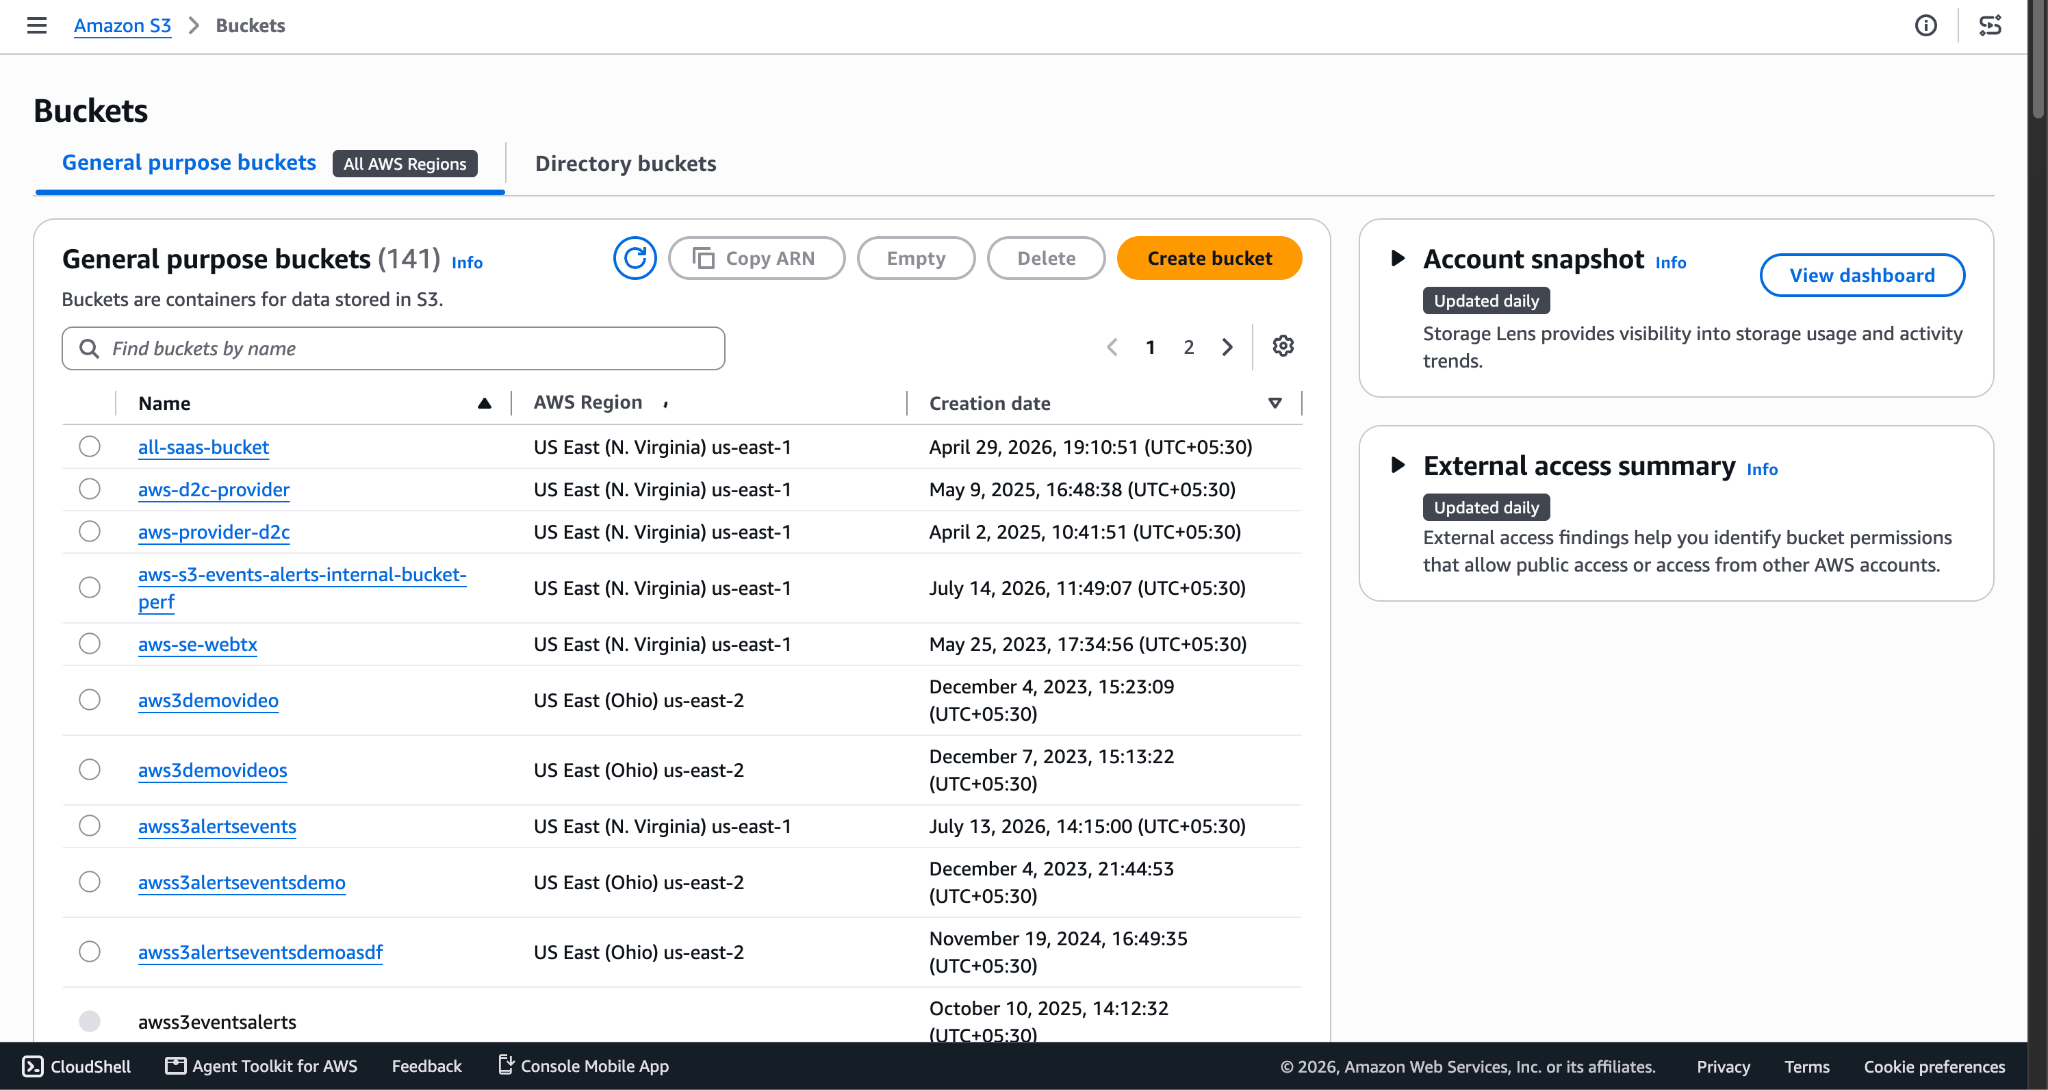
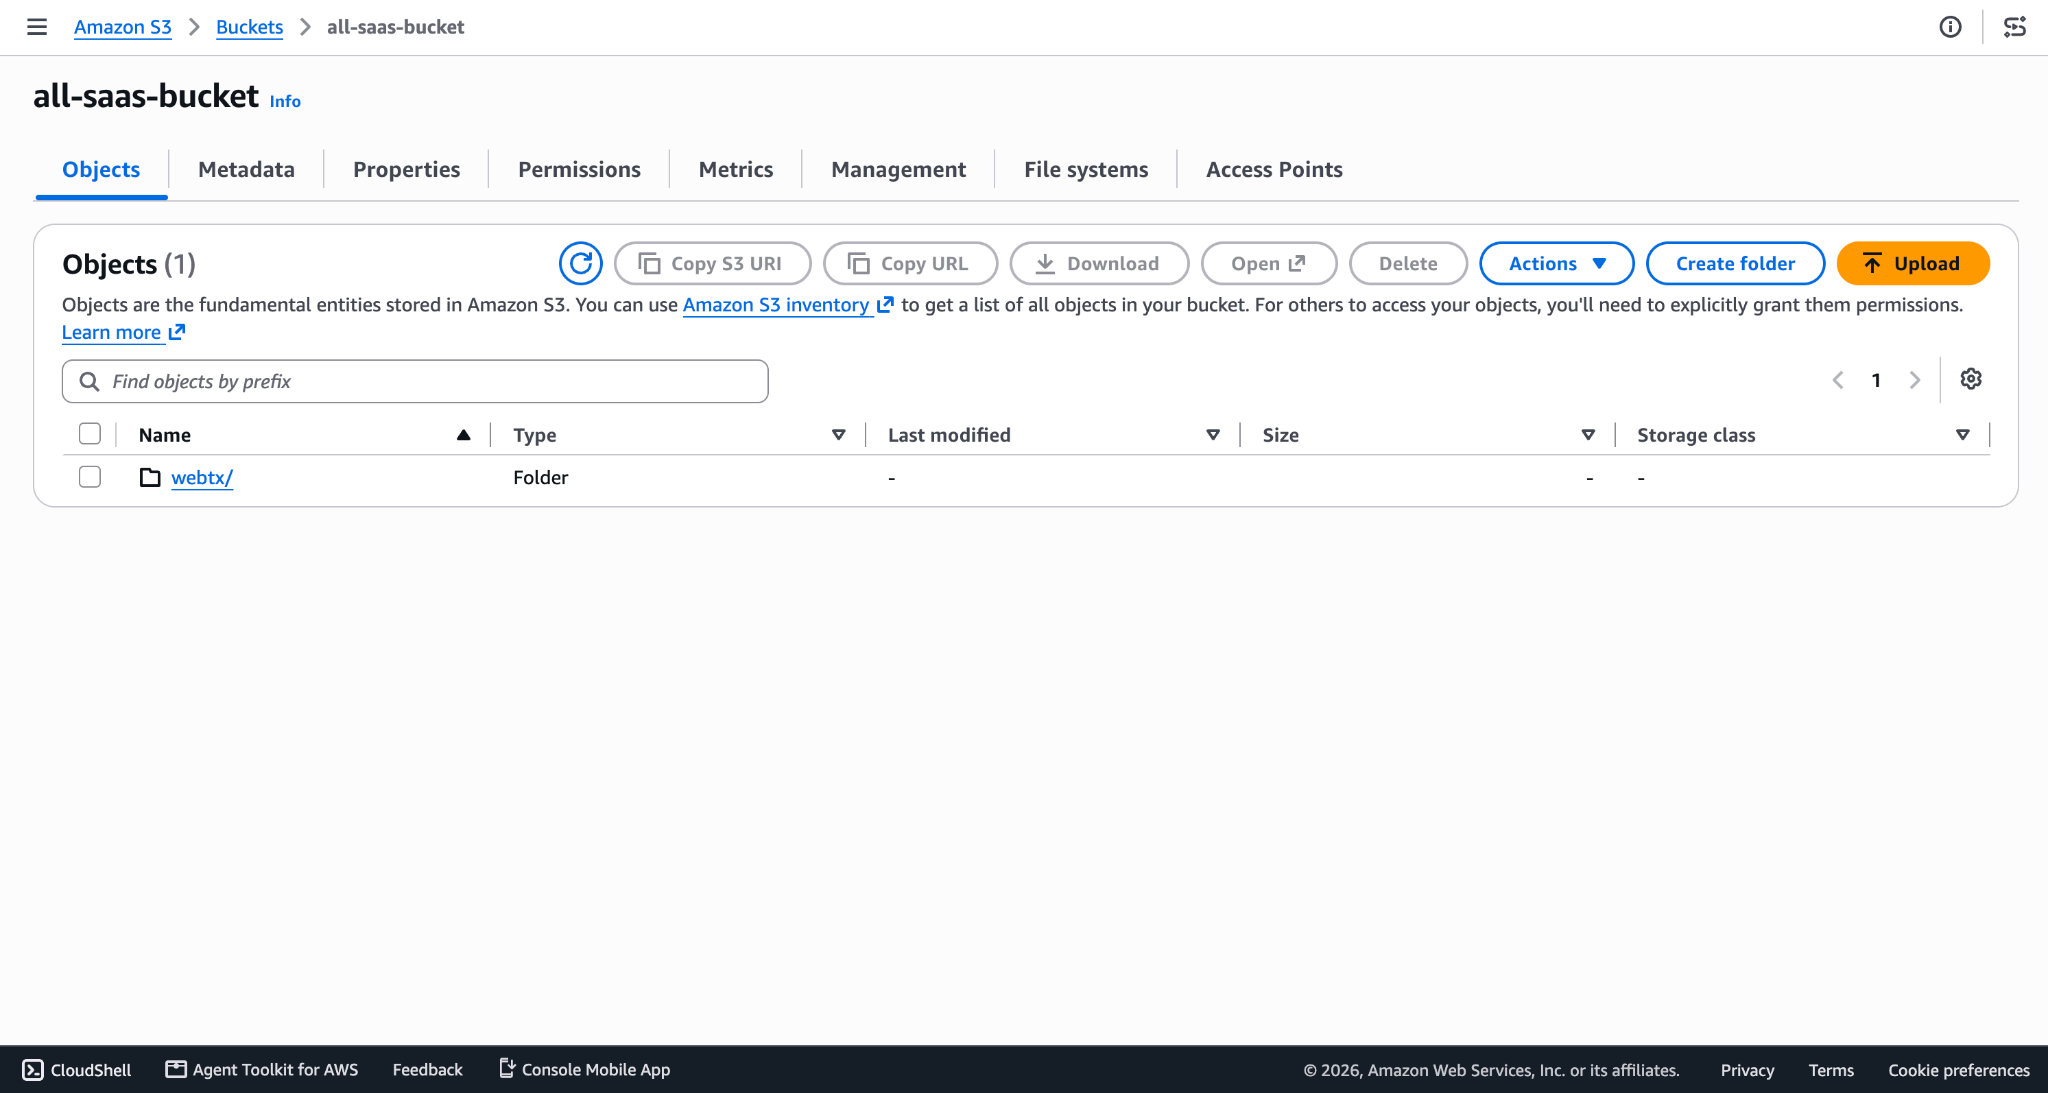
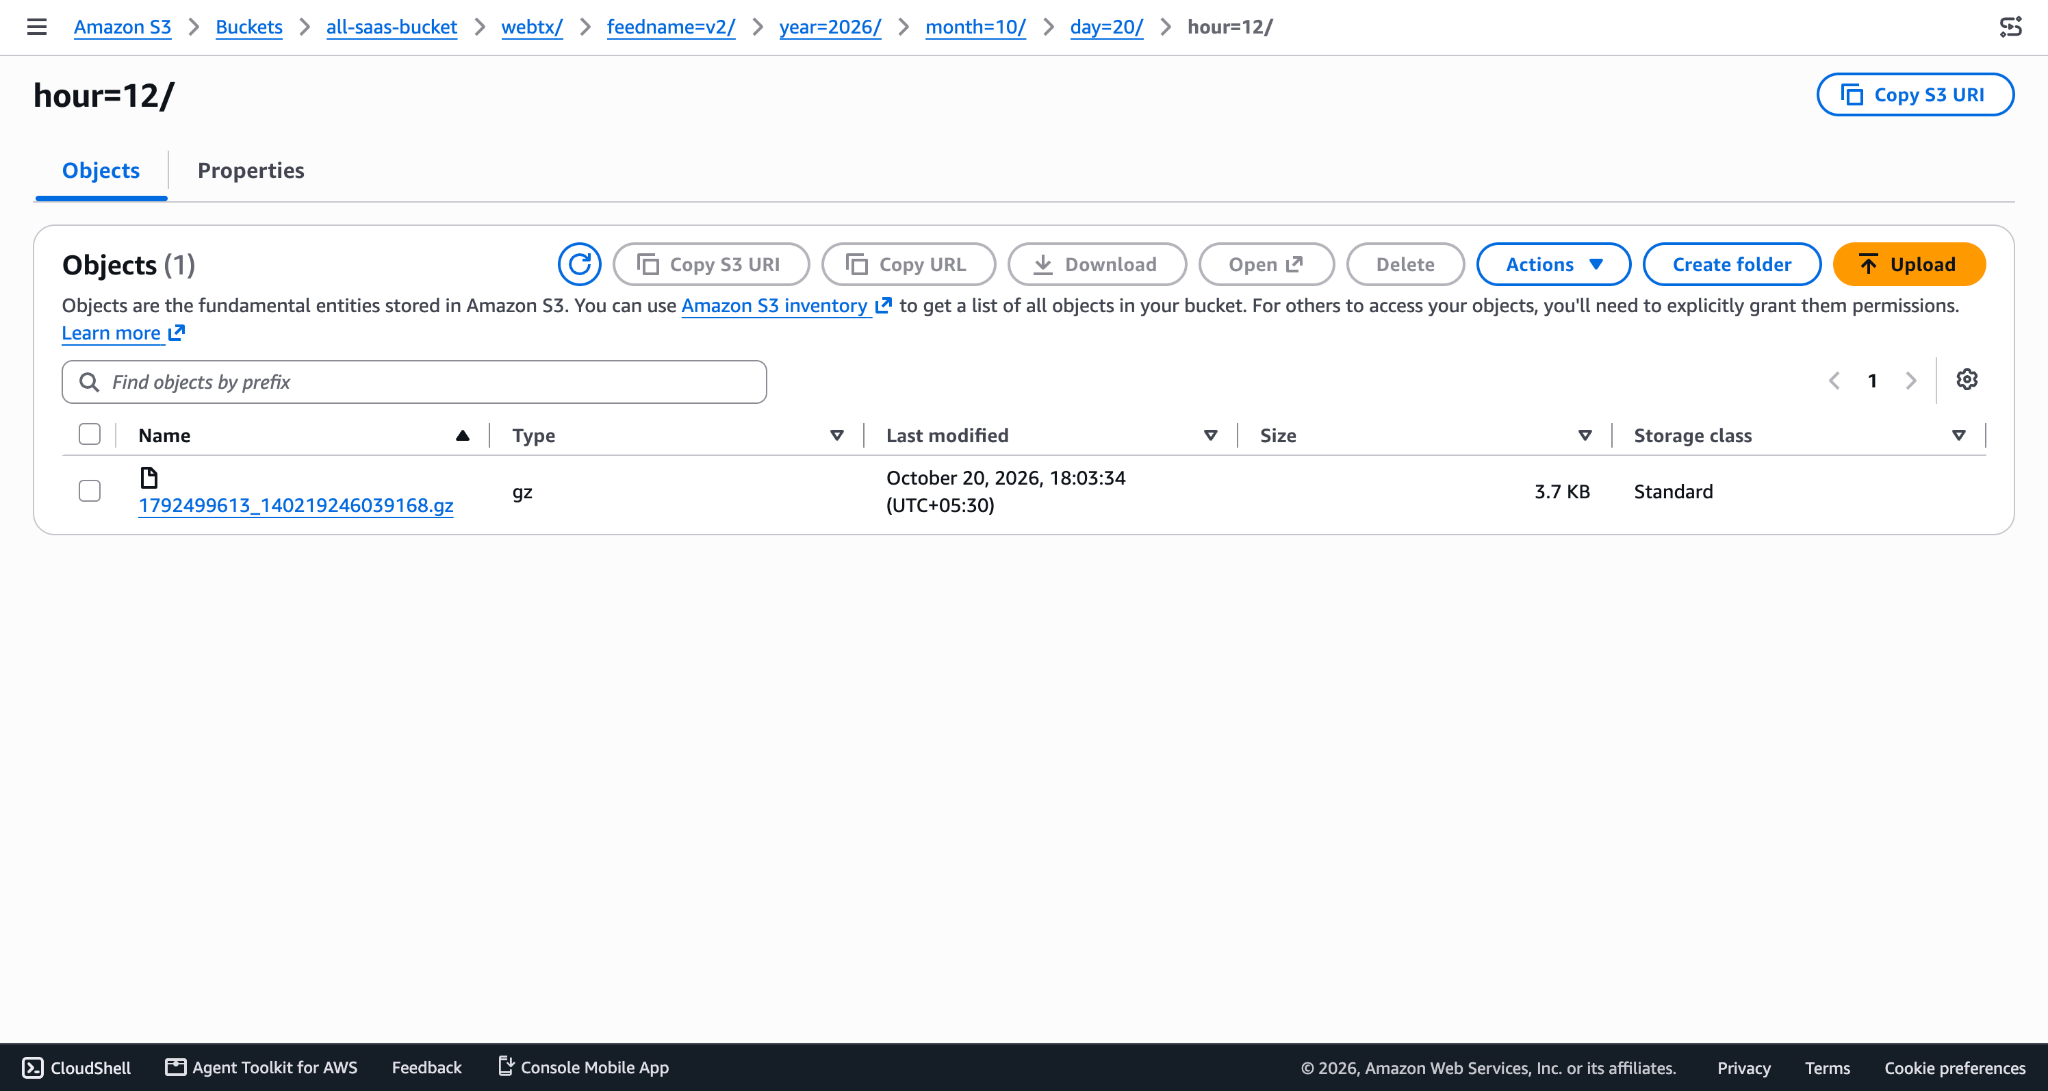
Example: Webtxdemobucket/webtx/feedname=2.0.0/year=2023/month=11/day=30/hour=9/1792588265_132874188526208_37862b2b68994795874100a37cc8e2cf.gz
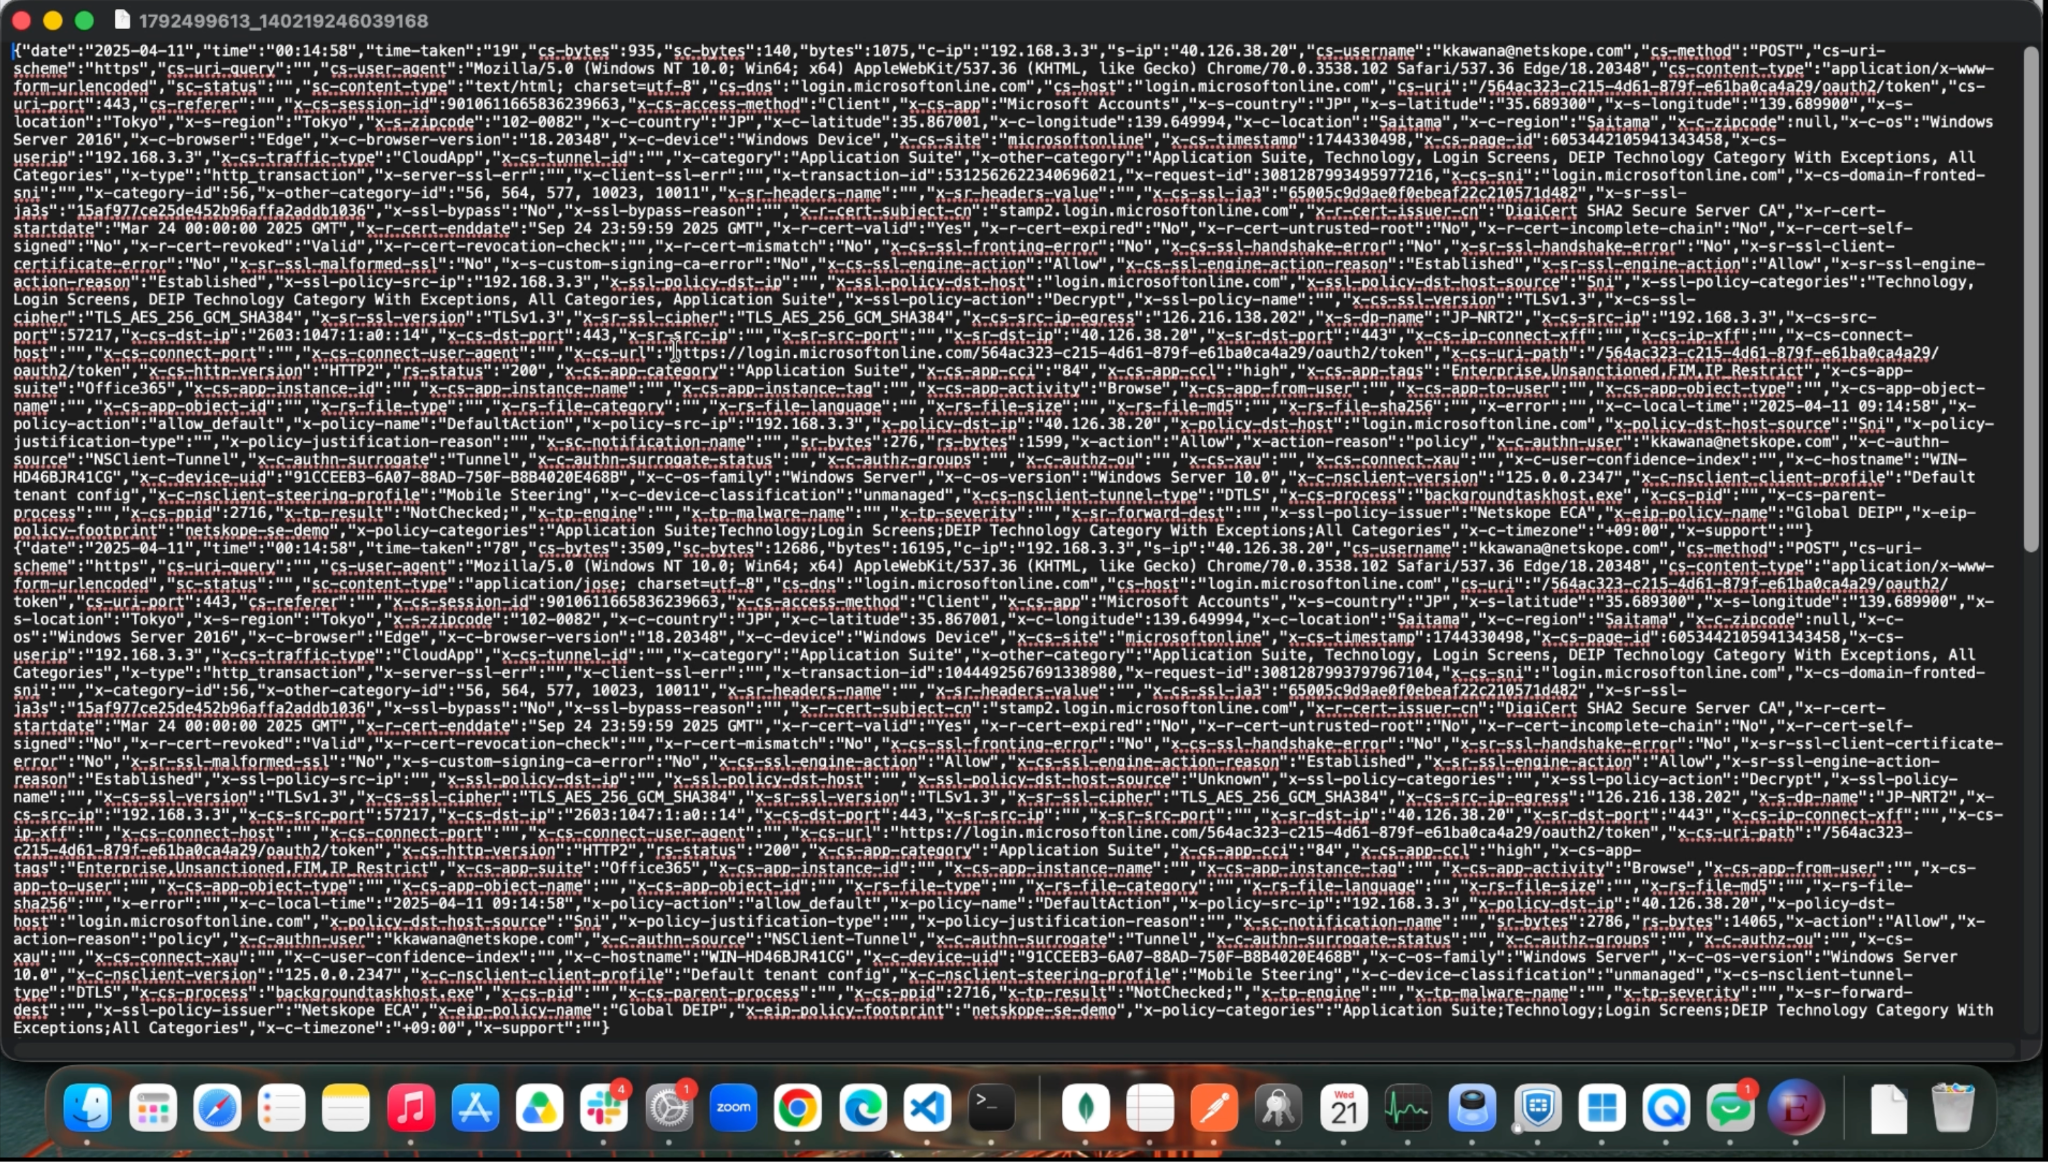
Here is the sample content of the downloaded file:
Troubleshooting the AWS S3 WebTx Plugin
Problèmes dans la configuration existante du plugin après la mise à jour du plugin
Si vous avez récemment mis à jour votre plugin AWS S3, il est possible que la modification de la configuration du plugin existant entraîne l'affichage d'une interface Cloud Exchange vide. Ce problème peut survenir dans les versions 4.2.0 et 5.0.0 de Cloud Exchange si les utilisateurs tentent de modifier la configuration du plugin après la mise à jour et accèdent à la page des paramètres de configuration.
What to do:
For versions 4.2.0 and 5.0.0, the only solution available is to delete the current plugin configuration and set up a new one from scratch.
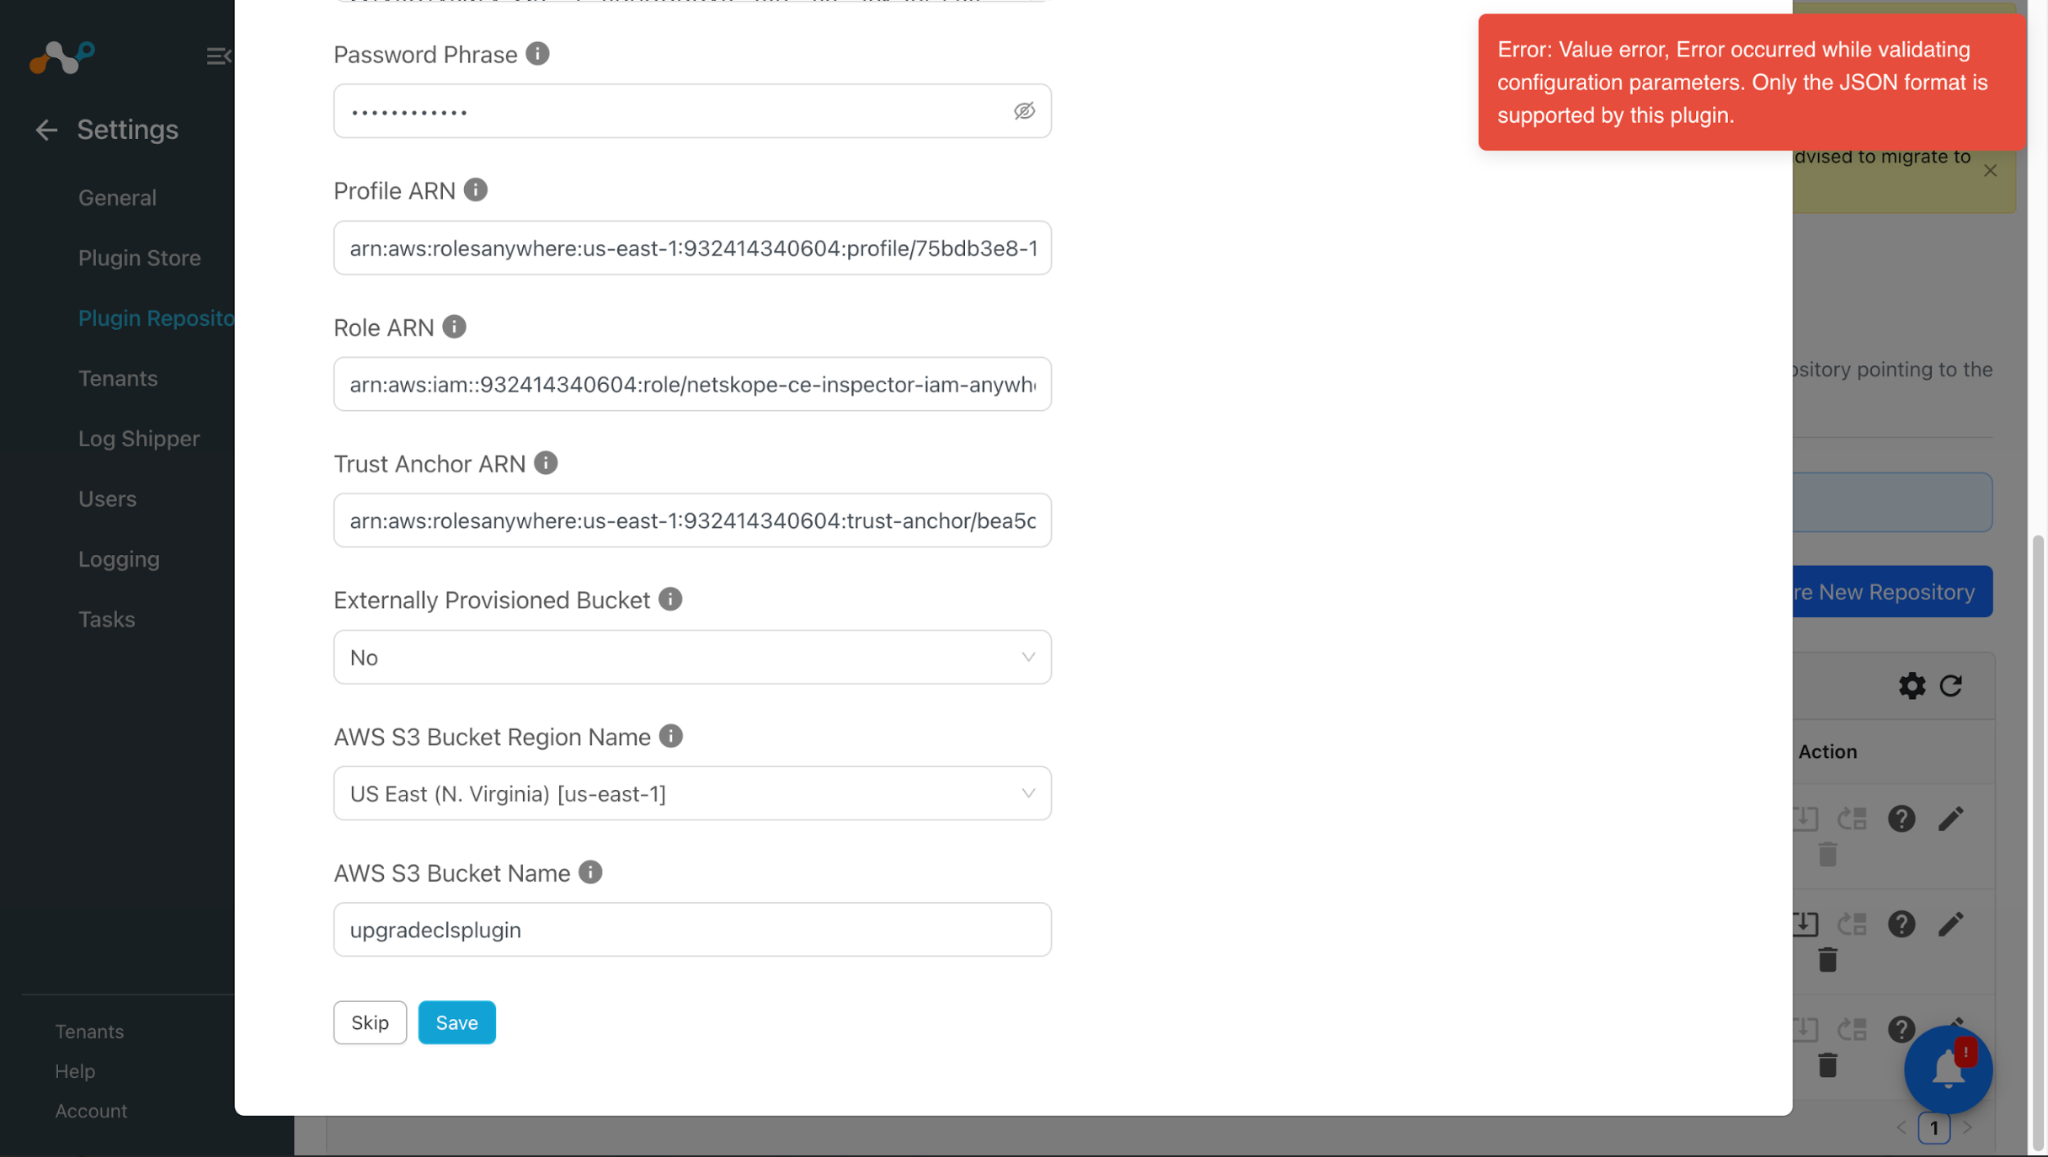
Getting an error while upgrading the AWS S3 WebTx plugin
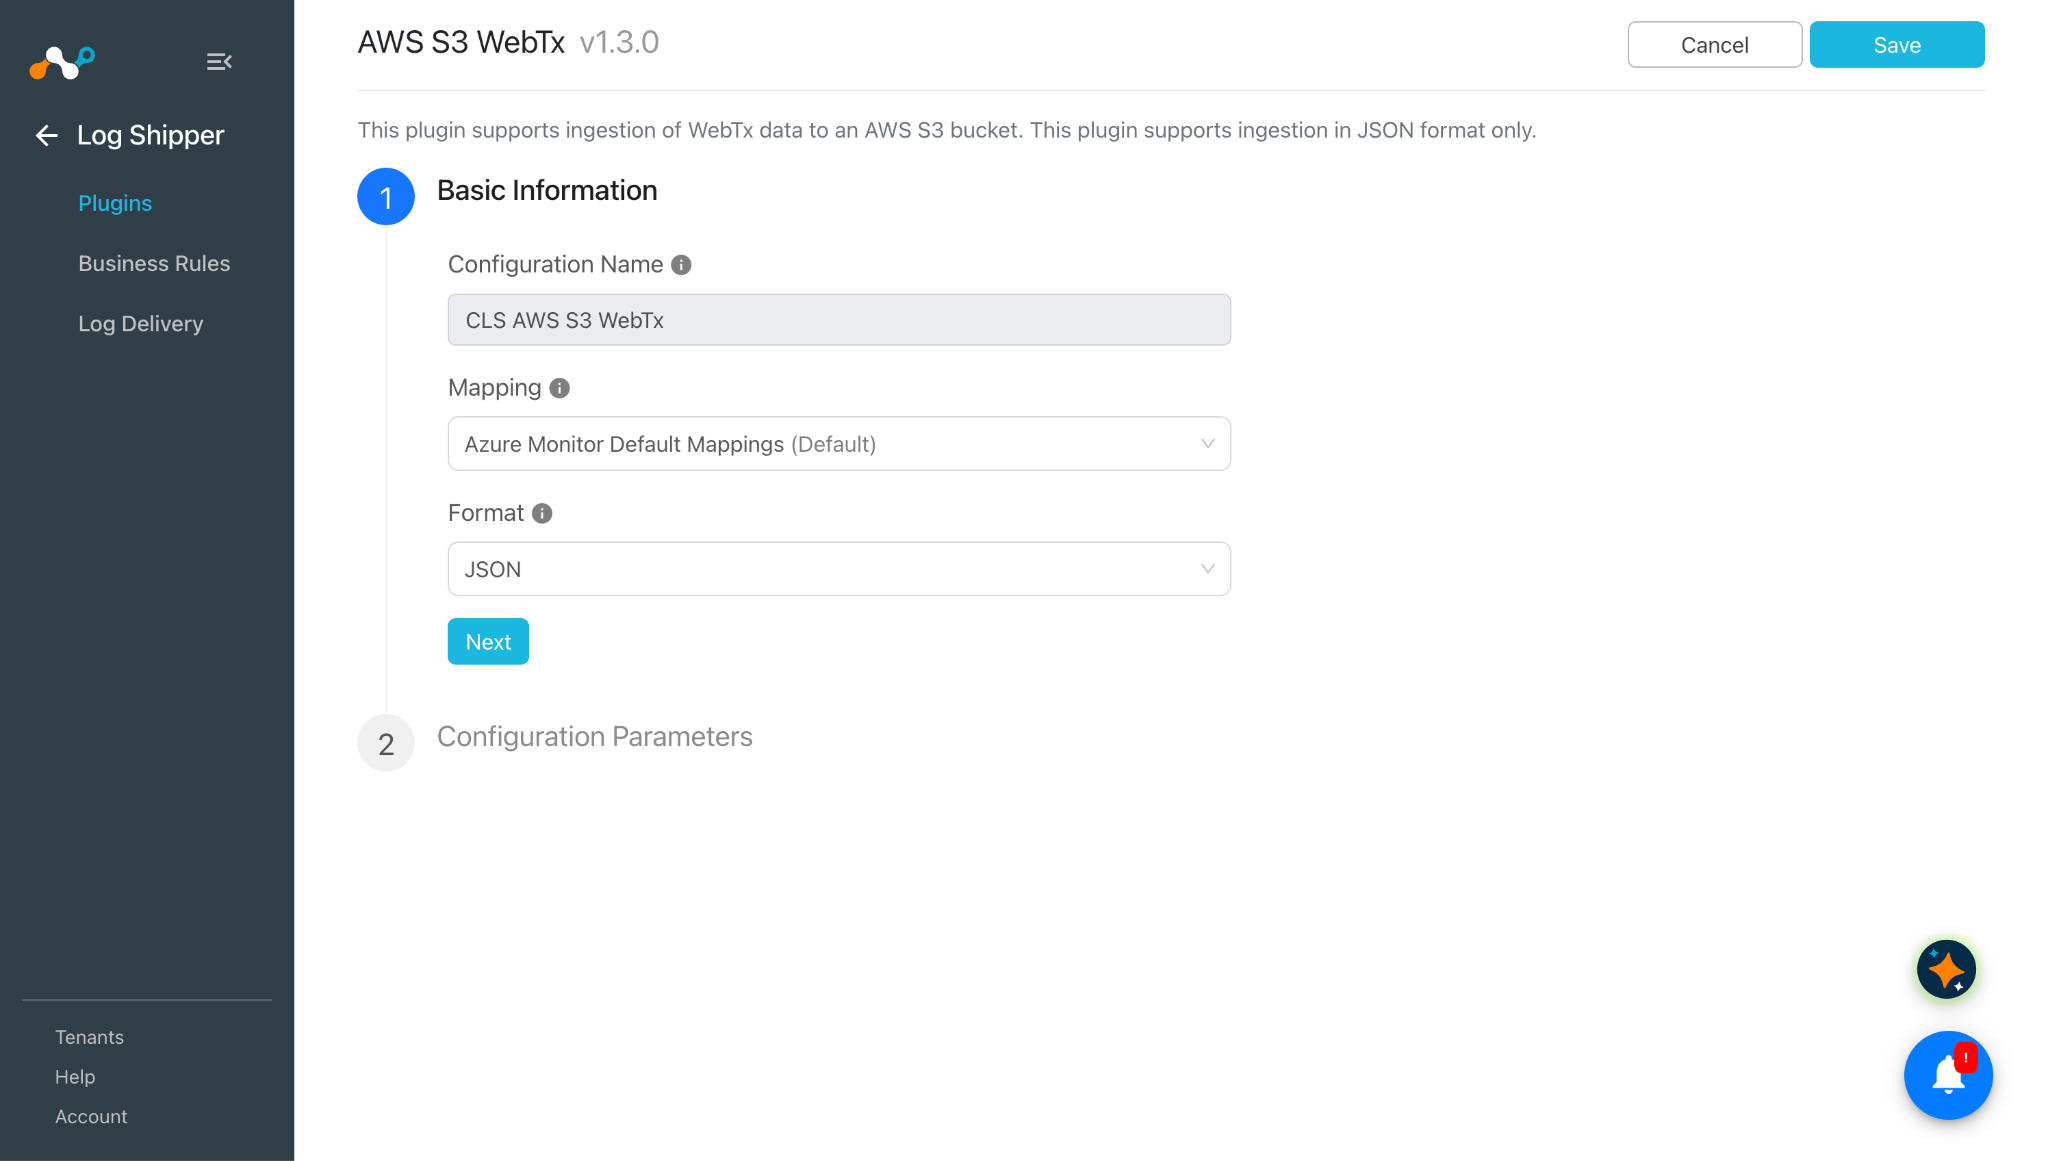
If you see the error Only the JSON format is supported by this plugin while upgrading the plugin, CEF may be selected as the format under Basic Information.
What to do:
- Click Skip while upgrading the plugin.
- Edit the plugin configuration and select JSON from the Format dropdown.
- Cliquez sur Save.
- Enable the plugin configuration.
Problèmes lors de la configuration du plugin New
If you are creating a new plugin with AWS IAM Roles Anywhere and face an error of 400, you can find the root cause for not being able to save the plugin in the logs. Go to Logging and expand the logs.


What to do:
When you expand the log, you see At least one of the Trust Anchor ARN, Role ARN, and Profile ARN has a different account ID. Check that the provided parameters are generated from the same account and have the same region.