

This document describes how High Availability (HA) works in Cloud Exchange. After reviewing the architectural diagram feature list, prerequisites, and sizing guidelines, deploy HA in Cloud Exchange. After the deployment section, there are sections that explain migrating, upgrading, hardening, known limitations, and troubleshooting.
HA Architecture

Features
- Active-Active configurations for Cloud Exchange nodes, enhancing system availability and fault tolerance.
- The Cloud Exchange Core container is engineered to function as a dedicated worker capable of handling multiple tasks concurrently. For a medium-sized setup, it can manage 10 tasks, while a large setup allows for 20 tasks. These tasks may include operations such as polling, ingestion, and heartbeat monitoring. In a High Availability (HA) cluster with three nodes, the processing power effectively triples, enhancing the system’s execution capacity.
- Task assignments are coordinated through RabbitMQ, which distributes tasks to the core container’s workers based on their current load and the number of tasks they are actively processing. In the event of a core container restart or a node failure, transformation and ingestion tasks are requeued to ensure no data is lost. Meanwhile, data retrieval tasks are reassigned to another node, typically within five minutes of the failure, subject to the workload of the new node.
- To encapsulate, the core container is designed with both task-level and node-level HA to ensure continuous operation and data integrity.
- In a cluster, there will be multiple instances of MongoDB and RabbitMQ. If one node goes down, the other nodes will continue to serve requests, ensuring zero downtime.
- The multiple identical nodes of Cloud Exchange will be running concurrently. And all of them are actively processing plugin tasks simultaneously.
To watch a video about how to configure Cloud Exchange HA, click play.
To watch a video about how Cloud Exchange HA Failover works, click play.
UI Dashboard for Cluster Status
Check the current cluster status on the Home page of Cloud Exchange.

The Core service is dependent on the UI services. Because for security reasons, we are not making the core service public. The Core service will be accessible through UI service, and it will be accessed by an internal network. If the UI service is down, the core will show an unknown status on the dashboard.
Important Notes
- If you are transitioning from a standalone configuration to a High Availability (HA) setup, you should know your maintenance password, as it is required to migrate the Mongo data into the new setup.
- If you are using Cloud Exchange as a VM, check this point and make hostname changes accordingly.
Make sure all the machines have different hostnames. Use this command to change the hostname of a particular machine.sudo hostnamectl set-hostname <new_hostname>
- Make sure that every machine can connect to the ports listed below on every machine including the machine itself. The reason for including the current machine is, the API calls will be made to the IP address of the server, and the API call will be made from inside the docker container. So the connectivity of the port using IP address must be allowed. The firewall policies for these listed ports and all the machines should be configured to ensure seamless connection between the machines.
- 4369 (A peer discovery service used by RabbitMQ nodes and CLI tools)
- 8000
- 5671 (Used by AMQP 0-9-1 and AMQP 1.0 clients without TLS)
- 15671 (HTTP API clients, management UI and rabbitmqadmin without TLS)
- 25672 (Used for internode and CLI tools communication)
- 35672 (Used for CLI tools communication)
- 27017 (The default port for mongod and mongos instances.)
- Selected UI port (Default 443 for HTTPS and 80 for HTTP) (To access the UI and internode healthcheck)
- 24007-24029 (GlusterFS ports used for inter node communication, health checks, selfheal demon, brick communication)
firewalld is already installed and disabled by default. You will need to enable the firewall by running these commands and restarting the docker service.sudo systemctl enable firewalld
sudo systemctl start firewalld
sudo systemctl restart docker
Sample command to open 443 port using a firewall:
sudo firewall-cmd --permanent --add-port=443/tcp
These ports will be used for the clustering of the MongoDB and RabbitMQ services. Also the UI ports are required to perform a health check from all the machines.
Deploy HA in Cloud Exchange
Set Up a Primary Node
- Clone the
netskopeoss/ta_cloud_exchangeGithub repository in all the machines where Netskope CE will be deployed:mkdir netskope cd netskope git clone https://github.com/netskopeoss/ta_cloud_exchange cd ta_cloud_exchange
If you already have the repo cloned, then remove any local changes and pull the latest version.
git reset --hard
git pull
Checkout the Desired Version. Before proceeding, checkout the desired version of the repository. For example, to checkout version 6.1.0.
git checkout v6.1.0
If you are using CE as a VM, the repo will be available on the
/opt/cloudexchange/cloudexchangepath. Change the current directory to thecloudexchangedirectory.cd /opt/cloudexchange/cloudexchange
- (optional) Copy and edit the
cloudexchange.configfile.cp cloudexchange.config.example cloudexchange.config
vi cloudexchange.config
- The maintenance and JWT Secret passwords are used internally within Cloud Exchange for database authentication. These passwords will be needed when restoring a backup.
- Non‑ASCII characters (e.g., accented letters, other scripts, emoji) are not supported for the Maintenance and JWT Secret Password, some of the processes might not work and might cause system failures if you use these special characters.
- Edit the variables as per your requirements and save the file. Then execute the following command:
sudo systemctl stop cloud-exchange && sudo systemctl disable cloud-exchange
- Execute setup.
sudo ./setup
- Execute start to bring up the standalone instance.
sudo ./start
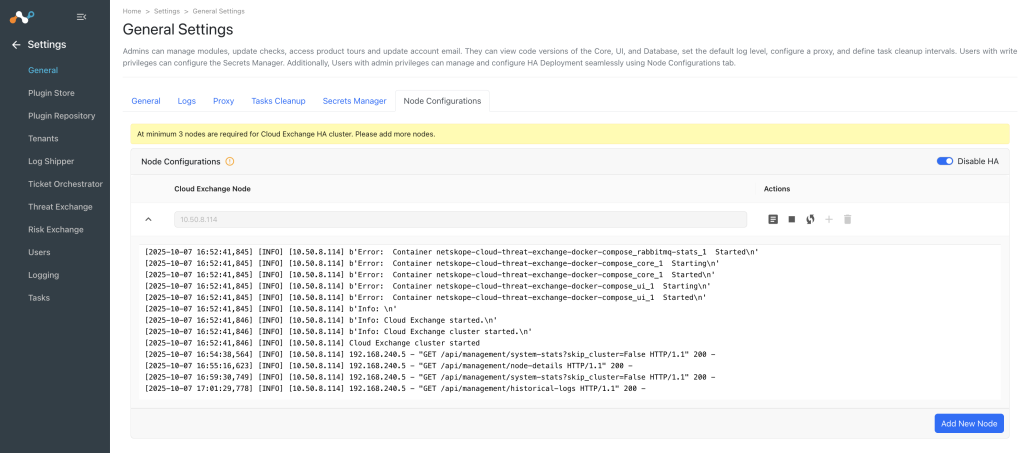
- After the node is up, go to Settings > General > Node Configuration.


- Click Enable HA, and confirm the choice. Observe the streamed logs. While enabling HA, the node will restart once.
After the node is up, validate the service status for RabbitMQ, MongoDB, Core, and UI.

Set Up a Secondary Node
- Copy the JWT secret Key from the primary node. If you don’t recall the JWT Secret value of the primary node, generate and apply new JWT token by following the steps here.
- Clone the
netskopeoss/ta_cloud_exchangepublic Github repository. - Checkout the Desired Version. Before proceeding, checkout the desired version of the repository. For example, to checkout version 6.1.0, Skip this three steps if you are using CE as a VM image (go to
/opt/cloudexchange/cloudexchangepath for CE as a VM Image).
git checkout v6.1.0
- In the secondary node inside the folder where the
cloudexchangerepository is cloned, edit thecloudexchange.configfile, and update the JWT Secret key from the primary node.
cp cloudexchange.config.example cloudexchange.config
vi cloudexchange.config
sudo systemctl stop cloud-exchange && sudo systemctl disable cloud-exchange
- Copy the existing CA key from
ta_cloud_exchange/data/ssl_certs/mongodb_rabbitmq_certs/tls_cert_ca.keyof the primary node. - Paste it at the same path on the secondary node. File name should be exact same as the
tls_cert_ca.key. - Execute setup on the secondary node. After setup is complete on a new node, the new certificates for that node will be generated and will be signed by an existing CA, and this will enable the Management server communications between the new node and the HA Cluster.
sudo ./setup
Add Secondary nodes into HA Cluster
- After the setup script is executed successfully in all nodes, log in to the primary node and go to Settings > General > Node Configurations.
- Click on Add New Node button, and enter the FQDN/IP address of the new node.
- Click the + icon beside the new node to proceed adding it as a new node.
Observe the streamed logs. While adding a new node, the primary node will also restart.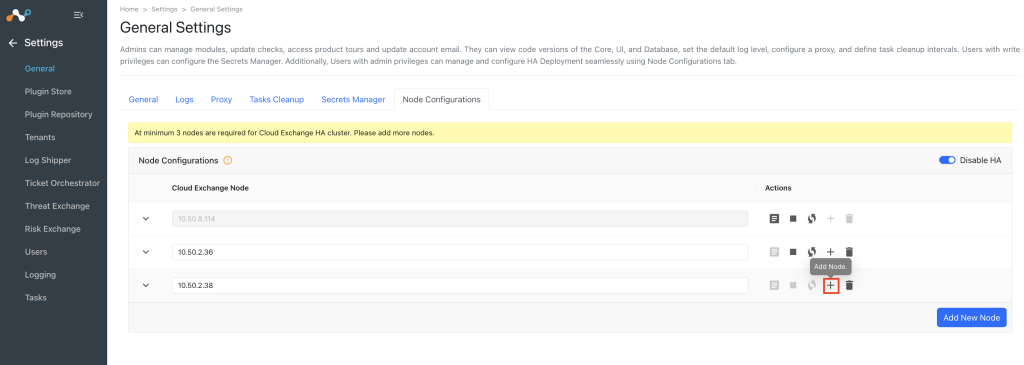

HA Node Management
- To add a new secondary node to a cluster, go to Settings > General > Node Configurations.
- Click Add and provide the secondary node IP address, and then click the add (+) icon.
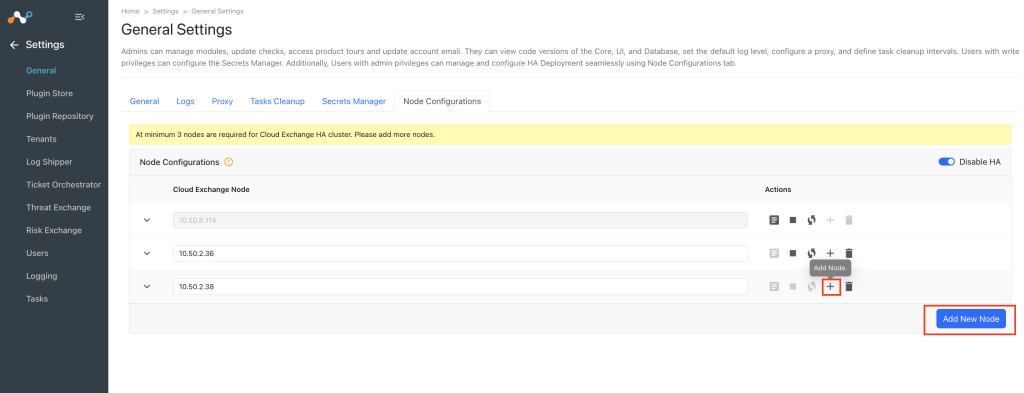
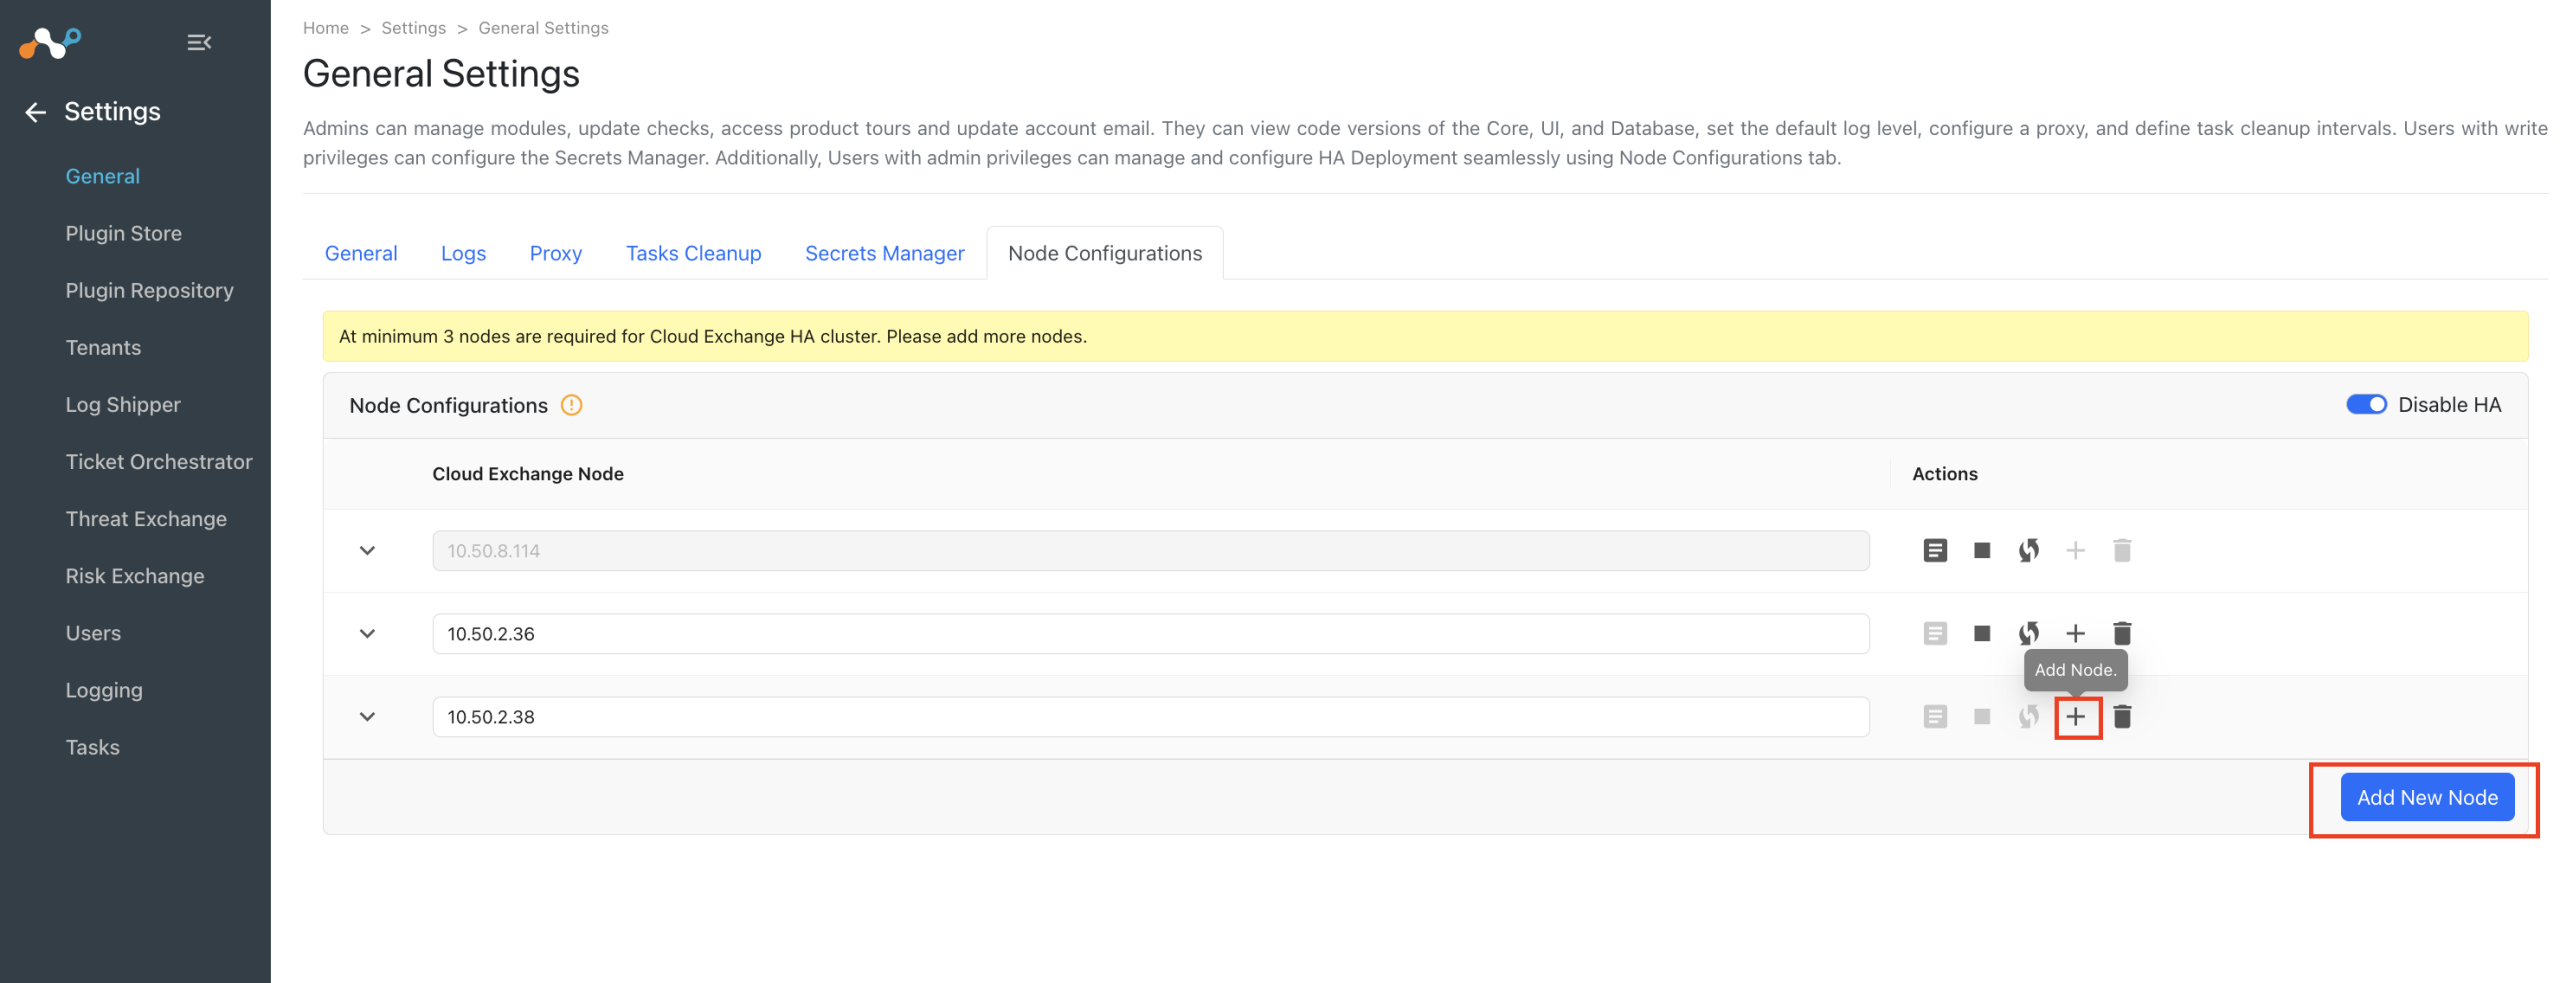
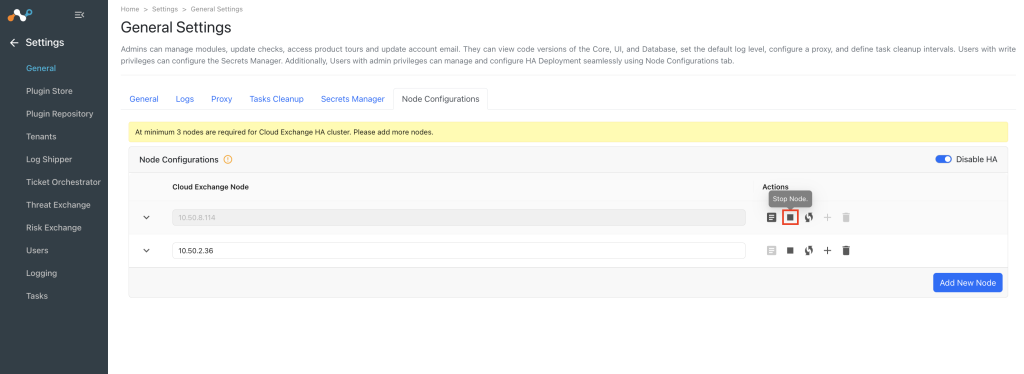
- Use the Stop icon besides the node to stop a node.

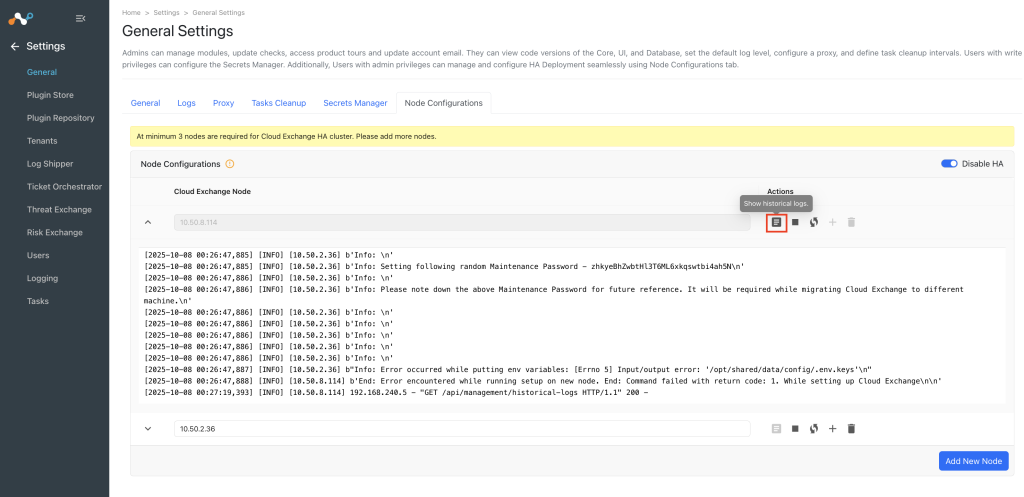
- User can also view the historical node for the node setup process using the Logs icon.

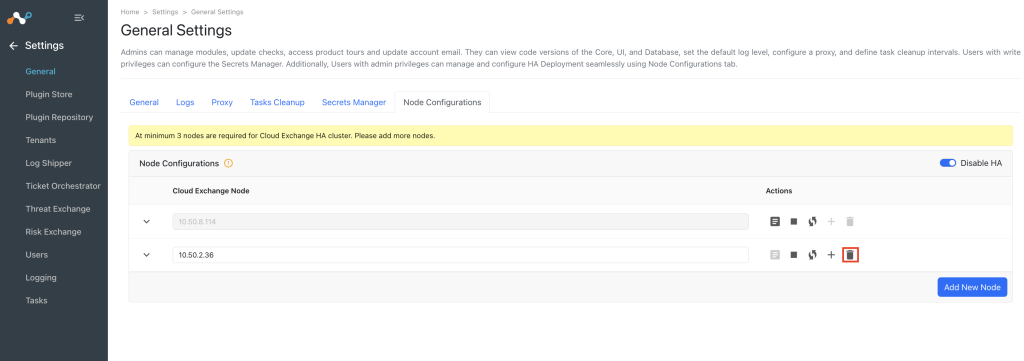
- Use the Delete icon to remove a secondary node from the cluster.

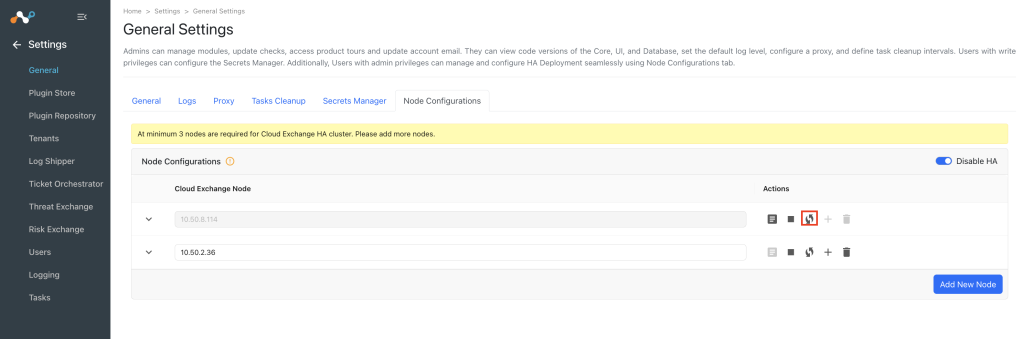
- Similarly, use the Restart icon to restart any node from the Cloud Exchange UI.

In the event you want to migrate back to standalone mode, watch this video to learn how.
Hardening Guidelines
- In order to establish the necessary connectivity between Docker services across various machines and facilitate the integration of nodes into the cluster, we have exposed the ports listed below from the Docker services. It is imperative that these ports remain accessible from all machines where the Cloud Exchange HA deployment is intended. To enhance security measures, it is also advisable to restrict access to these ports from other IP addresses.
These ports will be used for the clustering of the MongoDB and RabbitMQ services. Also the UI ports are required to perform a health check from all the machines.- 4369 (A peer discovery service used by RabbitMQ nodes and CLI tools)
- 5672 (Used by AMQP 0-9-1 and AMQP 1.0 clients without TLS)
- 15672 (HTTP API clients, management UI and rabbitmqadmin without TLS)
- 25672 (Used for inter-node and CLI tools communication)
- 35672 (Used for CLI tools communication)
- 27017 (The default port for mongodb and mongos instances)
- Selected UI port (Default 443 for HTTPS and 80 for HTTP) (To access the UI and internode healthcheck)
- GlusterFS installation and setup will be driven through the Cloud Exchange UI and management server, which will act as shared storage and will also have HA capabilities. All the VMs involved in the HA cluster should have connectivity to GlusterFS repo during HA configuration.
Cluster Node Count Requirements
As a part of MongoDb replication and RabbitMQ mirroring requirements in the event of a failure, it is crucial to ensure that the HA cluster remains operational with the majority of the Cloud Exchange nodes ACTIVE/ONLINE. An HA cluster with an odd number of Cloud Exchange nodes has a higher chance of remaining operational than a cluster with an even number of Cloud Exchange nodes.
| Total Number of CE Nodes in an HA cluster. | Minimum Number of ACTIVE/ONLINE CE Nodes Required in an HA Cluster at any Given Time for Successful Operation. |
|---|---|
| 3 | 2 |
| 4 | 3 |
| 5 | 3 |
| 6 | 4 |
| 7 | 4 |
| 8 | 5 |
| 9 | 5 |
Limitations
- You should ensure connectivity to GlusterFS repo during HA setup.
- Running multiple redundant instances of the Cloud Exchange requires additional hardware and computing resources.
- In some cases, HA setups may introduce increased latency due to the need to replicate data or coordinate between active instances.
- Whenever there are modifications to IP addresses or node-related configurations, it will be necessary to execute both the setup and start scripts on all machines within the system to ensure that the changes are properly propagated and synchronized across the cluster. It is recommended to add all the required machines at once and use a fixed IP addresses for the machines.
- It is crucial to maintain the majority of nodes operational at all times, as the failure to do so would result in cluster failure. For example,in a 3-node cluster, at least 2 nodes must be operational at any given time; similarly, in a 5-node cluster, at least 3 nodes should be up and running. The pattern continues accordingly for larger clusters. This is because MongoDB will not initiate the Primary election process under such circumstances. Additionally, we have implemented a pause_minority option for RabbitMQ to mitigate the challenges associated with network partition-induced inconsistencies. This should recover once the node comes back up and connects to the cluster again. Refer to Cluster Node Count Requirements to see the minimum required operational nodes in a cluster.
Ref: https://www.mongodb.com/docs/v5.0/core/replica-set-elections/#network-partition | https://www.rabbitmq.com/partitions.html#options - In rare cases, when a cluster is facing back-to-back node failures, there are chances of data loss in the RabbitMQ because the queue will become leader and mirror very frequently, and in such cases, other nodes may lose the data which is not synchronized yet.
Ref: https://www.rabbitmq.com/ha.html#behaviour - To use SSO, we will be able to add only one node’s IP address as a redirect URL. Optionally, we can configure the load balancer against all the IP addresses, and use IP address of the load balancer, to configure the SSO. And it will redirect the request to any available node.
Troubleshooting HA in Cloud Exchange
- The
./stopscript in HA will remove the MongoDB and RabbitMQ node from the cluster. And stop the services in that particular machine. It is crucial to have the services up while running the ./stop script. Otherwise the script might fail as the script won’t be able to create the Mongo client to remove the node. - During migration, if you have any issues with node renaming, check the prerequisite and restore the backup from 1st step. Then retry the migration from 2nd step.
sudo rm -rf <path-to-ta_cloud_exchange>/data/mongo-data/data/*
sudo cp -R <temp-mongo-path>/*
<path-to-ta_cloud_exchange>/data/mongo-data/data/ - Make sure docker/podman services are running. If not, run the services using this command
sudo systemctl restart docker
- If the UI shows a down status for any container for a long period of time, check the status of the container and perform a reboot if required. Use podman wherever applicable.
- Check the container status. If all the services are running move to the next step. Otherwise, run the start script again to recover the container.
docker ps
- Check for the MongoDB cluster status. Execute these commands to run the command inside the MongoDB container.
docker compose exec -- mongodb-primary bash
mongosh -u root -p $MONGO_INITDB_ROOT_PASSWORD
rs.status()
If the status shows anything other than PRIMARY and SECONDARY for a long period of time, run this command to restart the container on a specific machine.
docker compose restart mongodb-primary
- Check the RabbitMQ cluster status. Execute these commands to run the command inside the RabbitMQ container.
docker compose exec -- rabbitmq-stats bash
rabbitmqctl cluster_status
Check the running node section in the output and figure out the connected and running nodes. Restart the RabbitMQ container if required.
docker compose restart rabbitmq-stats
- Check the container status. If all the services are running move to the next step. Otherwise, run the start script again to recover the container.
- If any node experiences a worker lost error, like if the worker is not connected with RabbitMQ, restart the specific core container to recover the workers. This issue is likely to occur when the RabbitMQ cluster is down for a long period of time.
docker compose restart core
- GlusterFS installation errors while starting Cloud Exchange: While running the start script if you see the error failed to install glusterfs, you can ignore this error if you wish to use Cloud Exchange as a standalone instance and do not need to enable an HA cluster. If you wish to use the HA clustering, make sure the environment has connectivity to the GlusterFS repo and follow the steps in this documentation Upgrade an Underlying OS of Cloud Exchange on a VM.