This article provides instructions to deploy Netskope Client on Windows devices (either joined to Active Directory or Microsoft Entra ID) using the Microsoft Intune Win32 app.
Prerequisites
-
Import users into Netskope using Directory Importer or SCIM integration.
-
Convert the MSI Netskope Client package file to .intunewin format. To learn more, view Prepare Win32 app content for upload.
-
Ensure the device is enrolled in Microsoft Intune.
Deployment Procedure
To deploy Netskope Client With Win32 App, perform the following instructions:
-
Log in to the Azure Portal (portal.azure.com).
-
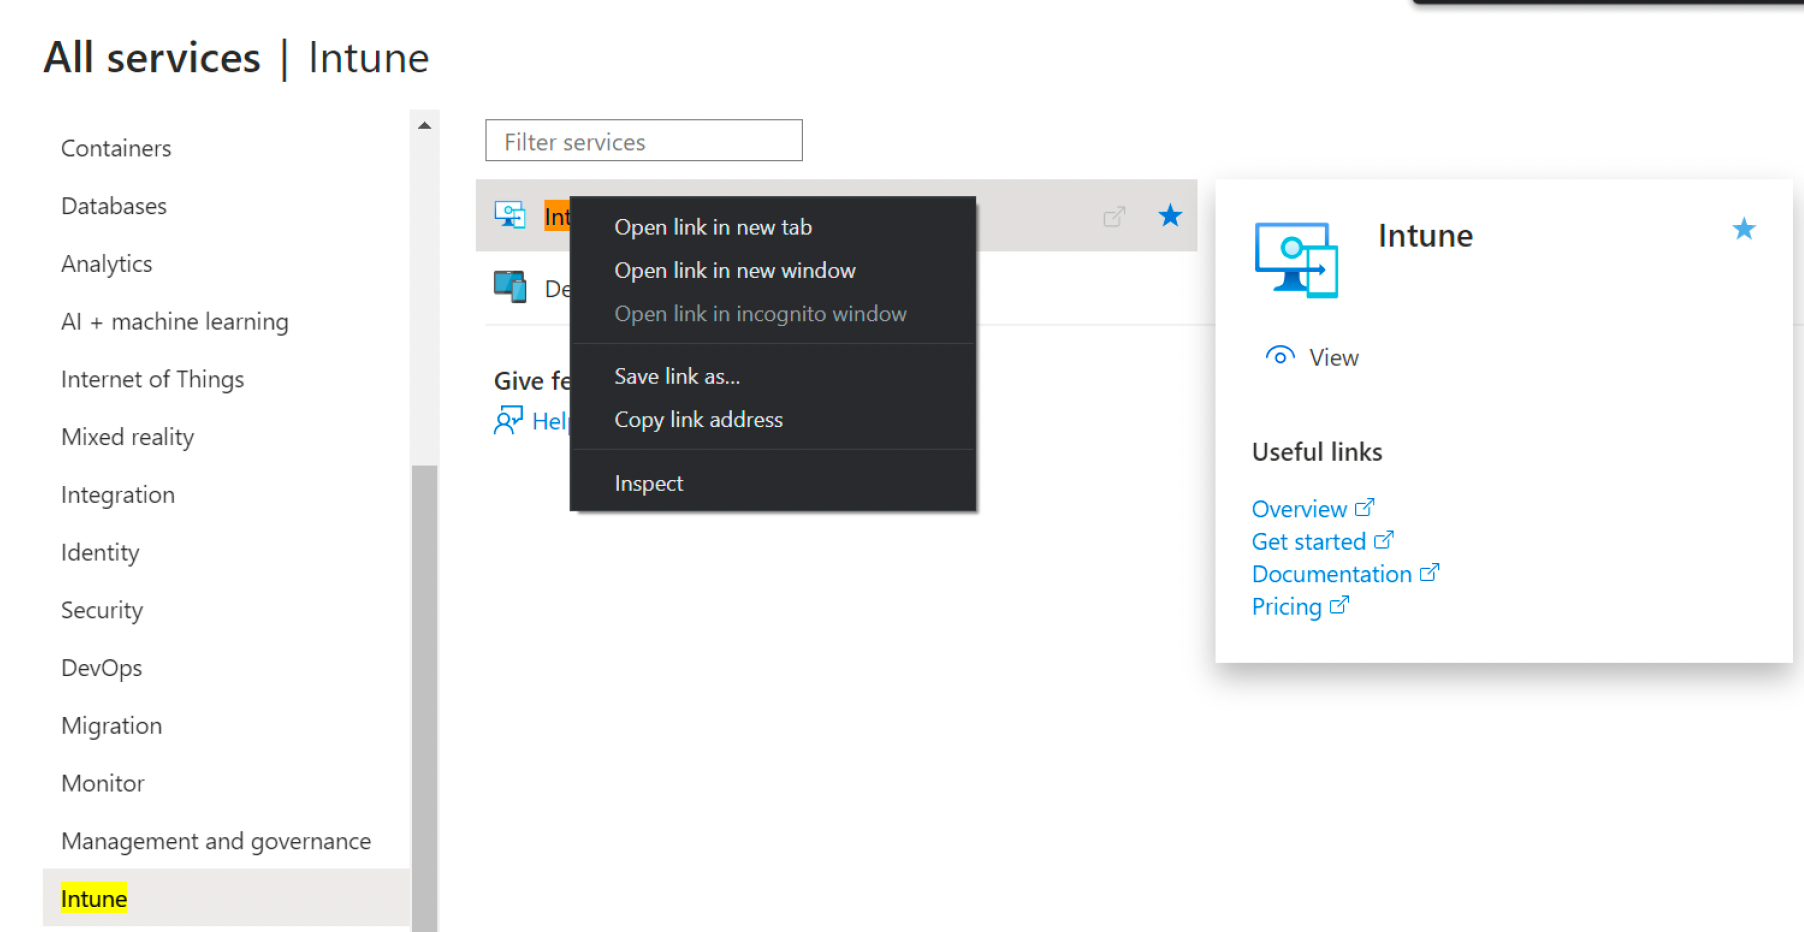
Click More Services.
-
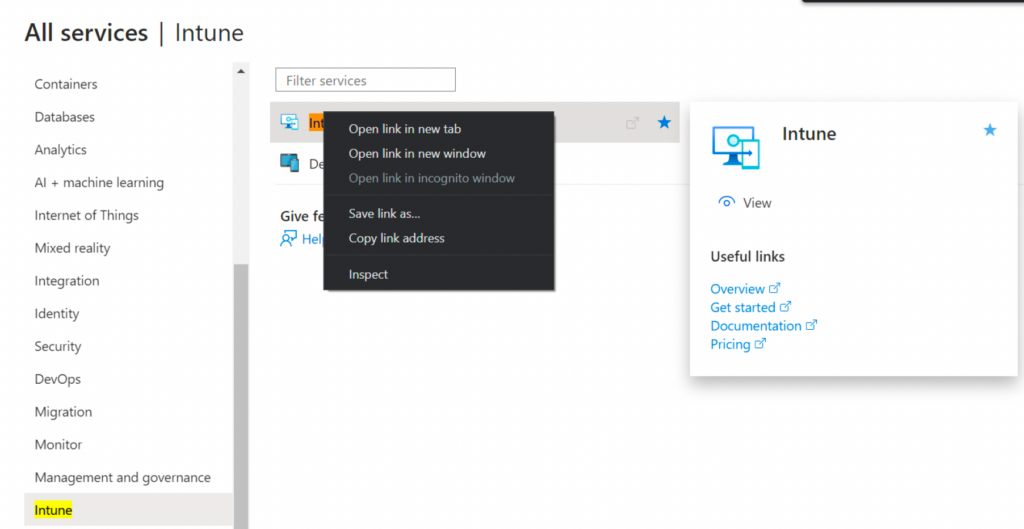
From the left-pane, click Intune.
-
From the main pane, right-click the Intune option and open it in a new tab. This redirects you to endpoint.microsoft.com.
-
From Microsoft Endpoint Manager admin center, select Apps > All Apps.
-
Select + Add.
-
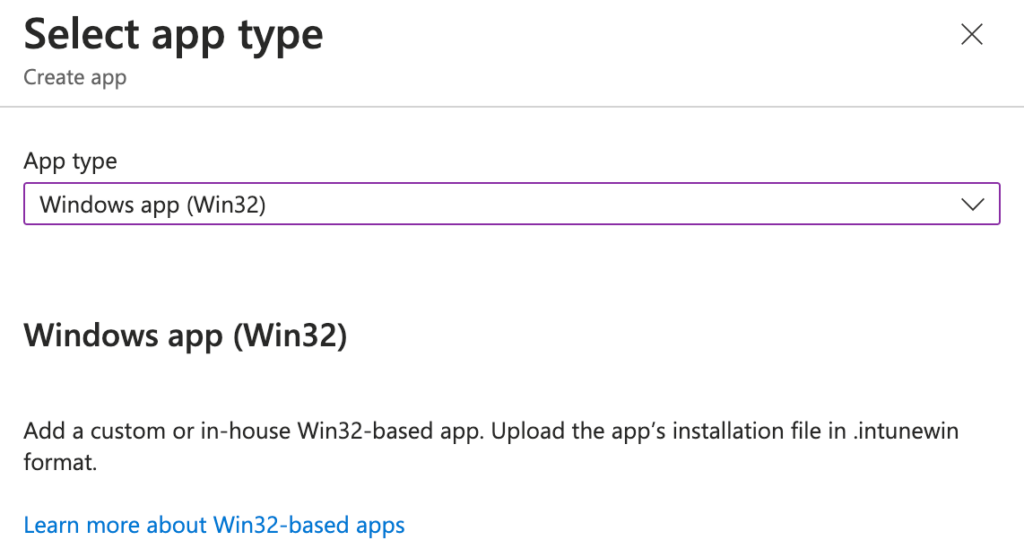
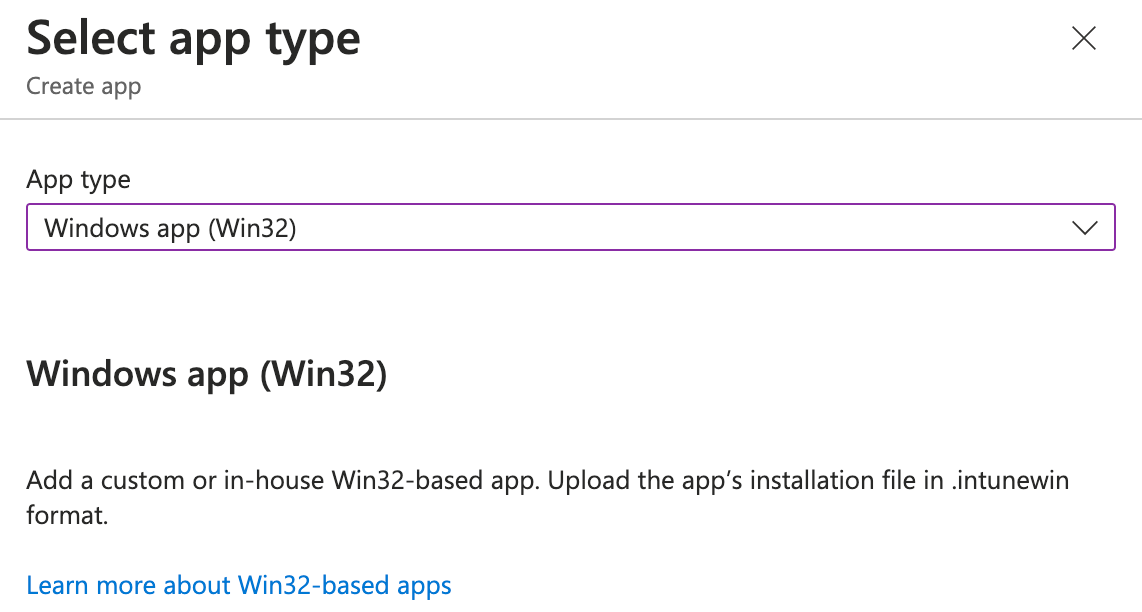
For App Type, select Windows app (Win32).
-
Click Select.
This navigates to Add App.
-
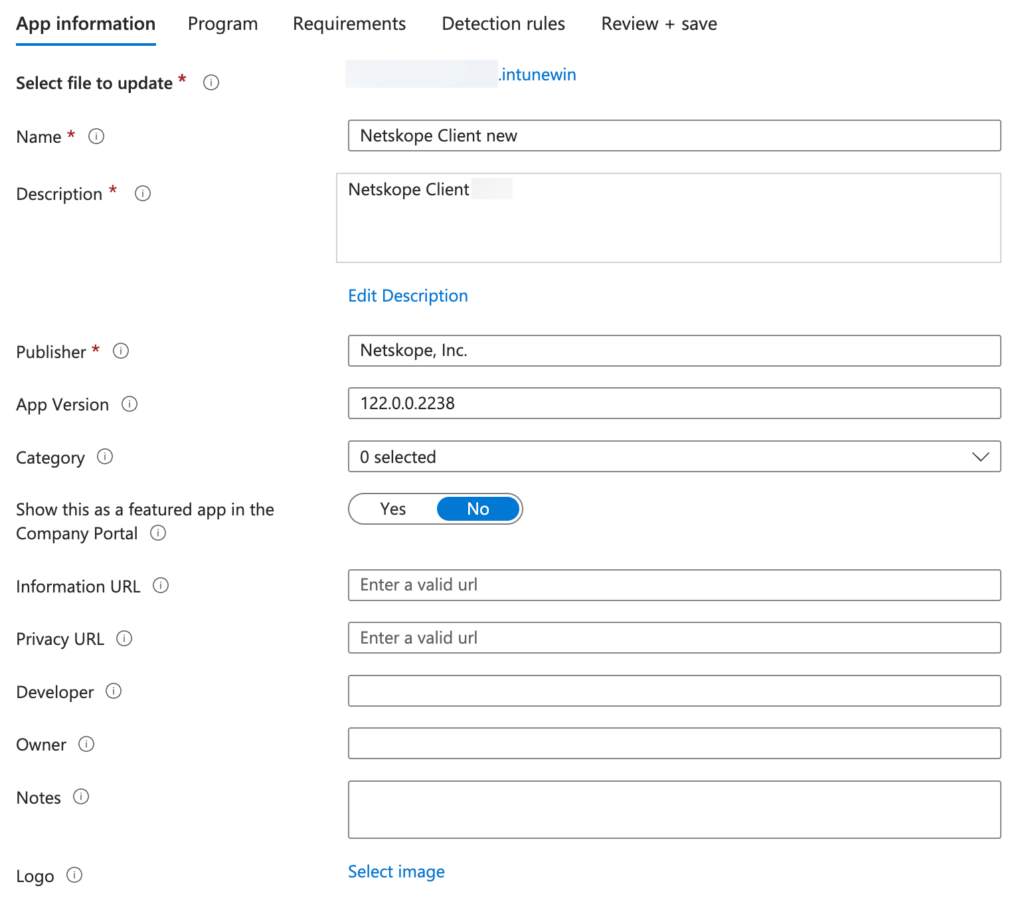
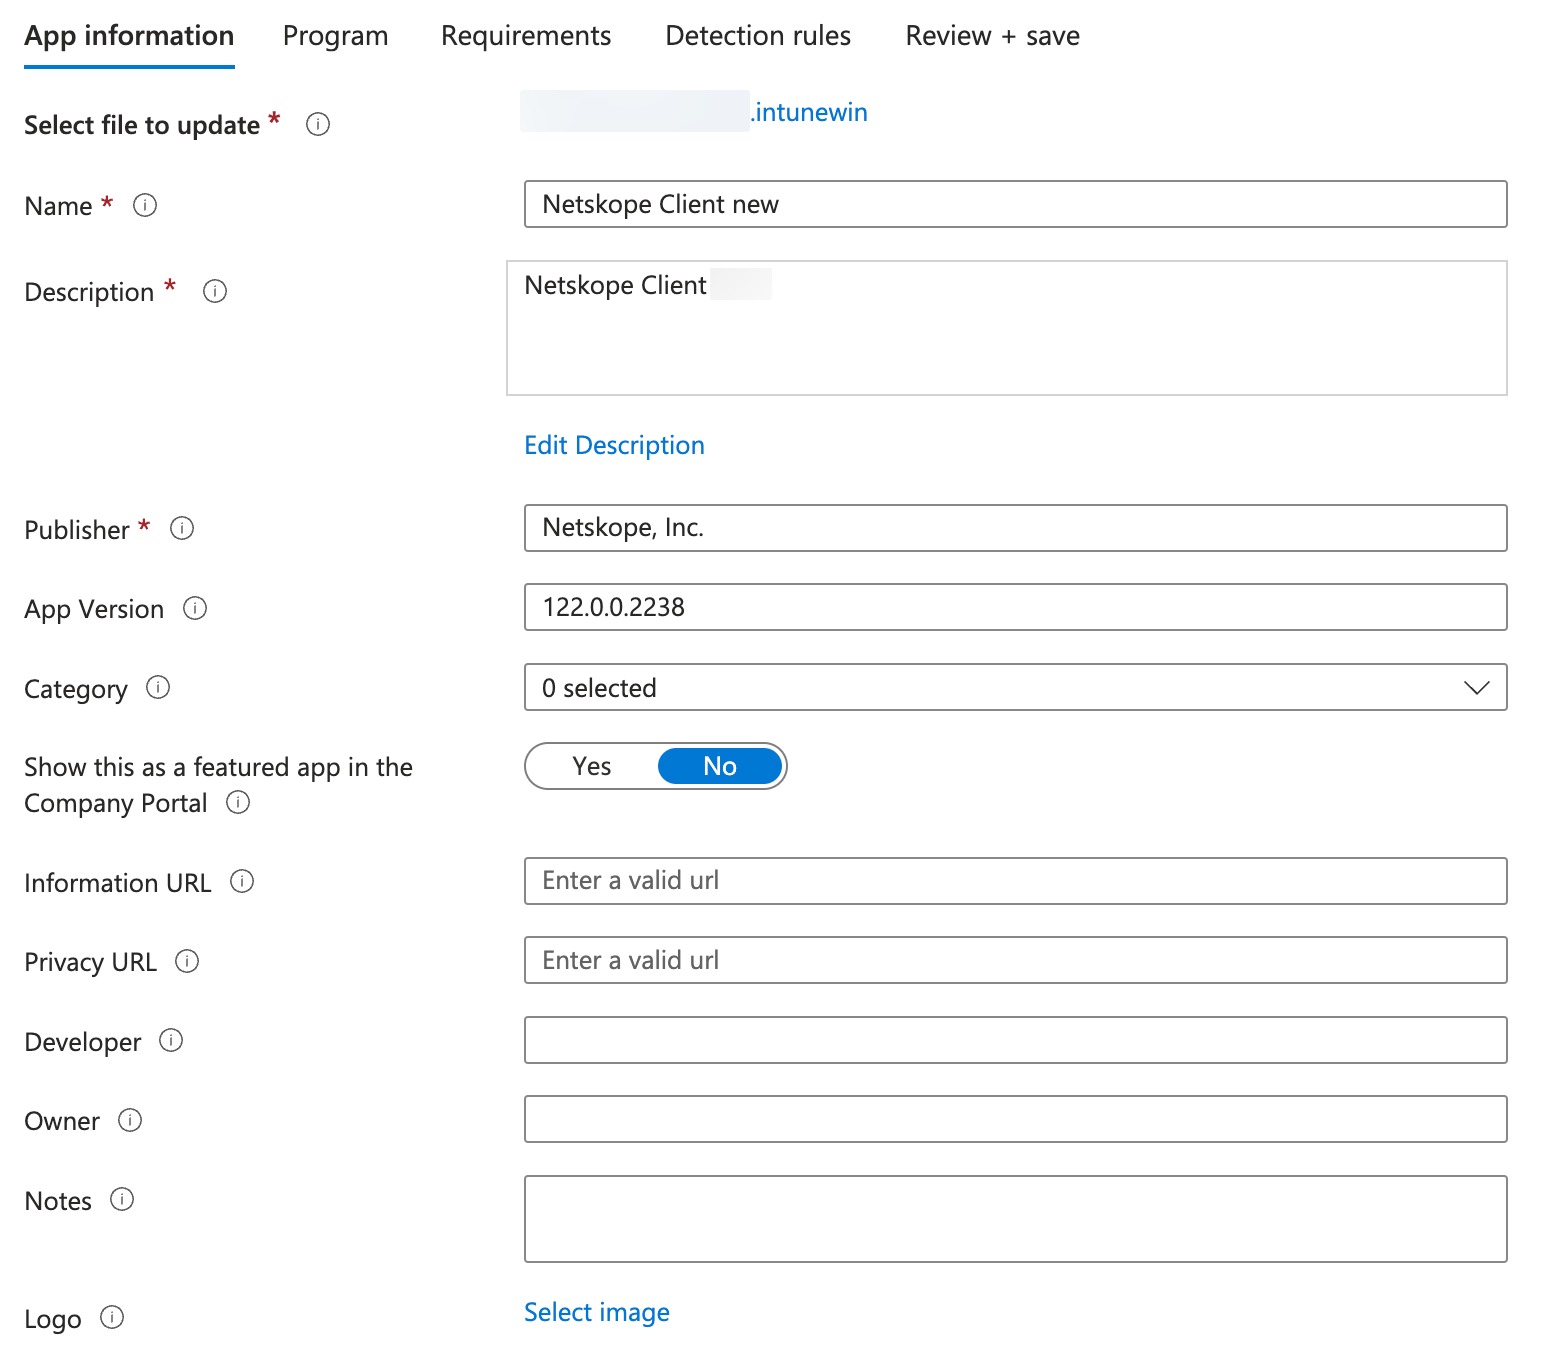
Under App Information, perform the following:
-
In Select file, click Select App Package file.
-
This opens a separate window.
-
In App package file upload the .intunewin file.
-
Click OK.
-
-
Name: Enter the name for the application. For example, Netskope Client Win32.
-
Description: Enter the description of the application.
-
Publisher: Enter the name of the publisher of the application.
-
Show this as a featured app in the Company Portal: Toggle to enable this option. Use this option to display the application on the main page of your organization portal where users browse for apps.
-
-
Click Next.
-
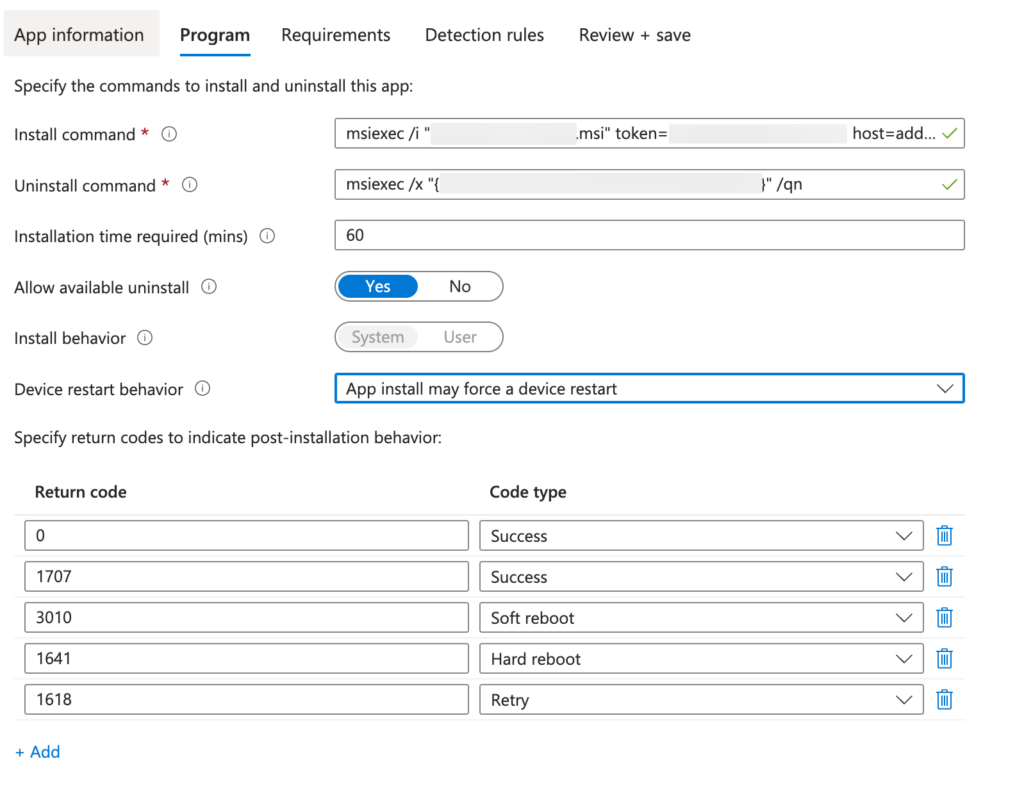
Under Program, perform the following:
-
Install Command: Enter the MSIEXEC command in the following format:
msiexec /I NSClient.msi token=<organization id> host=addon-<tenant-name>.goskope.com mode=peruserconfig enrollauthtoken=<your enrollauthtoken> enrollencryptiontoken=<your encryption token> autoupdate=on /qn
For example, if you are using IDP, enter the following command:
msiexec /I NSClient.msi installmode=IDP tenant=corp domain=eu.goskope.com /qn
To learn more about other MSI command, view Netskope Client for Windows.
– Usemode=peruserconfigonly in multi-user environments.
– Useautoupdate=ononly if you want to update Netskope Client automatically. -
Uninstall Command: Enter the MSIEXEC command in the following format:
msiexec /I NSClient.msi <Product code> /qn
To get the product code, run the following command in the command prompt:wmic product where "Name like '%Netskope%'" get Name,Version,IdentifyingNumber
-
-
Click Next.
-
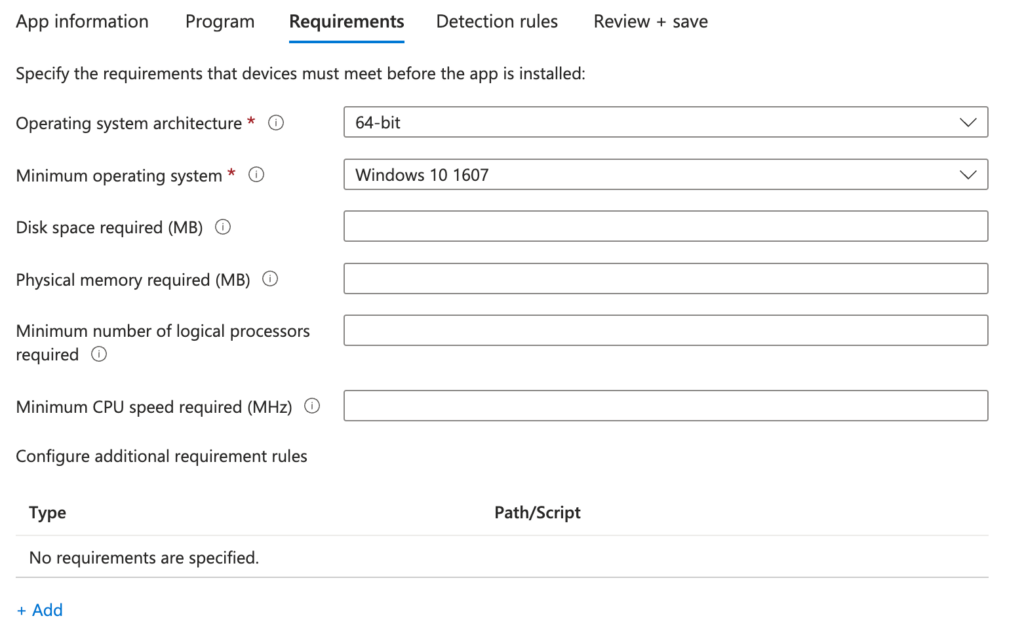
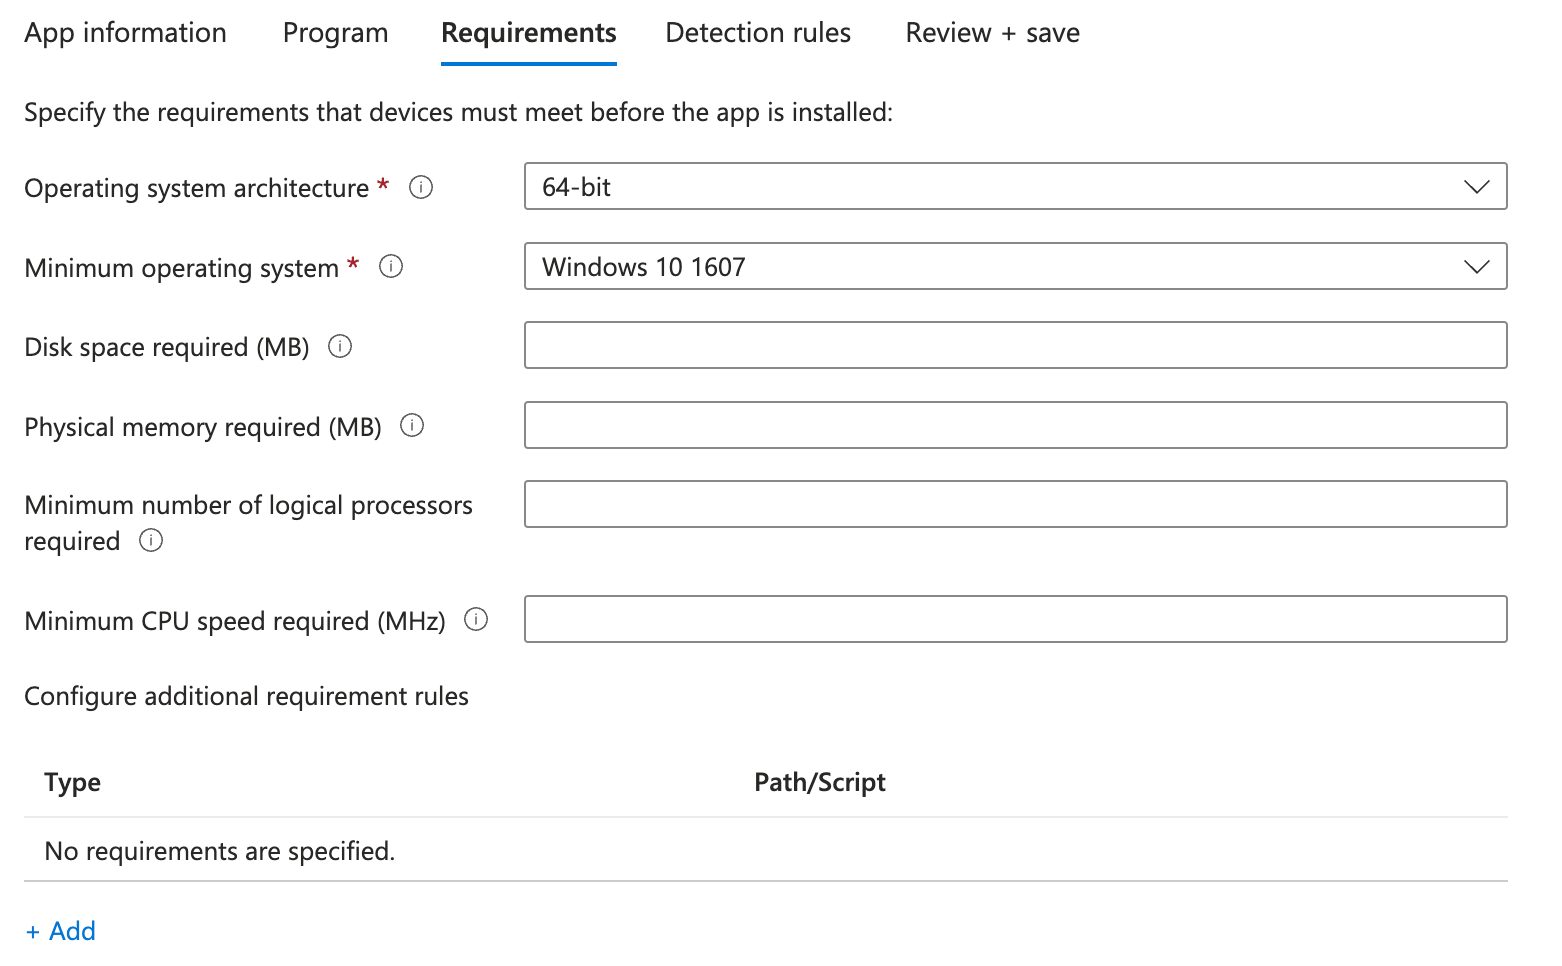
Under Requirements, enter the following:
-
Set the Operating system architecture to 64-bit.
-
Set the Minimum operating system to Windows 10 1607.
-
-
Click Next.
-
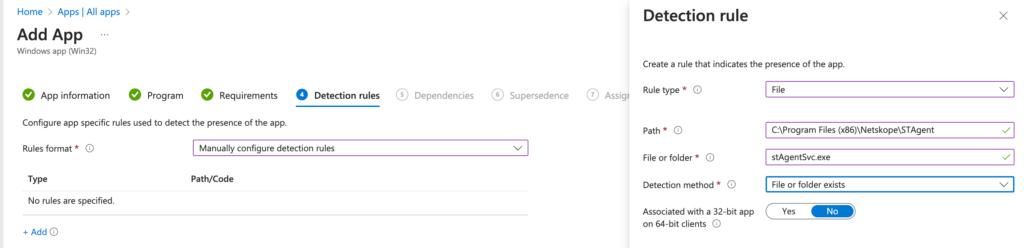
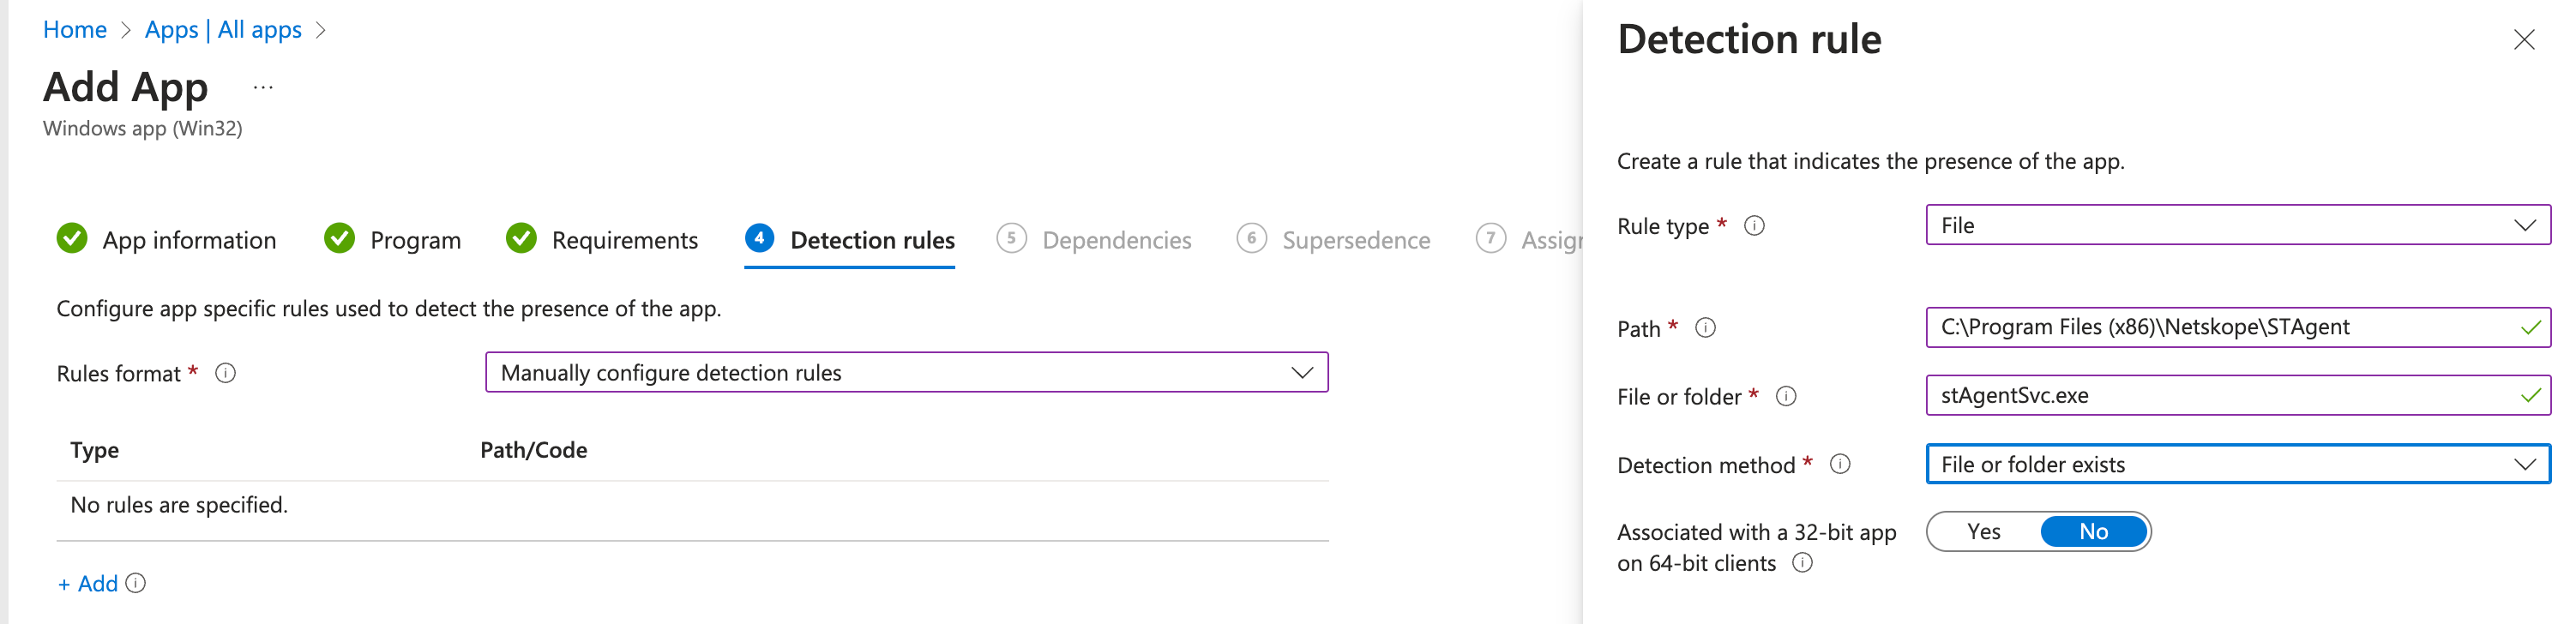
Under Detection Rules, perform the following:
-
Select Manually configure detection rules from the drop-down options in Rules format.
-
Click +Add.
This opens a separate window: Detection Rule.
-
Select Rule Type as File.
-
Set Path to:
-
For a 32-bit Netskope Client: C:\Program Files (x86)\Netskope\STAgent
-
For a 64-bit Netskope Client: C:\Program Files\Netskope\STAgent
-
-
Add stAgentSvc.exe in File or Folder.
-
Select Detection method as File or folder exists.
-
-
-
Click Next.
-
Under Dependency, click Next.
-
Under Supersedence, click Next.
-
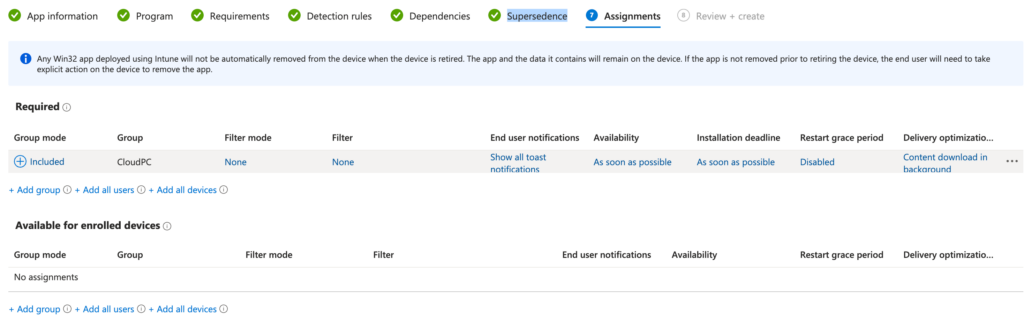
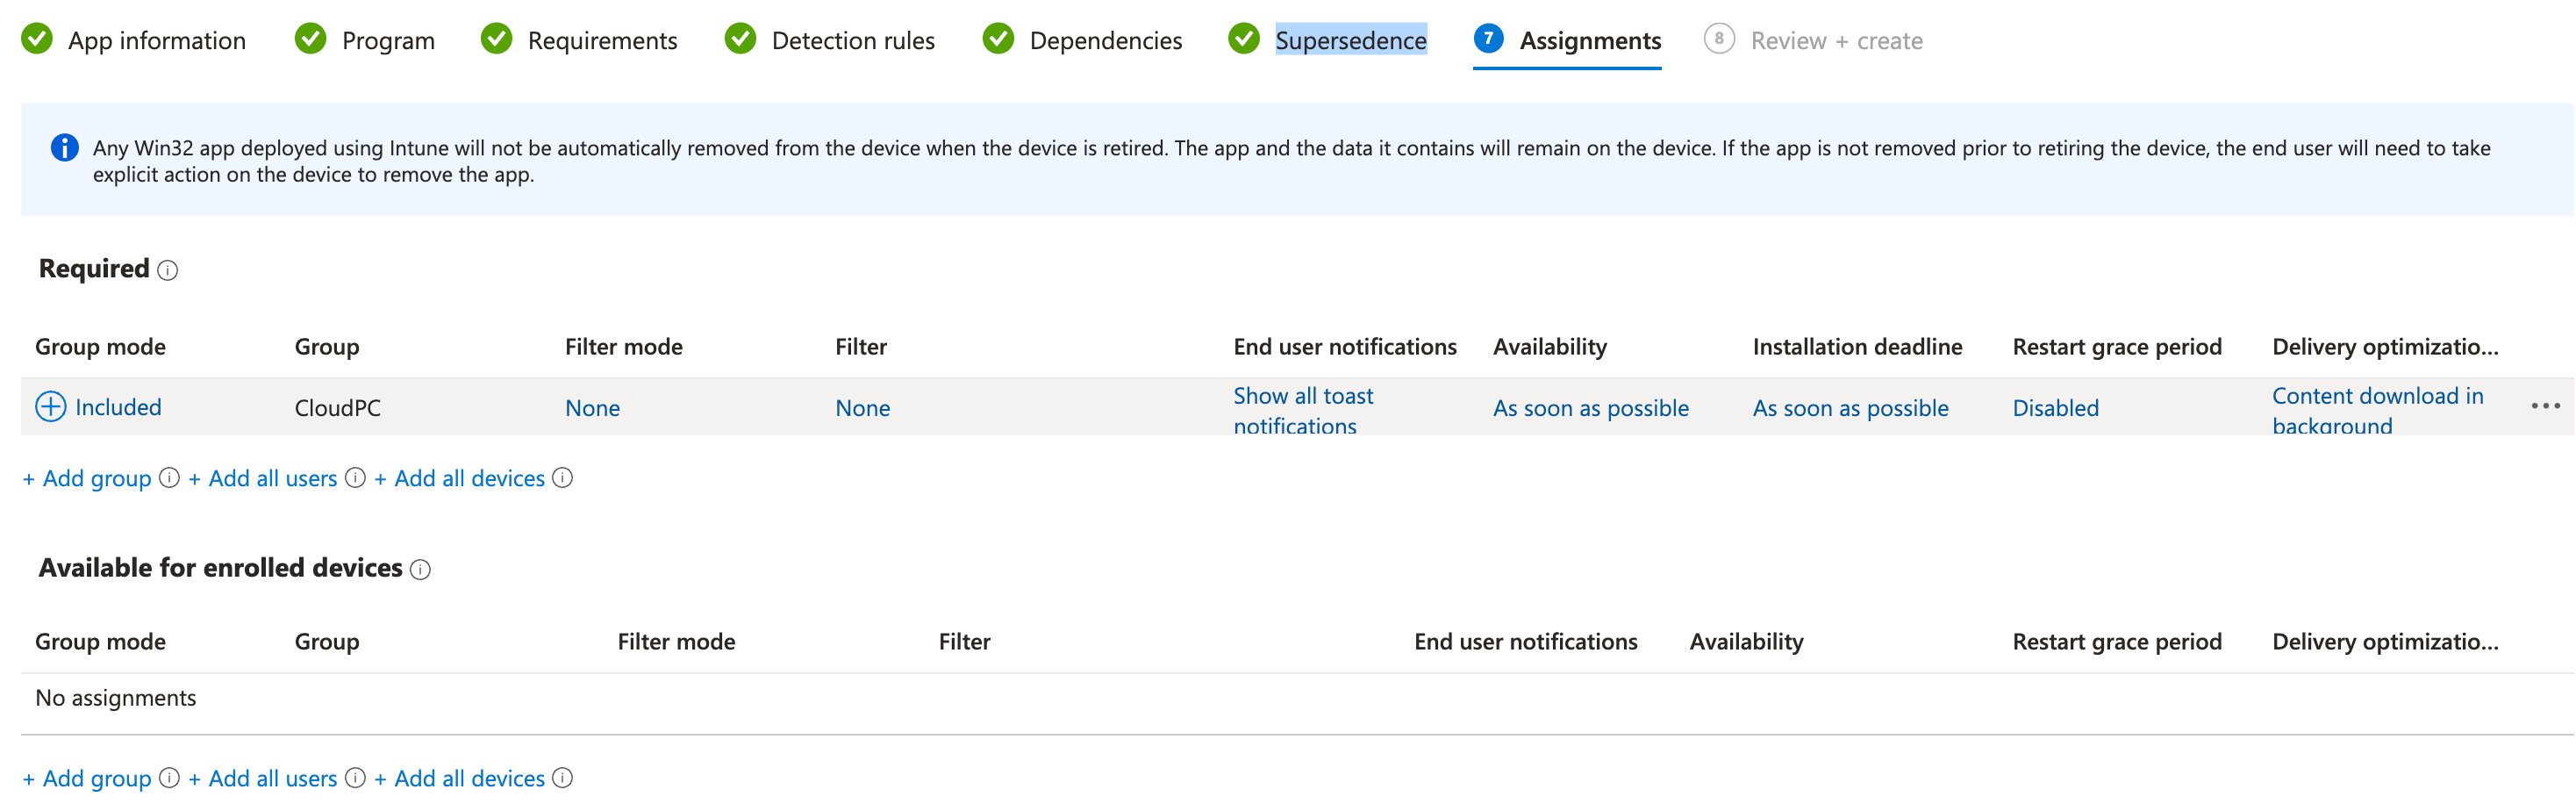
Under Assignment, perform the following:
-
Under Required, click Add group to add appropriate groups that need to be included.
-
Click Next.
-
-
Under Review + Create, click Create to review and complete the process.
-
You can monitor the installation process from Intune.
-
Go to Apps > Windows > Windows | Windows Apps > Search for Netskope > Device Install status.

To learn more, view Configure Win32 App in Intune.
Uninstall Netskope Client In Intune
To set up un-installion script for Netskope client in Windows devices follow the procedure as described in this section:
-
Select an existing Windows app in Apps > All Apps.
-
Go to Properties.
-
Ensure that you have added the uninstall command under Programs. If not added, click Edit in the Programs section and add the command to remove Netskope Client from the end-user device.
To add the Uninstall Command, enter the MSIEXEC command in the following format:
msiexec /I NSClient.msi <Product code> /qn
- To get the product code, run the following command in the command prompt:
wmic product where "Name like '%Netskope%'" get Name,Version,IdentifyingNumber - If the Password protection for Client uninstallation option in Client Configuration is enabled, enter the following command in the powershell script.
msiexec /x "{Product code}" /qn PASSWORD="[client_uninstall_password]"
For more details, see Password protection for Client uninstallation.
- To get the product code, run the following command in the command prompt:
-
Under the Assignments section, click Edit.
-
Under Uninstall, click Add group to add appropriate groups that need to be removed.
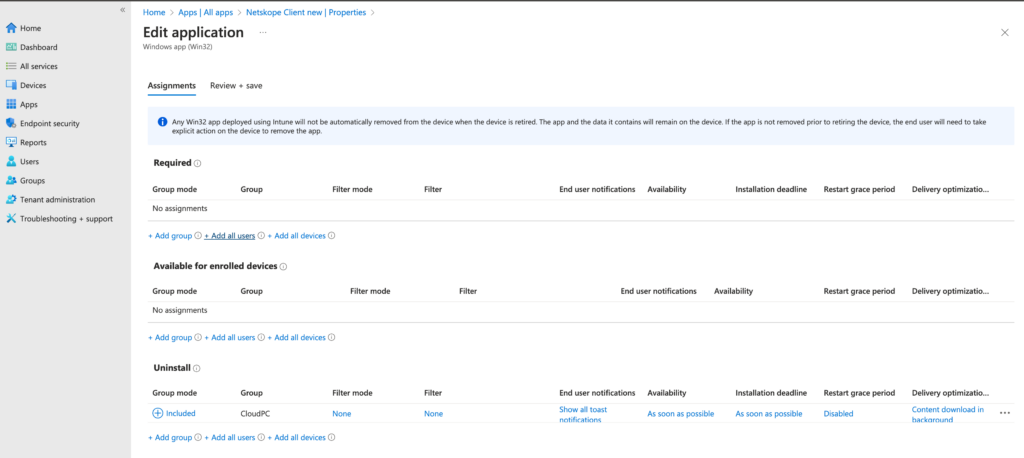 Ensure that you do not add the same group added under the Required section.
 -
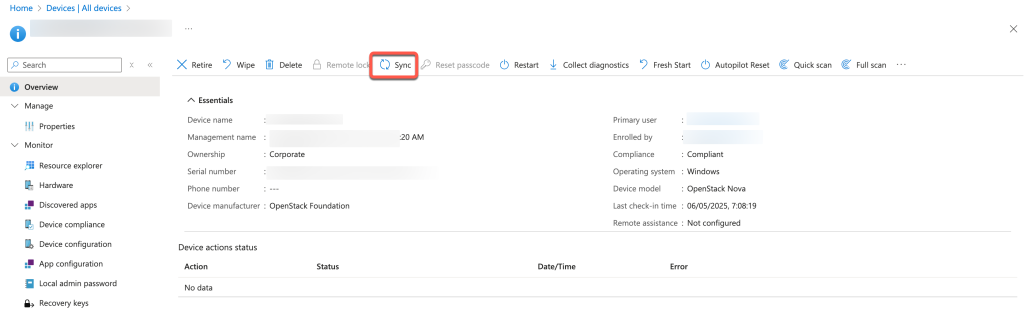
Go to Devices > All Devices.
-
Select the specific device where you need to uninstall Netskope Client.
-
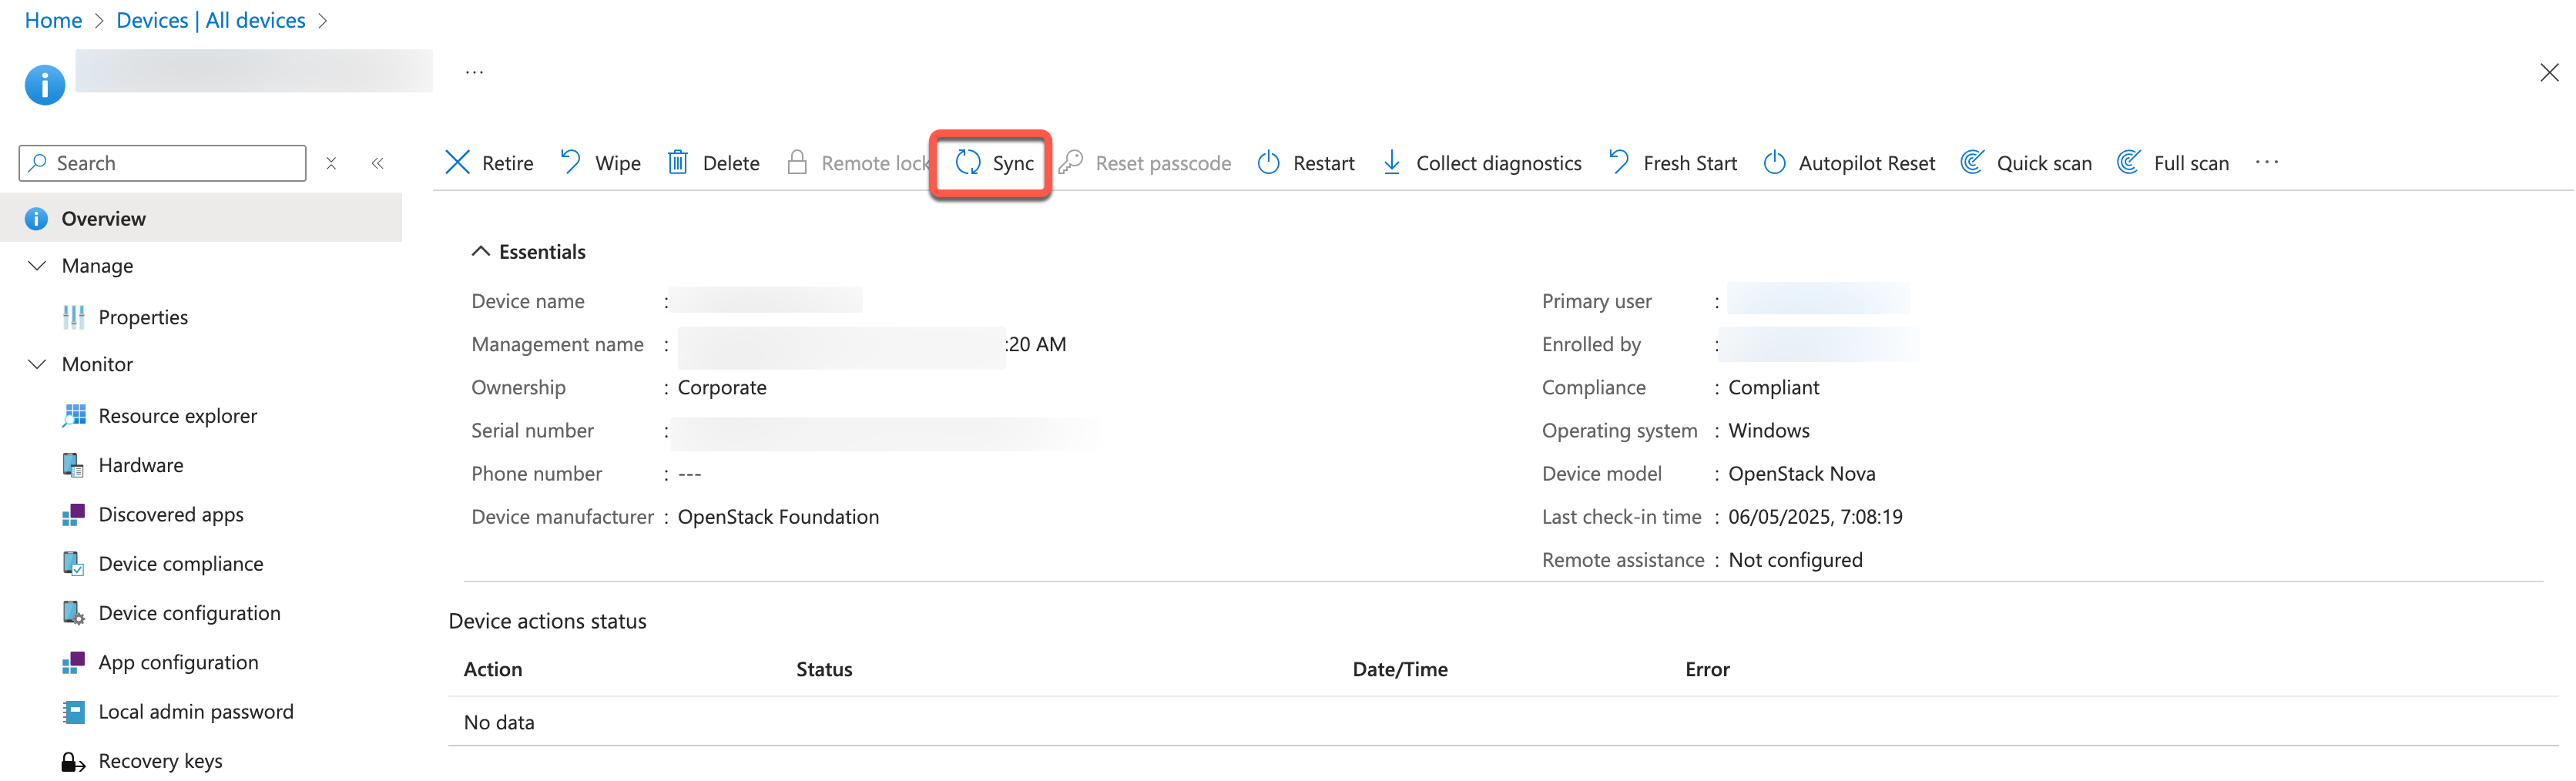
Click the Sync option.
 Go to the endpoint machine Accounts → Access work or school → select info under account name and click sync option. Wait till you receive the command from Intune.