

This article describes how to deploy Netskope Client on Windows devices using Omnissa Workspace ONE.
Prerequisites
- Administrators must possess proficient working knowledge of Omnissa Workspace ONE UEM.
- Administrators must review Netskope Client Client Enrollment Methods to understand the Client User Enrollment methods available for their environment.
- Import users into the Netskope tenant – see Provisioning Users for Netskope Client.
- Download Netskope Root and Tenant Certificates and ensure the certificates are available when needed.
- See Deploy Netskope Client via IdP when using IDP as the method of user enrollment.
Supported Platforms and Enrollment Methods
This article outlines the Netskope Client deployment instructions for the following user enrollment methods and supported platforms. User enrollment methods not documented here are not supported at this time.
| Enrollment Method | Single-User | Multi-User |
|---|---|---|
| IDP | Y | Y |
| UPN | Y | Y |
Client Deployment
This section describes the instruction to upload the .msi file and add the install command to deploy Netskope Client.
To upload the Client installer file:
-
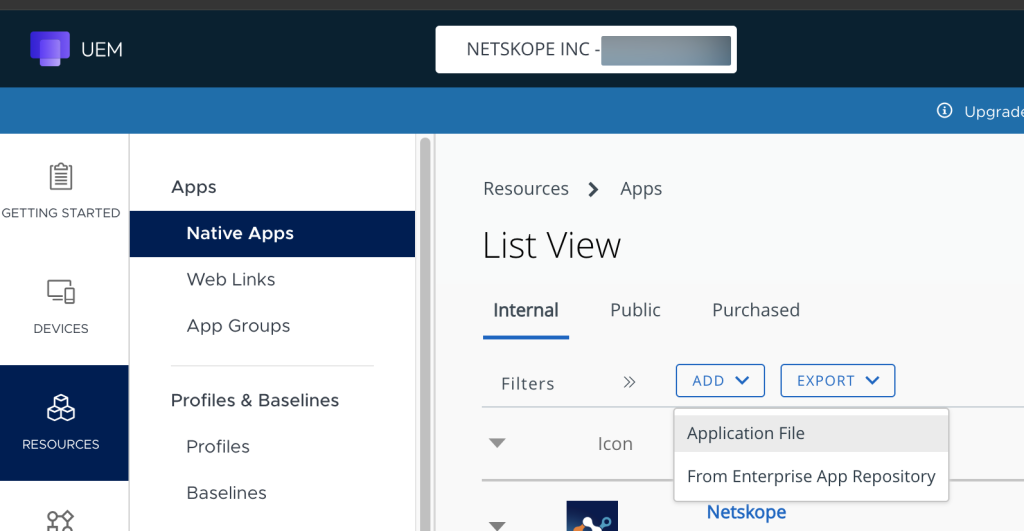
Navigate to Resources > Apps > Native Apps.
-
In the Internal tab, click Add > Application File.
-
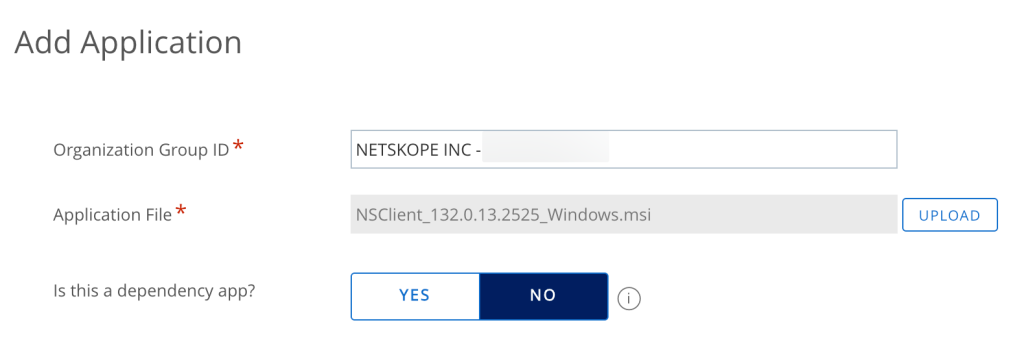
In the Add Application pop-up:
-
In Application File, click Upload and choose the Netskope Client installation file (with the msi extension). Download the latest installation files from Netskope Support.
After selecting the file, click Save to continue.
-
Select No in Is this a dependency app?.
-
-
Click Continue.
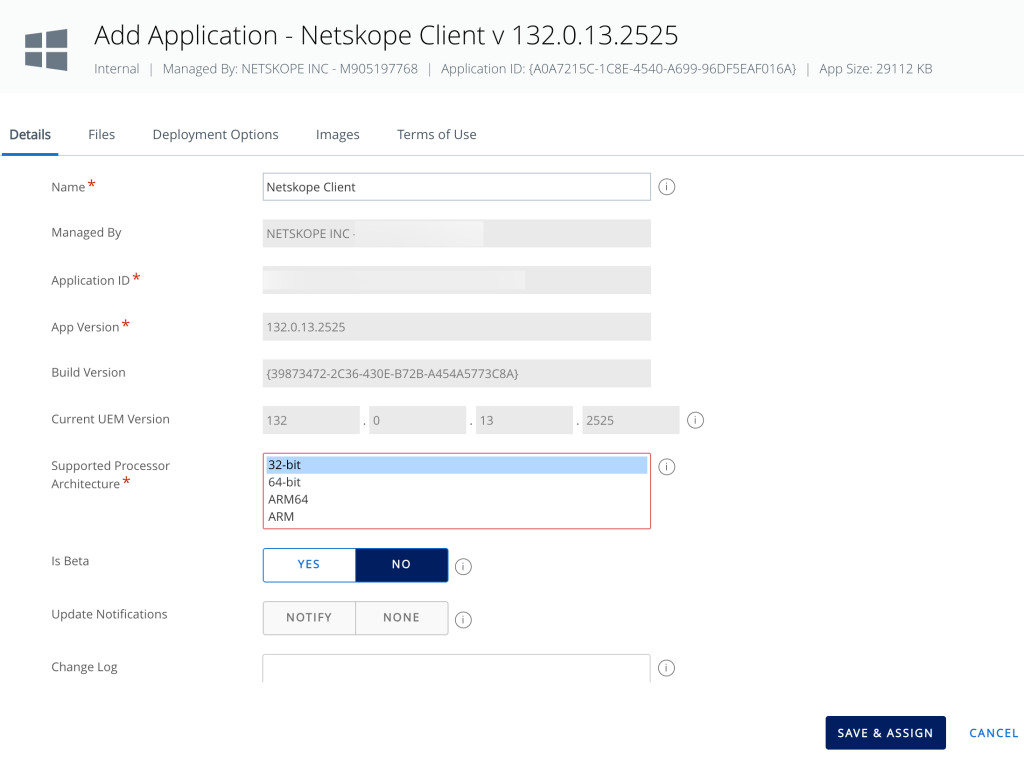
The system displays the details of the uploaded installer file.
-
In the Details tab, leave the form data with the default values.
-
In the Deployment Options tab, scroll down to the Install Command field under How To Install and enter the MSIEXEC command in the following format:
msiexec /I NSClient.msi tenant=<tenant-name> domain=[region.]<tenant-domain> enrollencryptiontoken=<Encryption Token> /qn
For example,
msiexec /I NSClient.msi tenant=corp domain=goskope.com installmode=IDP enrollencryptiontoken=XXX /qn
To learn more about MSIEXEC configuration options, view Netskope Client for Windows.
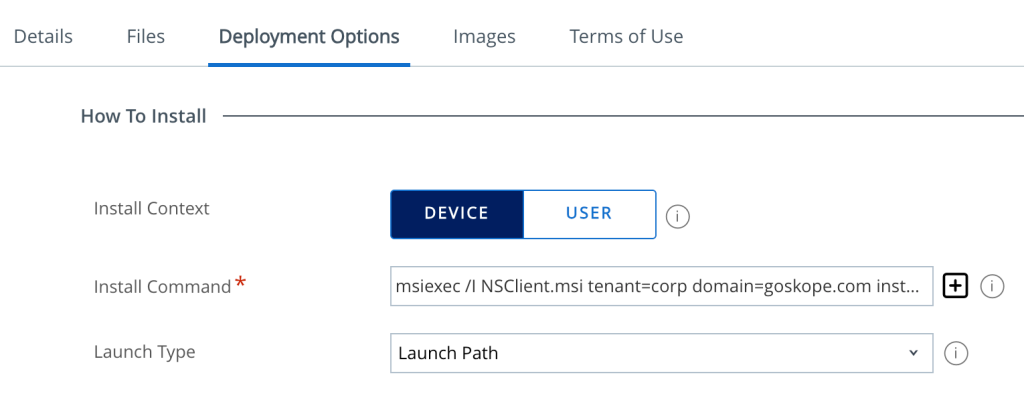 Ensure that you end the command with the
/qnparameter for silent and uninterrupted installation. Leave all other options with default values. -
Click Save and Assign.
-
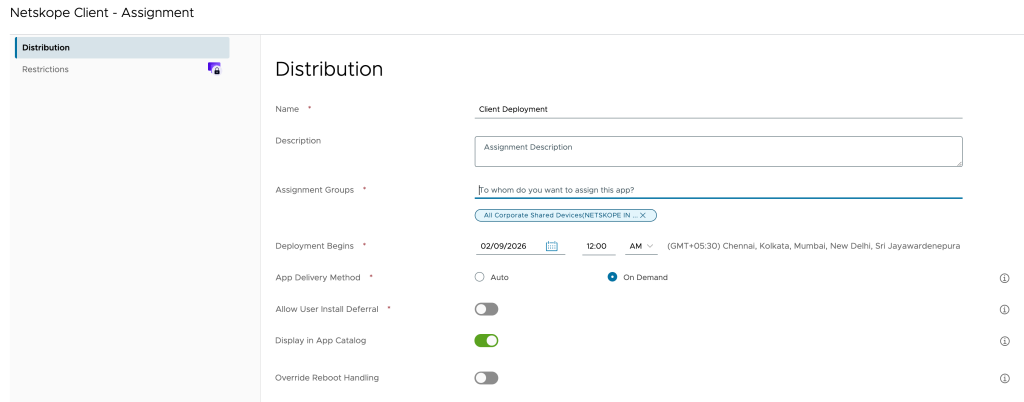
From the Assignment page, enter the following details:
-
Name: Specify a name for this delivery or deployment.
-
Description: Optional parameter to add more information about the deployment.
-
Assignment Groups: Select the groups in your organization to deploy the Client.
-
Deployment Begins: Time to start the deployment. Leave the default options as is.
-
App Delivery Method: Select Auto or On-Demand. Auto option will auto deploy client at the configured time. On-Demand can be used to deploy only when required for specific devices or groups.
-
-
Click Create.
-
From the Assignment details page, click Save.
-
From Preview of the Assigned Devices, click Publish.
-
After completing the deployment, go to Resources > Native.
-
Click the uploaded client.
The system displays a pop-up window with the deployment status.


