

This article describes the steps to integrate Enterprise Browser authentication with Microsoft Entra. The overview flow is outlined below:
- Add the Netskope application in Microsoft
- Assign users or groups to the Netskope application
- Configure SAML in Microsoft Entra
- Download the Microsoft SAML certificate
- Configure SAML proxy in Netskope
- Update the SAML Identity and ACS URL
- Test your SSO set up
Add the Netskope Application in Microsoft
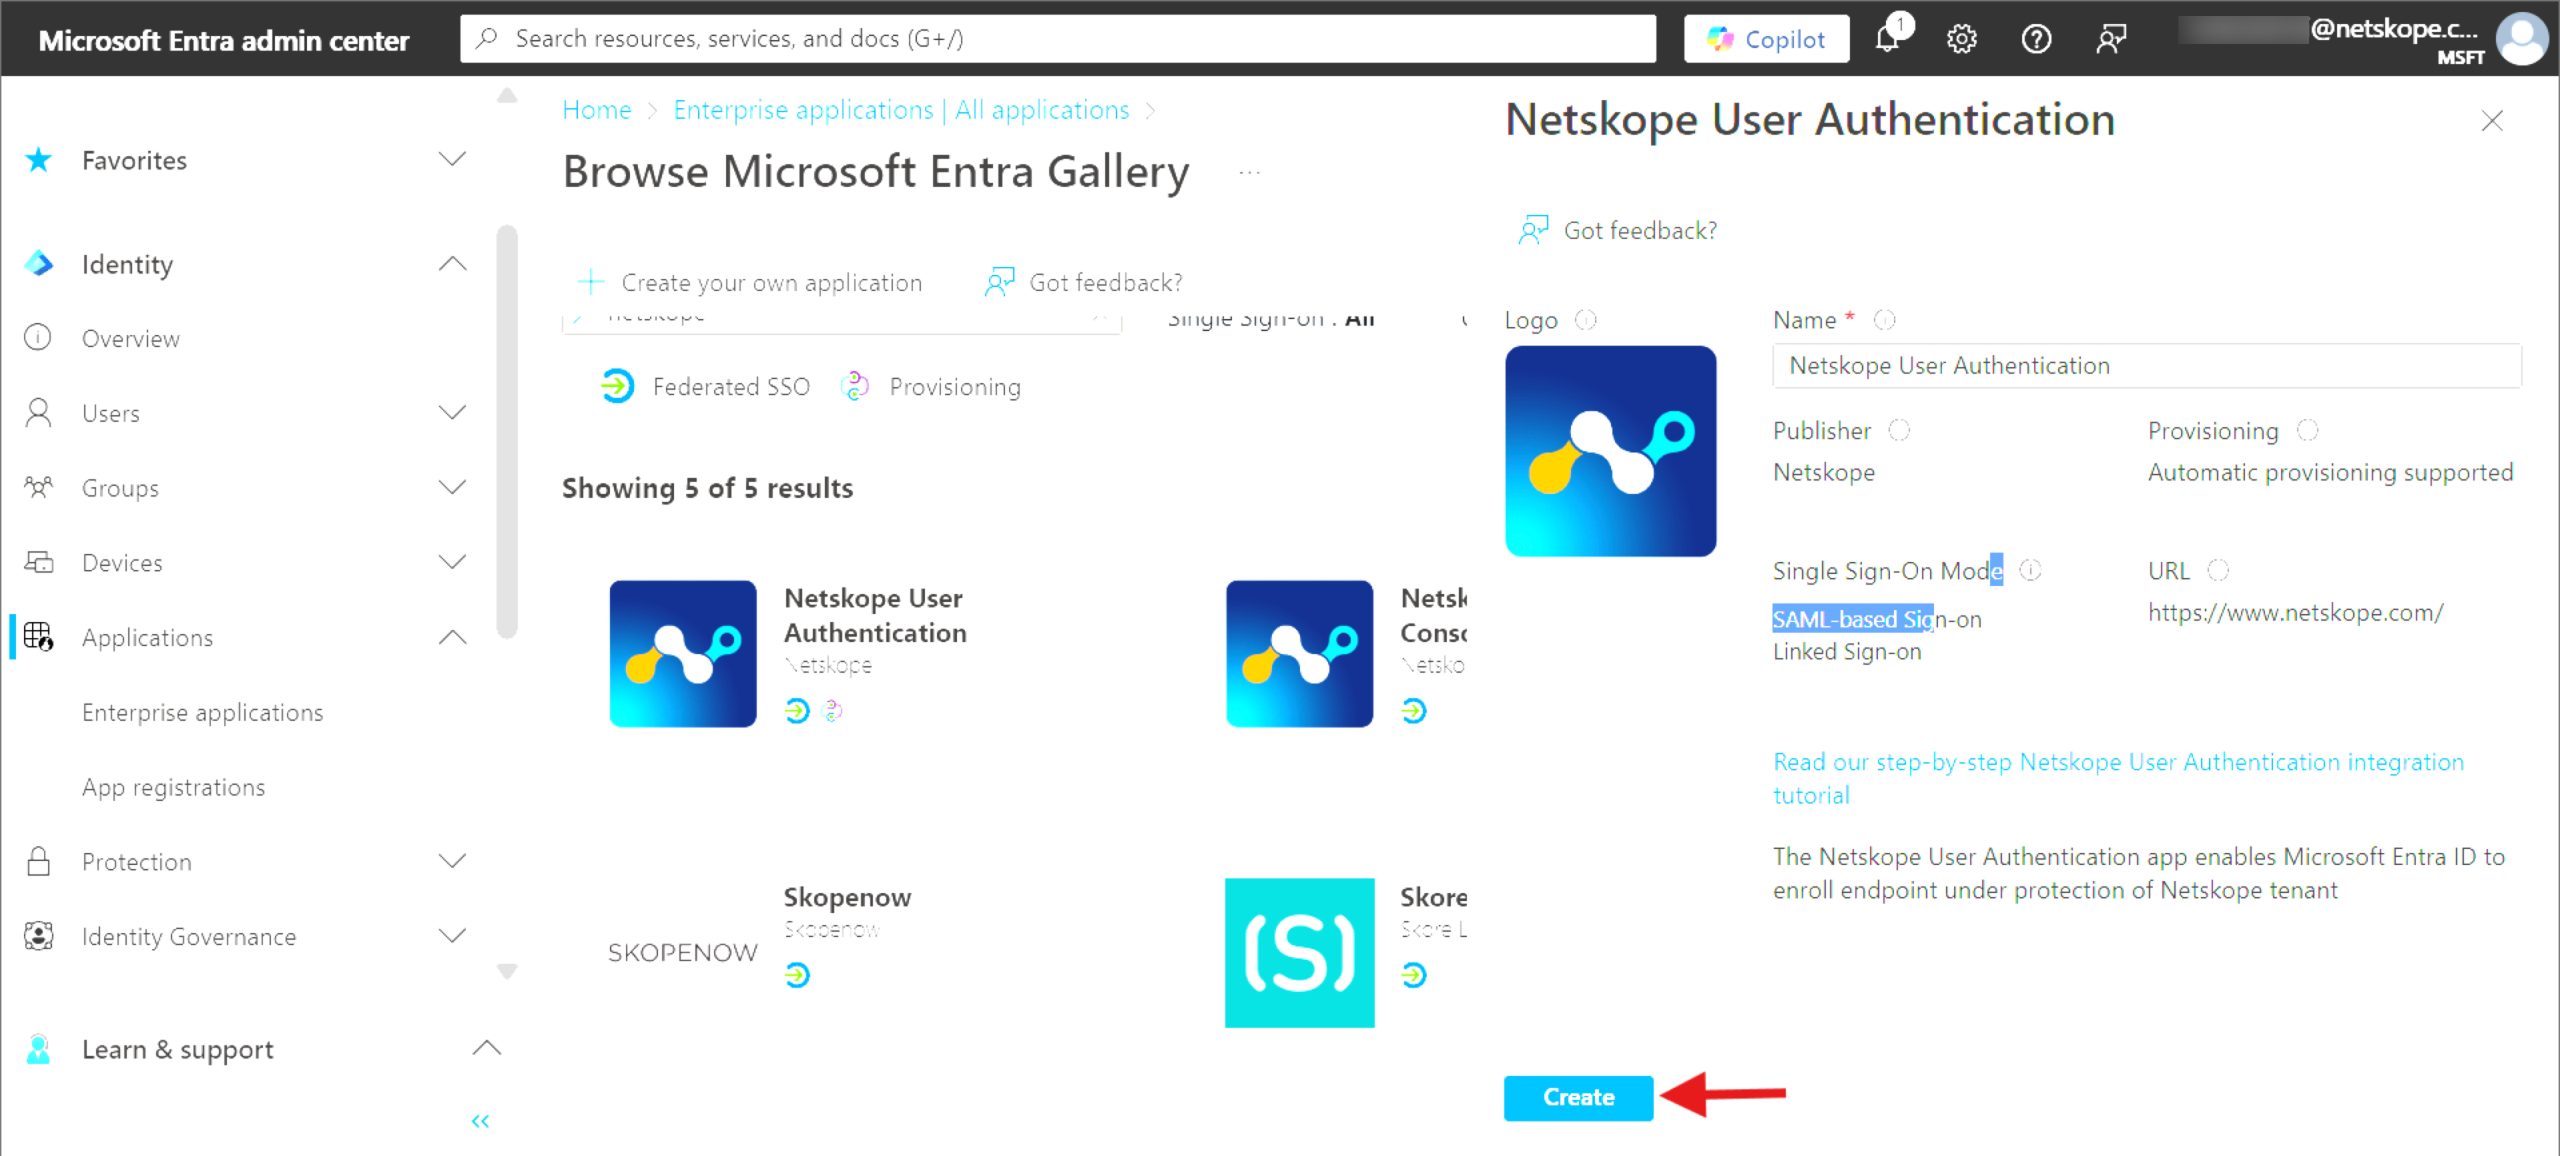
Log in to your Microsoft account and navigate to Identity > Applications > Enterprise Applications > click New Application.

In the Search Application bar, type Netskope User Authentication and click Create.
Assign Users or Groups to the Netskope Application
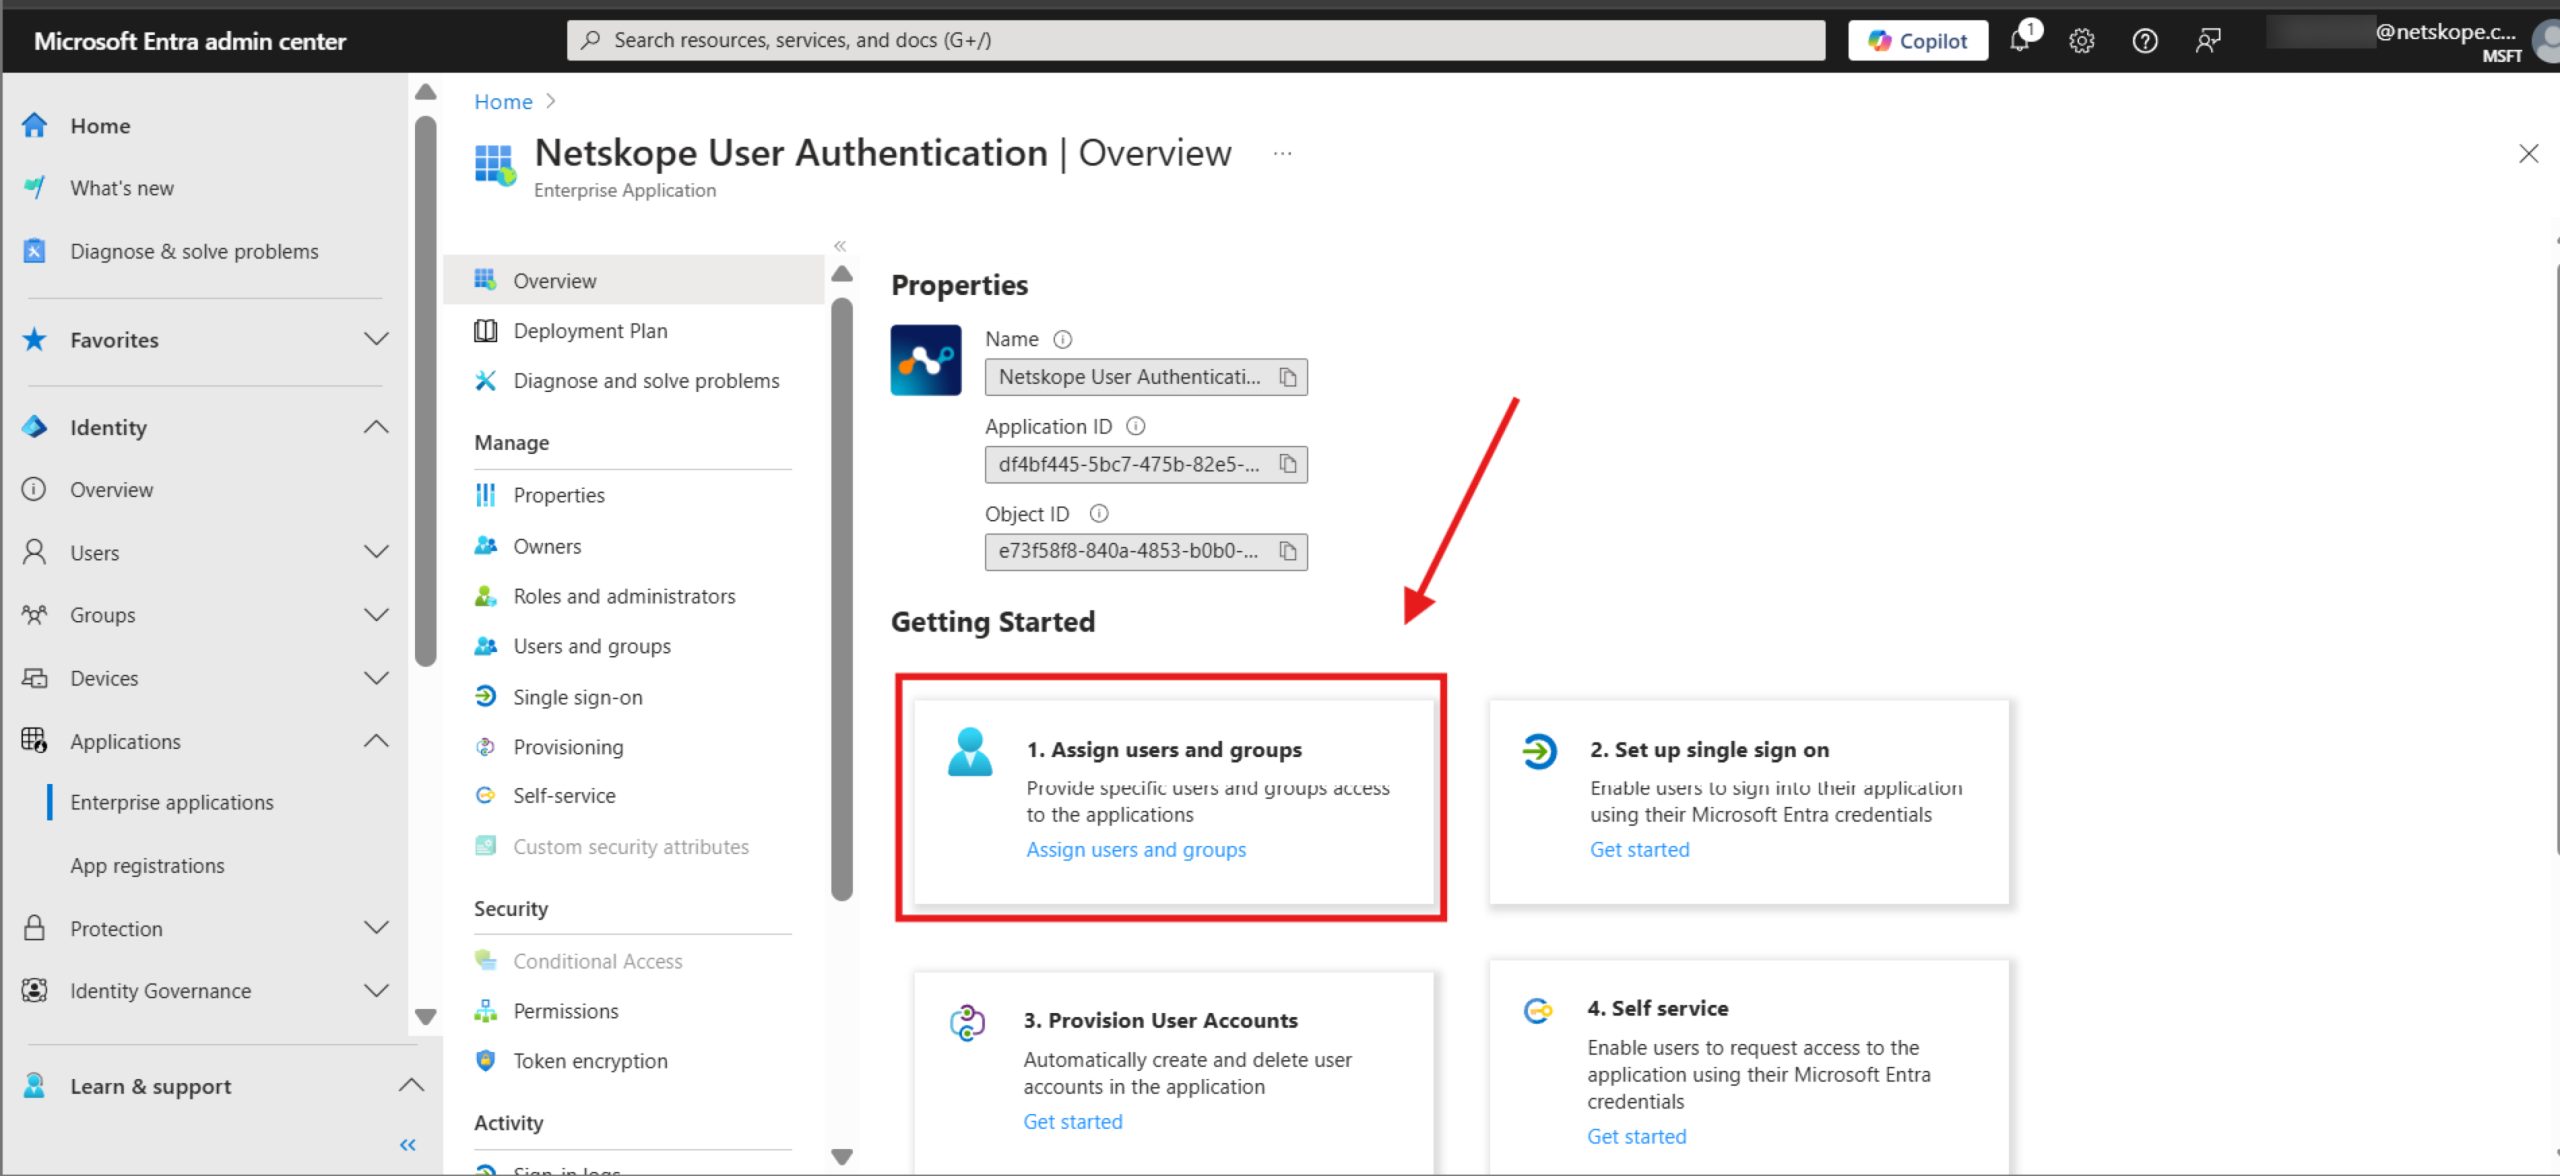
Navigate to Identity > Applications > Enterprise Applications > Netskope User Authentication.
Click Assign users and groups.
Select Add user/group.

Click None Selected.

Type the name of the group or user you want to assign to this app.

Check the group/user name, and click Select.

Click Assign.

Configure SAML in Microsoft Entra
Navigate to Identity > Enterprise applications > Netskope User Authentication.

Click Single sign-on.
Set the Subject NameID in the SAML Configuration
There are several steps to this set up. Navigate to Attributes and Claims. Delete all default additional claims.
This configuration still allows you to chose a different field name for sign on. Only change the Subject.NameID value that is being transmitted from EntraID to Netskope.
Select the value to edit the Unique User Identifier (Name ID) field.

Set the Source attribute to user.mail and click Save. This assigns user.mail as the claim value for Name ID. Click the x to close this section.

Download the Microsoft SAML Certificate
Download the certificate in Base64 format, and copy the Log in URL and Azure AD Identifier values. Save these values and enter these values in the Netskope Forward Proxy SAML settings page later.

Configure SAML Proxy in Netskope
Log in to Netskope and navigate to Settings > Security Cloud Platform > Forward Proxy > SAML.

Click New Account.

In New Account window configure the following options:
1. Name: Choose a descriptive SSO name. It is possible to create several SSO entries in web UI.
2. Access Method: check Enterprise Browser.
3. IDP SSO URL: paste the URL you copied from Microsoft Entra → Identity → Applications → Enterprise applications → Netskope User Authentication → Single Sign-On → Set up Netskope User Authentication.
4. IDP Entity ID: paste the ID you copied from Microsoft Entra → Identity → Applications → Enterprise applications → Netskope User Authentication → Single Sign-On → Set up Netskope User Authentication.
5. IDP Certificate: Upload the Base-64 certificate that you downloaded from Microsoft Entra.

After configuring these parameters, scroll down in the window to enable SSO.

Update the SAML Identity and ACS URL
After creating the SAML account in Netskope, copy the SAML Entity ID and SAML Proxy ACS URL. Save these URLs to paste them in your Microsoft Entra SSO configuration.
Navigate to Settings > Security Cloud Platform > Forward Proxy > SAML > click Netskope Settings.

Copy the SAML Entity ID and SAML Proxy ACS URLs.

Navigate back to Microsoft Entra > Identity > Applications > Enterprise applications > Netskope User Authentication > Single Sign-On > Basic SAML Configuration.
Click Edit and paste the Netskope SAML Entity ID and Netskope SAML Proxy ACS URLs.

The SAML configuration is complete. Sign in to Netskope and configure the bypass list. The following domains need to be explicitly bypassed for Microsoft Entra SSO authentication.
browser.events.data.microsoft.com
autologon.microsoftazuread-sso.com
autologon.microsoft-sso.com
login.live.com
login.microsoftonline.com
login.microsoft.com
aadcdn.msftauth.net
aadcdn.msauth.net
aadcdn.msftauthimages.net
device.login.microsoftonline.com
mysignins.microsoft.com
nsauth-<tenant-name>.goskope.com
SSO Testing
To test your SSO configuration, log in to Netskope and navigate to Settings > Security Cloud Platform > Forward Proxy. Click the ellipsis … at the end of your SAML account entry and click Test.

You will see a message similar to the following if your set up is successful.
