

The Netskope Client supports Single Sign-On (SSO) user enrollment when it integrates with a SAML 2.0 supported identity provider.
Supported Versions
IDP enrollment is available for user enrollment of the Netskope Client installed in the following end-user environments:
- Windows
- macOS
- Linux
- Android and ChromeOS
- iOS
Prerequisites
-
SAML Integration: Configure your IdP in the Settings > Security Cloud Platform > Forward Proxy > SAML in your Netskope Tenant UI. For more details, view SAML Forward Proxy.
-
User Provisioning: Provision all users into your Netskope admin console.The email address of the user in your Netskope Admin Console must match the email you find in the integrated IDP. For more details, view SCIM Settings.
-
Network Configuration: Ensure that you can access the destinations mentioned in Client Network Configuration.
-
For Android and ChromeOS deployments, end user devices must support Android AppLink feature. If the end-user devices (older than 2018 models) do not support AppLink, then user enrollment process requires additional manual user intervention user to select the Open With… dialog box. See Enrollment on Devices without AppLink Support section for illustration.
Advantages
-
Requiring a user password during enrollment ensures that the actual user is completing the process and prevents potential impersonation attacks.
-
Leveraging the security features of IDP, such as strong authentication mechanisms and password policies, provides a higher level of trust for enrolled devices.
-
Enabling multi-factor authentication (MFA) during the enrollment phase adds a second layer of verification, offering protection even if the user credentials are compromised.
Disadvantages
-
Typically not a silent deployment. Requires integrated Windows authentication configured with IDP for silent deployment.
-
NPA Pre-logon requires users to be authenticated at least once.
-
In a non-SSO environment, before the user enrolls, Fail Close is not enforced.
Netskope Client Deployment with Enrollment Tokens
In this mode, the user’s email address is used as the user identity fetched from the idP authentication. To identify if this method is used, refer the installation commands or methods and check if that contains following parameter:
installmode=IDP
And does not contain:
-
token=” ” -
host= “ “ (tenant name)
Before you begin to deploy Netskope Client using enrollment tokens, ensure to enable Secure Enrollment Services and add tokens in Settings > Security Cloud Platform > Netskope Client > MDM Distribution.
IDP Enrollment With Encryption Tokens
As the IDP enrollment authenticates the user against the IDP method, authtoken need not be configured. Encryption token is optional.
| Deployment Option | Installation Commands |
|---|---|
| Single-User Mode Installation for IDP-based Enrollment | < OS utility > < NSClient > installmode=IDP enrollencryptiontoken= < encryption token >For example, MSIEXEC command in Windows: msiexec /I NSClient.msi tenant=corp domain=goskope.com installmode=IDP enrollencryptiontoken=XXX /qn |
| Multi-User Mode Installation for IDP-based Enrollment | < OS utility > < NSClient > installmode=IDP tenant= < tenant-name > domain= < tenant-domain-name > enrollencryptiontoken= < encryption token > mode=peruserconfigFor example, MSIEXEC command in Windows: msiexec /I NSClient.msi tenant=corp domain=goskope.com installmode=IDP mode=peruserconfig enrollencryptiontoken=XXX /qn |
enrollencryptiontoken is generated and enforced in the UI, it must be used in the installation command. However, enrollauthtoken is optional even if it is generated and enforced.Prelogon Connectivity with Enrollment Tokens
To use NPA Prelogon, auth token must be present on the end-user machine even with IDP enrollments. Failing to do so results in the Prelogon user being unable to be provisioned.
Use the following commands with the flag prelogonuser=<user>@prelogon.netskope.com:
For single user mode ( with encryption token)
UPN: msiexec /I NSClient.msi host=<addon URL> token=<orgID> enrollauthtoken=<auth token> enrollencryptiontoken=<encryption token> prelogonuser=<user>@prelogon.netskope.com
IDP: msiexec /I NSClient.msi host=<addon URL> token=<orgID> installmode=IDP enrollauthtoken=<auth token> enrollencryptiontoken=<encryption token> prelogonuser=<user>@prelogon.netskope.com
For per-user mode
UPN: msiexec /I NSClient.msi host=<addon URL> token=<orgID> mode=peruserconfig enrollauthtoken=<auth token> enrollencryptiontoken=<encryption token> prelogonuser=<user>@prelogon.netskope.com
IDP: msiexec /I NSClient.msi host=<addon URL> token=<orgID> installmode=IDP mode=peruserconfig enrollauthtoken=<auth token> enrollencryptiontoken=<encryption token> prelogonuser=<user>@prelogon.netskope.com
To learn more, view Configure Client Prelogon Connectivity.
User Impact
Client Version 116.0.0 or earlier (includes any upgrades to these versions).
| Device | Existing User | New User Enrollments | Existing Enrolled User Requiring Re-enrollment | ||
|---|---|---|---|---|---|
| Client Version 116.0.0 or earlier (includes any upgrades to these versions) | Client version 116.1.0 or later (includes during the upgrades) | Client Version 116.0.0 or earlier (includes any upgrades to these versions) | Client version 116.1.0 or later (includes during the upgrades) | ||
| Personal Corporate Machine | No change | Netskope Client package with token | Netskope Client package with token |
|
|
| Shared Desktop/VDIs and so on | No change |
|
|
|
|
– These changes are required only if Create encryption of initial configuration of Netskope client is enabled.
– All operating systems other than Windows, do not require uninstallation and reinstallation before version 116.1.0.
– For Client version 116.1.0 or later, these changes are required only if Create encryption of initial configuration of Netskope client is enabled.
Example commands:
-
Re-run the MSIEXEC command with the new tokens.
This flexibility is available only for Windows devices and the MSI rerun is not supported if the Protect Client configuration and resources option is selected in the Client Configuration webUI. -
Use the following
nsdiagcommand to update the tokens:nsdiag -e enrollauthtoken=<token> enrollencryptiontoken=<token>
The preceding
nsdiagcommand is supported only on Windows and macOS platforms. You can runnsdiagcommand using the path: C:\Program Files (x86)\Netskope\STAgent.Run this command in admin mode in Windows.In Windows and macOS, if
nsdiag -ecommand fails then an error message is displayed in the command prompt.

Enrollment Workflow
The following sections describe the enrollment workflow for the following operating systems:
The following section describes the enrollment workflow for Windows:
Windows AD or Hybrid AD Joined – Integrated Windows Authentication (IWA)
Integrated Windows Authentication capabilities enable Single Sign On (SSO) if the user has logged into a corporate domain-joined device.
For example, if you run the following command: msiexec /I NSClient.msi installmode=IDP tenant=acme domain=goskope.com in your terminal, Netskope Client can seamlessly enroll the user through SSO. The following screenshots describe the end-user experience:


Once the installation and user enrollment and installation are complete, validate the User Email through the Configuration option of the Client’s system tray icon.
Microsoft Entra ID With Integrated Windows Authentication (IWA)
Microsoft Entra allows users to perform seamless Single Sign on (SSO) when the user’s machine connects to your corporate network. To learn more, view Quickstart: Microsoft Entra seamless single sign-on – Microsoft Entra ID.
Windows Devices Registered With Entra ID
You can also achieve a Single Sign-On (SSO) experience on Windows devices using Primary Refresh Token from Entra ID. Even though it does not require an Active Directory environment, you can still utilize this capability alongside Active Directory and Azure Active Directory (AAD). However, the device must be registered with Entra ID.
Okta With Agentless Desktop Single Sign-on (ADSSO)
Okta provides Agentless Desktop Single Sign On (ADSSO) capability. To learn more, view Install and configure the Okta IWA Web agent for Desktop Single Sign-on | Okta.
Non-Domain Joined Devices
-
If you install Client in IdP mode with tenant and domain suffix, the corporate IDP login page appears and the user needs to enter login credentials.
If you install Client without the tenant details, the user must enter the following details in the enroll window before getting the IdP login page:
– Tenant Name: If you are accessing tenant URL acme.goskope.com, then tenant name = acme.
– Domain Name: If you are accessing tenant URL acme.goskope.com, then domain name = goskope.com.The user can contact their Tenant admin for the Tenant Name and Domain Name.
-
On successful IdP authentication, Netskope enrolls the user.
The following sections describe the enrollment workflow for macOS devices:
Entra ID – Platform SSO
The concept of Primary Refresh Token holds particular significance for macOS devices when Entra ID serves as the Identity Provider. To learn more, view macOS Platform Single Sign-on (PSSO) overview – Microsoft Entra ID. Once a device registers with Entra ID, you can extend Single Sign-On (SSO) capabilities to the Netskope Client for browser-based authentication challenges. The installation parameters required are similar to the following example:
set -- 0 0 0 IDP goskope.com acme 0 mode=scheme preferephemeral=false httpmethod=get
Browser-Based authentication
Netskope Client supports FIDO authentication with our SAML forward proxy for macOS devices through external browser support. To learn more, view Jamf Pro.
Non-Domain Joined Devices
The following procedure illustrates the typical enrollment workflow:
-
If you install the Client in IdP mode with tenant and domain suffix, the corporate IDP login page appears and the user needs to enter login credentials.
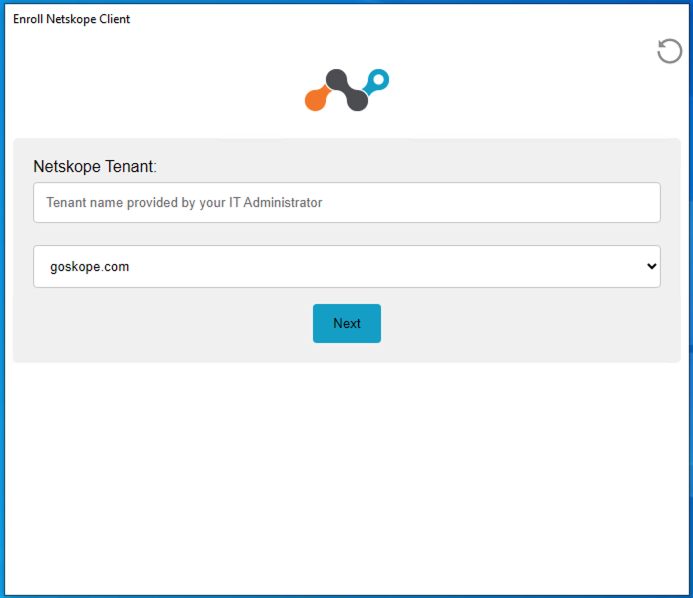 If you install Client without the tenant details, the user must enter the following details in the enroll window before getting the IdP login page:
– Tenant Name: If you are accessing tenant URL acme.goskope.com, then tenant name = acme.
– Domain Name: If you are accessing tenant URL acme.goskope.com, then domain name = goskope.com. -
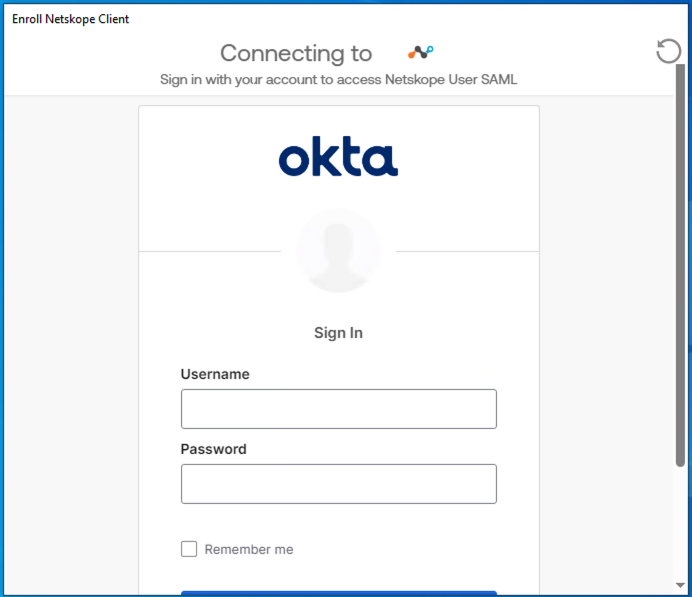
The Netskope Client redirects the user to the IDP authentication process.
-
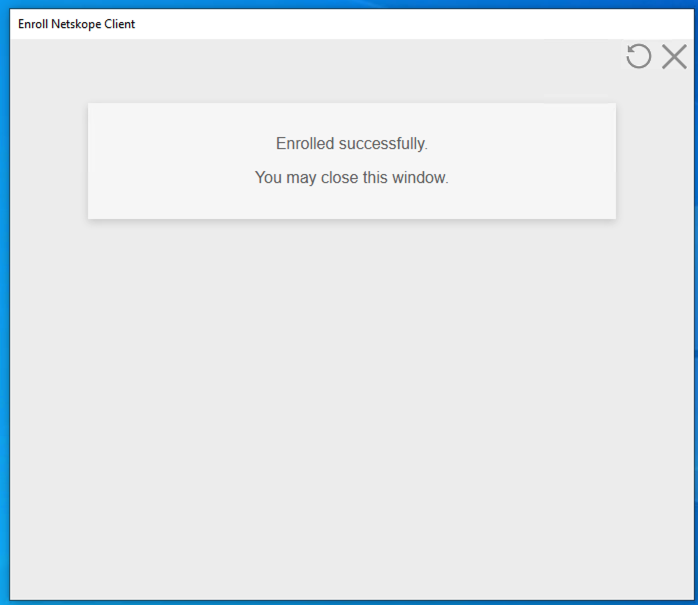
On successful IDP authentication, Netskope enrolls the user.
The following procedure illustrates the typical enrollment workflow:
-
If you install the Client in IdP mode with tenant and domain suffix, the corporate IDP login page appears and the user needs to enter login credentials.
If you install Client without the tenant details, the user must enter the following details in the enroll window before getting the IdP login page:
– Tenant Name: If you are accessing tenant URL acme.goskope.com, then tenant name = acme.
– Domain Name: If you are accessing tenant URL acme.goskope.com, then Domain name = goskope.com. -
The Netskope Client redirects the user to the IdP authentication process.
-
On successful IDP authentication, Netskope enrolls the user.
To learn more, view Netskope Client for Linux.
Refer to Netskope Client for Android and ChromesOS to learn more about the enrollment process.
Enrollment on Devices without AppLink Support
If you have a ChromeOS device that does not support the Android AppLink feature, then you must manually select the Client app for the enrollment process.
After the Client (Netskope Client app) is successfully installed and the dP authentication is successful, the user must manually open the Client app to receive the Netskope tenant authentication token to continue with the enrollment process. In the popup (see the following screenshot), click the Open button and also ensure that you select the Remember my choice option.
 |
Refer to Netskope Client for iOS to learn more about the enrollment process.
Enforce Enrollment
Administrators can mandate enrollment for IDP enrollment method where it enforces the end-users to enroll with their login credentials. To learn more, view Enforce Enrollment for Netskope Client.
Unenrollment
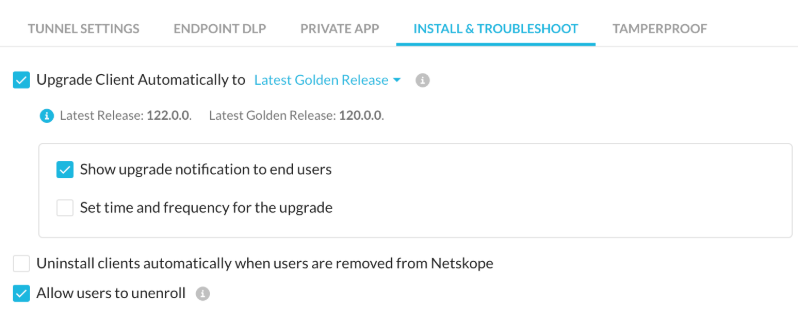
A user can unenroll by selecting Allow users to unenroll from Settings > Security Cloud Platform > Netskope Client > Client Configuration. To learn more, view Netskope Client Configuration.
IdP Enrollment Using Webview2
The Microsoft Edge WebView2 enables you to include web technologies such as HTML and javascript into your native applications. Netskope Client supports user IdP enrollment using WebView2. The following lists the requirements:
- Supported OS: Windows 10 or above.
- Webview2 version (Minimum): 106.0.1370.52.
To check the version of the WebView2 installed in your machine, you can use one of the following methods:
Method 1
- Go to Start > Add or Remove Programs.
- Search for WebView2.

Method 2
- Go to Start > Settings > Apps > Apps & Features.
- Search for WebView2. You can find the version of the installed WebView2.
