

Create a Publisher to deploy on your network and use with a private app. The token generated in this procedure is used to deploy the Publisher, so be sure to make a copy. Auto-Update profiles have been add to the Publisher settings. If you have not yet created an Auto-Update profile, you can choose to use the default profile, or go to Configure Publisher Auto-Updates to create one.
- Go to Settings > Security Cloud Platform > Publishers.
- Click New Publisher.
- Enter a Publisher name (like
AWS US-WestWing publisher), and then select an Auto-Update profile.
- Click Save & Generate Token.

- Click Copy to get the registration token.

- Click Done.
After deploying the Publisher, return to the Publisher page to verify the status is Connected.

The Publishers page shows how many Publishers have been created, each Publisher’s name, status, version, CN, and number of connected apps. To customize the columns shown on the page, click the gear icon in the table header and check the columns you want to see. To edit the name, delete, or update a Publisher, click the menu icon in the row a Publisher is listed.
You can search for and filter Publishers listed on the page based on search criteria. If a filter has an arrow, you can select predefined search criteria, or search by entering specific criteria. Click Add Filter to view and select a predefined filter, or search for a Publisher, Update Profile, and Version.

Configure a Publisher in AWS
The Netskope Publisher allows for zero trust network access to applications and hosts in your public cloud or private data center. This includes the ability to leverage a Publisher in Amazon Web Services.
This section explains how to create a Publisher instance in Amazon Web Services. Knowledge of the Netskope UI and Amazon Web Services are required, along with:
- A Netskope Tenant.
- A copy of your Publisher registration token.
- An Amazon Web Services account.
To access the AMI file from the Publisher page in the Netskope UI, go to Settings > Security Cloud Platform > Publishers and click Publisher AMI. When deploying a Publisher in AWS China please deploy the AMI through AWS marketplace in China: Marketplace: Netskope Private Access Publisher instead of the link below.

Perform these steps in the AWS console.
Launch an EC2 Instance
- Sign in to your Amazon Web Services (AWS) console.
- Click Services > Find services. Search for EC2 and then select EC2.
- Click Instances in the left sidebar menu.
- Click Launch Instance.
Choose an Amazon Machine Image (AMI)
- Click AWS Marketplace in the left sidebar menu.
- Enter
>Netskopein the search bar. - Netskope Private Access Publisher should appear in the search results. Click Select.
Choose an Instance Type
- Select t3.medium as the instance type.
- Click Next: Configure Instance Details.
Configure Instance Details
The token you copied from the Netskope UI is needed to complete these steps.
- Enter
1in the Number of instances field. - Select the VPC where the application you want to publish via Netskope is deployed in the Network field.
- Keep the default values for the remaining fields.
Optional (Only outside of China)
- Click Advanced Details to expand this section.
- In the User data section, select the As text option.
- Enter the Netskope Publisher registration token into the User Data text field.
Add a Name Tag
Adding a name tag is optional, but doing so will make it easier to identify your Netskope Publisher EC2 instance.
- Click the Add Tags tab, near the top of the page.
- Click Add Tag.
- Enter
Namein the Key field. - Enter
AWS US-WestWing publisherin the Value field. - Click Review and Launch.
Review Instance Launch
- Review the information in the AMI Details Instance Type sections.
- Click Launch.
- Select or create a key pair. This key pair is used to ssh in to the Publisher VM. Password-based authentication is by default disabled on the AWS publishers.
- Click Launch Instances.
- Review the information on the Launch Status page.
- Click View Instances.
View Instances
- You should now see a new EC2 instance with the name
AWS US-WestWing publisher(if you completed the Add a Name Tag steps). - AWS typically takes several minutes to launch EC2 instance and run status checks. Wait until your Instance State is Running and Status Checks have passed.
Register the Publisher
Note
Registering the Publisher is optional and only required if the Publisher token was not provided during the initial Publisher instance deployment, or when deploying a Publisher within AWS China.
SSH into the publisher (default username: ubuntu, default password: ubuntu). When prompted, change your password. After you change it, the system auto-disconnects your SSH session, so you will need to reconnect and log in with their new password before proceeding.
- SSH into the Publisher (default username:
ubuntu, default password:ubuntu).Note
In the event of a password change, the new password must meet the following minimum requirements:
- Minimum password length must be 14 characters.
- Must contain one upper case letter.
- Must contain one lower case letter.
- Must contain one digit (number).
- Must contain one non-alphanumeric character. Cannot be a palindrome.
Note
For Publishers on AWS China: First proceed to the next section and do not register the publisher.
- When prompted for a menu choice, select Register.
- When requested, enter the Netskope registration token, and then click Enter. You can also enter the token with this command:
sudo ./npa_publisher_wizard -token <TOKEN>. - Go to Settings > Security Cloud Platform > Publishers in your Netskope tenant and confirm your Publisher has a Connected status. If not, go to Publisher Logs for Troubleshooting.
Additional Steps before Registration in AWS China
Perform the following steps on the Publisher VM in AWS China before registering the Publisher. These steps prepare the environment for registration and ensure downloads use China-accessible mirrors.
- Exit the Publisher Wizard: When the wizard menu appears, select 7. Exit to return to the shell prompt.
- Install
curl: Update package metadata and installcurl:sudo apt update && sudo apt install -y curl
- Download the setup/upgrade helper script: Use
curlto download the latest China setup script to your home directory:curl https://npa-ova.oss-cn-shenzhen.aliyuncs.com/publisher.netskope.com/latest/generic/setup_and_upgrade_china_publisher.py > ~/setup_and_upgrade_china_publisher.py
- Verify the script integrity (SHA-256): Calculate the SHA-256 checksum and confirm it matches the expected value:
shasum -a 256 setup_and_upgrade_china_publisher.py
Expected output (hash should match exactly):2645a1d6c5bbb83fa8dc794d6bade10167d8b241463d62edc6c53eb8f3bb72f5 setup_and_upgrade_china_publisher.py
Note
If the checksum does not match, do not run the script. Redownload the file and verify again. Run the setup/upgrade script.
- Execute the script to configure prerequisites and optimize mirrors for Mainland China.
sudo python3 setup_and_upgrade_china_publisher.py
Note
The script may update packages and repositories. Allow it to complete without interruption.
- Confirm Docker APT mirror is set to
Aliyun: Validate that the Docker repository points to theAliyunmirror instead ofdownload.docker.com:sudo cat /etc/apt/sources.list.d/archive_uri-https_download_docker_com_linux_ubuntu-jammy.list
Expected content:deb [arch=amd64] http://mirrors.aliyun.com/docker-ce/linux/ubuntu jammy stable
If needed, update the file so that
# deb-src [arch=amd64] http://mirrors.aliyun.com/docker-ce/linux/ubuntu jammy stablehttps://download.docker.com/linux/ubuntuis replaced withhttp://mirrors.aliyun.com/docker-ce/linux/ubuntu, and then runsudo apt update. - Validate required resource files: Ensure the following files are present (created by the setup/upgrade script):
ls -l /home/ubuntu/resources/npa-publisher-public.pem
ls -l /home/ubuntu/resources/.prc_dp
Note
If either file is missing, rerun the setup script from step 5.
- Register the Publisher: Start the wizard and complete registration with your Publisher token:
sudo ./npa_publisher_wizard -token <TOKEN>
- Upgrade the Publisher via the wizard: After registration has been completed, upgrade to the latest Publisher software version. Select 1. Upgrade and follow the prompts.
Configure a Publisher in Azure
The Netskope Publisher allows for zero trust network access to applications and hosts in your public cloud or private data center. This includes the ability to leverage a Publisher in Azure.
This topic explains how to create a Publisher instance in Azure. Knowledge of the Netskope UI and Azure are required, along with:
- A Netskope Tenant
- A copy of your Publisher registration token
- An Azure account.
Note
Azure Publishers require 30GB HDD instead of the standard 8GB.
Perform these steps in the Azure console.
Create a Virtual Machine (VM)
- Go to Azure Marketplace and search for Netskope Private Access Publisher.
- Click Create.
- Select Netskope Private Access Publisher from the drop-down menu.
- Click Basics.
- Select or edit the Resource group and virtual machine, if required.
- While creating the VM, the Username field automatically adds
azureuserby default. You must change the Username toubuntu, and only useubuntuto ensure a successful login to the virtual machine. Only the usernameubuntucan be used to log in.
- Copy and paste your public SSH key under SSH public key. If you do not have a public SSH key, select Generate new key pair. This key pair is used to ssh in to the Publisher VM. Password-based authentication is by default disabled on the Azure publishers.
- Select SSH from the Select public inbound ports dropdown menu.
- Click Next:Disks.
- Customize according to the desired disk settings or use the default settings.
- Click Next: Networking.
- Review your networking settings.
- Select SSH from the Select public inbound ports dropdown menu.
- Click Review + Create and analyze the virtual machine settings.
- Click Create.
- Wait until the deployment completes.
Open an SSH Session
- Click Virtual machines.
- Select the newly created VM.
- Find a public IP address.
- On your computer terminal execute:
ssh -i <your_private_ssh.key> ubuntu@<ipaddress>.
Register the Publisher
Note
Registering the Publisher is optional and only required if the Publisher token was not provided during the initial Publisher instance deployment.
SSH into the publisher (default username: ubuntu, default password: ubuntu). When prompted, change your password. After you change it, the system auto-disconnects your SSH session, so you will need to reconnect and log in with their new password before proceeding.
- SSH into the Publisher (default username:
ubuntu, default password:ubuntu).Note
In the event of a password change, the new password must meet the following minimum requirements:
- Minimum password length must be 14 characters.
- Must contain one upper case letter.
- Must contain one lower case letter.
- Must contain one digit (number).
- Must contain one non-alphanumeric character.
- Cannot be a palindrome.
- When prompted for a menu choice, select Register.
- When requested, enter the Netskope registration token, and then click Enter. You can also enter the token with this command:
sudo ./npa_publisher_wizard -token <TOKEN>. - Go to Settings > Security Cloud Platform > Publishers in your Netskope tenant and confirm your Publisher has a Connected status. If not, go to Publisher Logs for Troubleshooting.
Configure a Publisher in GCP
The Netskope Publisher allows for zero trust network access to applications and hosts in your public cloud or private data center. This includes the ability to leverage a Publisher in Google Cloud Platform.
This topic explains how to create a Publisher instance in Google Cloud Platform Storage. Knowledge of the Netskope UI and Google Cloud Platform are required, along with:
- A Netskope Tenant
- A copy of your Publisher registration token
- A Google Cloud Platform account with a working VPC setup and API permissions.
Important
Ensure your /tmp folder has a 777 permission for successful Publisher deployments and OS updates.
Perform these steps in the Google Cloud Platform console.
- Log in to Google Cloud Platform at https://console.cloud.google.com/
 .
. - Click the menu icon in the top left and select Compute Engine and then VM instances.

- Click Create Instance.
- Enter a name for the instance, like
netskope-publisher.
- Select a Region and Zone. For testing purposes this can be anything. In a production environment, you want to enter the region and zone where the applications reside.

- Configure the instance memory and CPU settings (2 core, 4 GB memory is the recommended setting, but for testing purposes a smaller machine will work).

- Click Change under Boot disk.

- Select Ubuntu as the Operating System and Ubuntu 22.04 LTS as the Version. Leave the Boot disk type and Size as the defaults.
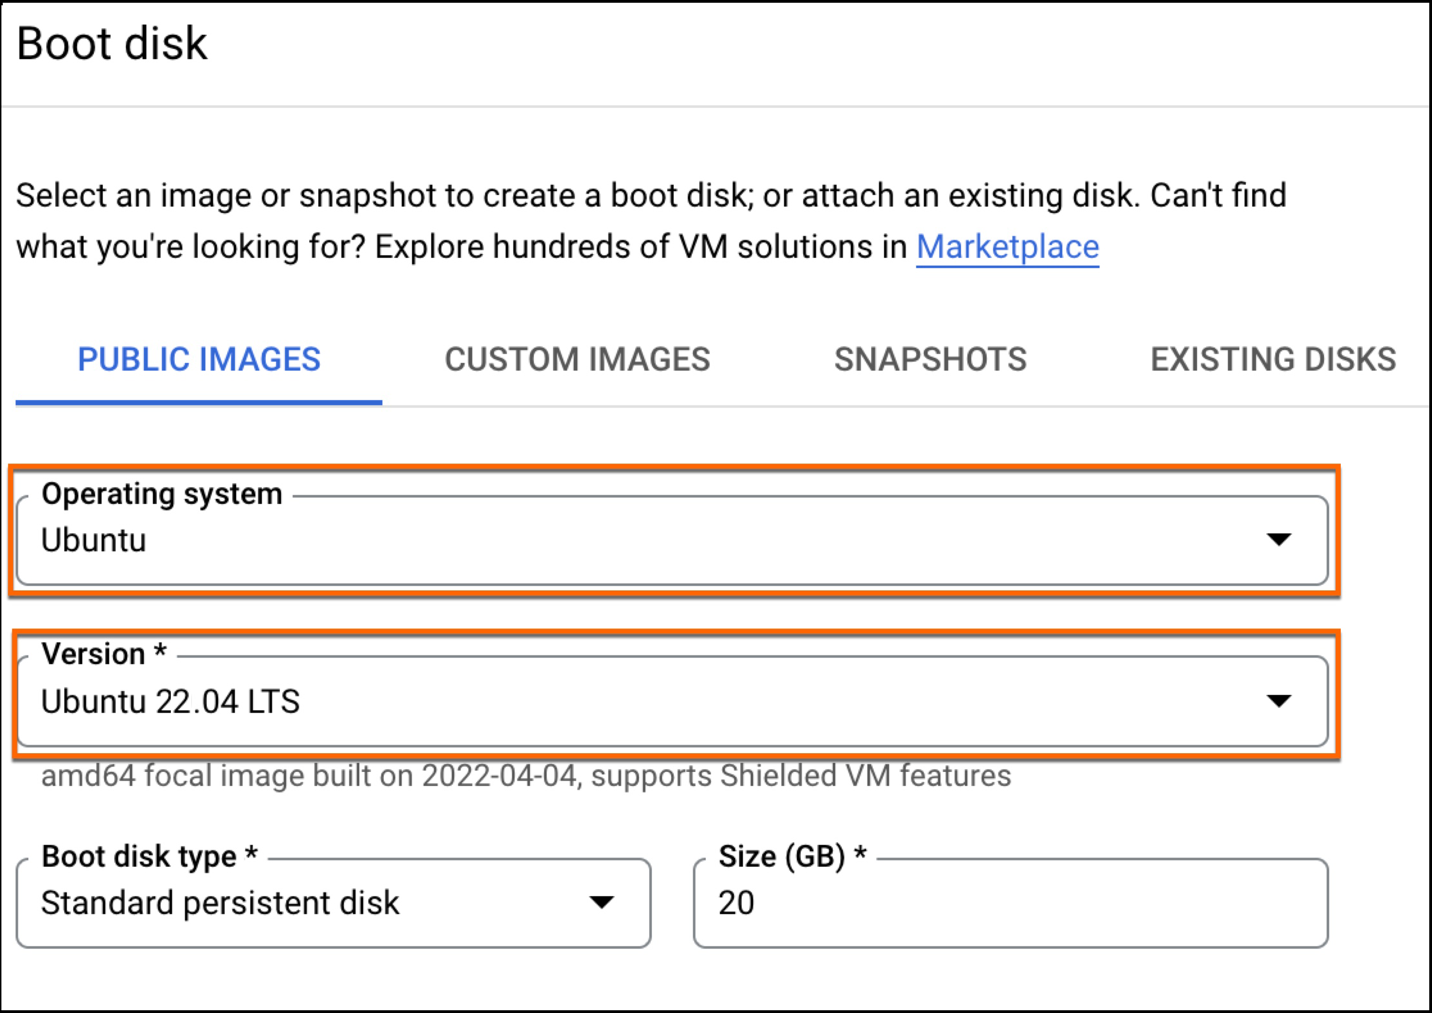
- Click Select.

Note: Steps 10-13 are optional if no other route to the internet is available.
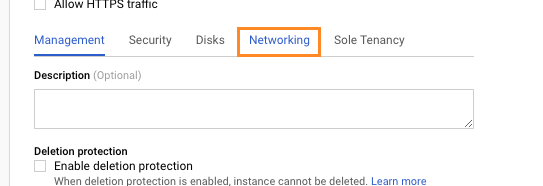
- Click Management, security, disks, networking, sole tenancy

- Click Networking.
- Click the pencil icon to edit the network interface.

- Select your Network, Subnetwork, and specify an Ephemeral external IP.

- Click Create to start the instance creation.

- After the instance is available, connect to it by clicking SSH under the Compute Engine page.

- In the SSH session, enter your home directory
/home/$USERNAMEthrough commandcd.Important
For deployments based on Ubuntu 22.04, GCP has an updated guest environment that might require manual DNS changes. Validate this for your environment before proceeding; refer to Manually Configure Custom DNS on GCP.
- Due to Google Cloud Platform’s (GCP) network infrastructure, which uses a default MTU (Maximum Transmission Unit) of 1460, we advise customers to run the Netskope Publisher in a specific mode called No NAT.
In this mode, traffic is proxied directly from the egress network interface instead of applying Source NAT (SNAT). This approach avoids potential packet fragmentation problems that can occur from the interaction between Linux’s masquerade and conntrack modules.
To enable No NAT mode on a new or existing Publisher installation, follow these steps:
a. Ensure you are logged in with the normal user account that will be used to deploy or manage the Publisher (do not use the root user).
b. Create the resources directory in your user’s home directory, if it doesn’t already exist:mkdir -p ~/resources
c. Create the empty .nonat file inside that directory. The presence of this file is what activates the mode.touch ~/resources/.nonat
After creating the file, continue to step 18 or (re)start the Netskope Publisher service. It will automatically detect the .nonat file and enable the feature. - Run the following command under the home directory to download and install the necessary components for the Publisher. This may take about 10 minutes.
curl https://s3-us-west-2.amazonaws.com/publisher.netskope.com/latest/generic/bootstrap.sh | sudo bash; sudo su - $USER; exit
- At the end of this process, you have a fully functional Netskope Publisher and can register it with Netskope.
Register the Publisher
SSH into the publisher (default username: ubuntu, default password: ubuntu). When prompted, change your password. After you change it, the system auto-disconnects your SSH session, so you will need to reconnect and log in with their new password before proceeding.
- SSH into the Publisher (default username:
ubuntu, default password:ubuntu).Note
In the event of a password change, the new password must meet the following minimum requirements:
- Minimum password length must be 14 characters.
- Must contain one upper case letter.
- Must contain one lower case letter.
- Must contain one digit (number).
- Must contain one non-alphanumeric character.
- Cannot be a palindrome.
- When prompted for a menu choice, select Register.
- When requested, enter the Netskope registration token, and then click Enter. You can also enter the token with this command:
sudo ./npa_publisher_wizard -token <TOKEN>. - Go to Settings > Security Cloud Platform > Publishers in your Netskope tenant and confirm your Publisher has a Connected status. If not, go to Publisher Logs for Troubleshooting.
Configure a Publisher in VMWare ESXi
The Netskope Publisher allows for zero trust network access to applications and hosts in your public cloud or private data center. This includes the ability to leverage a Publisher in VMWare ESXi.
This topic explains how to create a Publisher instance in VMWare ESXi. Knowledge of the Netskope UI and VMWare ESXi are required, along with:
- A Netskope Tenant
- A copy of your Publisher registration token
- A VMWare ESXi account, Version 7 Update 2 or later.
To access the OVA from the Publisher page in the Netskope UI, go to Settings > Security Cloud Platform > Publishers and click Publisher OVA to download the Publisher OVA file. The OVA file is needed to create a ESXi-based Publisher.

Note
If you want to validate the integrity of the OVA, the SHA hash can be found in the Publisher Release Notes.
Perform these steps in the VMWare ESXi console.
- Log in to your ESXi instance and click Virtual Machines.

- Click Create/Register VM.
- For Select Creation Type, select Deploy a virtual machine from an OVF or OVA file, and then click Next.

- For Select OVF and VMDK files, enter a name for the VM, drag and drop the OVA from Netskope, and then click Next.

- For Select Storage, keep the default settings and click Next.

- For Deployment Options, select your default network, and then click Next.

- For Ready to Complete, review the settings to confirm, and then click Finish.

If a Publisher needs additional interfaces, proceed to step 8.
- To add another interface, click on the VM you just created and then click Edit Settings.
- Click Add Network Adapter, and then click Save.
Register the Publisher
SSH into the publisher (default username: ubuntu, default password: ubuntu). When prompted, change your password. After you change it, the system auto-disconnects your SSH session, so you will need to reconnect and log in with their new password before proceeding.
- SSH into the Publisher (default username:
ubuntu, default password:ubuntu).Note
In the event of a password change, the new password must meet the following minimum requirements:
- Minimum password length must be 14 characters.
- Must contain one upper case letter.
- Must contain one lower case letter.
- Must contain one digit (number).
- Must contain one non-alphanumeric character.
- Cannot be a palindrome.
- When prompted for a menu choice, select Register.
- Execute the following command only if the Publisher is hosted inside China and needs to connect to a NewEdge DC inside China:
sudo touch resources/.prc_dp. - When requested, enter the Netskope registration token, and then click Enter. You can also enter the token with this command:
sudo ./npa_publisher_wizard -token <TOKEN>. - Go to Settings > Security Cloud Platform > Publishers in your Netskope tenant and confirm your Publisher has a Connected status. If not, go to Publisher Logs for Troubleshooting.
Configure a Publisher in Hyper-V
The Netskope Publisher allows for zero trust network access to applications and hosts in your public cloud or private data center. This includes the ability to leverage a Publisher in Hyper-V.
This topic explains how to create a Publisher instance in Hyper-V. Knowledge of the Netskope UI and Hyper-V are required, along with:
- A Netskope Tenant
- A copy of your Publisher registration token
- A Hyper-V account
- HyperV version 10 or later.
To access the VHDX file from the Publisher page in the Netskope UI, go to Settings > Security Cloud Platform > Publishers and click Publisher VHDX.

Note
If you want to validate the integrity of the VHDX, the SHA hash can be found in the Publisher Release Notes.
Perform these steps in the Hyper-V console.
- Launch the Microsoft Hyper-V Manager and select the Action New > Virtual Machine….

- Enter a VM Name (like NPA Publisher), optionally an installation location, and then click Next.
Tip
Name the Publisher to describe its location and/or application use.

- Leave Generation 1 selected and click Next.

- Specify the amount of memory for the NPA Publisher (4096 is recommended for most use cases) and click Next.

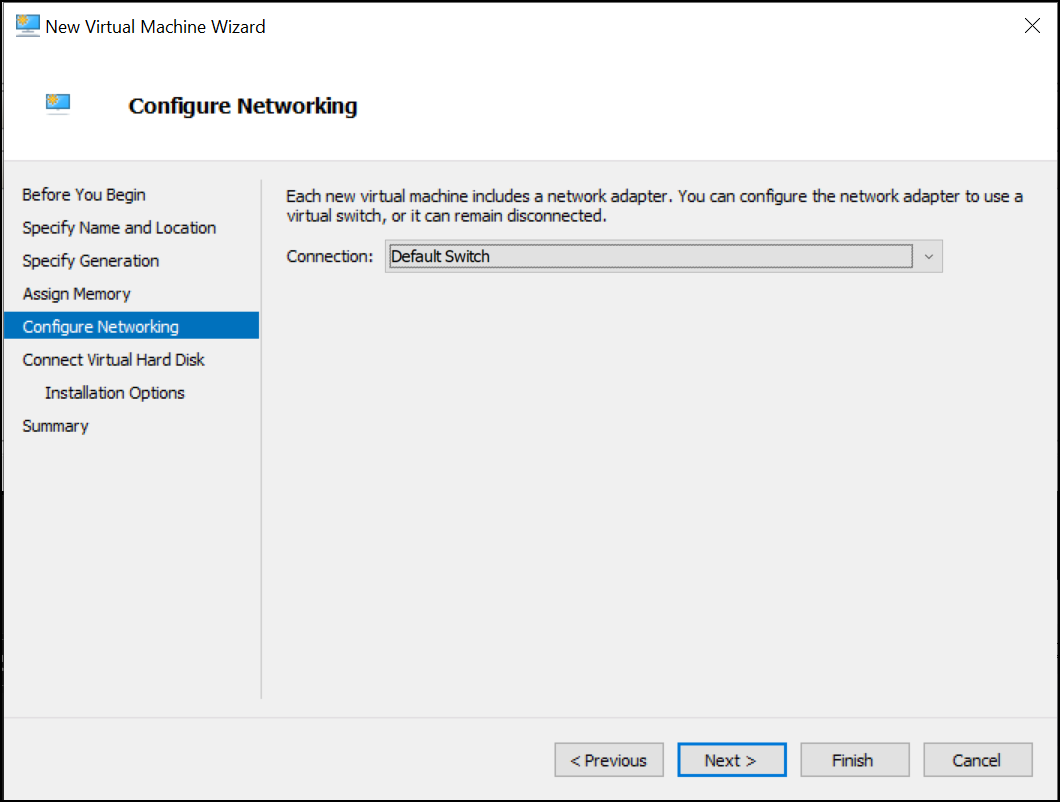
- Select a network adapter to attach the NPA Publisher that has Internet access and click Next.
- Select Use an existing virtual hard disk and then Browse to the downloaded VHDX file. When finished, click Next.

- Confirm the Hyper-V Wizard configuration options and click Finish.

- Now you can Start your NPA Publisher in Hyper-V.

- Get the IP address provided by the Hyper-V Manager to SSH into a Publisher for Network Settings.

Register the Publisher
SSH into the publisher (default username: ubuntu, default password: ubuntu). When prompted, change your password. After you change it, the system auto-disconnects your SSH session, so you will need to reconnect and log in with their new password before proceeding.
- SSH into the Publisher (default username:
ubuntu, default password:ubuntu).Note
In the event of a password change, the new password must meet the following minimum requirements:
- Minimum password length must be 14 characters.
- Must contain one upper case letter.
- Must contain one lower case letter.
- Must contain one digit (number).
- Must contain one non-alphanumeric character.
- Cannot be a palindrome.
- When prompted for a menu choice, select Register.
- Execute the following command only if the Publisher is hosted inside China and needs to connect to a NewEdge DC inside China:
sudo touch resources/.prc_dp. - When requested, enter the Netskope registration token, and then click Enter. You can also enter the token with this command:
sudo ./npa_publisher_wizard -token <TOKEN>. - Go to Settings > Security Cloud Platform > Publishers in your Netskope tenant and confirm your Publisher has a Connected status. If not, go to Publisher Logs for Troubleshooting.
Configure a Publisher on a KVM Host (QCOW2)
This document describes how to configure a Netskope NPA Publisher on a Linux host with a KVM (Kernel-based Virtual Machine) using the Publisher QCOW2 image. These instructions are based on Ubuntu 22.04 as the host OS, but apply to any Linux distribution that supports KVM and libvirt.
Prerequisites
To complete this configuration, you need:
- A Netskope tenant with NPA enabled.
- A Publisher registration token (generated from the Netskope tenant).
- A Linux host with KVM acceleration available (verify with
kvm-ok). - At least 4 GB RAM and 2 vCPUs free for the Publisher VM.
- 20 GB free disk space for the QCOW2 image.
Install KVM and Required Tools
sudo apt update
sudo apt install -y cpu-checker qemu-kvm libvirt-daemon-system libvirt-clients virtinst bridge-utils

# Verify KVM is available
kvm-ok
# Should print: "KVM acceleration can be used"

# Add yourself to the kvm and libvirt groups (log out and back in afterwards)
sudo usermod -aG kvm,libvirt $USER
Start the libvirt default network (created by the install above; it needs to be activated):
sudo virsh net-start default
sudo virsh net-autostart default
sudo virsh net-list # confirm "default" is active
Download the Publisher QCOW2 Image
wget https://s3-us-west-2.amazonaws.com/publisher.netskope.com/latest/NetskopePrivateAccessPublisher.qcow2
wget https://s3-us-west-2.amazonaws.com/publisher.netskope.com/latest/NetskopePrivateAccessPublisher.qcow2.SHA256.txt

# Verify the checksum
EXPECTED=$(cat NetskopePrivateAccessPublisher.qcow2.SHA256.txt)
ACTUAL=$(sha256sum NetskopePrivateAccessPublisher.qcow2 | awk '{print $1}')
[[ "$EXPECTED" == "$ACTUAL" ]] && echo "OK" || echo "MISMATCH"

# Move the image into libvirt storage
sudo mv NetskopePrivateAccessPublisher.qcow2 /var/lib/libvirt/images/npa-publisher.qcow2
sudo chown libvirt-qemu:kvm /var/lib/libvirt/images/npa-publisher.qcow2
Create the Publisher VM
Launch the VM with the libvirt default NAT network. The VM gets an IP on the libvirt internal 192.168.122.0/24 network, and the host can reach the VM directly.
sudo virt-install \
  --name npa-publisher \
  --memory 4096 \
  --vcpus 2 \
  --disk path=/var/lib/libvirt/images/npa-publisher.qcow2,format=qcow2,bus=virtio \
  --os-variant ubuntu22.04 \
  --network network=default,model=virtio \
  --graphics none \
  --console pty,target_type=serial \
  --import \
  --noautoconsole
Confirm the VM is running:
sudo virsh list --all
Register the Publisher
You can access the Publisher VM via the libvirt serial console or via SSH. Either method works for completing the wizard.
Option A: Connect via the serial console (recommended for KVM)
The serial console works regardless of network configuration and is the most reliable way to interact with a fresh Publisher VM.
sudo virsh console npa-publisher
# Press Enter at the blank screen to see the login prompt
# To exit the console later, press Ctrl + ]
Option B: Connect via SSH
Wait 30-60 seconds after the VM starts for DHCP to complete, then look up the VM’s IP address:
sudo virsh domifaddr npa-publisher
# IP will be 192.168.122.x for default NAT

ssh ubuntu@<VM_IP>
First Login with Wizard
- Log in with the default credentials: username
ubuntu, passwordubuntu. - You will be prompted to create a new password. Password rules:
- Minimum 14 characters
- At least one uppercase letter
- At least one lowercase letter
- At least one digit
- At least one non-alphanumeric character
- No palindromes
- Run the Publisher wizard:
sudo ./npa_publisher_wizard
- From the wizard menu, select Register, and paste your registration token when prompted.
- Alternatively, register non-interactively with this command:
sudo ./npa_publisher_wizard -token <REGISTRATION_TOKEN>
- Verify the Publisher status in the Netskope tenant; it should show as Connected.
Common VM Operations
# List VMs
sudo virsh list --all

# Stop / start the VM
sudo virsh shutdown npa-publisher
sudo virsh start npa-publisher

# Force off (if shutdown hangs)
sudo virsh destroy npa-publisher

# Connect to the console (Ctrl + ] to exit)
sudo virsh console npa-publisher

# Delete the VM and its disk
sudo virsh destroy npa-publisher
sudo virsh undefine npa-publisher --remove-all-storage
Advanced Network Options
The default NAT network works for most cases. If you need the Publisher VM to be reachable on your physical LAN, replace the --network argument in the virt-install command:
Bridge to a Physical NIC
The VM gets an IP on your LAN (same subnet as the host). Requires a pre-configured br0 bridge on the host.
--network bridge=br0,model=virtio
macvtap direct
Quick LAN access without configuring a bridge. Note that the host itself cannot SSH to the VM in this mode (other LAN machines can). Replace eth0 with the actual host interface name.
--network type=direct,source=eth0,source_mode=bridge,model=virtio
macvtap does not work on cloud instances (AWS EC2, GCP, Azure) because the cloud network filters non-ENI MAC addresses. Use it only on physical or on-premises virtualized hosts.
Troubleshooting
Network not found: no network with matching name ‘default’
Start the default network:
sudo virsh net-start default
sudo virsh net-autostart default
If the default network was deleted (unusual), recreate it from the libvirt bundled XML:
sudo virsh net-define /usr/share/libvirt/networks/default.xml
sudo virsh net-start default
sudo virsh net-autostart default
virt-install: command not found
Install virtinst:
sudo apt install -y virtinst
VM has no IPv4 address (after virsh domifaddr)
Wait 30-60 seconds for DHCP to complete and check again. If the VM still has no IP (DHCP unavailable on your network, static IP required), connect via virsh console and use the Publisher wizard to configure networking interactively (static IP, DNS, gateway).
Permission denied (publickey,password) when SSHing
The Publisher requires password authentication. Use the default credentials (ubuntu/ubuntu) on first login; you’ll be forced to change the password immediately.here
Configure a Publisher on a Standalone Linux System (Ubuntu/RHEL)
The Netskope Publisher allows for zero trust network access to applications and hosts in your public cloud or private data center. This includes the ability to leverage a Publisher on a standalone installation of Ubuntu 22.04 or Red Hat Enterprise Linux 9.6. Any x86 server running on Ubuntu 22.04 or RHEL 9.6, whether on-premises or in a public cloud, and whether physical or virtual, that satisfies the requirements is supported.
This topic explains how to create a Publisher instance on a Standalone Linux Installation. Knowledge of the Netskope UI is required, along with:
- A Netskope Tenant.
- A copy of your Publisher registration token.
- A Ubuntu 22.04 or Red Hat Enterprise Linux 9.6 installed system with following configuration:
- Meets Publisher Requirements.Have a non-root user with sudo permission to install the Publisher with a script.
Important
Ensure your
/tmpfolder has a777permission for successful Publisher deployments and OS updates.
Run the following command in the non-root SSH session on your Linux Operating System to download and install the necessary components for the Publisher. This may take about 10 minutes.
curl https://s3-us-west-2.amazonaws.com/publisher.netskope.com/latest/generic/bootstrap.sh | sudo bash; sudo su - $USER; exit
At the end of this process, you have a fully functional Netskope Publisher and can register it with Netskope.
Note
During auto-update of this Publisher, Netskope will update the Publisher and make an attempt to update the operating system. Kernel updates should be carried out by the system administrator. For more information, go to Publisher Auto-Update.
Register the Publisher
- SSH into the Publisher.
Note
In the event of a password change, the new password must meet the following minimum requirements:
- Minimum password length must be 14 characters.Must contain one upper case letter.Must contain one lower case letter.Must contain one digit (number).Must contain one non-alphanumeric character.Cannot be a palindrome.
- Once logged in to the linux shell run:
sudo ./npa_publisher_wizard -token <TOKEN>. - Go to Settings > Security Cloud Platform > Publishers in your Netskope tenant and confirm your Publisher has a Connected status. If not, go to Publisher Logs for Troubleshooting.