

Cloud Exchange supports VMware ESXi, HyperV, and KVM virtual machines.
VMware
Prerequisites
- ESXi 6.7 or later.
- 8 CPUs and 16 GB RAM available in ESXi. Follow sizing profiles strictly, refer System Requirements.
- Minimum 152 GB of free disk space.
- Download the Latest OVA file from here.
MD5: 1760e181f2e1577cf53cd4f15992e743
SHA256: 4e61142fa43b3a7d152e6c849c2748abc463a3e7a2d9ca2f44cce78875b5cbb2
Configure the OVA
- Log in to your vSphere Client.
- Select VMs and Templates from the menu.

- Select the Datacenter where you want to deploy Cloud Exchange.
- Right-click on the Datacenter and click Deploy OVF Template.

- Deploy the OVF Template wizard.
- For Select the OVF template, select Local file, upload the latest OVA file, and then click Next.

- For Select a name and folder, enter the virtual machine name, select the location for virtual machine, and then click Next.

- For Select a compute resource, find the wanted resource, and then click Next.

- For Review the details, verify the settings, and then click Next.

- For Select storage, ensure that it has a minimum of 150 GB of free disk space available, and then click Next.

- For Select networks, pick a network, and then click Next.

- For Ready to complete, verify the settings, and then click Finish.
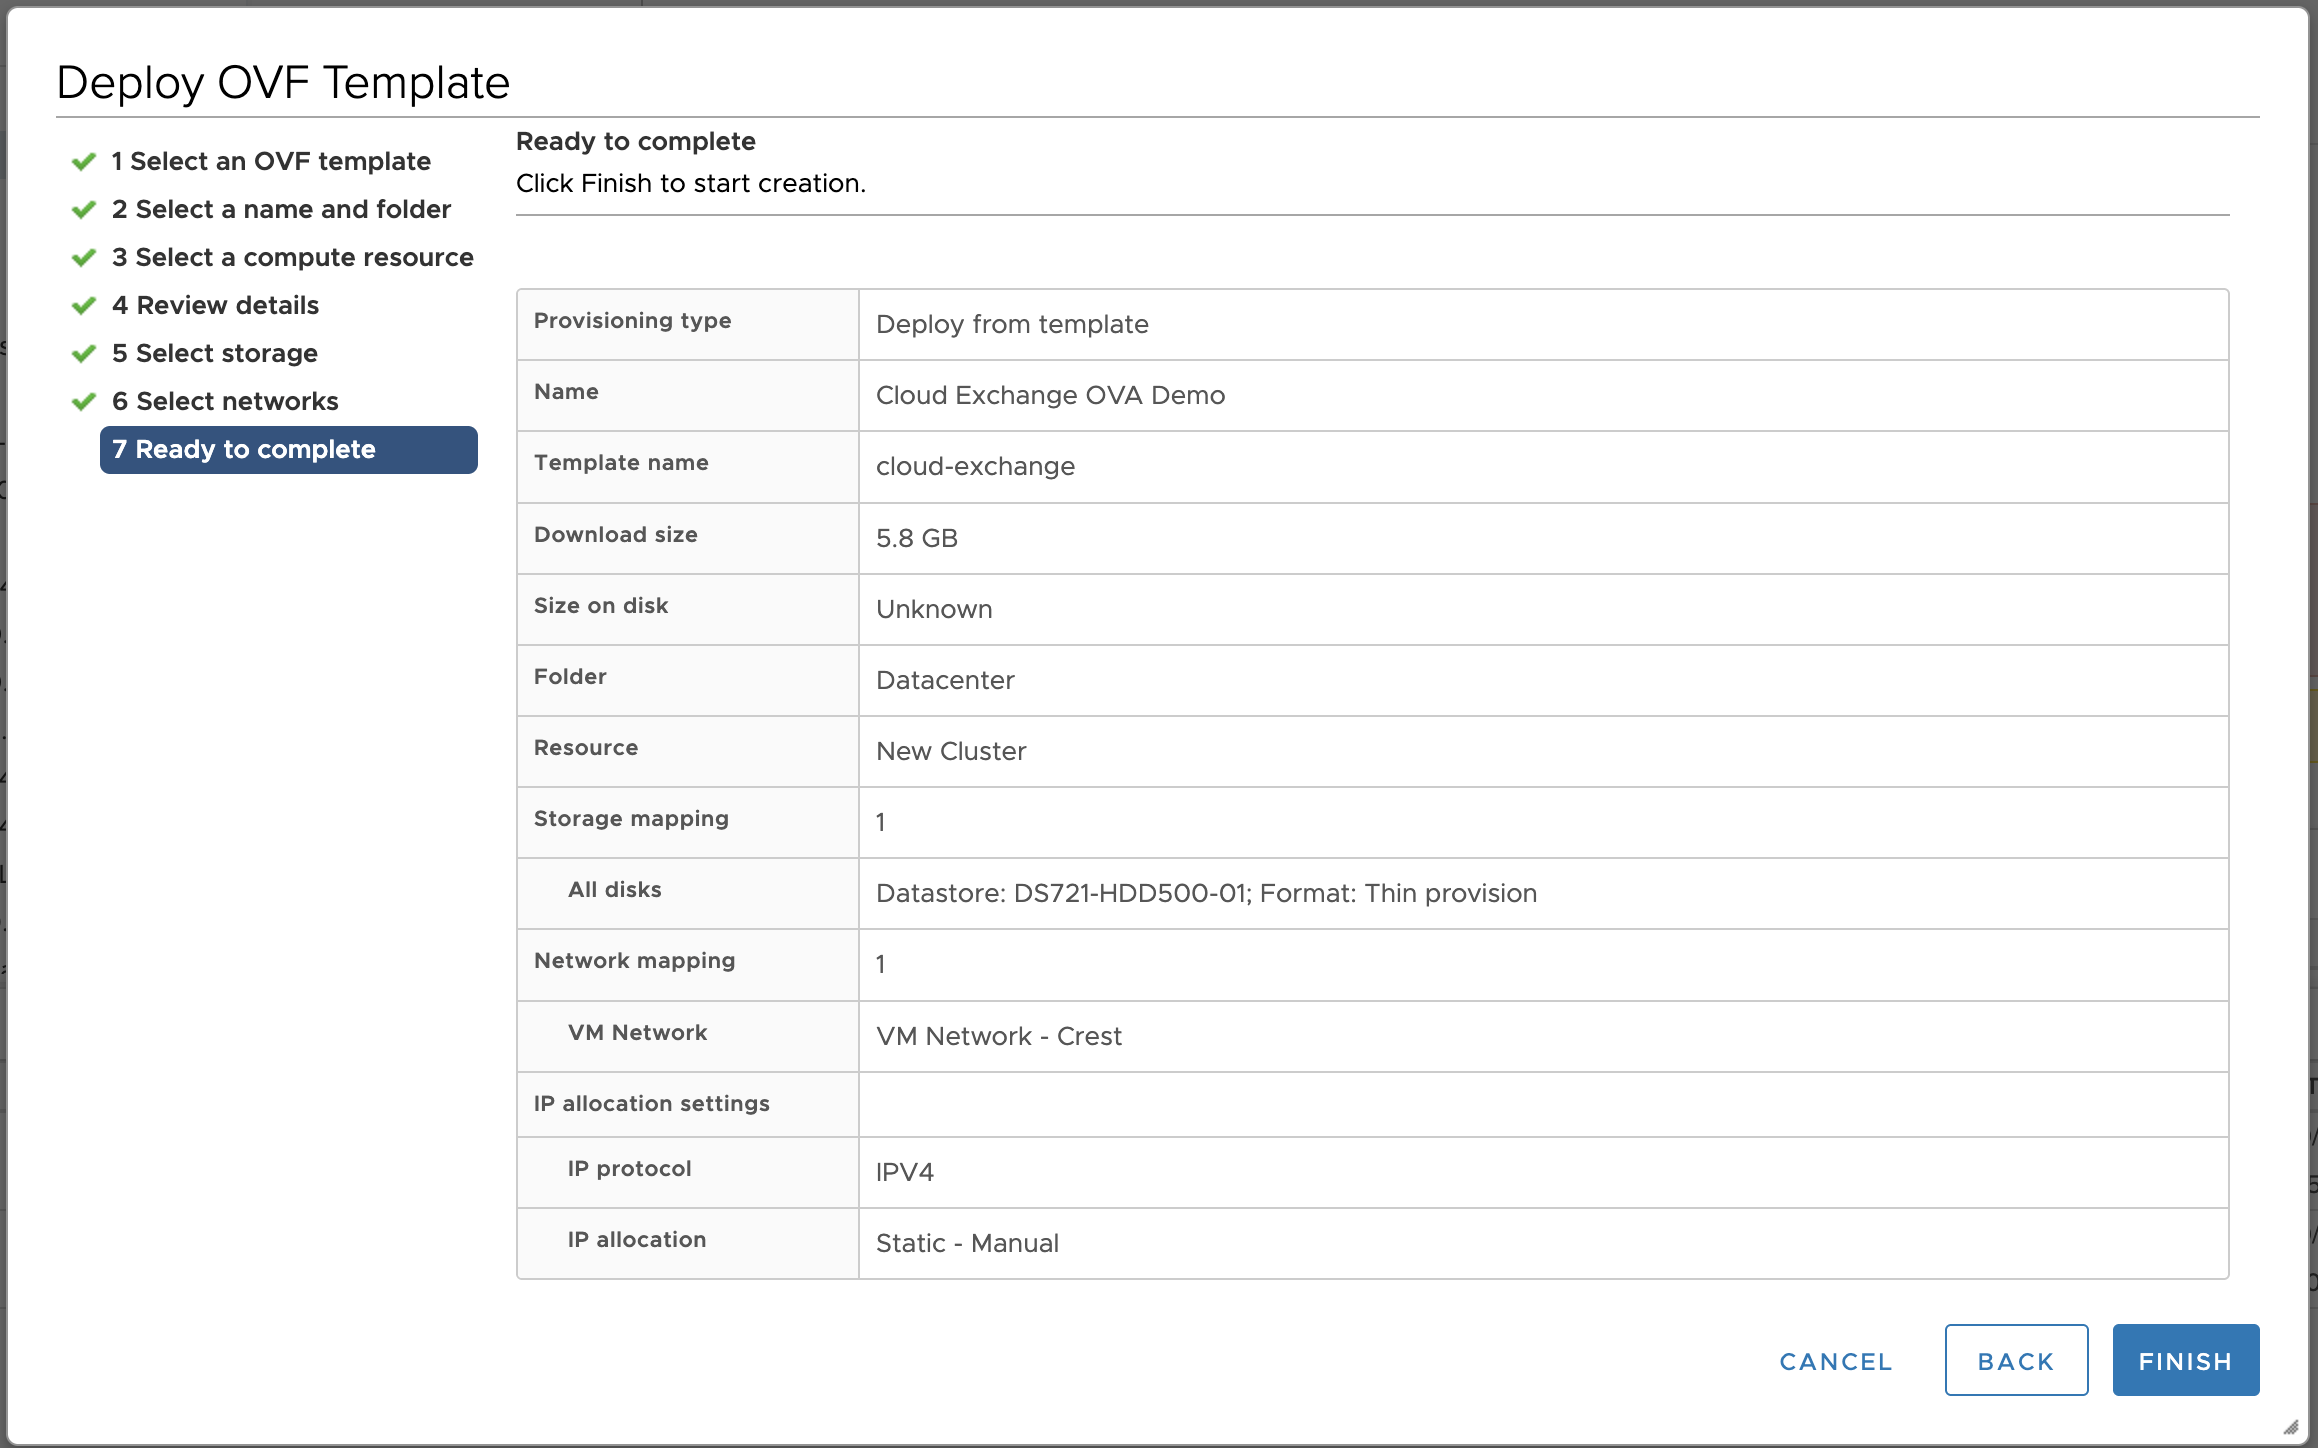
- For Select the OVF template, select Local file, upload the latest OVA file, and then click Next.
- Wait for the import task to be finished.

- Select the deployed VM and click Edit Settings.

- Change the CPU and Memory of the VM according to your profile requirements (for a medium profile, 8 CPU and 16 GB RAM are required), and then click OK. (Follow sizing profiles strictly, refer System Requirements.)

- Power on the VM.

- Launch the web console after powering on the VM.

- Wait for the login prompt, and log in using the credentials below. Be sure to change the password with a more secure string.
Username: cteadmin
Password : Cl0ud3xc4ang3!
- If your network has DHCP enabled, the VM will get its IP assigned. Run the command
$ ip addrto verify whether the IP is assigned to theeth0interface or not. If the IP is not assigned automatically, reach out to your IT administrator, and follow these steps (or How to assign static IP using netplan).- Edit the file
netskope_netplan_sample.yamlunder/home/cteadmin.vi /home/cteadmin/netskope_netplan_sample.yaml
- In the file, add the IP address that you want to assign, and then save the file. (Check with the IT System Administrator for the IP address.)

- Copy the yaml file inside
/etc/netplan:cp /home/cteadmin/netskope_netplan_sample.yaml /etc/netplan
- Restart the network service before applying the netplan changes.
sudo systemctl restart systemd-networkd - Apply and assign the IP address:
sudo netplan apply - Validate that IP address is assigned using the following command:
ip addr
- Edit the file
- Go to the Cloud Exchange directory:
cd /opt/cloudexchange/cloudexchange/
- Copy and edit the cloudexchange config file.
sudo cp cloudexchange.config.example cloudexchange.config
sudo vi cloudexchange.config - Configure the CloudExchange configuration file by setting the parameters according to your requirements.
- This password is required only once during the initial setup and cannot be changed later.
- It is strongly recommended to set a secure password.
- If no password is specified, a random 32-character password will be automatically generated.
- Non‑ASCII characters (e.g., accented letters, other scripts, emoji) are not supported for the maintenance password in CE and can cause failures.
- Please record and securely store the generated maintenance password, as it will be required when migrating Cloud Exchange to another machine.
- If not specified, a random 32-character key will be automatically generated.
- Non‑ASCII characters (e.g., accented letters, other scripts, emoji) are not supported for the JWT SECRET in CE and can cause failures.
- Record and securely store the generated JWT SECRET, as it will be required for the Cloud Exchange HA configuration.
- Execute the setup script.
sudo python3 ./setup
- Launch Cloud Exchange.
sudo ./start
- Wait for 5-10 minutes and then access the CE using the IP address of VM. (https://<ip>).
Default User Login
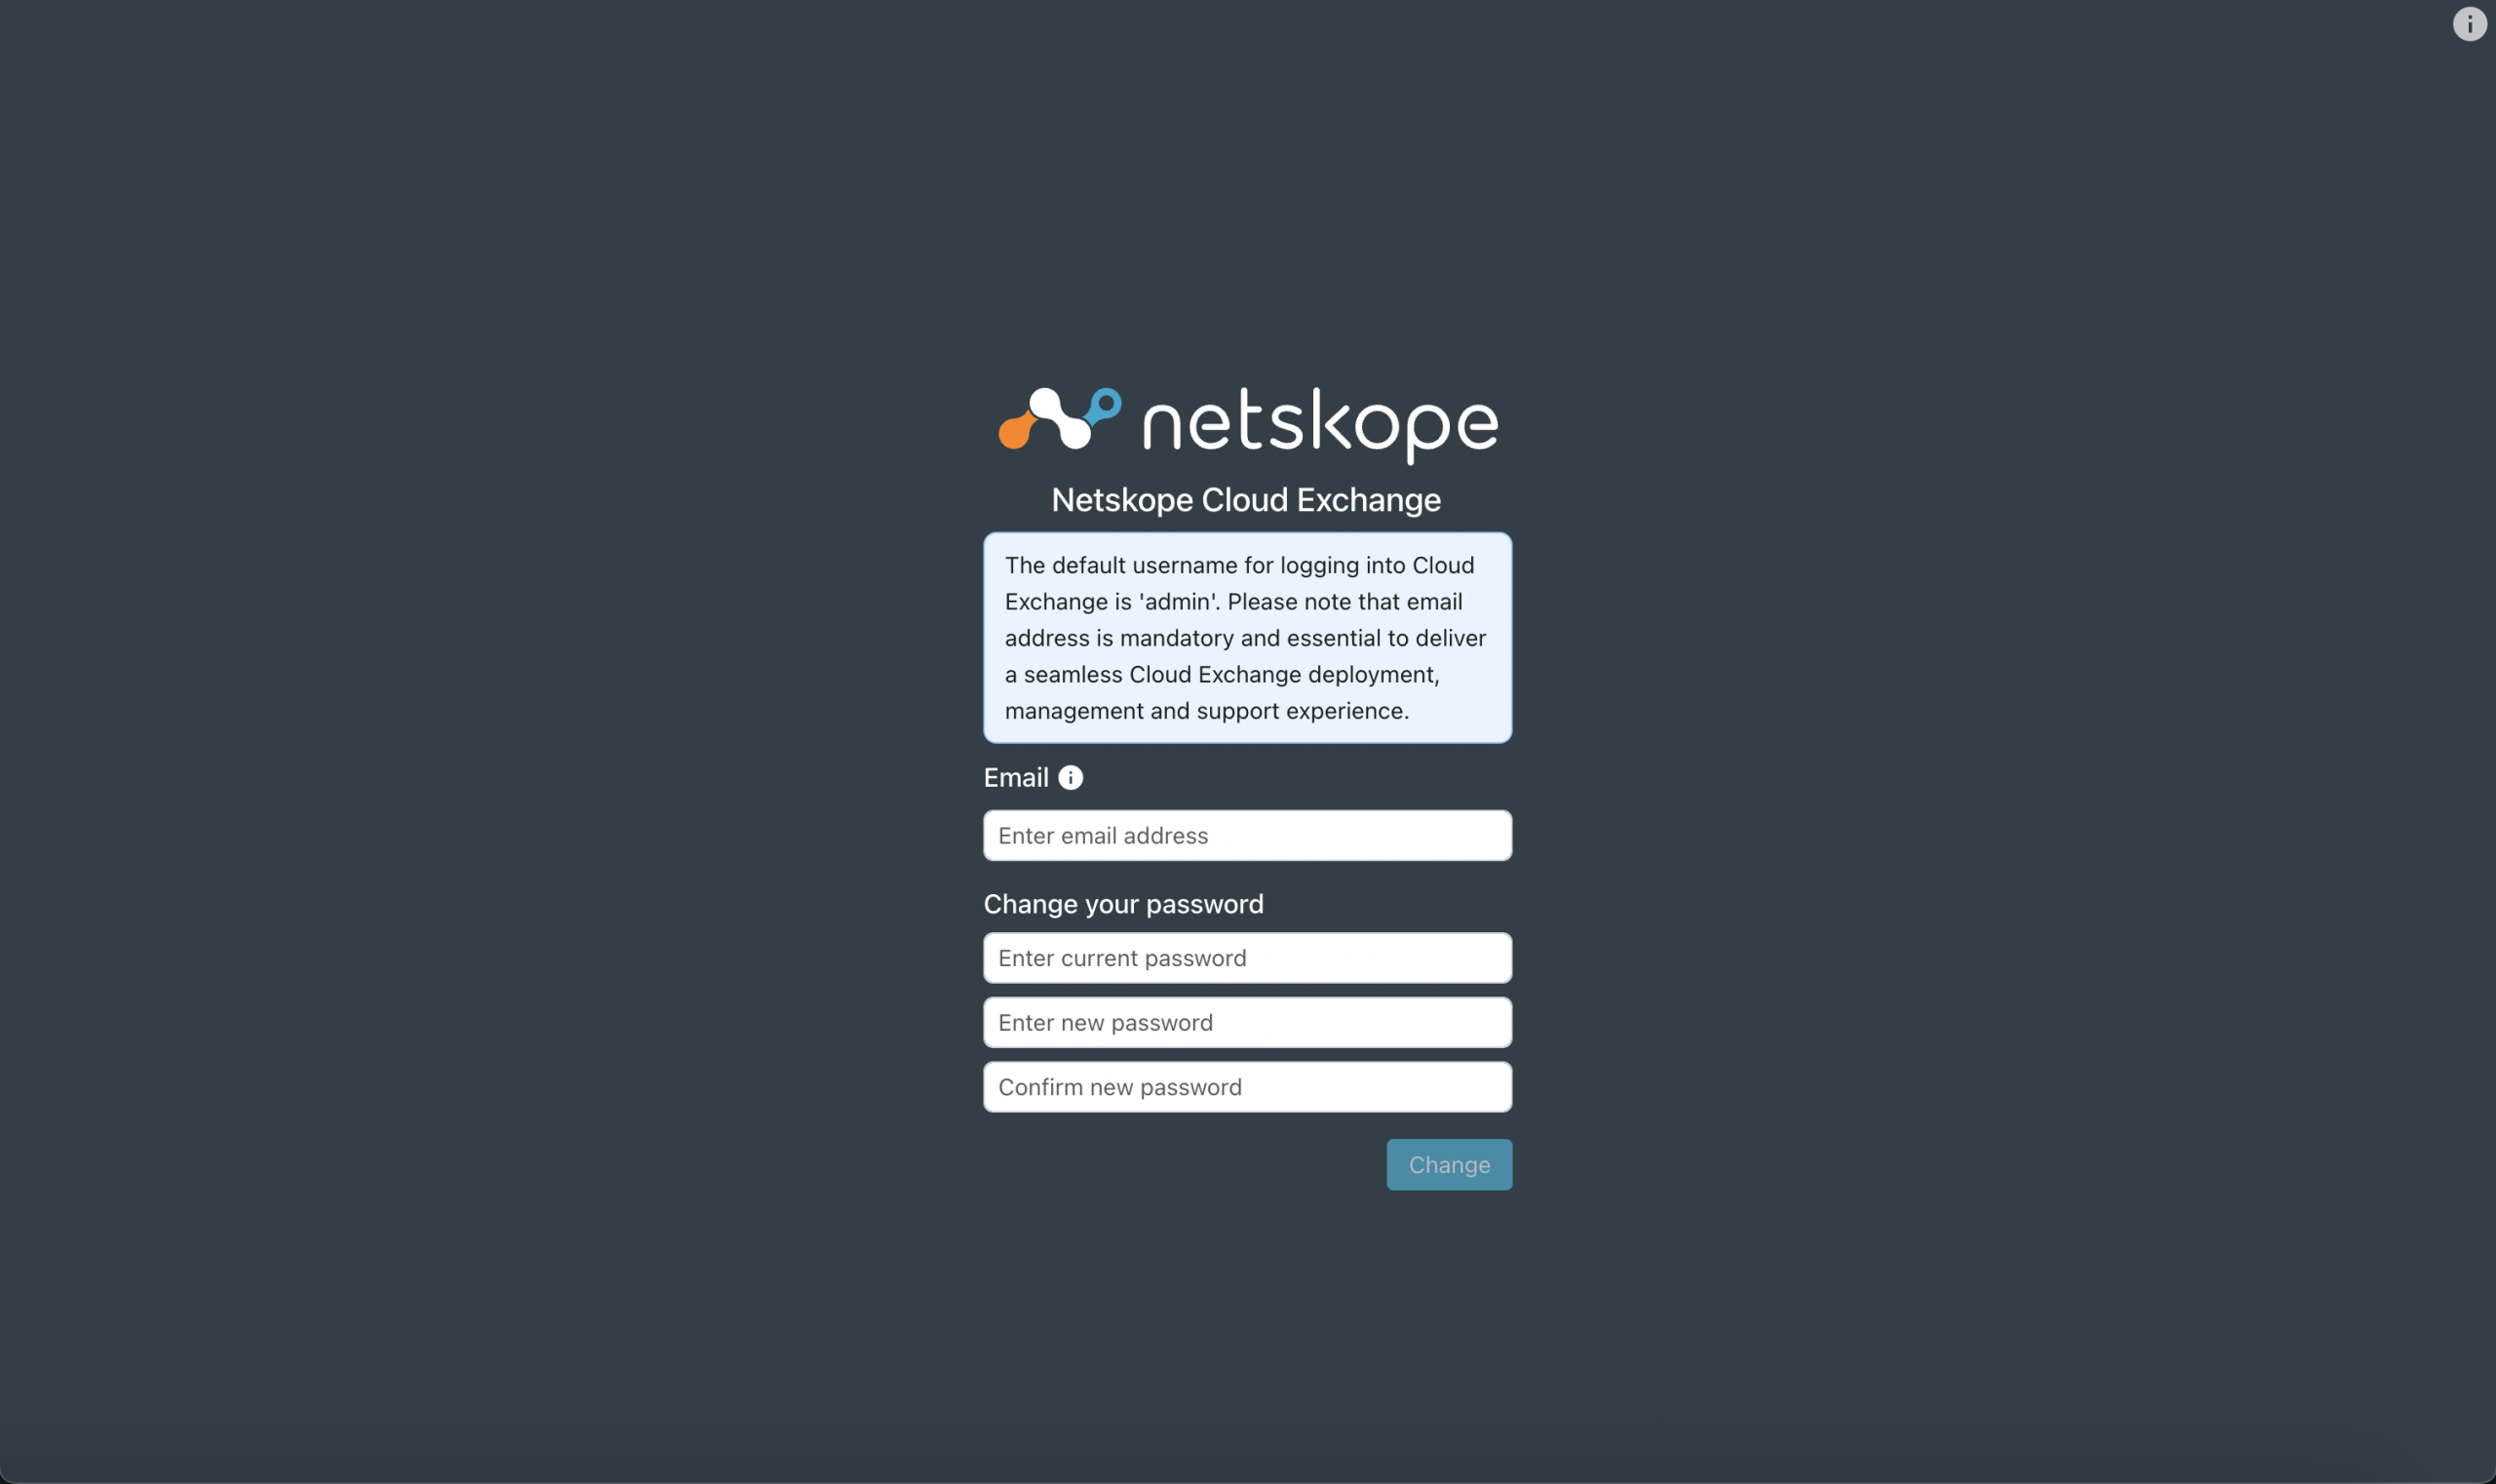
By default, a single user is created with administrative capabilities with these credentials:
- Username:
admin - Password:
admin
This user will have Administrator level access to the application. This user will have write access, and will be able to create new users as well.
On the first login, you will be required to change these credentials. After that, log in using your new credentials.
Security Guidelines
- We recommend changing the password of the VM to a super secure password and remember it for future logins to the VM. If the new password is forgotten, then there is no way to recover the VM.
- Restrict SSH access to specific IP addresses. Please consult with your IT team for the same.
Increase the Size of Disk/Volume (Optional)
The following these steps will only increase the disk/volume size. After performing these steps, follow How to Extend Linux LVM Logical Volume to increase the file system size.
- Select the VM in which you want to increase disk space.
- Power Off the virtual machine.

- Click Edit Settings.

- Change the Hard disk 1 size per your requirements and click OK.

- Power On the VM.

- After the machine starts, follow How to Extend Linux LVM Logical Volume.
Hyper-V
Prerequisites
- A Hyper-V instance.
- 8 CPUs and 16GB RAM available in the server. Follow sizing profiles strictly, refer System Requirements.
- Minimum 152 GB of free disk space
- Download the Hyper-V virtual machine zip file from here.
MD5: bb0bc476289d47697d4718553d77c65c
SHA256: ddb464cad0e09f6d9b3a534f2515ea925ea906dc0d82bc13a56312c2754b5c65
Configure Hyper-V
- Unzip the downloaded virtual machine file.
- Open the Hyper-V manager and right-click on the server where you want to install Cloud Exchange, and then click New > Virtual Machine..
- Click Next on the Before you begin page.
- Specify name and location for the virtual machine, and then click Next.
- For Specify Generation, select Generation 2, and then click Next.
- For Assign Memory, change the RAM according to your profile (medium, large, etc.), and then click Next.
- For Configure Networking, on the connection dropdown, select the appropriate virtual switch per your organization recommendations, and click Next.
- For Connect Virtual Hard Disk, choose Use an existing virtual hard disk. Then, under Location, click Browse… to select the CE vhdx file path where you extracted the zip file and click Next.
- Click Finish.
- Wait for machine to be created, right-click on the newly created virtual machine, and then click Settings.
- Click on Security, uncheck Enable Secure Boot, and then click Apply.
- Click Processor, change the processor according to your profile (medium, large, etc.), and then click Apply.
- Now start the virtual machine. Right-click on your virtual machine and click Start.
- Connect to the virtual machine. Right-click on your virtual machine and click Connect…
- Wait for login prompt, log in using the following credentials, and then change the password with a more secure string.
- Username: cteadmin
- Password : Cl0ud3xc4ang3!
- If your network has DHCP enabled, the VM will get its IP assigned. Run the command
$ ip addrto verify whether an IP is assigned to theeth0interface or not. If an IP is not assigned automatically, reach out to your IT administrator and follow these steps (or How to configure static IP using Netplan).- Edit the file
netskope_netplan_sample.yamlunder/home/cteadmin:vi /home/cteadmin/netskope_netplan_sample.yaml
- In the file, add the IP address that you want to assign, and then save the file. (Check with the IT System Administrator for the IP address.)
- Copy the yaml file inside
/etc/netplan:cp /home/cteadmin/netskope_netplan_sample.yaml /etc/netplan
- Restart the network service before applying the netplan changes:
sudo systemctl restart systemd-networkd
- Apply and assign the IP address:
sudo netplan apply
- Edit the file
- Validate that IP address is assigned using the following command:
ip addr
- Go to the Cloud Exchange directory:
cd /opt/cloudexchange/cloudexchange/
- Copy and edit the cloudexchange config file.
sudo cp cloudexchange.config.example cloudexchange.config
sudo vi cloudexchange.config - Configure the CloudExchange configuration file by setting the parameters according to your requirements.
- This password is required only once during the initial setup and cannot be changed later.
- It is strongly recommended to set a secure password.
- If no password is specified, a random 32-character password will be automatically generated.
- Non‑ASCII characters (e.g., accented letters, other scripts, emoji) are not supported for the maintenance password in CE and can cause failures.
- Please record and securely store the generated maintenance password, as it will be required when migrating Cloud Exchange to another machine.
- If not specified, a random 32-character key will be automatically generated.
- Non‑ASCII characters (e.g., accented letters, other scripts, emoji) are not supported for the JWT SECRET in CE and can cause failures.
- Record and securely store the generated JWT SECRET, as it will be required for the Cloud Exchange HA configuration.
- Execute the setup script.
sudo python3 ./setup
- Launch Cloud Exchange.
sudo ./start
- Wait for 5-10 minutes and then access the CE using the IP address of VM.
Default User Login
By default, a single user is created with administrative capabilities with these credentials:
- Username:
admin - Password:
admin
This user will have Administrator level access to the application. This user will have write access, and will be able to create new users as well.
On the first login, you will be required to change these credentials. After that, log in using your new credentials.
Security Guidelines
- We recommend changing the password of the VM to a super secure password, and remember it for future login to the VM. If the new password is forgotten, then there is no way to recover the VM.
- Restrict SSH access to specific IP addresses. Consult with your IT team for the same.
Increase Size of Disk/Volume (Optional)
The following steps will only increase the disk/volume size. After performing these steps, follow the instructions in the next section Extend File system to new size of Disk/Volume (Optional) to increase the file system size.
- Turn off Virtual Machine for which you want to increase disk size.
- Select the Virtual Machine and right-click on it to open the Options menu.

- Open Settings for the Virtual Machine that you want to increase the disk size from Hyper-V manager of windows server.
- Select the Virtual Machine and right-click on it to open the Options menu.

- Select Hard Drive for SCSI Controller, and click Edit.

- Click Next for Locate Disk.

- Select Expand and click Next for Choose Action.

- Enter a New size per your requirement in the Configure Disk section, and then click Next.

- Verify the new disk size and click Finish.

- Click OK in Settings for virtual machine.

- Select the Virtual Machine and right-click on it to open Options menu.

- Start the VM and proceed to the Extend File system to new size of Disk/Volume (Optional) section below.
Extend the File System to a New Size of Disk/Volume (Optional)
These steps are applicable only after you have increased the size of the Disk/Volume.
Follow these steps to increase the disk space of the Cloud Exchange virtual machine.
- Change the Disk size of the VM per your requirement (for example, 200GB).
- Now start the VM and SSH into the machine.
- Check the current disk size:
df -h /
- Check disks and identify the device name associated with the disk (like
/dev/sda):sudo fdisk -l
- Modify the disk and create a new partition:
sudo fdisk /dev/<device-name>(like
$ sudo fdisk /dev/sda) - There will be an error message like:
“GPT PMBR size mismatch (317263871 != 335544319) will be corrected by write.”
This represents that there is some space available in the disk. - Create new partition by entering the
ncommand in the fdisk CLI. Command (m for help): n - Enter the partition number, and the first and last sector of the new partition (Keep all the values to default). Click enter to keep the values to default.
- Partition number (4-128, default 4):
- First sector (317261824-335544286, default 317261824):
- Last sector, +/-sectors or +/-size{K,M,G,T,P} (317261824-335544286, default 335544286):
- Write partition changes by entering the
wcommand in the fdisk CLI. Command (m for help): w - Now fdisk will be exited automatically with the following message:
“The partition table has been altered.
Syncing disks.” - Create a physical volume:
sudo pvcreate /dev/<device-name><partition-number>(like
$ sudo pvcreate /dev/sda4) - Extend the physical volume to the Cloud Exchange volume group:
sudo vgextend ce_vg /dev/<device-name><Partition-number>(like
$ sudo vgextend ce_vg /dev/sda4) - Extend the logical volume to OS volume of Cloud Exchange volume group:
sudo lvextend -l +100%FREE /dev/ce_vg/OS
- Resize the OS volume:
sudo resize2fs /dev/ce_vg/OS
- Verify the disk size:
df -h /
KVM
Prerequisites
- A server with KVM enabled along with xrdp. Follow sizing profiles strictly, refer System Requirements.
- RDP Client.
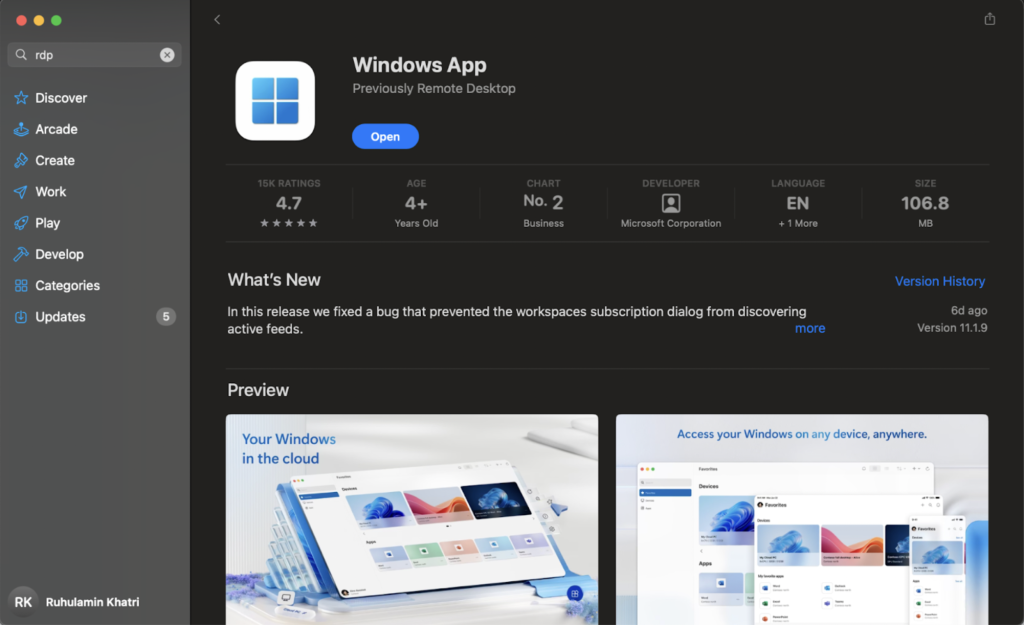
- Update xrdp config to enable root login.
- ssh to instance with root login.
- Open gdm-password file using below command:
vi /etc/pam.d/gdm-password
- For “auth required pam_succeed_if.so user != root quiet_success”, comment this line by adding “#” at the beginning.
Example: “#auth required pam_succeed_if.so user != root quiet_success”
- Minimum 152 GB of free disk space.
- Download the KVM virtual machine zip file from here.
MD5: bba76d22fa3b1b91d829b461f284fd83
SHA256: 4791ed58b051c6a13597496d02c1e2598ead7c0b71b54f59a8ef14614771cd01

Configure KVM
- SSH to the instance with root user and download the KVM image at the /root/Desktop path using a wget command.
- Open the RDP client and add the instance details (hostname/ip, username , password), use the root user.
- After you are logged in as root, click Activities (top left), search for VM and click Virtual Machine Manager.
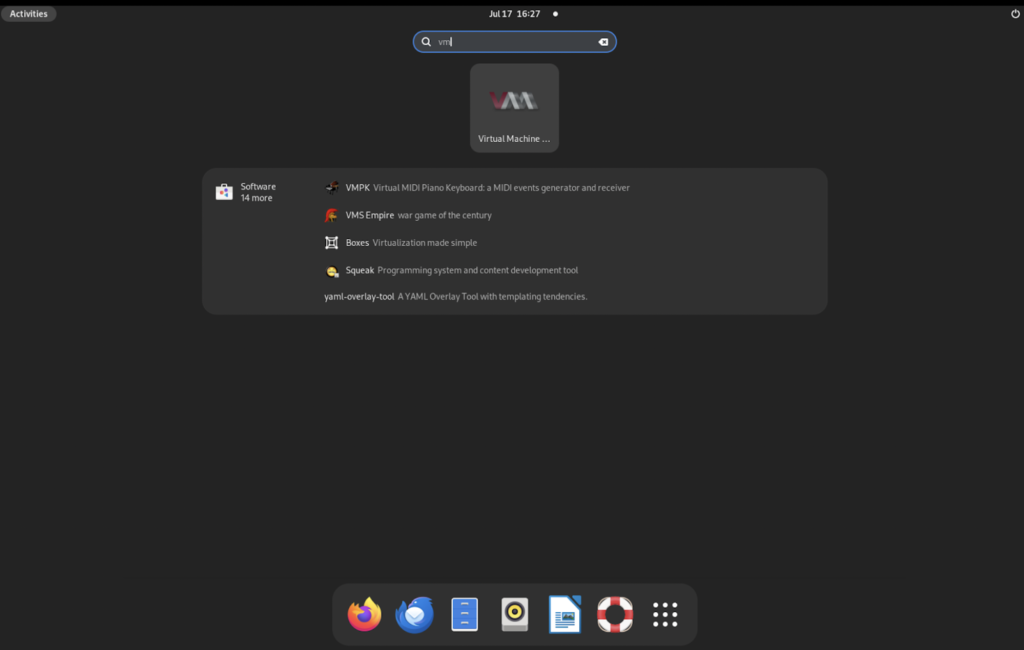
- Click New Virtual Machine.
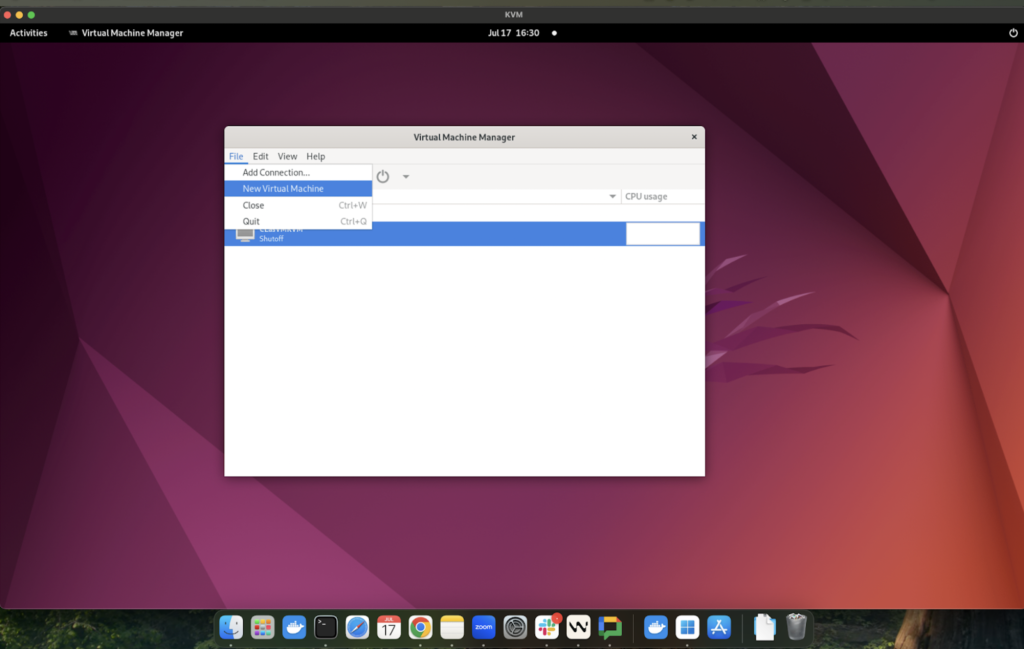
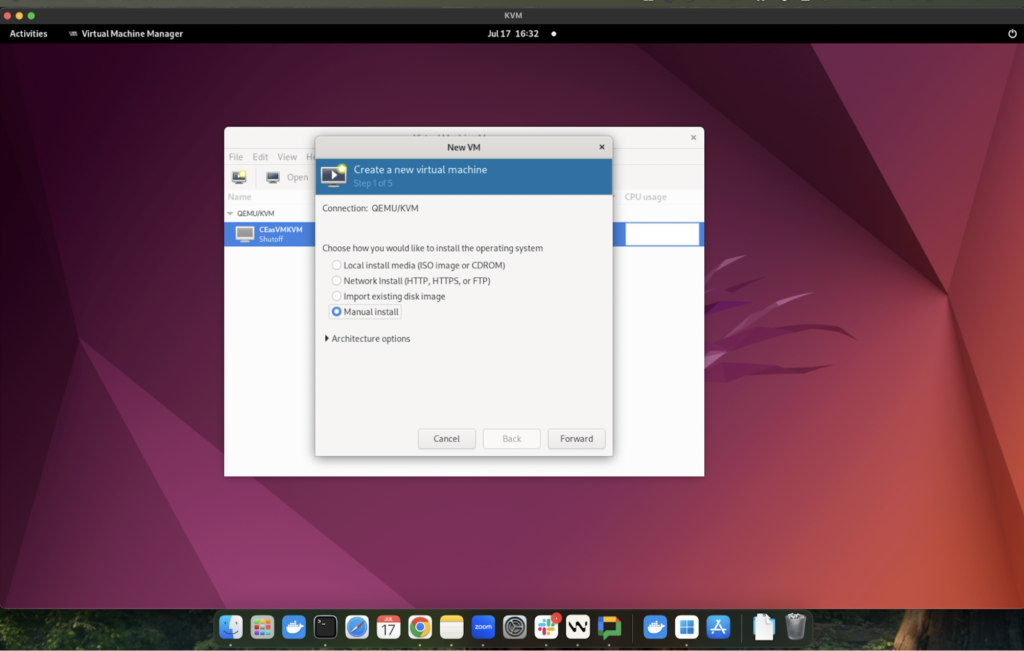
- Select Manual install and click Forward.
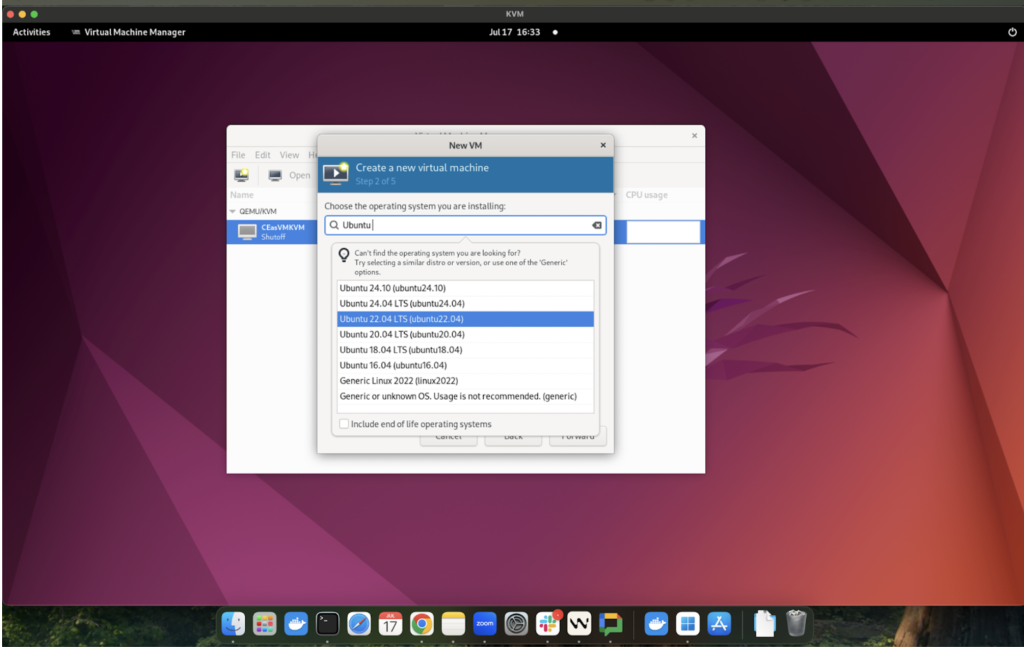
- Search for Ubuntu, select Ubuntu 22.04, and then click Forward.
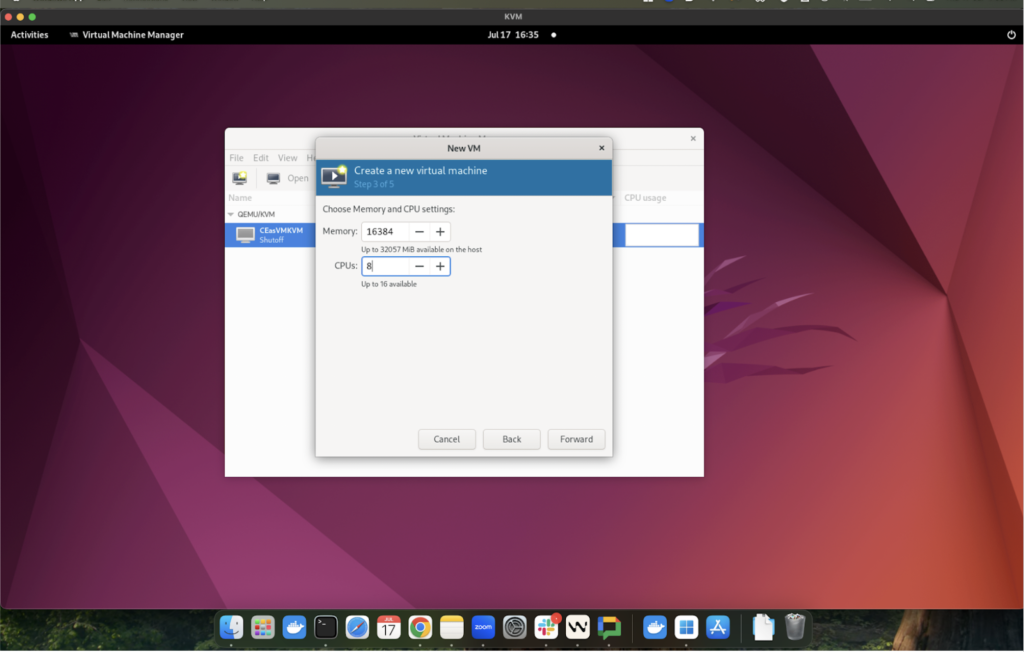
- Assign memory and CPU as per medium profile (8CPU, 16384MB RAM) and click Forward.
- Click Select or create custom storage, click Manage > Browse Local, browse the path of Downloaded QCOW2 image path (/root/Desktop), and select the qcow2 file. Click Open, and then click Forward.
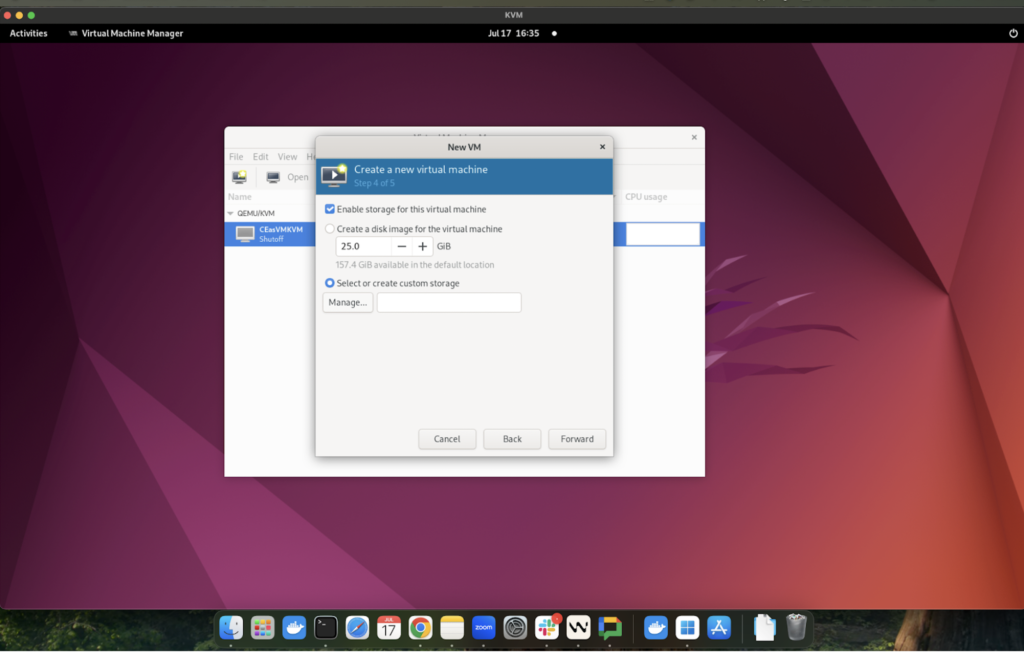
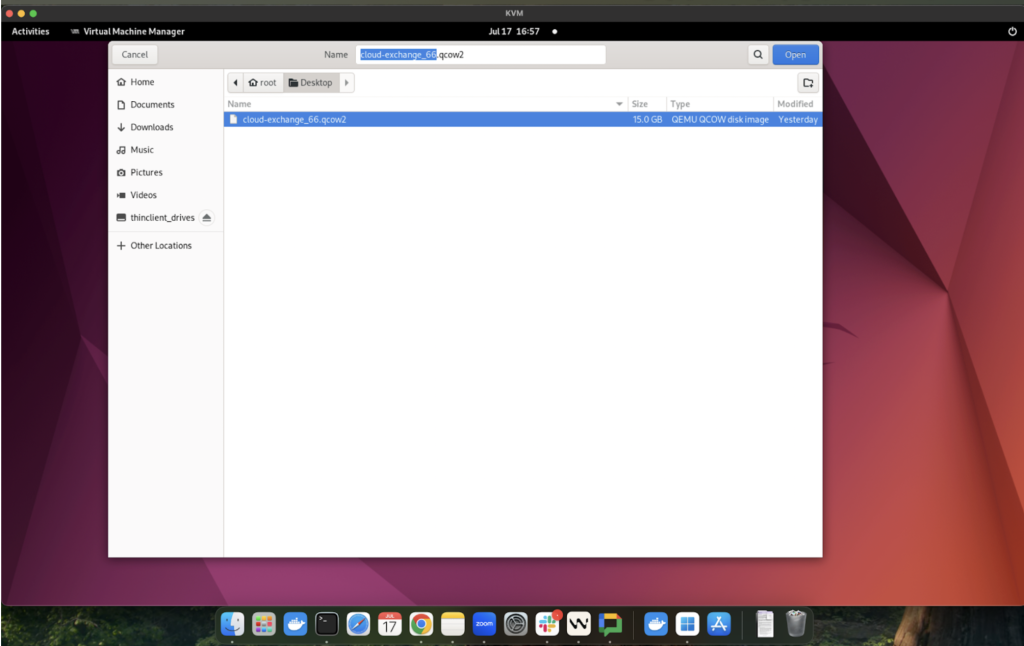
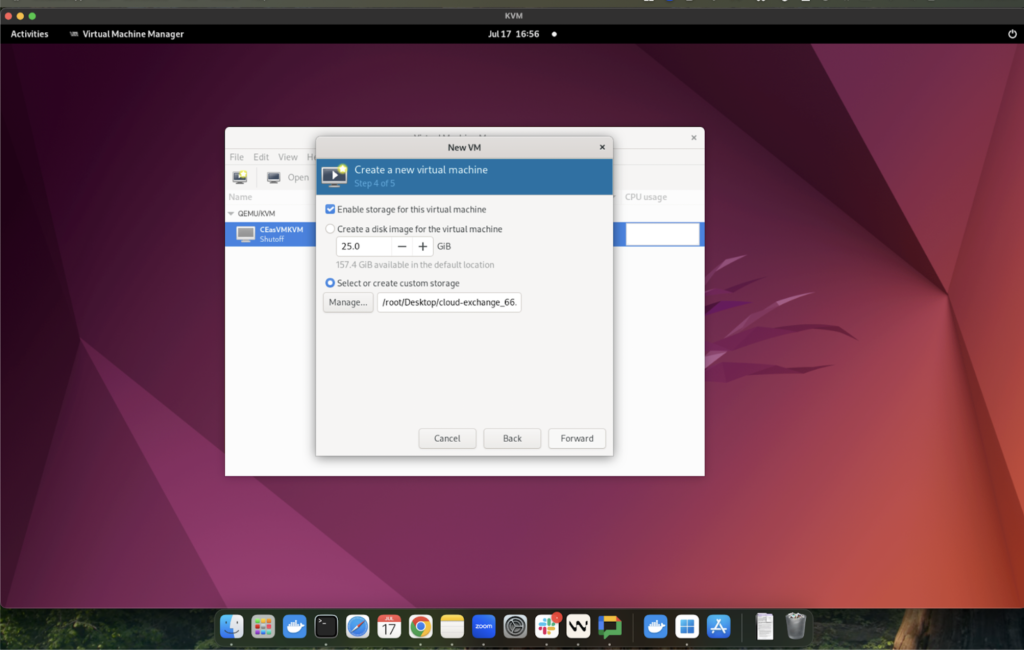
- Provide an appropriate name for the VM and click Finish. After you click Finish, the machine will be started automatically.
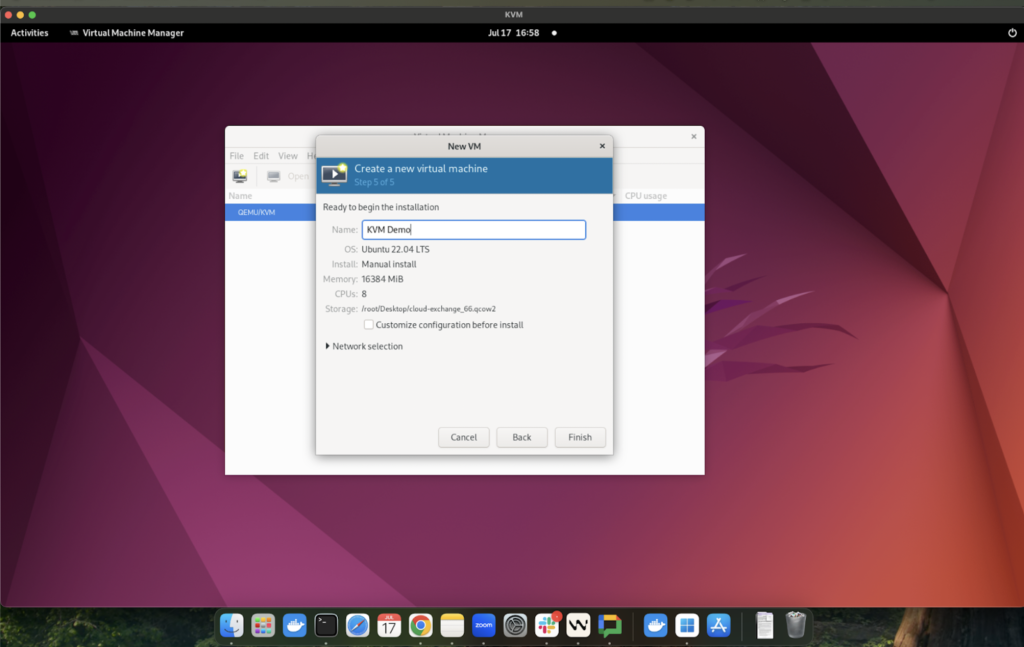
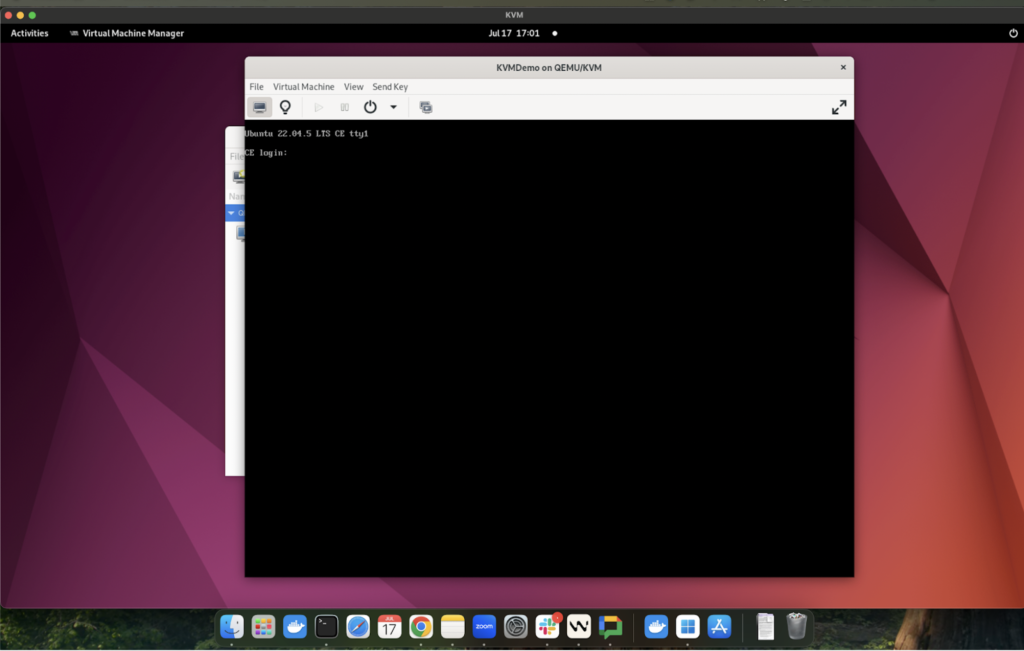
- Wait for login prompt, log in using the following credentials, and then change the password with a more secure string
- Username: cteadmin
- Password : Cl0ud3xc4ang3!
- Go to the Cloud Exchange directory:
cd /opt/cloudexchange/cloudexchange/
- Copy and edit the cloudexchange config file.
sudo cp cloudexchange.config.example cloudexchange.config
sudo vi cloudexchange.config - Configure the CloudExchange configuration file by setting the parameters according to your requirements.


- This password is required only once during the initial setup and cannot be changed later.
- It is strongly recommended to set a secure password.
- If no password is specified, a random 32-character password will be automatically generated.
- Non‑ASCII characters (e.g., accented letters, other scripts, emoji) are not supported for the maintenance password in CE and can cause failures.
- Please record and securely store the generated maintenance password, as it will be required when migrating Cloud Exchange to another machine.
- If not specified, a random 32-character key will be automatically generated.
- Non‑ASCII characters (e.g., accented letters, other scripts, emoji) are not supported for the JWT SECRET in CE and can cause failures.
- Record and securely store the generated JWT SECRET, as it will be required for the Cloud Exchange HA configuration.
- Execute the setup script.
sudo python3 ./setup
- Launch Cloud Exchange.
sudo ./start
- Wait for few minutes for CE to be started.
Default User Login
By default, a single user is created with administrative capabilities with these credentials:
- Username: admin
- Password: admin
This user will have Administrator level access to the application. This user will have write access, and will be able to create new users as well.
On the first login, you will be required to change these credentials. After that, log in using your new credentials.
Security Guidelines
- We recommend changing the password of the VM to a super secure password, and remember it for future login to the VM. If the new password is forgotten, then there is no way to recover the VM.
- Restrict SSH access to specific IP addresses. Consult with your IT team for the same.