The Private Application metrics provide you with data on performance of monitored private application hosts when used by a user.

In each of the widgets on this dashboard, click the down arrow  to Export a CSV file with the data.
Network Path
The Network Path view provides a view into all the paths taken by a user’s traffic to the monitored private application hosts and ports along with the performance of each path segment. Since DEM uses Real User Monitoring to measure performance of private applications, only monitored private applications used by the user in the selected time window are shown in this view. If a user has not used an application, the metrics will not show up on the page.

Network Path Node Categories
The following node categories are displayed in the Network Path metric:
- Device: The device of the selected user.
- Gateway: Netskope gateway that the user’s device was connected to. Netskope Client builds a TLS tunnel with the closest Client Gateway located in one of the several Netskope Data Centers. This is where policy is enforced.
- Stitcher: Publisher builds a TLS tunnel with the closest Publisher Gateway (Stitcher) located in one of the Netskope Data Centers. This is a gateway for the Publisher to connect to the Netskope Cloud.
- Publisher: Publisher nodes that were used to connect to private application hosts.
- App Host: Monitored private application hosts used by the user in the selected time window.

Vertices
Vertices connecting the nodes are represented as the path segments. You can hover over vertices for the following information:
- Sessions: This is the total count of sessions that went on this path segment in the selected timeframe.
- Latency: This is the observed average latency across all the sessions on the path segment.Hovering over the vertices will show you both Average and Median latency observed across all the user sessions that went to the path segment.

Policy Block View
Network Path View now highlights Explicit Policy Blocks when a user is unable to access a private application host due to a policy with the action set to Block. This helps admins instantly identify policy as the cause of access failure and degraded user experience.Once the user is unblocked, normal network path data for the application will appear. The Policy Block node will remain in the view to provide historical context.
Network Path Filters
You can use the Network Path metric filters to narrow down the number of unique paths shown in the widget. To learn more about Network Path filters, please see the Network Path Node Categories section.
You can use the filters menu to view a network path by selecting from the following filter options:
- Gateways: Filters the path to only show selected gateways.
- Stitchers: Filters the path to only show selected stitchers.
- Publishers: Filters the path to only show selected gateways. Only the top 50 worst publishers are selected by default for performance reasons. You can deselect existing selections and select different publishers.
- Average Latency: Dynamically generates latency ranges based on AVG latency values across path segments and filters path segments to meet the selected latency thresholds.
- Policy Block: Filters the gateways where the policy block was observed.

To View a Unique Path
You can view a unique network path by selecting from the following options:
- Click on the nodes to select the path you would like to troubleshoot further.
- Alternatively, you can use the Network Path filter menu.
Path Segment Metrics
This section shows the performance metrics of individual path segments after a unique path has been selected from the Network Path view. This section will allow admins to correlate user experience issues to the selected segments. You can view the following Network Path Segments:
- Client to Gateway
- Gateway to Stitcher
- Stitcher to Publisher
Client to Gateway

Latency
Latency measures the delay in user’s application traffic between the client and the Gateway tunnel measured from the client. It is displayed as a time series, updated every minute to show how latency changes over time.
Latency is calculated as a running moving weighted average, which gives more importance to recent traffic measurements while smoothing out short-term fluctuations. This helps identify long-term network trends and potential performance issues.
Loss Rate
Packet loss is the percentage of data packets lost between the client and the Gateway. It is shown as a time series with 1-minute granularity.A high loss rate may indicate network congestion or issues, affecting reliability and performance.
Traffic
Traffic refers to the total amount of data (in bytes) uploaded and downloaded between the Client and the Gateway across all user connections in the past one minute.
Gateway to Stitcher

Latency
Latency refers to the measured delay in a user’s traffic between the Gateway and the Stitcher tunnel measured from the Gateway, plotted as a time series with 1-minute granularity. This is a measure of congestion in the Gateway to Stitcher tunnel which carried the user’s traffic.
Latency is calculated as a running moving weighted average, which gives more importance to recent measurement while smoothing out short-term fluctuations. This helps identify long-term network trends and potential performance issues.
Loss Rate
Loss rate is the rate of packet loss observed within the Gateway to Stitcher tunnel over the past minute.
It represents the percentage of NPA real user data packets that fail to reach the Stitcher.
Stitcher to Publisher

Latency
Latency refers to the measured delay in a user’s traffic between the Stitcher and the Publisher tunnel measured from the Stitcher, plotted as a time series with 1-minute granularity. This is a measure of congestion in the Stitcher to Publisher tunnel which carried the user’s traffic.
Latency is calculated as a running moving weighted average, which gives more importance to recent measurement while smoothing out short-term fluctuations. This helps identify long-term network trends and potential performance issues.
Loss Rate
The rate of packet loss observed within the Stitcher to Publisher tunnel over the past minute..
Sessions
You can view the session details to map the performance on the path segments (Client to Gateway, Gateway to Stitcher, or Stitcher to Publisher). To view the sessions for a user, please do the following:
- Hover a data point in a path segment metric.
- Click Sessions.
- The Sessions window will open.

Sessions Window
The Sessions Window provides detailed visibility into active user sessions for a selected user, time frame, and path segment. It also includes session close reasons to identify tunnel tear down by publisher disconnection.

The Sessions Window shows the following information:
- Time Range: The selected time window from the time series chart on the previous screen.
- User: The ID of the user being analyzed.
- Private App Host: The host of the private application accessed during the session.
- Private App: The name of the private application as defined by policy.
- Private App Port: The port(s) through which traffic was observed.
- Sessions: This table lists all sessions associated with the application host shown at the top of the screen.
- Start Time: When the session began.
- End Time: When the session ended.
- Port: The destination port used during the session.
- Total Traffic (RX/TX): Total download (RX) and upload (TX) traffic during the session.
- Session Close Reason: Reason the session ended. Possible values include:
- Dropped due to publisher disconnection
- Dropped based on policy
- Routine cleanup
Other Impacted Users
The “Other Impacted Users” metric helps you identify users who shared the same tunnel as the selected user during a period of latency degradation. You can view this metric by hovering over a data point in a Gateway to Sticher or Stitcher to Publisher metric, and clicking the “Other Impacted Users” button. This allows you to assess the potential scope of impact and optionally reach out to those users for confirmation or further investigation.

How to Filter
You can filter this view by selecting the available latency thresholds in the dropdown menu. The system will:
- Analyze the selected user’s tunnel paths within the path segments
- Identify tunnels where observed latency meets or exceeds the chosen threshold.
- Shows list of other users who had active connections for any DEM monitored private application hosts on those same tunnels during the selected time window.
Available Latency Thresholds
- ≥ 50 ms: Shows users who shared tunnels with latency of 50 ms or more.
- ≥ 100 ms: Shows users who shared tunnels with latency of 100 ms or more.
- ≥ 200 ms: Shows users who shared tunnels with latency of 200 ms or more.
Publisher Utilization Metrics
The Publisher Utilization metric shows CPU, memory, and storage usage over time for publishers the user used to access private apps. Monitor these to spot overloads, prevent performance issues, and ensure smooth app access.

Publisher CPU Usage
The percentage of processing capacity used by the publisher in the set time range for the selected user and device.
Publisher Memory Usage
The percentage of system memory in use in the set time range for the selected user and device.
Publisher Storage Usage
The percentage of allocated storage space consumed in the set time range for the selected user and device.
Device Performance and Health Metrics
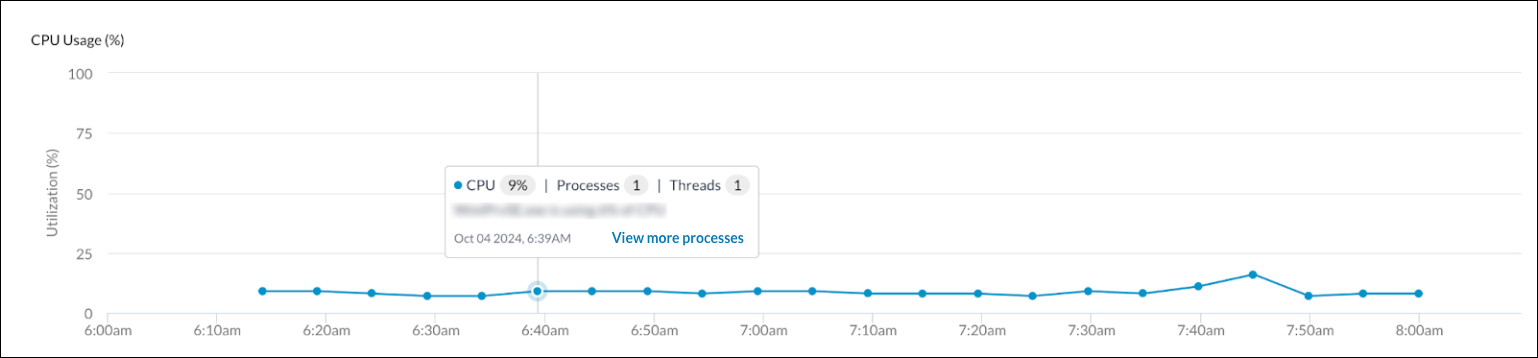
CPU Usage
The CPU Usage metric displays the observed CPU Usage in the set time range for the selected user and device. You can hover over the time data points to view more detailed information about the CPU, processes, and threads. You can also click View more processes to view additional information, to learn more, please see the Process Info section.
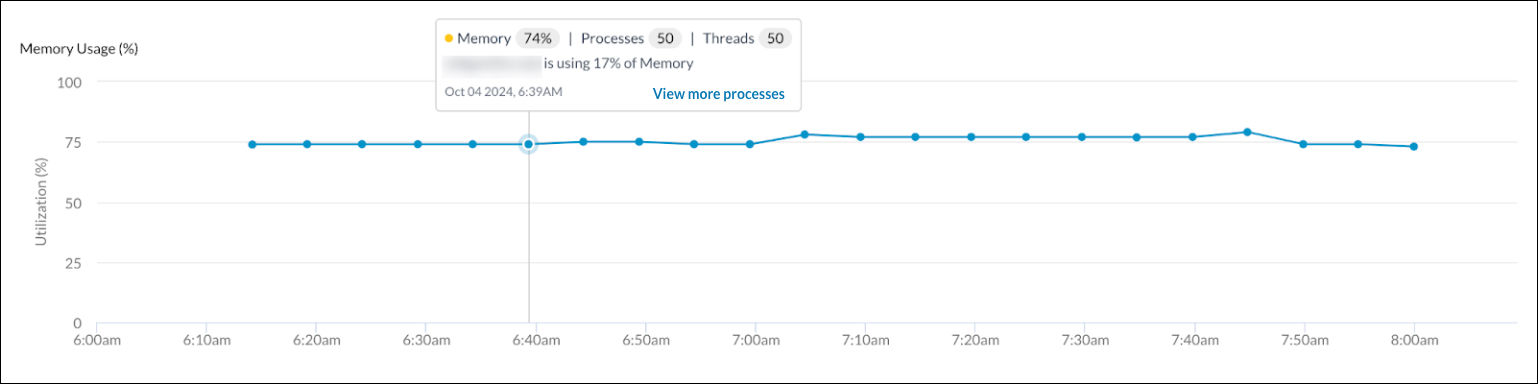
Memory Usage
The Memory Usage metric displays the observed memory usage in the set time range for the selected user and device. You can hover over the time data points to view more detailed information about the memory, processes, and threads. You can also click View more processes to view additional information, to learn more, please see the Process Info section.
Disk Usage
The Disk Usage metric displays information about the disk usage of the selected user and device for the set time range. To view the disk usage percentage at a selected time, hover over the associated data point.

Process Info
The Processes window provides additional details about processes with greater than 1% of utilization. To open the Processes window for a specific timestamp, do the following:
- Select a set timestamp by hovering over the corresponding data point on the CPU Usage, Memory Usage, or Disk Usage metric.
- A box of data will appear when you hover over a timestamp.
- Click the View more processes button.
- The Processes window will open.
- View information for the selected timestamp by clicking on the following tabs:
- CPU: This tab displays a list of the process, CPU %, threads, and process ID.
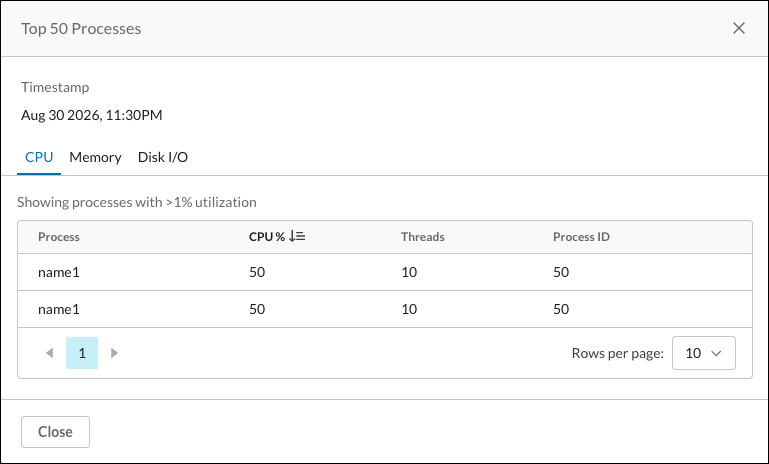
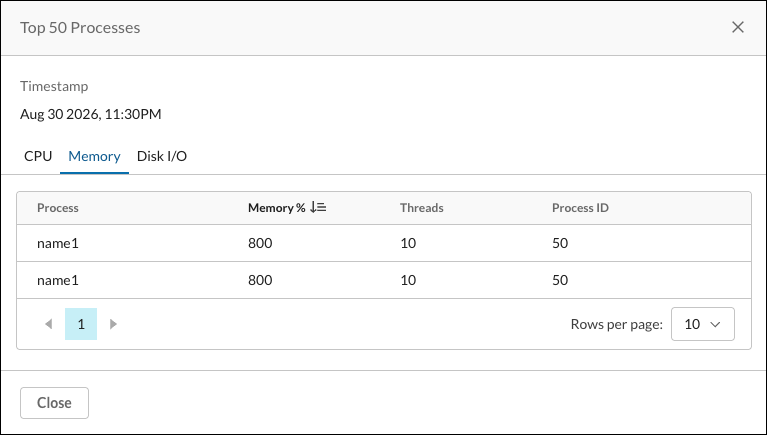
- Memory: This tab displays a list of the process, memory %, threads, and process ID.
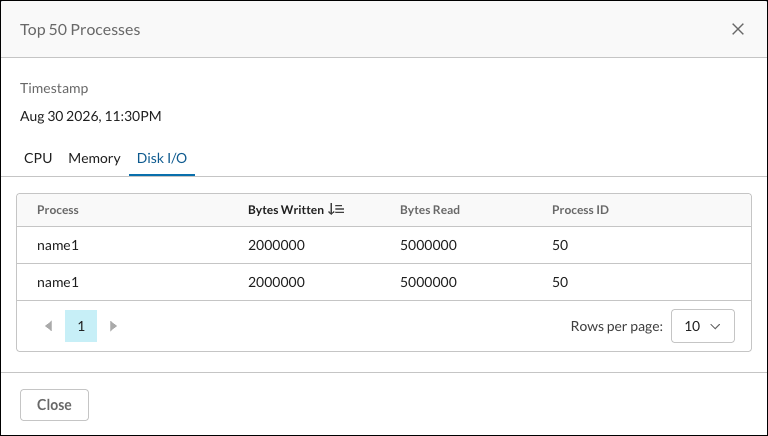
- Disk I/O: This tab displays a list of the process, bytes written, bytes read, and process ID.
- CPU: This tab displays a list of the process, CPU %, threads, and process ID.
Network Throughput
The Network Throughput metric displays the observed network throughput in the set time range for the selected user and device. You can view the sent bytes and received bytes by hovering over a data point.

Disk I/O Rate
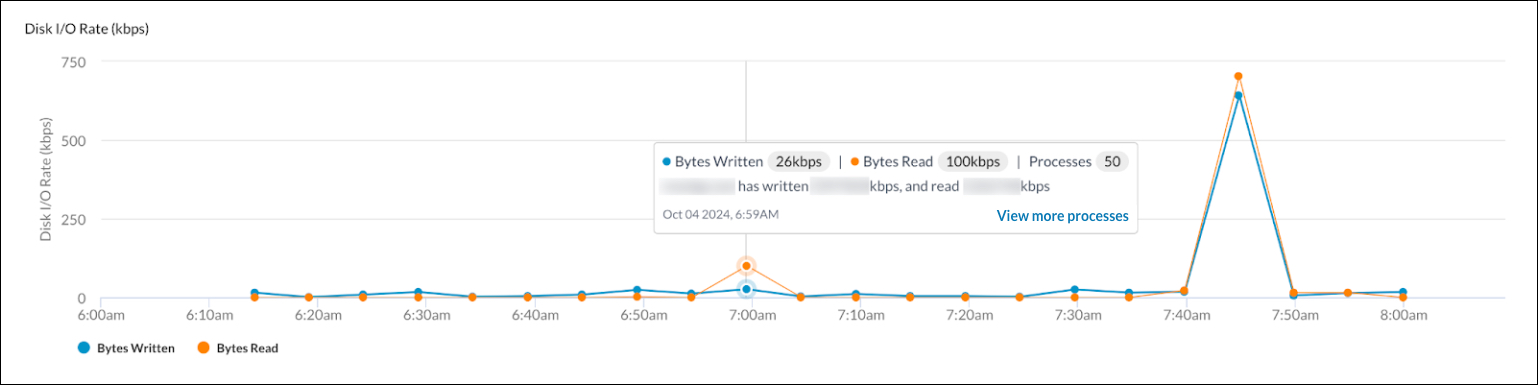
The Disk I/O Rate metric displays the observed disk input/output rate in the set time range for the selected user and device. You can hover over a data point to view information about the bytes written, bytes read, and processes. You can also click View more processes to view additional information, to learn more, please see the Process Info section.
Battery

The Battery metric provides information about the battery level for the selected user’s device at a specific point in time.
Wifi Signal Strength
The Wifi Signal Strength metric provides information about the wifi signal strength for the selected user’s device at a specific point in time.

Network Events – Device Events
The Network Events – Device Events metric displays data on any device or network specific events that may have occurred during the set time range such as logons, logoffs, or network disconnections.

Advanced Wi-Fi
The Advanced Wi-Fi section on the Saas/Custom application tab shows the Wi-Fi score for users. Hover over the session to see the score for a specific point in time. Click the down arrow to Export a CSV file with this data.
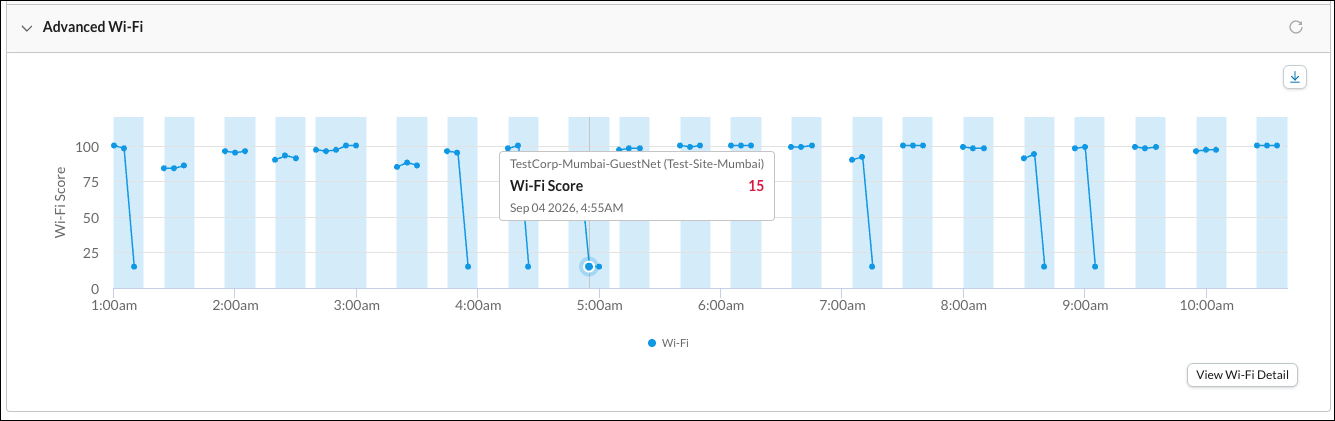
Click View Wi-Fi Details to open this window.
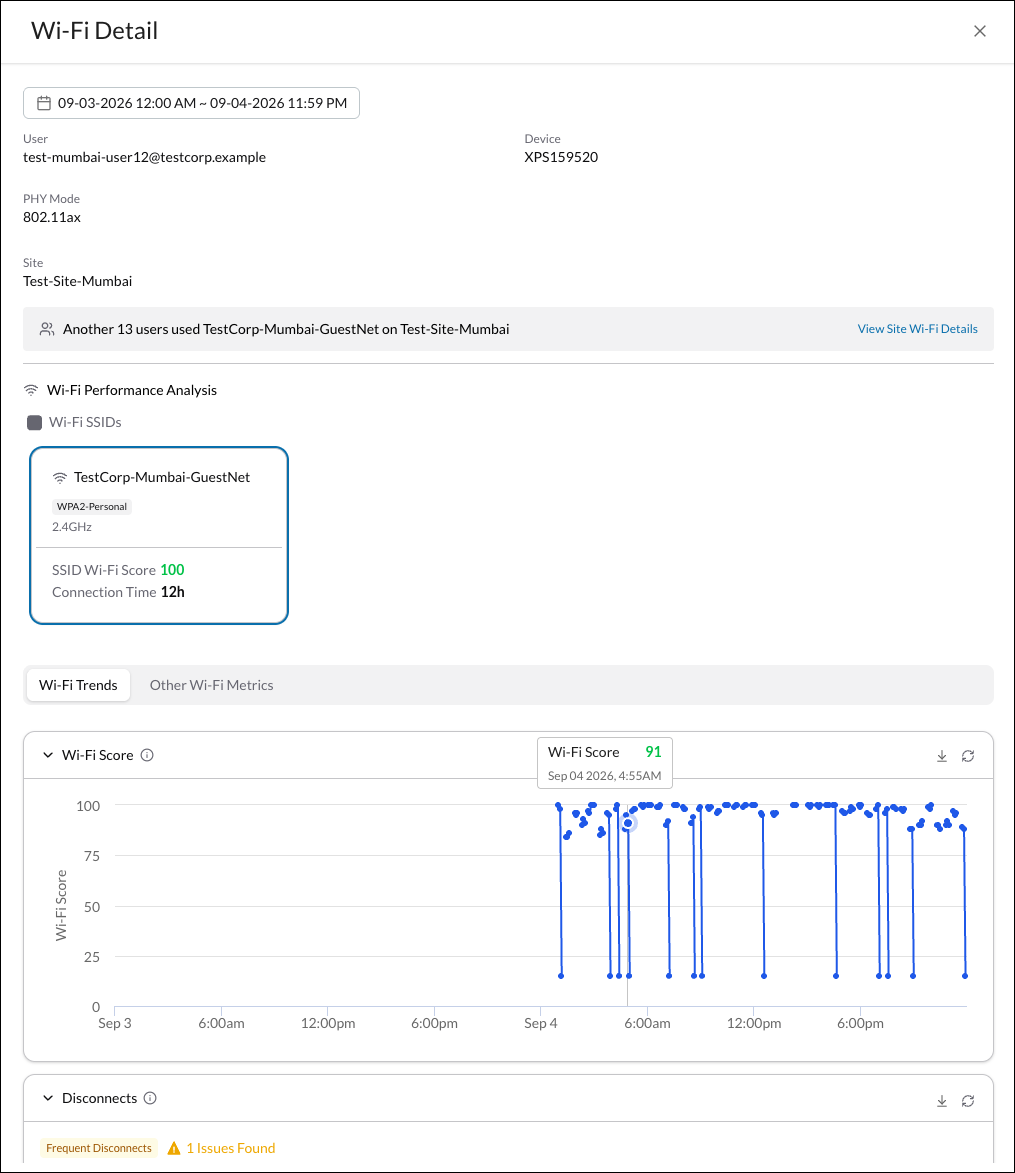
This page displays the Wi-Fi Trends and other Wi-Fi Metrics.
- Wi-Fi Score: A 0–100 score for this device’s Wi-Fi quality on this network, based on signal strength and connection stability. Drops further when an issue is detected. Click the down arrow to Export a CSV file with this data.
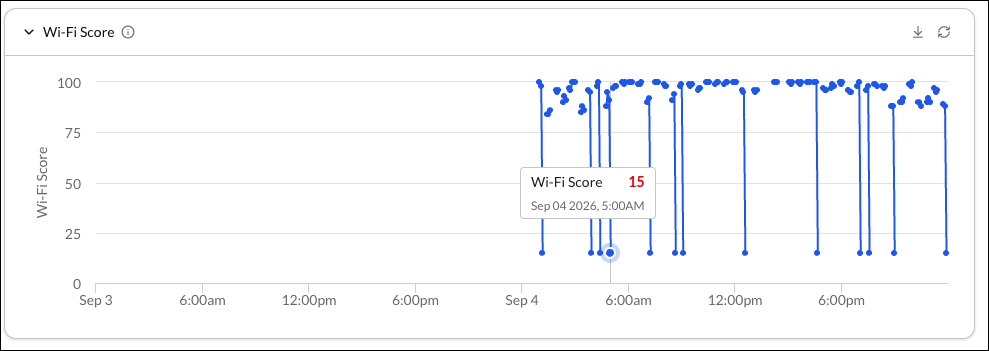
To learn more about how scores are calculated, see How DEM User Experience Scores are Calculated.
For a more granular view, use your mouse to highlight and expand the chart to show more incremental time periods.
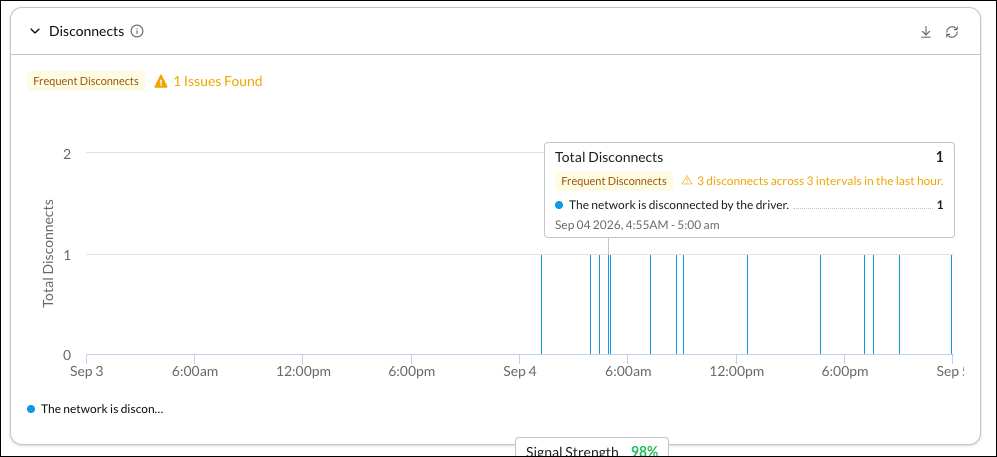
- Disconnects: This device disconnects per 5-minute window, broken down by reason. Flagged as an issue if disconnect was observed in 3+ windows in the past hour, or 3 new windows since the last issue. Only Windows devices include Reason codes and exclude user-initiated disconnects. Click the down arrow to Export a CSV file with this data.
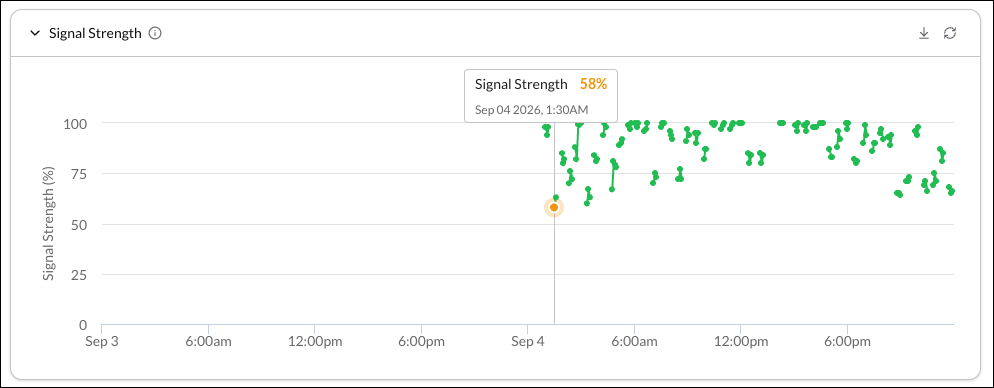
- Signal Strength: This device’s Wi-Fi signal strength over time. Flagged as an issue when signal drops to 30% or below. Click the down arrow to Export a CSV file with this data.
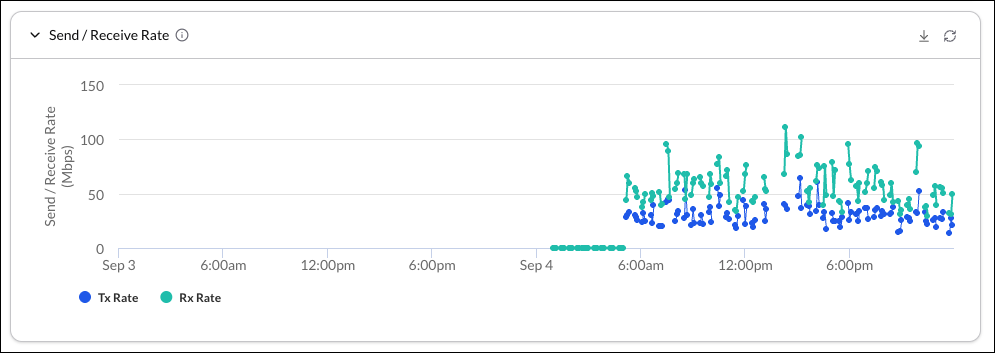
- Send/Receive Rate: This device’s Wi-Fi upload and download speeds over time, in Mbps. Each point is a 5-minute average. Click the down arrow to Export a CSV file with this data.
- Roaming: Tracks this device’s switching between access points (roaming) on this network. Flags a bad roam when signal quality drops from Good (>60%) to Bad (<30%). On Windows, Location Services must be turned on to detect this.
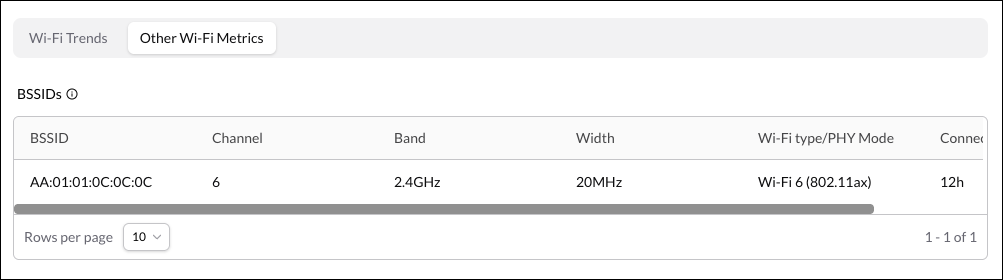
Review the Other Wi-Fi Metrics section:

BSSIDs: Lists every access point (BSSID) users have connected to on the network, plus the Channel, Band, Width, Wi-Fi Type, and Connection time.