

Ticket Orchestrator is designed to streamline the creation and management of tickets and/or notifications in 3rd-party ITSM or collaboration applications only as a result of a matching alert in the customer’s Netskope Security Cloud.
Click play to learn how to set up Ticket Orchestrator.
Ticket Orchestrator Global Settings
Only admins can set the duration that data is held in Cloud Exchange. Once the maximum configured duration is exceeded, any tickets, notifications, and/or alerts/events will be removed from the Ticket Orchestrator module. Any notifications or tickets created in 3rd-party systems via plugins will NOT be modified. Only tickets can be selectively versus globally removed using the filter. If no tickets match the configured rule for deletion, nothing will be deleted, and these logs will continue to consume storage on the host system. Go to Settings > Ticket Orchestrator.
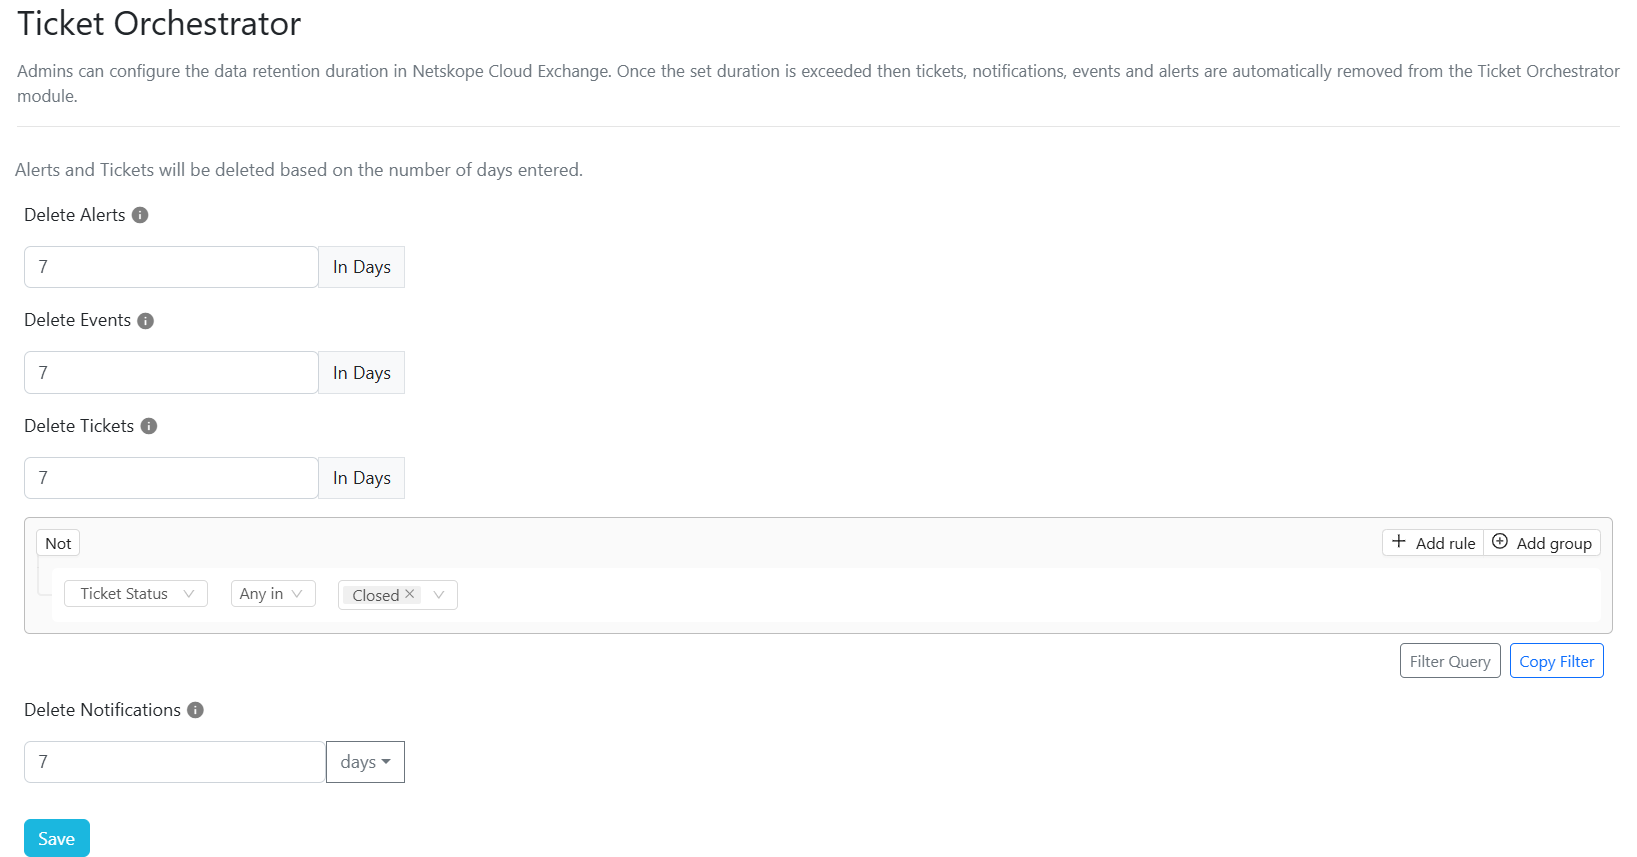 |
Specify in the number of days how often you want to delete alerts and events, tickets, and notifications.
Ticket Orchestrator maintains a database of tickets captured from configured plugins. To filter based on a rule or group, click Add rule or Add group, and then select the appropriate comparison operator And / Or by moving the mouse over the And button in the upper left, creating a multi-variable match.
The Ticket Orchestrator includes Alerts and Events sections. The Alerts page provides a detailed list of all alerts from your Netskope tenant, CE logs, and the CRE module, enabling users to view and filter alerts based on their preferences. Similarly, the Events page displays a detailed list of all events from your Netskope tenant, allowing users to view and filter specific event types as needed.
The Alerts and Events supported by Ticket Orchestrator module are:
- Alerts: Log, CRE, DLP, watchlist, Content, ips, Remediation, ctep, c2, uba, policy, quarantine, anomaly, Malware, Compromised Credential, Device, Security Assessment, Legal Hold, malsite.
- Events: incident, endpoint.
Retry tickets by selecting other ticket status on the Tickets page of the Ticket Orchestrator module, and then clicking the Retry image (arrows in a circle).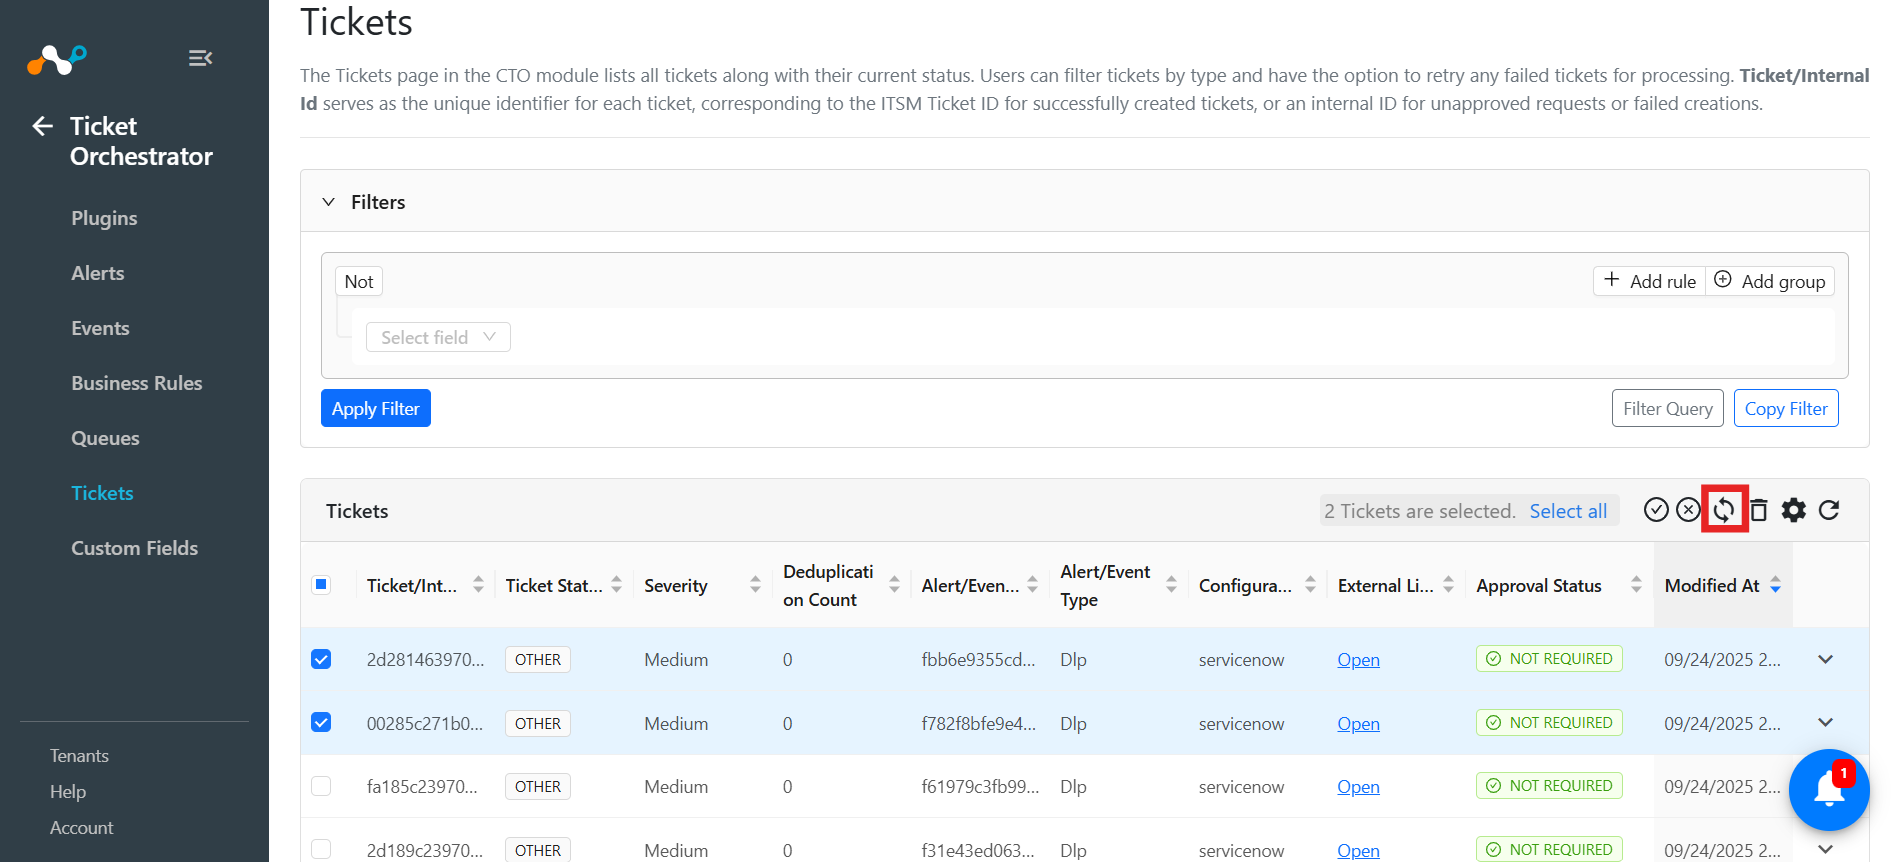
Click Yes to confirm the action.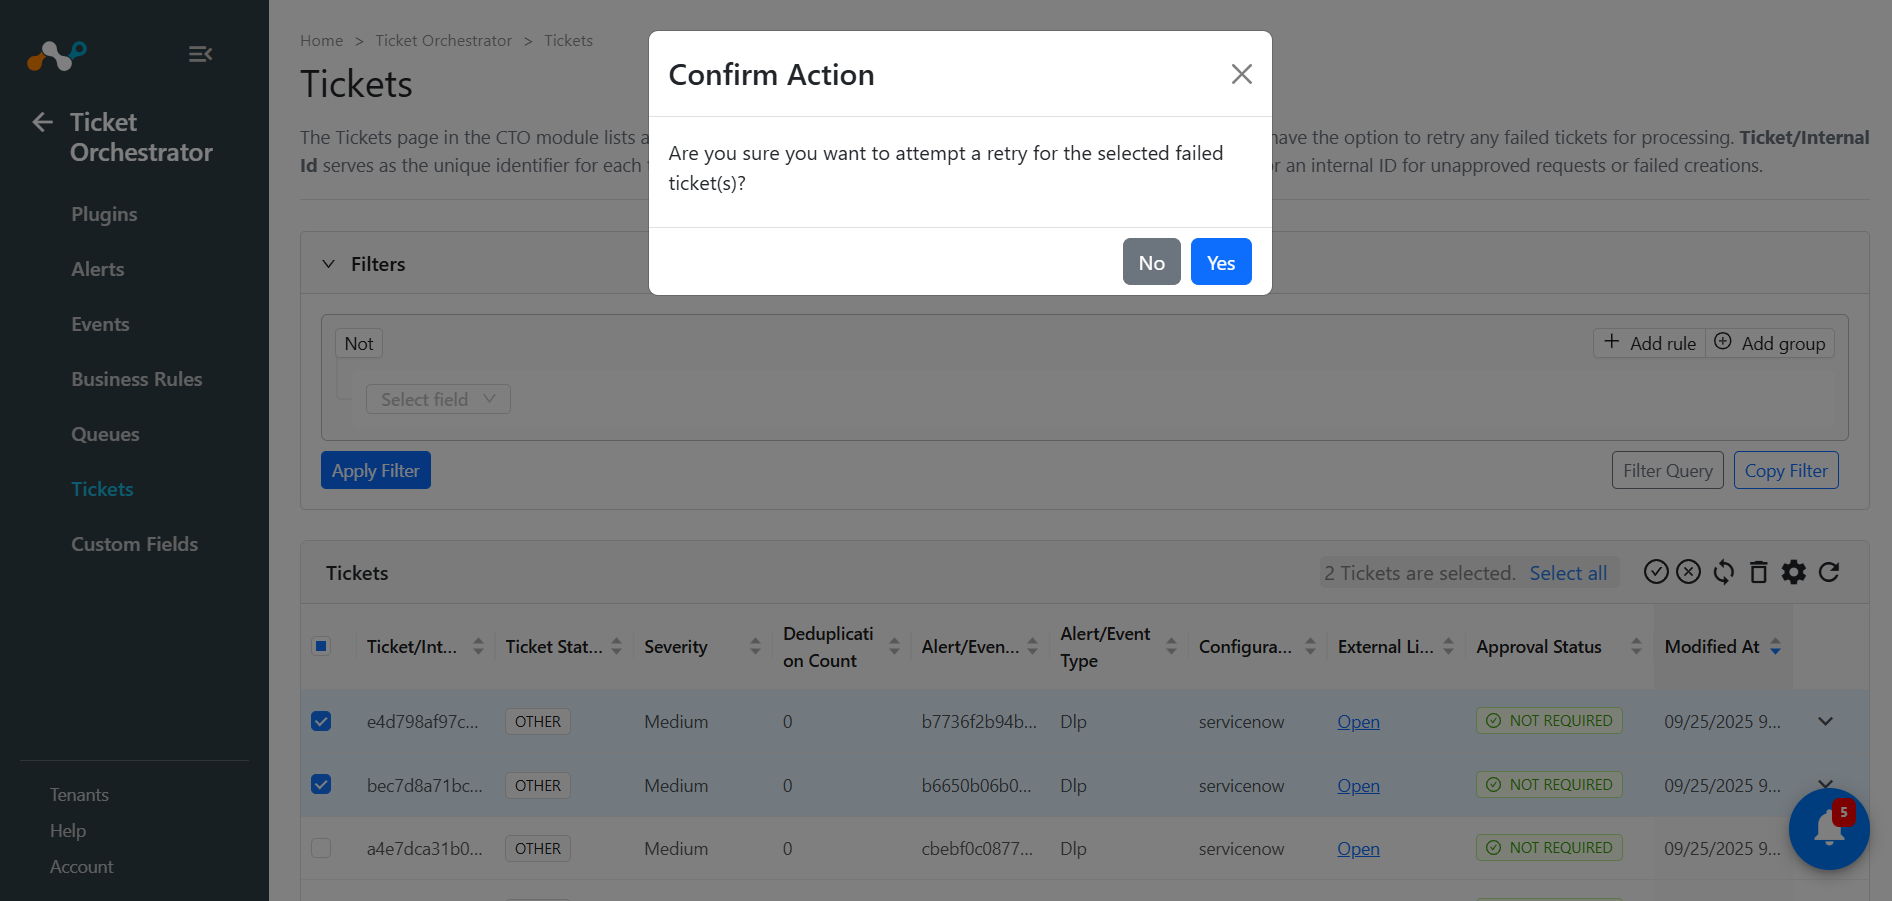
- Configure 3rd-party Ticket Orchestrator Plugins
- View Configured Ticket Orchestrator Plugins
- Update Configured Ticket Orchestrator Plugins
- List Alerts and Use Filter Options
- List Events and Use Filter Options
- Manage Ticket Orchestrator Business Rules
- Mapping a Business Rule to a Workflow Queue
- List Tickets and Use Filter Options
- Manage Custom Fields
- Ticket Orchestrator Custom Plugin Developers Guide