

These instructions are for the Admin only. This section describes the initial steps for getting started with Netskope Cloud Exchange after installation is complete.
Default User Login
By default, a single user is created with administrative capabilities with these credentials:
- Username: admin
- Password: admin
This user will have Administrator level access to the application. This user will have write access, and will be able to create new users as well.
On the first login, you will be required to change these credentials. After that, log in using your new credentials.
 |
Service Status can be viewed on the i icon mouse hover at the top of the login screen. The default color of that icon should be gray. If any of the services are down, the icon will be highlighted with red color.

Enable Modules
Upon successful login, enable the modules you want to use.
Note
Before enabling any module, you must configure the Netskope tenant plugin first. If the tenant plugin is not configured, you will not be able to enable any modules.
Note
You cannot enabled Exact Data Match or Custom File Classification modules while other modules are enabled. To enable either of these modules, you must first disable the other enabled modules.
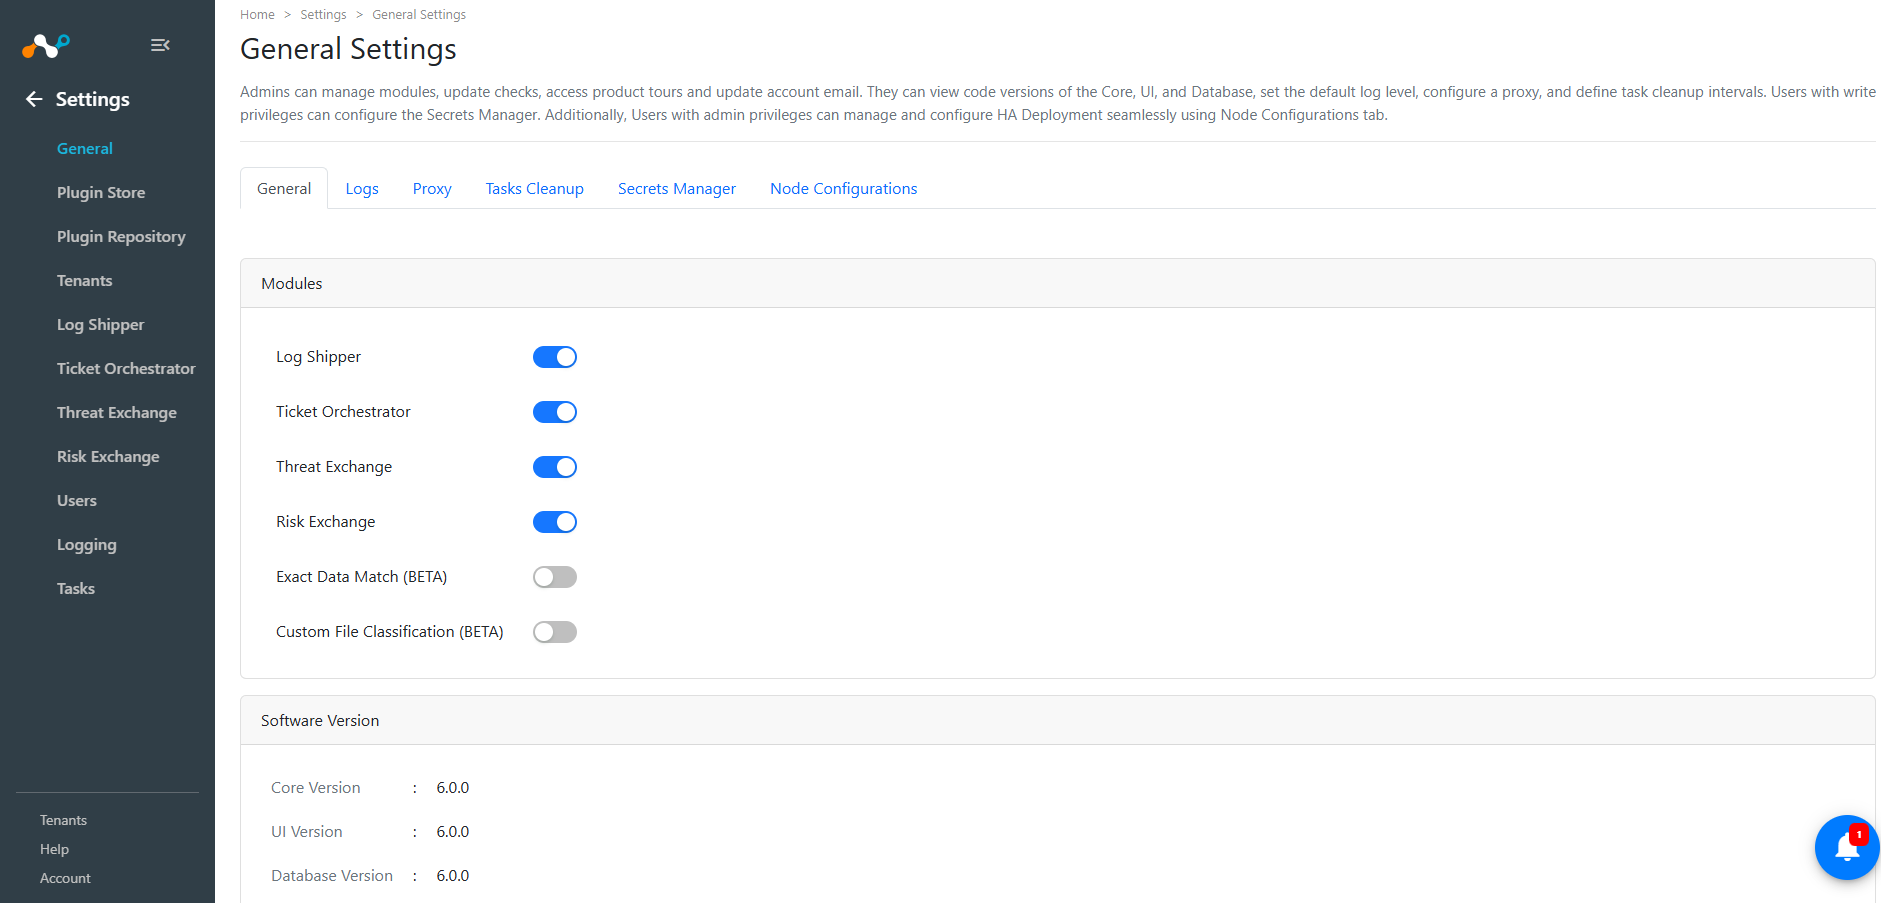
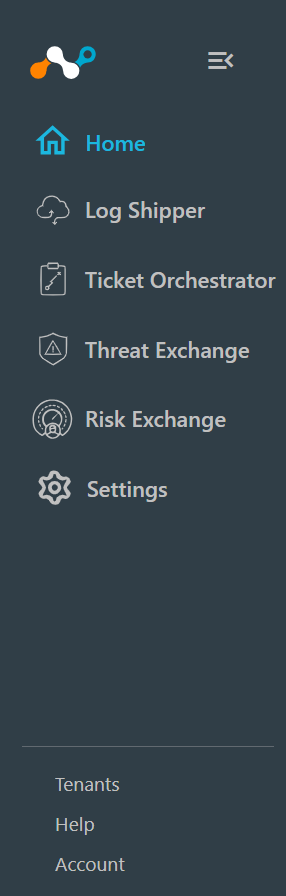
Enabled modules appear in the left panel.
Go to the following sections to configure the Cloud Exchange modules you enabled.
Configure the Netskope Tenant Plugin for Cloud Exchange
Before enabling modules and configuring their plugins, the Netskope tenant plugin must first be configured in Cloud Exchange.
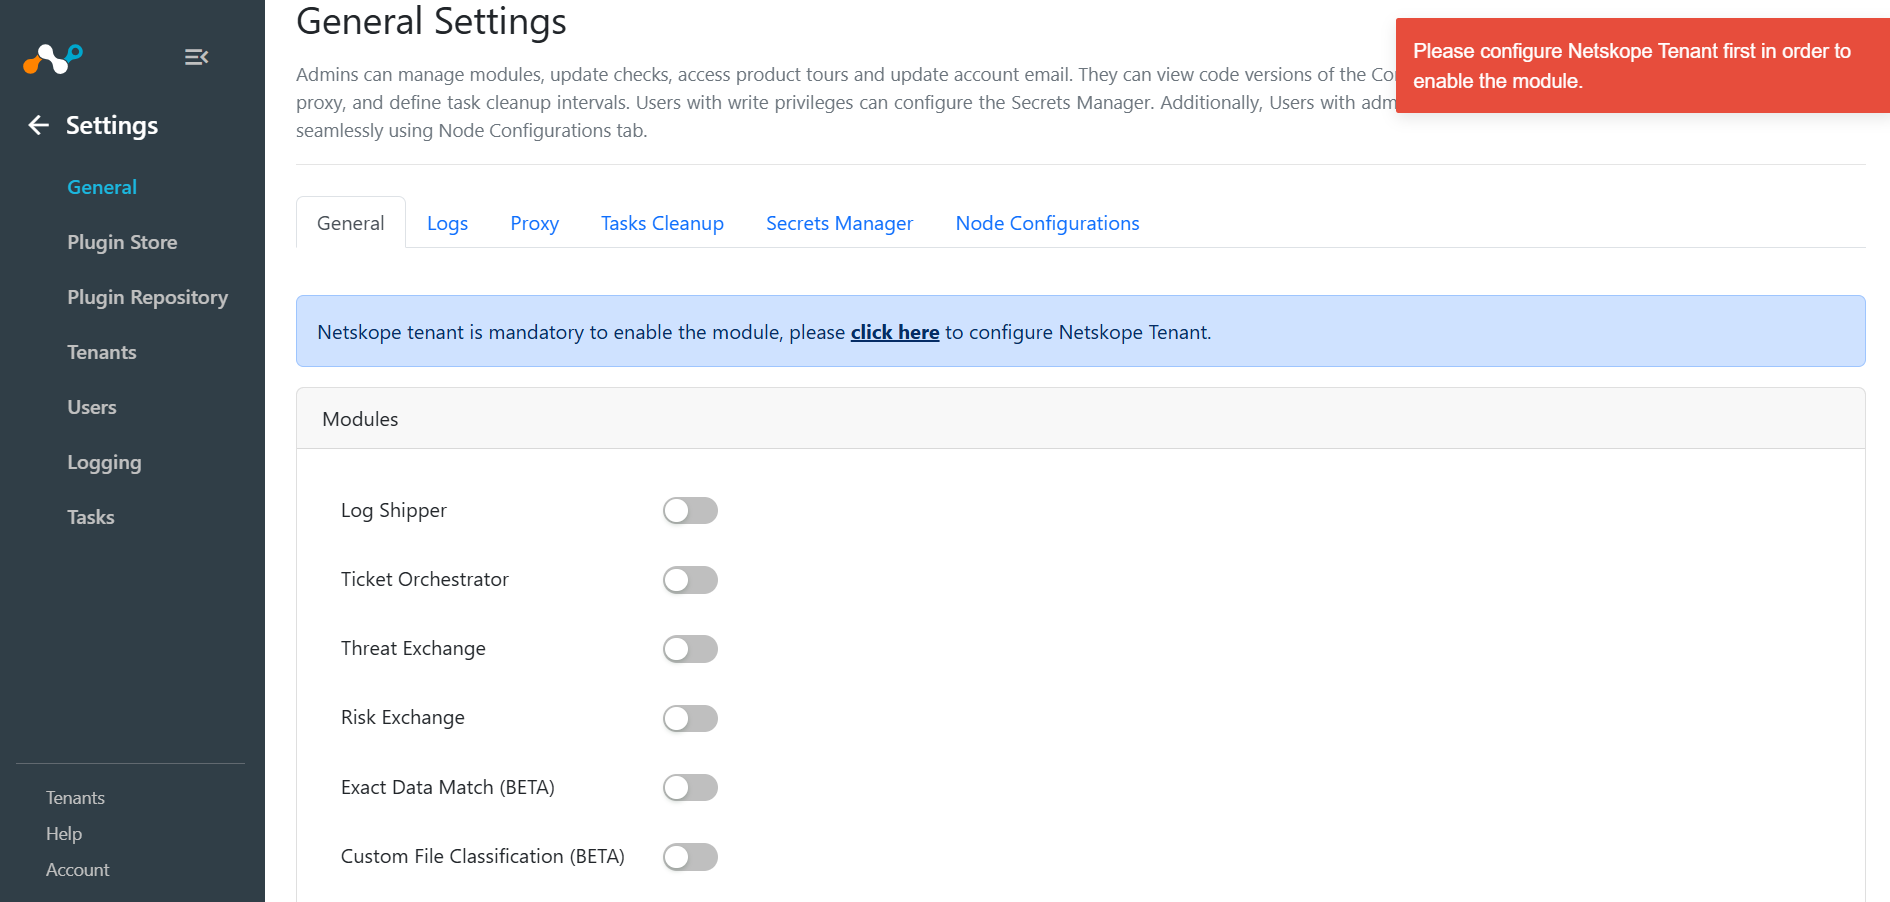
Configure the Tenant Plugin
- Go to Settings > Plugin Store.
- Search for and select the Netskope Tenant plugin in the Plugin Store.
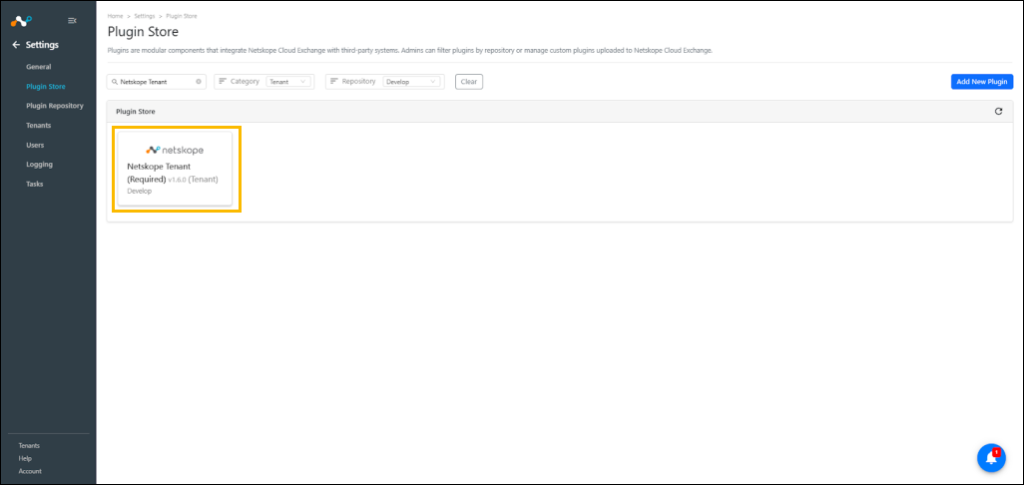
- Enter these parameters:
- Name: Enter the name for tenant configuration.
- Tenant URL: Enter the Netskope tenant URL.
- V1 API Token (Optional) : Optional V1 API token to authenticate Netskope Tenant. V1 Token can be obtained from the Netskope Tenant (Settings > Tools > REST API v1).
- V2 API Token: V2 token API token with RBACv3 to authenticate Netskope Tenant. V2 token with RBACv3 can be obtained from the Netskope Tenant (Settings > Administration > Administrators & Roles). Please refer to the Cloud Exchange Knowledge Base article for more details.
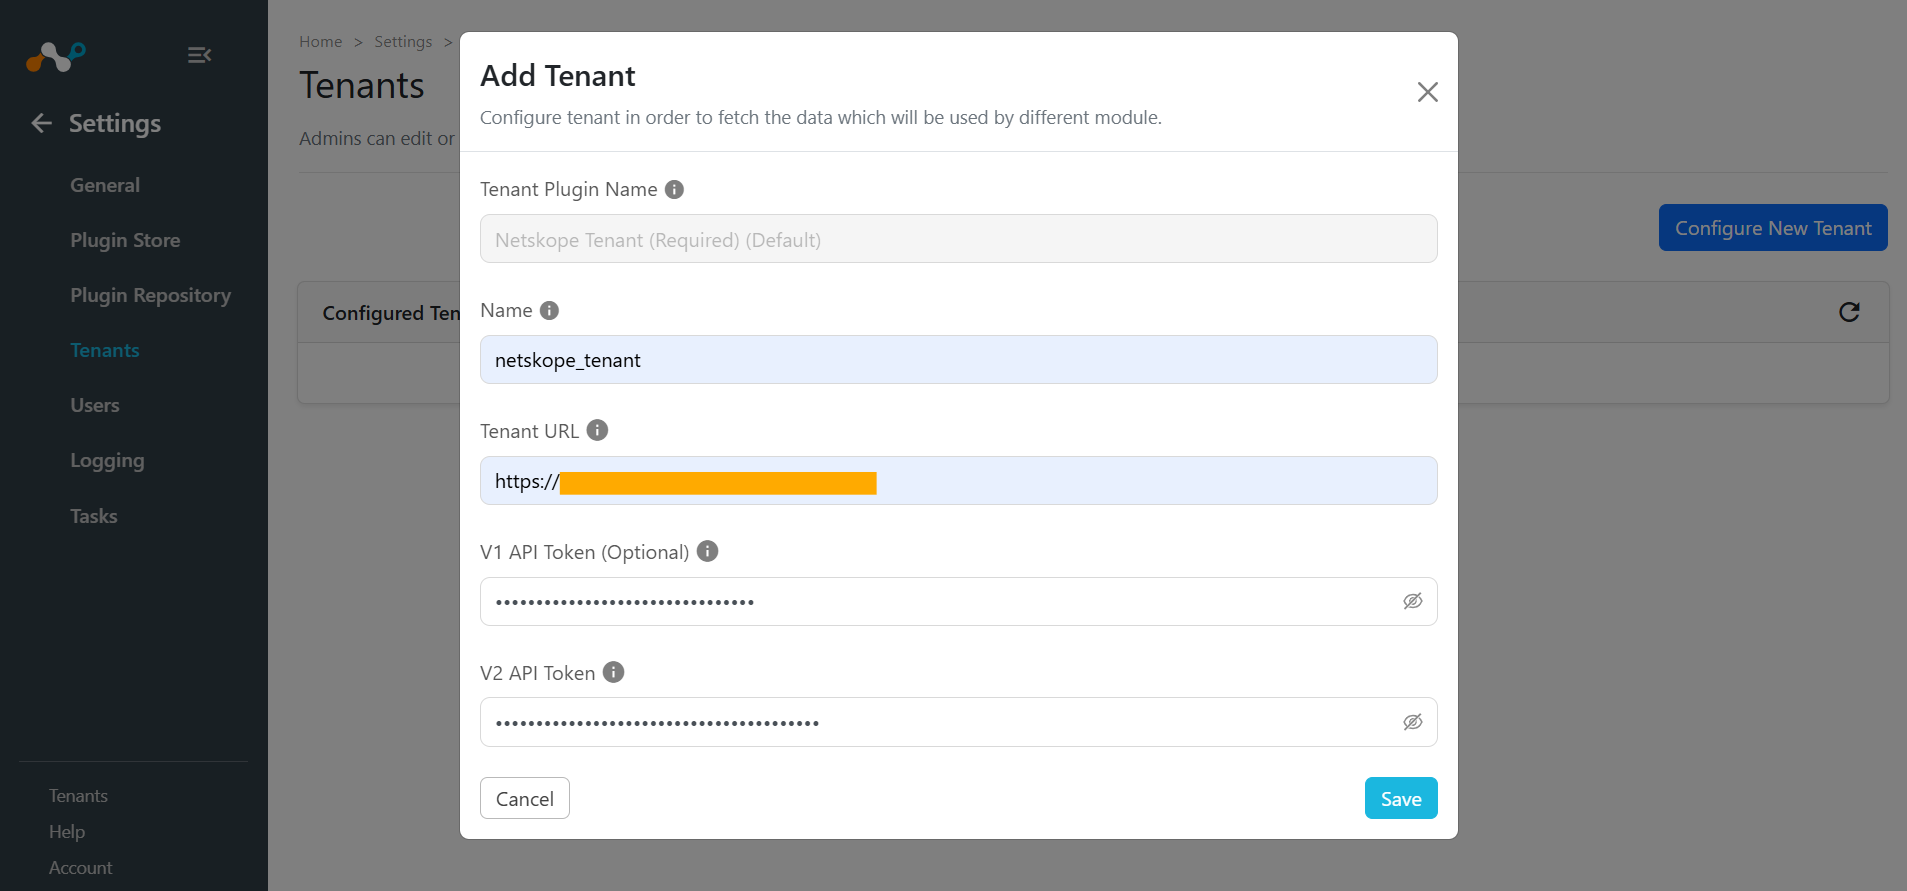
- Click Save.
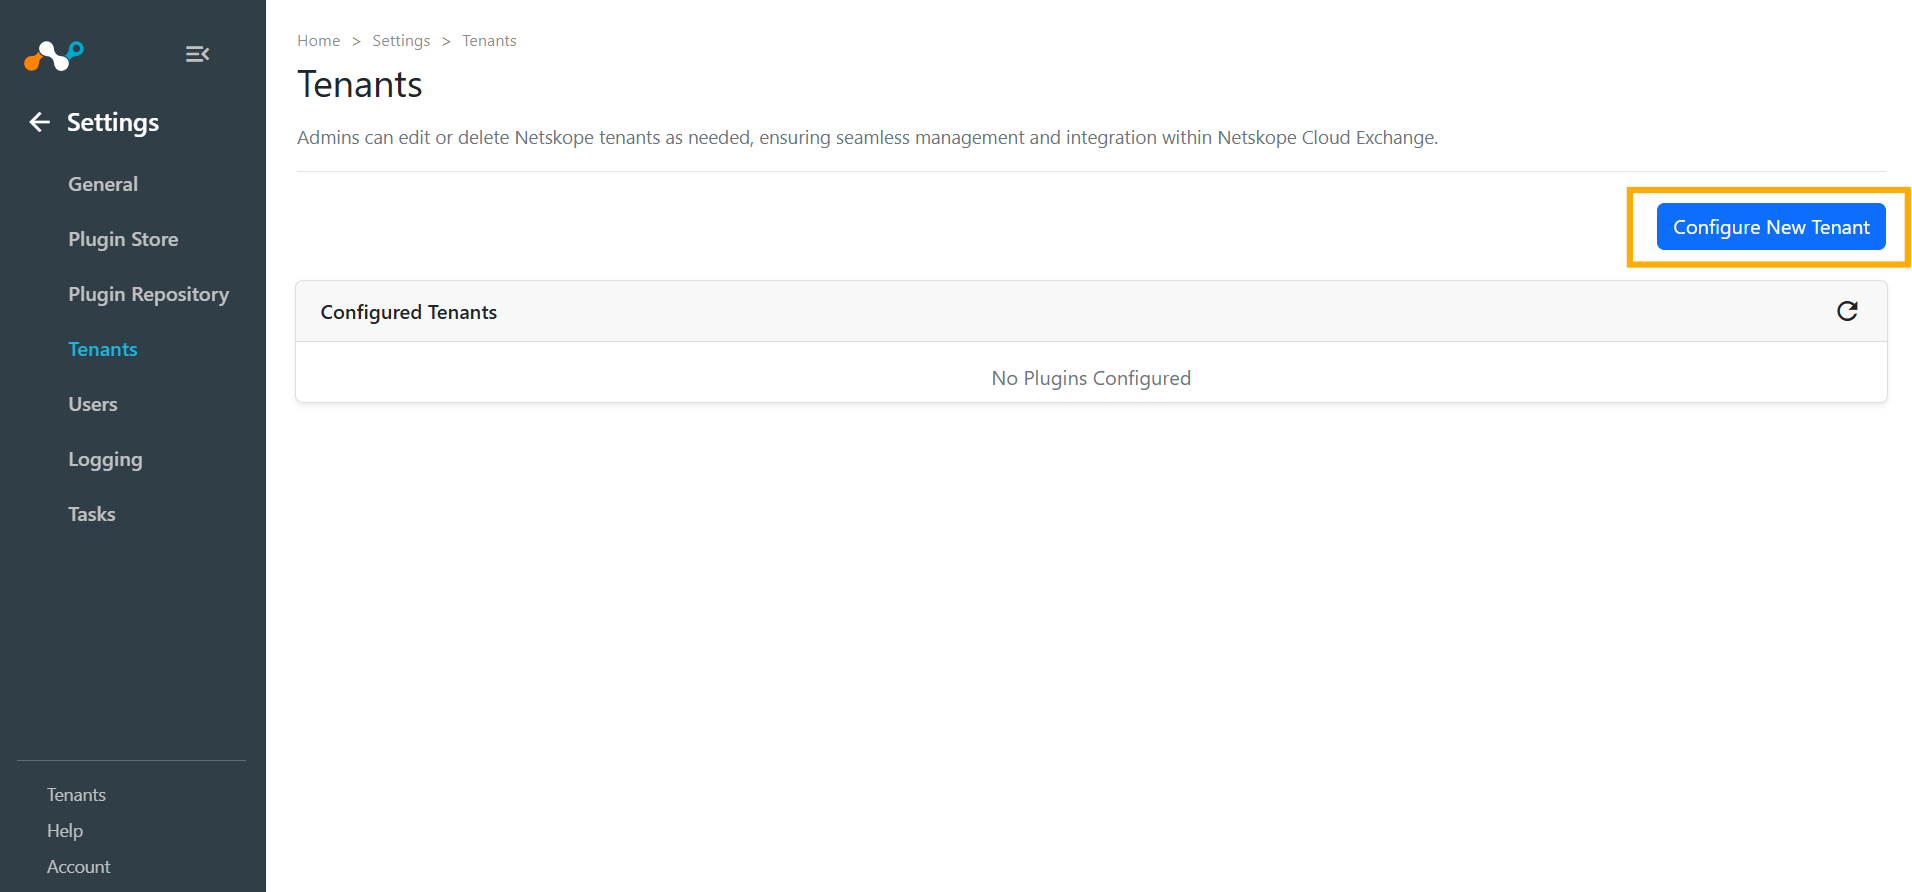
- Configured tenants are shown on the Tenants page.
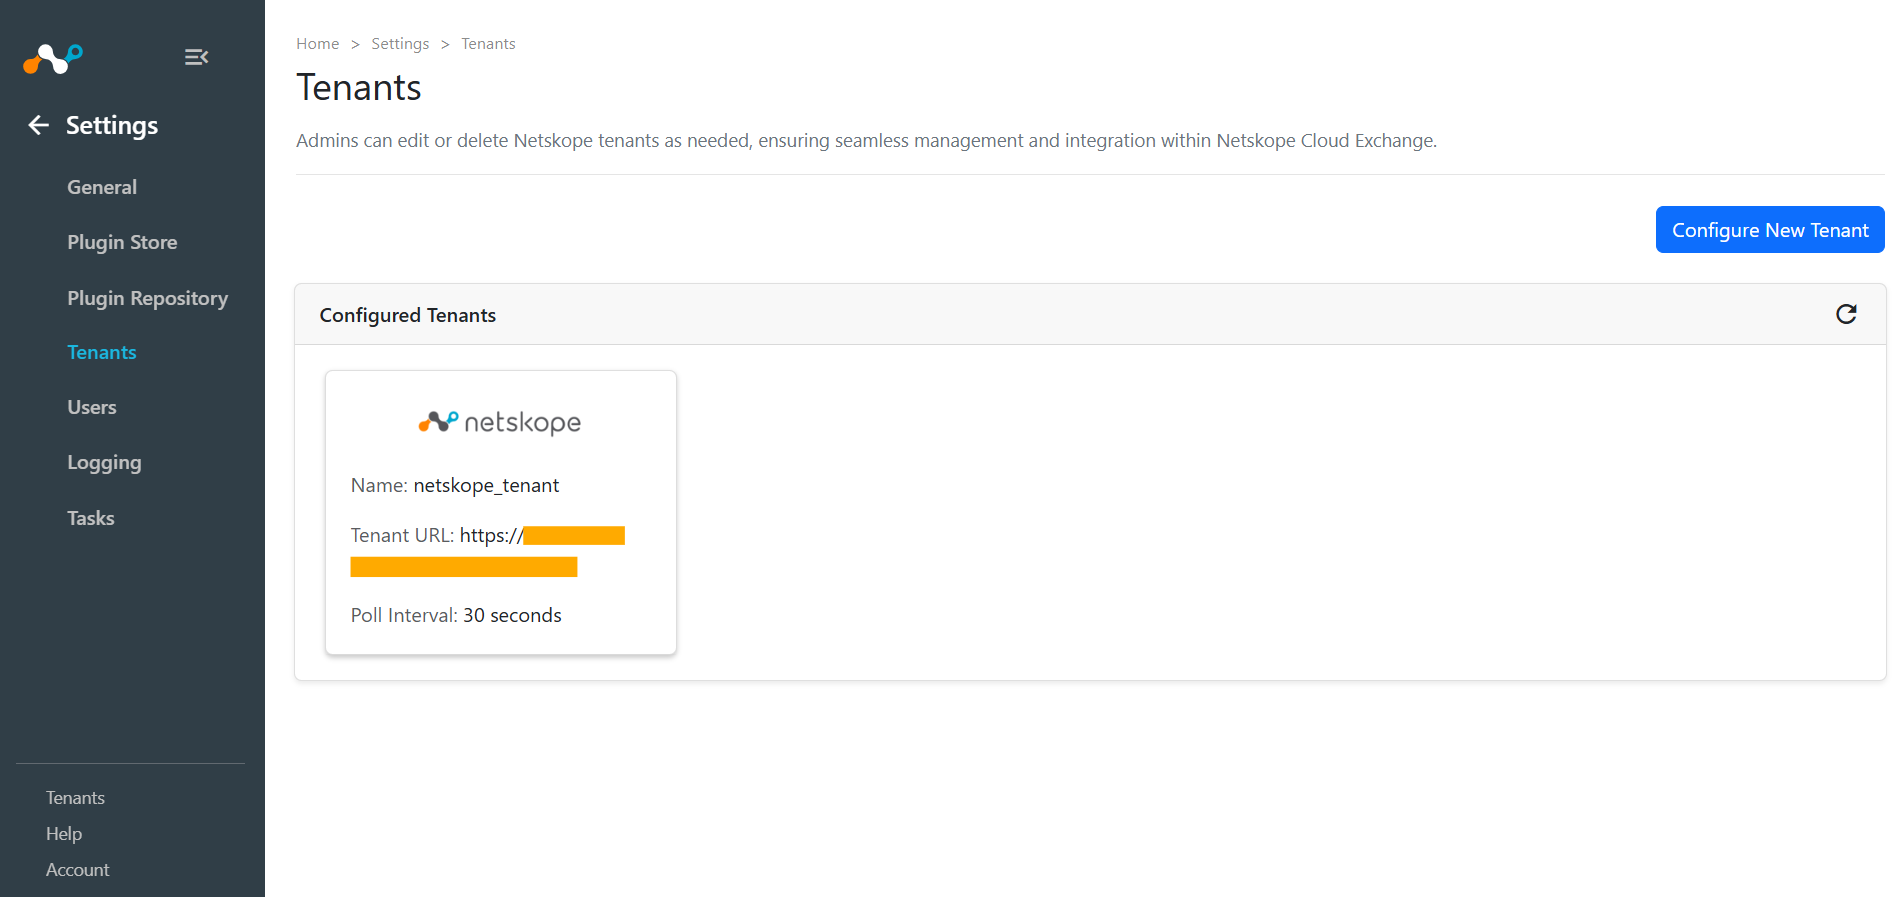

The Cloud Exchange platform REST API scopes are explained here.
Select the guide that best fits your environment to get started with Cloud Exchange.
Articles in this Section
- Netskope Tenant Plugin
- Netskope Borderless WAN Tenant Plugin
- Log Shipper Plugin
- Ticket Orchestrator Plugin
- Threat Exchange Plugin
- Risk Exchange Plugin
- Exact Data Match Plugin (Beta)
- Custom File Classification Plugin
- Using Beta Plugins
- Explore the Dashboards
- Cloud Exchange SSO with Entra ID
- Cloud Exchange SSO with Okta
- SSO Access for Netskope Support
- SSO Configuration